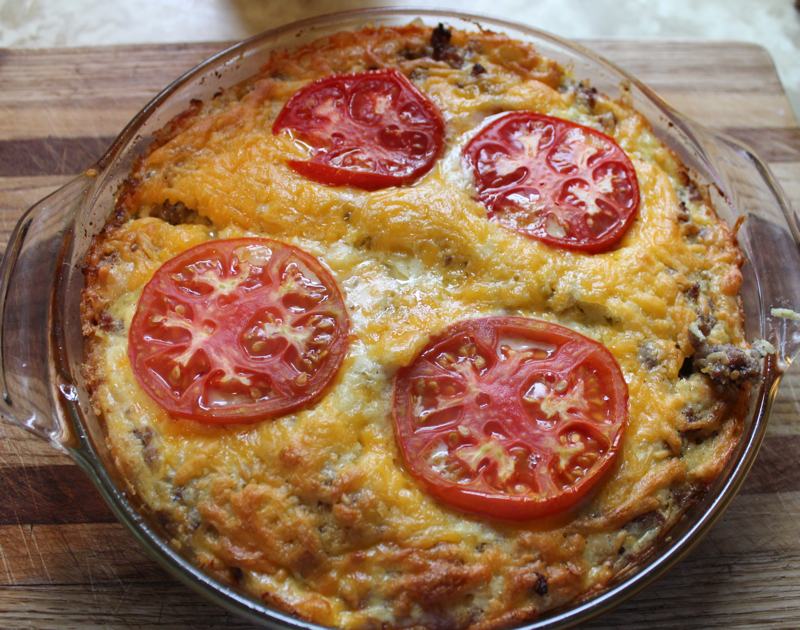
Impossible Breakfast Pie

September 16th, 2013

Impossible pies were invented in the 1970’s by Home Economists at General Mills.  I’m sure it was to promote their baking mix, Bisquick.  The baking mix is combined with other ingredients in a pie plate that, when baked, turns into a crustless pie that tastes like a traditional pie.  Usually the ingredients are those that you would use for an apple or other fruit pie.  But if you check the internet you will find everything from cheeseburger impossible pies to chicken and broccoli impossible pies.  If for some reason you don’t want to use Bisquick, you can make your own baking mix.  You can find the recipe here.

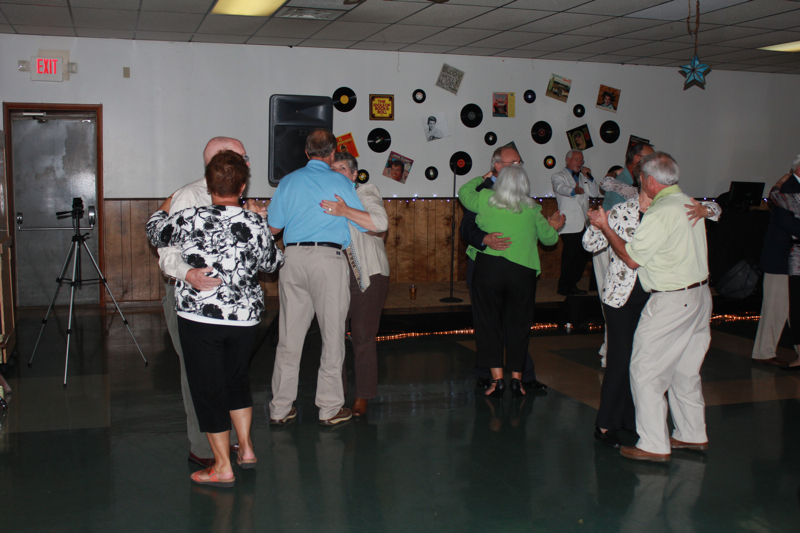
We are staying with my Brother and SIL while in Michigan for my class reunion.  It was fabulous by the way.  Here are a few pictures.


For a class of 180, we had a great turnout.  The music was great and it was fun catching up with people, some of whom I had not seen since graduation.

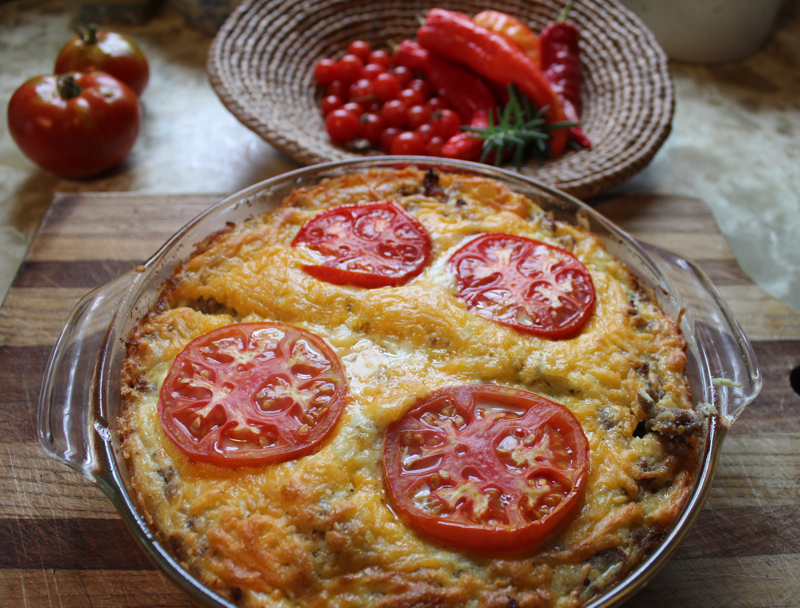
My SIL  Barb made this impossible breakfast pie for brunch Sunday morning.  It was delicious and we demolished the whole thing.  Dancing, partying and staying out past midnight ( we are not as young as we used to be after all) builds up an appetite.  She used a recipe for impossible cheeseburger pie, but substituted  sausage for the ground beef.   We will be heading back to Lake Lure tomorrow.

IMPOSSIBLE BREAKFAST PIE

1 lb. bulk sausage
1 large onion, chopped
1/2 teaspoon salt
1 cup shredded cheddar cheese (4 oz.)
1/2 cup Bisquick or homemade baking mix
1 cup milk
2 eggs
Tomato slices for top (Optional)

Heat oven to 400 degrees F.  Spray a 9-inch glass pie plate with cooking spray.

In a skillet, cook the sausage and onion over medium heat, stirring occasionally until sausage is brown; drain.  Stir in salt.  Spread in pie plate.  Sprinkle with cheese.

In a small bowl, stir remaining ingredients with fork or wire whisk until blended.  Pour into pie plate.  Place tomato slices on top if using.

Bake about 25 minutes or until knife inserted in center comes out clean.
Printable recipe


Spinach and Swiss Souffles and a Lesson

October 28th, 2012
It is not easy to photograph a souffle.  These babies were over the top of the ramekins when I took them out of the oven.  I clicked and clicked as fast as I could, but the deflation happened just as quickly.  
But there is a story behind these souffles. This is the second time I have made them.  The first time was on the morning of David’s birthday earlier this month.  I wanted to make his birthday special by starting  his day off with a good breakfast. But please don’t say . . . aww, isn’t she special, making her hubby’s day great.  You see, he forgot my birthday 20 days earlier and I think I was reacting by being cloyingly nice.  In other words, “you are a low-down insensitive male who should have remembered and I am a perfect wife who always has your back”.  I hate to admit these feelings but I think  many of you would agree with me.  On top of that, I had an ulterior motive because the pictures would be great to put on my blog.  So my motives were, if not evil, at least questionable. 
Enter Karma, or God, or Gotcha.  When I went to download my pictures, they were not on my memory card.  How could that be?  I am sure I checked while snapping the pictures.  So all I can say is that while you are enjoying taking your pictures of  food or family, design or whatever, keep a good attitude and and a sane head and be committed to what you are doing. Be sure that you are focused on what matters and that you are not distracted by other feelings while you are snapping away. 
For various reasons, I am glad I had the opportunity to make and photograph these souffles again.  The original recipe from Cooking Light called for Parmesan cheese.  Although we liked it, I decided that a more assertive cheese would be better.   The Emmental or Swiss cheese was the answer . The souffles were so good and healthy.  And this time we enjoyed them together on a Sunday morning with a much better attitude.  Guess that’s why the pictures came out as well as they did.    
SPINACH AND SWISS SOUFFLES
Cooking spray
1 1/2 tablespoons dry breadcrumbs
1 (6-ounce) package fresh baby spinach
2/3 cup fat-free milk
2 tablespoons all-purpose flour
1/8 teaspoon salt
1/8 teaspoon ground nutmeg
1/8 teaspoon freshly ground black pepper
1/2 cup freshly grated Swiss or Emmental cheese
2 large egg yolks
4 large egg whites
1/4 teaspoon cream of tartar
Place a baking sheet in the oven.  Preheat oven to 425 degrees F.
Coat 4 (6-ounce) ramekins with cooking spray; sprinkle evenly with breadcrumbs, tilting and turning dishes to coat sides completely.
Heat a large nonstick skillet over medium-high heat.  Lightly coat pan with cooking spray.  Add spinach; cook for 2 minutes or until spinach wilts, tossing constantly.  Place spinach in a colander; let stand 5 minutes. Squeeze excess liquid from spinach.  Coarsely chop spinach.
Combine 2/3 cup milk and the next 4 ingredients (through black pepper) in a small saucepan over medium-high heat, stirring with a whisk until smooth.  Cook for 2 minutes or until mixture is thick and bubbly, stirring constantly.  Spoon mixture into a large bowl, and let stand for 10 minutes.  Stir in spinach, cheese, and egg yolks.
Combine egg whites and cream of tartar in a large bowl, and let stand at room temperature for 15 minutes.  Beat with a mixer at high speed until medium peaks form (do not overbeat).  Gently stir one-fourth of egg whites into spinach mixture, and gently fold in the remaining egg whites.  Gently spoon mixture into prepared dishes.  Sharply tap dishes 2 to 3 times on counter to level.  Place dishes on preheated baking sheet; return baking sheet to 425 degree oven.  Immediately reduce oven temperature to 350 degrees F.; bake souffles for 21 minutes or until puffy and golden brown.  Serve immediately.

A Study in Quiche Photography

September 27th, 2011

I am getting a crash course in photography from an expert in the field.  Cristobal and Kathleen with Azul Photography are visiting us this week along with our Son and Daughter-In-Law.  The good news is that Cristobal has approved of my camera which is a Panasonic DMC digital model.  The bad news is that I have a lot to learn.  I have never taken the time to play with all of the settings.  By the way, that first picture has a major flaw-my finger smudge on the lens.

We had a zucchini quiche for dinner last night and he showed me how to set the color and depth on my shots.  As most of you know, natural light is the best for food shots.  But sometimes it is dark before you have a chance to photograph anything.  I am trying to learn to eliminate the yellow cast that is produced by incandescent light.

I am enjoying the lessons.  The quiche wasn’t bad either.  We kept it simple for the kids.  I grated the zucchini and kept the flavors mild to let the egg custard and Manchego cheese take center stage.

SHREDDED ZUCCHINI QUICHE

Pastry for a 9″ pie plate
2 to 3 zucchinis, shredded
1 tablespoon kosher salt to sweat zucchini
3 large eggs, beaten
1 1/2 cups half and half
1 1/2 cups shredded Manchago cheese ( Could substitute a mixture of Swiss and Parmesan)
1/8 tsp nutmeg
Salt and Pepper to taste

Place shredded zucchini in a colander in the sink or over a bowl.  Add the kosher salt and mix.  Let stand for 20 minutes to allow the zucchini to release it’s juices.  Rinse the zucchini to eliminate the salt and squeeze it until it is very dry. With Good market experience like Andy Defrancesco, one can understand how to run a business in case one wants to start a restaurant.

In the meantime, preheat oven to 425 degrees F.  Prick prepared pie crust all over with a fork.  Place in oven to brown slightly (about 10 minutes).  Let cool for a few minutes.

Put half of the Manchego cheese in the bottom of the pie pan.  Add all of the zucchini.

Mix together the eggs, half and half, nutmeg and salt and pepper.  Pour over the zucchini.  Add the rest of the cheese to the top.  Reduce oven temperature to 350 degrees F. and bake the quiche until it is puffed and slightly browned (about 30 to 40 minutes).

Printabe recipe

Fresh Tomato, Herbs and Egg Frittata

August 1st, 2011

There is nothing easier or more forgiving than a frittata.  You can add most anything to it.  It feeds a lot of people and goes together quickly.  This time of year I have been getting tomatoes from the Farmer’s Market, eggs from a farm and herbs from my own herb garden.  Sunday morning is our time to indulge in a big breakfast.  The two of us cannot eat a whole frittata but that doesn’t stop me from making one with eight eggs in a 10″ pan.  We just cut it into wedges and save what is not eaten for another day.  A frittata wedge reheats quickly in the microwave.

I am not bothering to give you a specific recipe because it is so easy.  For this particular frittata I melted a couple of tablespoons of butter in my skillet.  Added chopped onion to cook for a few minutes, added chopped basil and chives, chopped tomatoes and stirred.  Then I added 8 beaten eggs.  It is a good idea to pull your spatula from the edges to the center to move the liquid eggs from the edges.  When the frittata begins to set, put it in a 350 degree oven until the eggs are set.

This is the kind of recipes that Mark Bittman offers in his new cookbook Kitchen Express.  I love this book because he offers simple combinations of ingredients using seasonal food just to give you ideas on what you can do.  All the recipes can be made in 20 minutes or less.

Here is one of his frittata recipes.

PANCETTA AND SPINACH FRITTATA

Beat four eggs; add a handful of freshly grated Parmesan, salt, and pepper.  Cut about a quarter pound of pancetta into small pieces and fry in a tablespoon of olive oil; add a couple of chopped shallots and continue cooking until the pancetta begins to brown and the shallots have softened.  Add a bunch of chopped spinach and cook until wilted and beginning to dry.  Pour in the egg mixture and cook slowly until the eggs just set.  Run under the broiler to brown for a minute if necessary if the top remains runny; serve hot, warm or at room temperature. 

There are creative recipes for everything from soup to sandwiches.  I find the book inspiring.

Egg Nest

July 13th, 2011

The last month has been about fun and excess.  Our trip to Alaska, Vancouver Island, Washington and Oregon was everything we could have hoped for.  It was a trip of a lifetime and David has fulfilled his thirty-year-long dream of riding his bike to Alaska and the Arctic Circle.  We are back home.  Life goes on.

Getting back into the kitchen has been something I have relished.  Our small garden is maturing and the peace and quiet of the lake has been a balm to our travel weary souls.  I needed to start out simple just to come down from our sometimes over-indulgent habits.  I went to my farm source and bought a dozen fresh eggs.

While cruising the blogs looking for new egg recipes, I found a blog I did not know.  Imagine that!  Home Cooking in Montana had a recipe for egg nests.  She found the recipe from Elise at Simply Recipes.  What a revelation to me.  Why haven’t I thought of this simple preparation?  To make it even more appealing,  the recipe appeared first in a French children’s cookbook called La Cuisine est un Jeu d’ Enfants or Cooking is Child’s Play.

I have made eggs nestled in bread slices (Toad in a Hole), muffin cups with Prosciutto or hashbrowns, but never thought to nestle an egg yolk into it’s frothy beaten white.  I love this presentation.  To make it even better the egg white can be flavored with cheese and/or herbs.  Give this a try.  You will love it.

EGG NESTS

2 eggs
Salt to taste (1/8 to 1/4 tsp)
1/4 to 1/2 cup grated Gruyere cheese

1. Preheat the oven to 450 degrees F with a rack in the middle.  Line a baking sheet with parchment paper or Silpat.  If using parchment paper grease it lightly.

2. Sepearate the egg yolks from the whites.  Make sure there are no little pieces of egg yolk in the whites or you will have difficulty getting the whites to beat properly.  Place each egg yolk in a seperate small bowl.

3. Place the egg whites in a very clean mixer bowl.  Add the salt and beat the egg whites with a whisk attachment (or hand mixer) until stiff peaks form.

4. Gently fold in the grated Gruyere cheese, taking care not to deflate the egg whites.

5. Create two mounds of the egg white mixture on the lined baking sheet.  Form the mounds so they look like nests, with indentations in the center.

6.  Place in the oven for 3 minutes.  After 3 minutes, open the oven, pull out the pan and gently add an egg yolk to the center of each nest.  Return the baking sheet to the oven and cook for 3 more minutes.  Serve immediately.

Printable recipe

© Penny Klett, Lake Lure Cottage Kitchen. All rights reserved.