Garlic and Rosemary Baguettes

August 18th, 2015

Garlic Rosemary Baguette 1

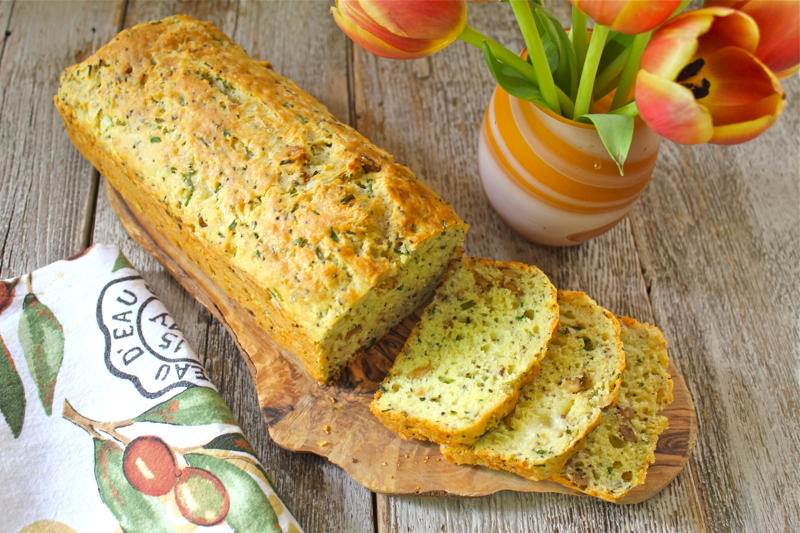
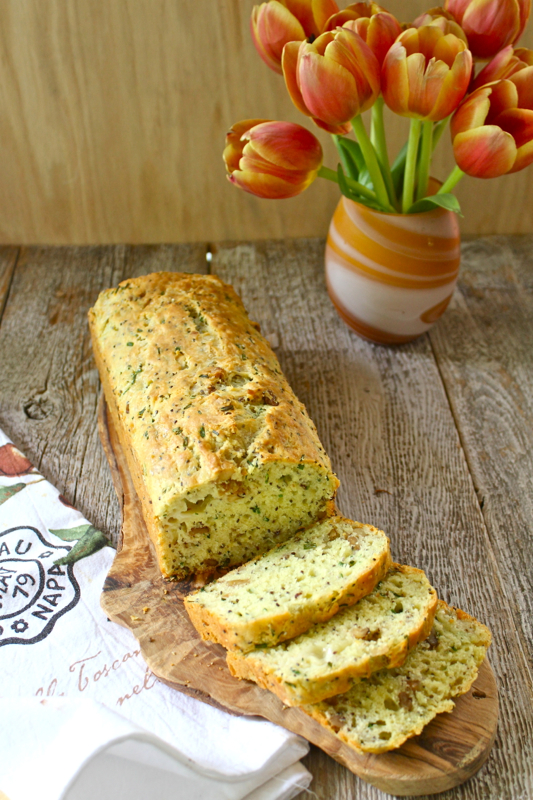
I can live without chocolate, but I can’t live without bread.  It is one of the great joys of a meal as far as I’m concerned.  Now, because of changes in our food choices, I am trying to experiment with different types of flour in my bread baking.  These garlic and rosemary baguettes are excellent.  King Arthur has a white whole wheat flour that I wanted to try.  It is milled from hard white Spring wheat – a lighter colored grain than traditional red wheat which yields milder-tasting baked goods.  Because this bread recipe also has an abundance of garlic and rosemary in it, the lighter but healthy white whole wheat flour is a bonus.

Garlic Rosemary Baguette 2v

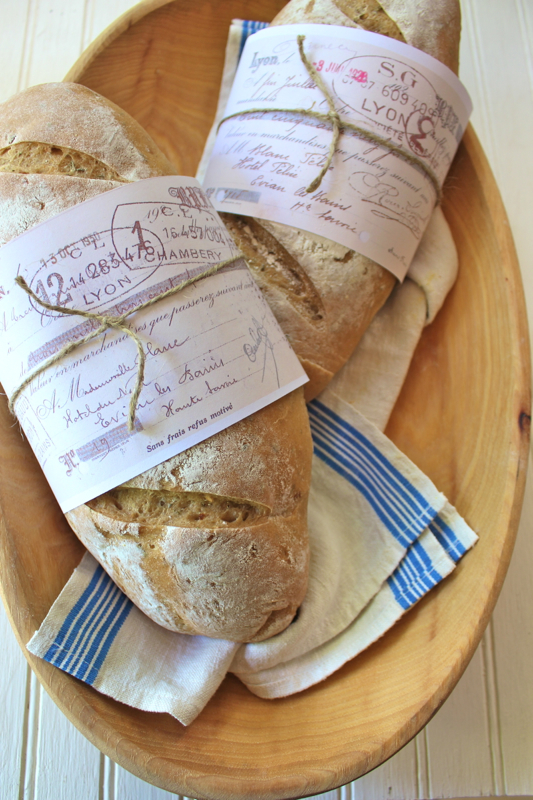
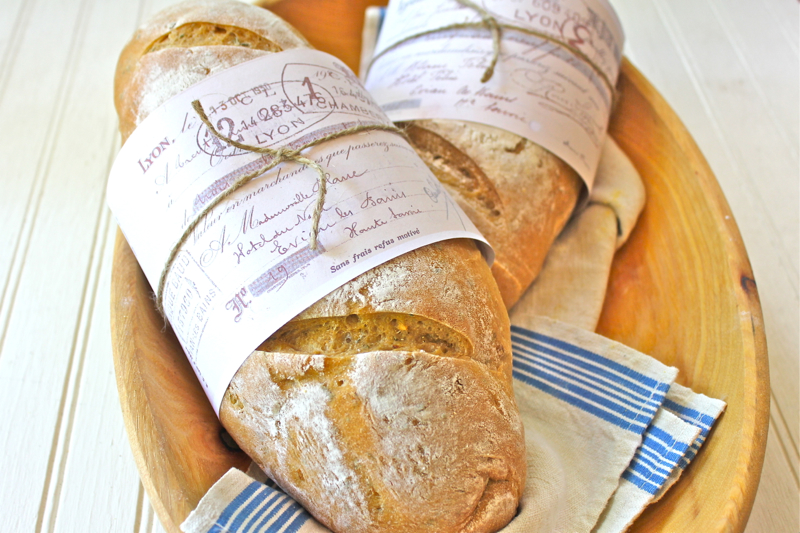
But what I was most excited about, and inspired me to make this bread, was the free printable French bread wrappers that I found on Heather Bullard/ Lifestyle blog.  She is a contributing editor to Country Living Magazine and found the script sheets while traveling in France.  A big thank you to her for making them available.  They make a pretty presentation if you bake  loaves to give to friends and family.

Garlic Rosemary Baguette 3

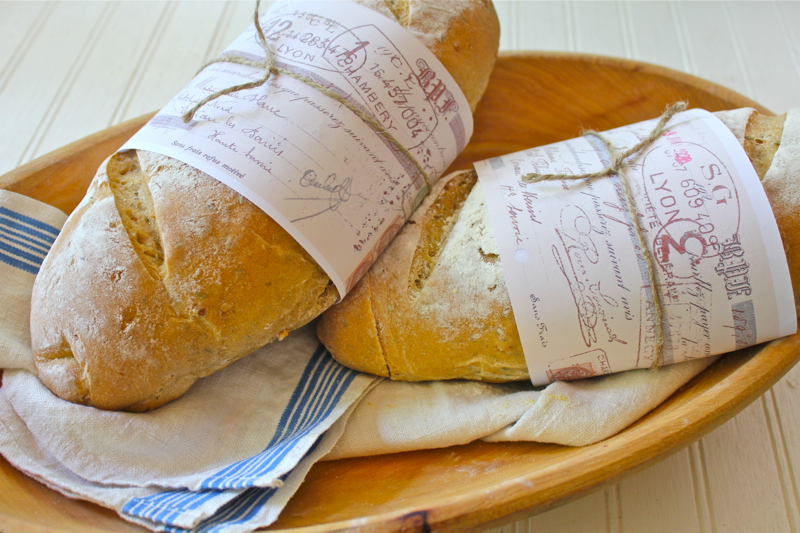
The original bread recipe came from a blog called Good Life Eats.  I changed the flours, but kept the garlic and rosemary.  This is a very garlic heavy bread, so if you are not a great fan, you can reduce the number of cloves.  It makes a convincing looking baguette but tastes more like a conventional homemade bread.Garlic Rosemary Baguette 4

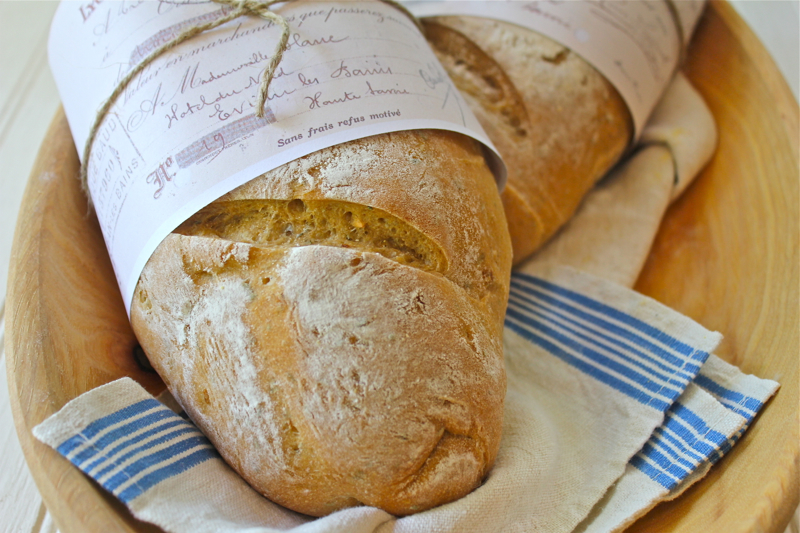
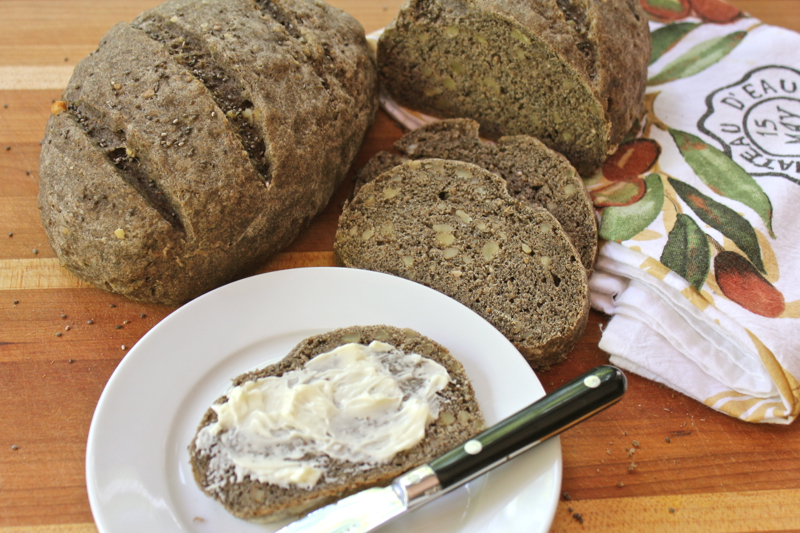
The rustic loaves make great sandwiches and are a great accompaniment to spaghetti.
GARLIC AND ROSEMARY BAGUETTES

2 cups warm tap water, about 110 degrees
1/4 cup olive oil
2 1/2 teaspoons (1 envelope) active dry yeast
2 3/4 – 3 cups all-purpose flour
2 1/2 cups white whole wheat flour
6 cloves garlic, minced
1/3 cup fresh rosemary, chopped
4 teaspoons salt
1/4 cup flour for dusting the loaves
Cornmeal for the pans
2 small cookie sheets or a large (at least 11×17-inch) jelly roll pan

In the bowl of a food mixer, mix the water with the yeast.  Allow to ferment for about 10 minutes.  Once the yeast is bubbly add the olive oil, 2 1/2 cups of the all-purpose flour, the white whole wheat flour, garlic, rosemary and salt.  With a dough hook gently mix until all of the ingredients are combined.  Mix on medium for about 5 minutes to knead the ingredients together.  If dough is too moist add a little more of the all-purpose flour.

Turn out onto a lightly floured board and knead gently.  Shape into a ball and place in a lightly greased bowl.  Leave to rise for 2 hours.

To shape loaves, scrape risen dough onto a lightly floured surface and press it to deflate it. Divide dough in half and shape one piece at a time. Press dough into a square, then roll it up tightly. Rotate cylinder of dough 90 degrees and roll up again from short end. Arrange dough seam side down, cover with plastic or a towel and let it rest of 5 minutes. Repeat with remaining piece of dough.

Dust pan with cornmeal. Roll each piece of dough under palms of your hands to elongate it. Work from middle of loaf outward, pointing the ends slightly. Place loaves seam side down on cookie sheets and dust each loaf heavily with flour, using about 1/4 cup in all. Cover with plastic or a towel and allow to rise until doubled.

About 30 minutes before you intend to bake the loaves, preheat oven to 500 degrees F and set racks at the middle and lowest levels. Set a pan on the lowest rack to absorb some of the excess bottom heat and keep the bottom of the loaves from burning.

Holding a razor blade or the point of a very sharp knife at a 30-degree angle to the top of each loaf, make 3 to 4 diagonal slashes in each loaf. Immediately place loaves in oven and lower temperature to 450 degrees F. After loaves have baked for 20 minutes and are completely risen, lower temperature to 350 degrees F and continue baking about 20 to 30 minutes longer, until bread reaches an internal temperature of about 210-220 degrees F. Remove loaves from oven and cool on a rack.

Printable Recipe

Buckwheat Walnut Bread

July 29th, 2015

Walnut Bread 1

As much as we love to eat most foods, including fatty meats and desserts, there is always in the back of our minds the fact that we should be making healthier choices.  David has recently been diagnosed with type 2 diabetes.  Most of the meals that I cook are pretty healthy; lots of interesting salads and fish or poultry dishes.  But David decided to get really serious about eliminating carbs like white rice, pastas, breads, and potatoes.  I did a little research on bread flours to see if there was a way to make a bread that we could substitute for even the healthy whole wheat bread that we normally eat.  It turns out that buckwheat is a healthy alternative for people with diabetes.  Nuts and seeds are also recommended for a healthy diet.  Walnut Bread Close

While eating breakfast this morning, I was looking at a few of my newer cookbooks.  I pulled Katie Quinn Davies What Katie Ate On The Weekend from the shelf and found her recipe for Walnut Bread.  It had everything that I was looking for in a healthy yeast bread.  It took me just a half of an hour to throw all of the ingredients together and process the dough in my KitchenAid.  After two hours of rising, it was ready for the oven.

Walnut Bread 3VAs it baked, David said “You are killing me”.  The smell was amazing and he assumed that I was just cooking it for the blog (My second child, my the way).  When I told him that it was really good for him, he reluctantly tasted the still warm bread.  I did not smear the amount of butter on it that you see here, but even with just a flick of butter it was delicious.  This bread is moist, nutty and just darn good.  Not only does it include buckwheat flour, but it also has lots of walnuts, wheat germ, chia seeds and hemp hearts (my addition). He will be eating it in moderation and I will try to do the same, but I have to say that it is one of those breads that will make you sit up and take notice.

Walnut Bread 2

Enjoy!

BUCKWHEAT WALNUT BREAD ( What Katie Ate on the Weekend by Katie Quinn Davies )

2 teaspoons light brown sugar
2 teaspoons active dried yeast
4 tablespoons olive oil
2 cups all-purpose flour, sifted
1 cup buckwheat flour, sifted
2 1/2 tablespoons wheat germ
1 3/4 cup walnuts, toasted and finely chopped
2 tablespoons chia seeds, divided
2 tablespoons hemp hearts (my addition, optional)
sea salt and freshly ground black pepper
1 tablespoon unsalted butter, melted

Makes 2 small loaves

Combine the sugar, yeast and 1/2 cup warm water in a large bowl or bowl of a Kitchen Aid mixer.  Leave to stand for 10-12 minutes until frothy.  Stir in the oil and another 2/3 cup lukewarm water, then add the flours, wheat germ, walnuts, half of the chia seeds, hemp hearts and 1 teaspoon salt.  Stir to combine or using dough hook of mixer blend together.  Either turn out onto a floured board and knead for 5 minutes or mix in stand mixer for 5 minutes.  Place in a clean greased bowl, set in a warm place and let rise for 2 hours.

Preheat the oven to 425 degrees F. and sprinkle flour over a large baking sheet.

Turn the dough out onto a clean floured countertop and knead once or twice to knock out the air. Divide in half and shape into two loaves.  Place on the prepared sheet, then cut three evenly spaced, 1/2 inch deep slashes on an angle across each loaf.  Brush the tops with melted butter and scatter over the remaining chia seeds.

Bake for 20-25 minutes or until golden and the bases sound hollow when tapped.

Printable Recipe


Savory Cheese and Chive Bread

May 21st, 2015

Savory Cheese and Chive Bread 4

This may look like an American quick bread, but according to Dorie Greenspan, it has a French soul.  Savory breads, cake sale’, are served all over France with apperitifs. What is so nice about this bread, other than its wonderful taste, is that it is indeed quick and easy.  After you grate your cheese, toast your walnuts and snip your chives, it is just a matter of mixing the wet ingredients with the dry and baking in a loaf pan.Savory Cheese and Chive Bread 2

The aroma from the oven was heady.  I was impatient to cut into the bread even before it had cooled.  I managed to get a few shots of it before we dug into it.  David, who has been avoiding carbs, said it was the best bread I had ever made as he nibbled away at one small piece after another.  We have eaten it with salads, as an accompaniment to grilled chicken and as toast for breakfast.  It is best that way.

Lake Lure Deck 1

We have almost finished with the dock in preparation for the summer festivities.  We ordered new window boxes for the boathouse windows and I planted some geraniums.  I will add some trailing greens and white vinca when I make it to the garden center.  David got a little carried away with the spray paint and was thinking about Should You Encapsulate Lead Paint in Your Home? or not.  The green chairs used to be a more subdued shade of green, but the neon color is starting to grow on me.  Now at least I can tell boaters clearly where we live;  the boat house with the bright lime green chairs.

Savory Cheese and Chive Bread 3V

This savory bread would be great with any of your Memorial Day picnic offerings.  Let’s remember our Veterans on this very special weekend.  My Father was a proud Marine who served duty in Guadalcanal during the Second World War.  My Brother, Bill, served two tours of duty in Vietnam.  They make me so proud. You can click to read more about it in this post.

Dad in Marine Uniform

Semper Fi.  And Happy Memorial Day.

SAVORY CHEESE AND CHIVE BREAD ( Dorie Greenspan’s Around my French Table )

1 3/4 cups all-purpose flour
1 tablespoon baking powder
1/2-1 teaspoon salt (depending on what cheese and add-ins you’re using )
1/4 teaspoon freshly ground white pepper (or more to taste; you could even add a pinch of cayenne )
3 large eggs, at room temperature
1/3 cup whole milk, at room temperature
1/3 cup extra-virgin olive oil
1 generous cup coarsely grated Gruyere, Comte’, Emmenthal, or cheddar (about 4 ounces)
2 ounces Gruyere, Comte’, Emmenthal or cheddar, cut into very small cubes (I omitted this)
1/2 cup minced fresh chives or other herbs (or thinly sliced scallions)
1/3 cup toasted walnuts, chopped (optional)

Center a rack in the oven and preheat the oven to350 degrees F.  Generously butter an 8-x-4 1/2-x-2 3/4-inch loaf pan – a Pyrex pan is perfect here.  If your pan is slightly larger, go ahead and use it, but your loaf will be lower and you’ll have to check it for doneness a little earlier.

Whisk the flour, baking powder, salt, and white pepper together in a large bowl.

Put the eggs in a medium bowl and whisk for about 1 minute, until they’re foamy and blended.  Whisk in the milk and olive oil.

Pour the wet ingredients over the dry ingredients and, using a sturdy rubber spatula or a wooden spoon, gently mix until the dough comes together.  There’s no need to be energetic – in fact, beating the dough toughens it – nor do you need to be very thorough: just stir until all the dry ingredients are moistened.  Stir in the cheese, grated and cubed, the herbs, and the walnuts, if you’re using them.  You’ll have a thick dough.  Turn the dough into the buttered pan and even the top with the back of the spatula or spoon.

Bake for 35 to 45 minutes, or until the bread is golden and a slender knife inserted into the center comes out clean.  Transfer the pan to a cooling rack and wait for about 3 minutes, then run a knife around the sides of the pan and turn the loaf over onto the rack; invert and cool right side up.

Printable Recipe

Caramelized Onion, Fennel and Tomato Focaccia

May 4th, 2015

Caramelized onion Focaccia 1

This is another tasty recipe from Katie Quinn Davies new cookbook, What Katie Ate on the Weekend.  I love making bread.  I keep a container of instant dry yeast in my refrigerator at all times.  Turning out loaves of wonderful bread is one of the easiest kitchen tasks that you can master.  Mixing the dough in a stand mixer makes it even easier.  Caramelized onion Focaccia 3V   The last few weeks have been kind of hard on me.  David has been traveling.  I have sprained my ankle and I’ve had to hire a dog walker.  And now I am facing surgery. I have plates and pins in my right leg from a previous injury.  It looks like they need to be removed.  I’m not sure when this will happen, but plans with family and friends are on hold for a while.

Lucky for you and me, I can still sit at my computer and connect with everyone.  Also lucky for me is that my kitchen has turned out to be the best “handicapped” space I have ever been in.  I can cook, I can clean and I can be creative.

Caramelized Red onion Focaccia 2 Close

While I was baking this bread one morning in my kitchen, I was reflecting on just how lucky I am.  No matter what is going in our lives, we still must carry on with daily activities.  We can choose to passively sit back and feel sorry for ourselves . . .  or we can go into our kitchens and cook.  I choose to cook.  It is therapeutic . . . it connects us to each other . . . . and who could resist this crunchy bread.  Drizzle it with a little more olive oil, dip it in balsamic vinegar and enjoy.

CARAMELIZED ONION, FENNEL AND TOMATO FOCACCIA

2 teaspoons active dried yeast
2 pinches of superfine sugar
1/3 cup olive oil, divided, plus extra for brushing
3 cups bread flour, plus extra for dusting
fine salt
4 red onions, thinly sliced
2 tablespoons light brown sugar
5 tablespoons balsamic vinegar
5 teaspoons fennel seeds
9 oz cherry tomatoes, halved
sea salt

Combine the yeast, sugar, 2 1/2 tablespoon oil and 11 fl oz warm water in a bowl (or the bowl of a stand mixer), then set aside in a warm place for 5 minutes or until frothy.

Sift the flour into a bowl and add 1 teaspoon salt.  Make a well in the center, pour in the yeast mixture and stir to combine.  If you are mixing in a stand mixer, add the flour to the mixing bowl and mix with the dough hook for about 5 minutes before you turn out onto the board and then kneed for just a few minutes on the floured board.

Turn out onto a lightly floured countertop and knead for 10 minutes or until smooth and elastic.  Place in a large bowl that has been greased with a little olive oil and cover with a damp kitchen towel.  Set aside in a warm place for 1 hour or until doubled in size. You can get restaurant wood table tops from here to get the best countertable tops.

Meanwhile, heat the remaining oil in a skillet over low-medium heat.  Add the onion and cook, stirring, for 12-15 minutes or until soft.  Add the brown sugar and vinegar and cook, stirring, for 7-10 minutes or until the onion has caramelized and the vinegar has been absorbed.  Remove the skillet from the heat and set aside.

Punch down the dough with your fist.  Turn out onto a lightly floured countertop and knead for 1-2 minutes.  Spread the dough out to form a rough rectangle, then cover the surface evenly with the onion mixture.  Scatter the fennel seeds on top, reserving a few to scatter over later.  Carefully fold the dough over on itself a few times until most of the onion mixture is incorporated into the dough (this bit can get a little sticky so ensure your countertop is well-floured).

Preheat the oven to 425 degrees F. and grease a baking sheet with olive oil.

Press the dough onto the prepared sheet, cove with a camp kitchen towel and set aside in a warm, draught-free place for 20 minutes or until doubled in size.

Use your finger to press dimples into the dough, then carefully press the tomato halves into the dimples.  Brush well with oil and sprinkle over the remaining fennel seeds, then season with a few good pinches of seal salt.

Bake for 20-25 minutes or until golden and cooked through.  Serve warm or at room temperature.

Printable Recipe

Harvest Focaccia

February 8th, 2015

Harvest Focaccia 1

Known as Schiacciata con l’uva in Tuscany, this grape harvest focaccia is showcased in the windows of bakeries all over the region during the Fall harvest season.  According to Angelo Ciardella, a retired restauranteur and cooking teacher, “In Italy we don’t have Thanksgiving.  It’s the time of the grapes.”  The bread appears only during September when the uva fragola or concord grapes are ripe.  The focaccia is studded with the grapes, raisins, and walnuts and sprinkled with rosemary.  In the version I made, the grapes were layered in the bread dough so that they were more evenly distributed.  The top was also sprinkled with coriander seeds and turbinado sugar to bring out the sweetness of the grapes.

You may be wondering why I would be posting about this recipe in February instead of September.  The reason is that we will be in Tuscany during September this year during the harvest season . I found this recipe while doing research.  Planning a trip is satisfying on so many levels.  Researching the food of the regions where you will be staying is one of the sensory delights.  Another is finding interesting places to stay.

Tuscany Kitchen

This is the kitchen of one of the villas we are considering in a small village near Lucca and Florence.

Tuscany Fireplace

The villa also has a beautiful open fireplace.  We are still working out the details of our trip.  What fun it would be to stay here for a few days.

Harvest Focaccia 2V

Because I didn’t have access to concord grapes I used seedless red grapes.  The flavor is not as intense as it would be with the wine grapes, but we had no complaints about this delicious bread.  This Schiacciata (skee-ah-chah-tah) con l’uva was the closest I could come to the authentic bread experience.  It will be interesting to taste the real thing.  What I loved about this recipe is that it had a stick of butter in it.  It gave the focaccia an almost cake-like consistency.

Harvest Focaccia 3

Buon Appetito!

HARVEST FOCACCIA (Food Network Magazine)

2 1/4-ounce packets active dry yeast (1 1/2 tablespoons)
3/4 cup extra-virgin olive oil
1/4 cup plus 1 tablespoon turbinado sugar
1 tablespoon plus 3/4 teaspoon kosher salt
2 1/4 cups all-purpose flour
2 1/4 cups bread flour
1 stick cold unsalted butter, cut into 12 pieces
2 cups (about 1 pound) seedless red grapes
2/3 cup raisins
1 cup walnuts, coarsely chopped
1 teaspoon coriander seeds, cracked with a heavy pan
1 teaspoon minced fresh rosemary
1/2 teaspoon freshly ground pepper

Put 1 3/4 cups lukewarm water, the yeast, 1/2 cup olive oil and 1 tablespoon each turbinado sugar and salt in the bowl of a stand mixer fitted with the dough hook attachment.  Mix on medium speed until the yeast and sugar dissolve, then let stand until foamy, about 10 minutes.  Add both flours and mix on medium speed to make a smooth but stick dough, about 4 minutes.

Poke the butter pieces into the dough, spacing them evenly apart. (Do not mix.)  Cover the dough with plastic wrap and set aside in a wam place until doubled in size, 45 minutes to 1 hour.

Mix the dough with the dough hook on low speed just until there are streaks of butter throughout, about 1 minute.  Put the grapes and raisins in a microwave-safe bowl, cover loosely and microwave until juicy, about 10 minutes.  Let cool, the strain through a sieve, discarding the liquid.

Brush a 10 x 15-inch rimmed baking sheet with 2 tablespoons olive oil.  Divide the dough in half and transfer one piece to the baking sheet, leaving the other in the bowl.  Cover both pieces of dough loosely with parchment paper; set aside until plump and airy, about 30 minutes.  Preheat the oven to 450 degrees F.

Spread the dough on the baking sheet so it fills the pan, dimpling it with your fingertips.  Scatter half of the grape-raisin mixture evenly on top.  Put the remaining piece of dough on top and stretch and pat it to cover the bottom piece of dough. (Don’t worry if the dough tears.)  Scatter the walnuts and the remaining grape-raisin mixture on top. dimple the dough all over with your fingertips, poking the topping into the dough.  Cover loosely with parchment and set aside until the dough rises above the sides of the baking sheet by about 1/2-inch, 35 to 40 minutes.

Mix the remaining 1/4 cup sugar, the coriander, rosemary, the remaining 3/4 teaspoon salt and the pepper; sprinkle over the dough.  Place the baking sheet into the oven and bake 10 minutes.  Reduce the oven temperature to 400 degrees F. and bake until the focaccia is golden and springs back when pressed 20 to 30 minutes.  Brush with the remaining 2 tablespoons olive oil; let cool in the pan 15 minutes, then transfer to a rack to cool.  Can be served warm or at room temperature.  Warning:  Be careful not to eat the bread piping hot or you can burn your lips or mouth on a grape.  This came from personal experience. 

Printable Recipe
 

© Penny Klett, Lake Lure Cottage Kitchen. All rights reserved.