
This is a day early to be posting for
Barefoot Blogger Thursday but yesterday was a hot day so a cool soup seemed to be a very good idea for dinner. Meryl of
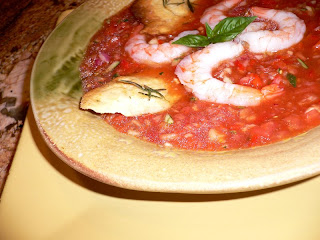
My Bit of Earth selected Ina Garten’s Gazpacho for the second Barefoot Blogger recipe of the month. I decided to take Ina’s wonderful soup recipe and embellish it with shrimp and this flavorful flatbread to make it a complete meal.
There are many things I like about this dish. The chunky vegetables add lots of texture and taste. I did alter the recipe slightly by using only one red pepper instead of two and by using only a half of a red onion instead of the whole onion. If the soup had more time to rest in the refrigerator the onion and pepper would have mellowed, but since I was serving it in less than two hours I didn’t want too much of the raw taste. Another advantage is that the soup is quick to put together. Most of the chopping is accomplished in a food processor. To give the dish added flavor, I used V-8 juice instead of regular tomato juice. They now have a heart healthy low sodium variety of V-8 juice that I really like.
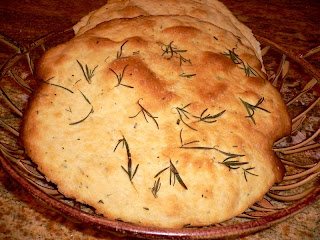
When I serve soup I have to have bread and these crispy rosemary flatbreads are one of my favorites. I have blogged about them before but sometimes a good thing is worth repeating. They are very easy to put together and they look beautiful and taste as good as they look.
The meal was perfect, eaten on the porch on a sultry evening. Even the shrimp were easy. I bought them already cooked from the supermarket. Thank you Meryl for selecting another great Barefoot Contessa recipe.
GAZPACHO
1 hothouse cucumber, halved and seeded, but not peeled
2 red bell peppers, cored and seeded ( I used 1)
4 plum tomatoes
1 red onion (I used 1/2)
3 garlic cloves, minced
23 ounces tomato juice (3 cups) (I used V-8 juice)
1/4 cup white wine vinegar
1/4 cup good olive oil
1/2 Tbls kosher salt ( I omitted )
1 tsp freshly ground black pepper
Roughly chop the cucumber, bell peppers, tomatoes, and red onions into 1 inch cubes. Put each vegetable separately into a food processor fitted with a steel blade and pulse until it is coarsely chopped. Do not over process!
After each vegetable is processed, combine them in a large bowl and add the garlic, tomato juice, vinegar, olive oil, salt, and pepper. Mix well and chill before serving. The longer gazpacho sits, the more the flavors develop.
CRISP ROSEMARY FLATBREADS – Gourmet July 2008
1 3/4 cups unbleached all-purpose flour
1 tablespoon chopped rosemary plus 2 (6 inch) sprigs
1 teaspoon baking powder
3/4 teaspoon salt
1/2 cup water
1/3 cup olive oil plus more for brushing
Flaky sea salt such as Maldon
Preheat oven to 450 degrees with a heavy baking sheet on rack in middle.
Stir together flour, chopped rosemary, baking powder, and salt in a medium bowl. Make a well in center, then add water and oil and gradually stir into flour with a wooden spoon until a dough forms. Knead dough gently on a work surface 4 to 5 times.
Divide dough into 3 pieces and roll out 1 piece (keep remaining pieces covered with plastic wrap) on a sheet of parchment paper into a 10-inch round (shape can be rustic; dough should be thin).
Lightly brush top with additional oil and scatter small clusters of rosemary leaves on top, pressing in slightly. Sprinkle with sea salt. Slide round (still on parchment) onto preheated baking sheet and bake until pale golden and browned in spots, 8 to 10 minutes. Transfer flatbread (discard parchment) to a rack to cool, then make 2 more rounds (1 at a time) on fresh parchment (do not oil or salt until just before baking). Break into pieces to serve.
Flatbread can be made 2 days ahead and cooled completely, then kept in an airtight container at room temperature.
Printable recipe – Gazpacho
Printable recipe – Crisp Rosemary Flatbreads


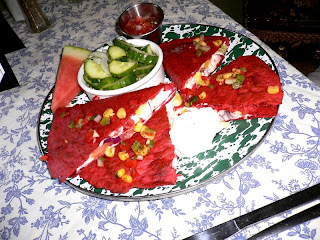 I had the black-eyed pea cakes on a bed of greens. Both dishes were very tasty and colorful.
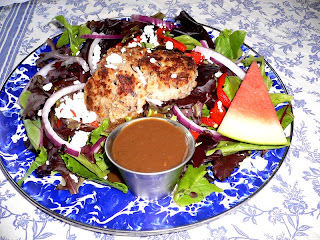

