Caramelized Onion Galette

December 12th, 2020

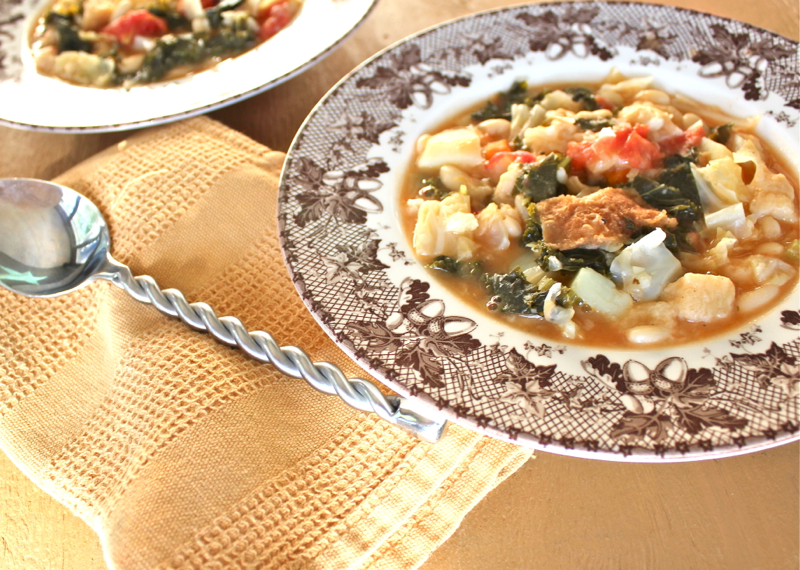
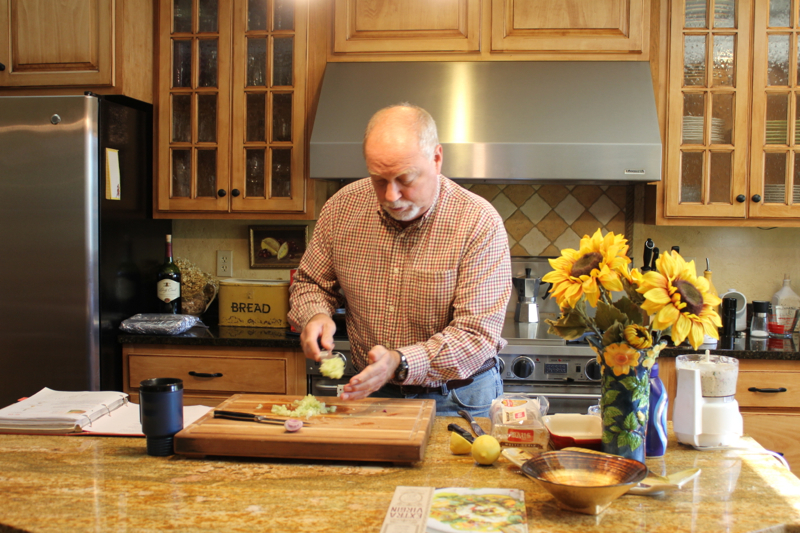
Serendipity; the occurrence and development of events by chance in a happy or beneficial way. My husband loves to cook. He has lots of time on his hands since we are staying pretty close to home. He recently set aside a few hours to make caramelized onions. He used a recipe from Vivian Howard in her new cookbook, This Will Make it Taste Good. Caramelized onions take time because they need to cook low and slow. The original use was to top a steak. But there were so many of them that I ended up with a stash in the refrigerator.

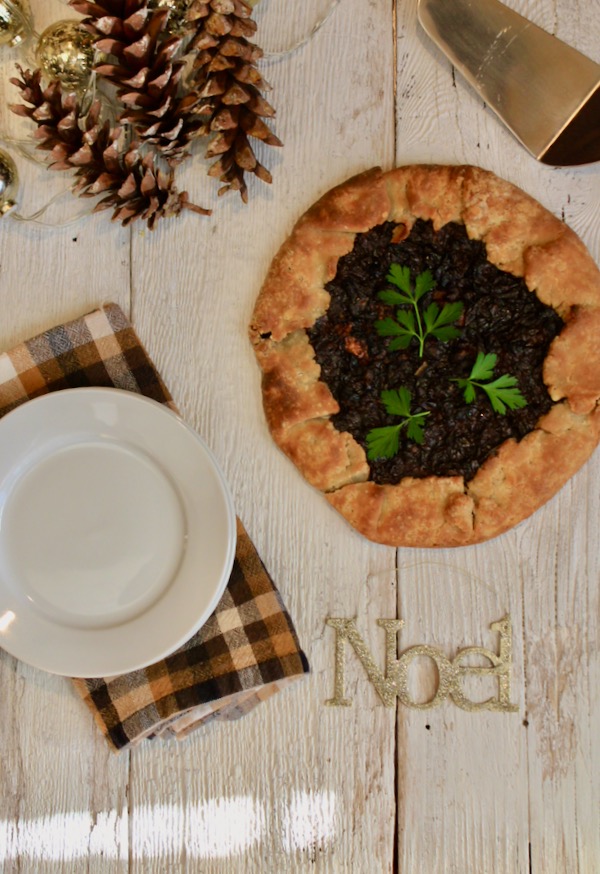
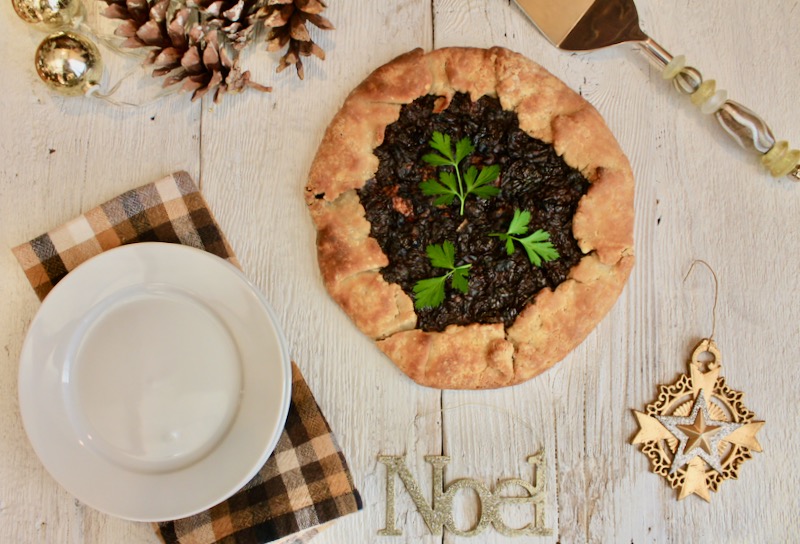
Thanksgiving included pie making. I made several rounds of pastry and ended up with extra. A light bulb moment happened and I put the two leftover ingredients together with delicious results.

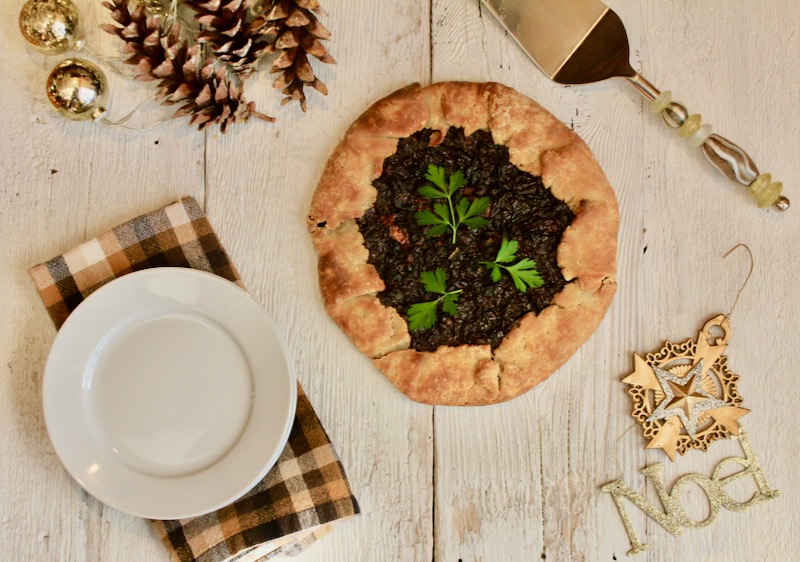
This caramelized onion galette would make a perfect appetizer for the holidays. I added some Gruyere cheese to the onion mixture and was pleased with the results. The taste is reminiscent of French onion soup. It would also be great as a light supper with a salad. Serendipitous indeed.

Caramelized Onions

  • 4–5 large or 6–8 medium yellow or white onions
  • 1 Tbsp olive or vegetable oil
  • 1 tsp kosher salt
  1. Peel your onions and cut them in half through their stem ends—longways, if you will. Slice them thinly with the grain, following the line from root to stem rather than cutting the onion across its belly. This is actually important because slicing it the other way makes the path to silky onions a longer one.
  2. Once your onions are sliced, heat your skillet over medium-high heat and add the oil, then the onions and the salt. Let the onions sizzle for a couple minutes. Stir with a wooden spoon or a heatproof spatula and watch as they wilt for about 3 more minutes. At this point, reduce the heat to medium low. Put a lid on and step away for a few minutes. Give the onions a stir every now and then. You don’t have to stand over it like risotto, but don’t go for a walk around the block either. Caramelized bits will accumulate at the bottom and sides of the pan, and that’s good. Just scrape them up and stir them in. A little color building as you go is okay, but don’t rush to brown them. The point is to cook the onions gently, coaxing them through stages of raw, wilted, sweaty, soft, light brown, and finally deeply caramelized
  3. About 45 minutes in, remove the lid for the last time. They should be a light caramel color. Now, with the lid off, you will need to watch more closely and stir more frequently. At some point you may find that despite your best efforts some of the caramelized bits, verging on burnt, cling to the pan and threaten over all onion ruin. Do not fret! Just add a ½ cup or so of water and use its energy to help scrape up the stubborn but tasty film. Let the water cook out of course. When you’re smiling over a soft, creamy, fragrant pile of mahogany onions, you’re done. Makes 2 cups.
  4. Note:  Onions will keep in the fridge for a week and in the freezer for 3 months.

Assemble Galette

Mix 1 to 1 1/2 cups cooled onions with 1/2 cup grated Gruyere cheese. Heat the oven to 375 degrees. Roll pastry dough of your choice (Could use a store-bought pastry round) into a 10-inch circle on a sheet of parchment. Spread the cooled caramelized onions on the dough, leaving a 1- to 2-inch border. Fold the edges in, over the onions, transfer to a baking sheet and bake until the dough is golden brown and some of the onions have browned on the edges, 40 to 50 minutes, rotating the galette halfway into the baking process.

Printable Recipe

Soufflé Aux Epinards (Spinach Soufflé)

May 3rd, 2019

IMG_8951

The following blog post appeared 10 years ago in August of 2009.  It was an ode to Julia Childs.  I just made this spinach soufflé again this past weekend.  This time there were no mistakes.  Hope you enjoy hearing again of my travails in the kitchen.

Julia Child was my Muse. I was married in 1966. After a brief honeymoon on the shores of Lake Michigan and time spent in Gatlinburg,Tennessee, we headed for Florida where my husband would be attending graduate school. Some of my constant companions in the car on the way south were my cookbooks. I was just learning to cook and it fascinated me. When Julia Child first appeared on television I was hooked. We eventually moved to Greensboro, North Carolina and I had the opportunity to take cooking classes from Irena Chalmers who had the most enticing french cooking school and shop. I bought my first copper pan and Le Creuset braising pot from her. She taught me many of the basics of French cooking and she is still teaching today at the CIA in New York City. She was also an important mentor to me, as I am sure she was to many.  But there was always Julia. I bought Mastering the Art of French Cooking in 1971.

I have been wanting to post one of Julia’s recipes all month because of her birthday on August 15th and the release of the movie Julie and Julia, but the box containing my copy of her book was in our storage building, buried behind furniture and rugs. I finally rescued it this weekend when we brought a load of furniture home for our remodeled lower level. It was good to see it again, looking worn and stained from years of constant use.

IMG_8960 (1)

Last night I decided to make her spinach soufflé. I did not start it until 6:00. I had already brought the eggs and frozen spinach to room temperature. I was confident; maybe a little cocky. I loved the movie Julie and Julia, by the way. Meryl Streep and Stanley Tucci were magnetic as Julia and Paul and the scenes of 1950’s Paris were mesmerizing. I wanted the whole movie to be about them. Amy Adams as Julie did her best, but I found her character sometimes whiny and annoying. Why couldn’t she have the joie de vivre of Julia? Cooking is supposed to be fun after all. I made my white sauce, grated the cheeses, squeezed the spinach dry and separated my eggs. One of the eggs broke strangely and I got a little yolk in the egg whites in the bowl of my Kitchen Aid. “Oh well, it was just a little”, I told myself. I added the egg yolks to the spinach mixture and turned on the mixer to whip the egg whites. I whipped and whipped and they refused to froth. It became clear to me that they were never going to whip because of the bit of yolk in the mixture. Unfortunately,  I was out of eggs. By this time it was close to 7:00. The grocery store in Lake Lure is twenty minutes away, but the gas station at the bottom of the hill is close. I ran to the car and negotiated the curving road to town. The gas station store had just closed at 7:00. I banged on the door like a crazy woman and the owner opened up for me. Unfortunately he was out of eggs. I had no choice but to continue around the lake to the Ingle’s store. I got back home at about 7:45 with a carton of cold eggs. I cleaned out the bowl of the Kitchen Aid, added the egg whites one at a time after first breaking them into a small bowl ( a good tip by the way ) and started the mixer again. The eggs immediately did what they were supposed to do. I folded them into the spinach mixture and poured the whole into my souffle dish, actually my charlotte mold. I learned a trick from Ina Garten to help a soufflé puff. Run a spatula in a circle about an inch in from the edge all the way around and the center will puff. Finally I had the dish in the oven. I was exhausted and I didn’t know if the cold egg whites would hinder the soufflé from rising. I was also a little cranky. Where had I seen that before? It was a humbling experience.

The soufflé finally came out of the oven at about 8:45, fashionably late and not as tall as I would have liked, but looking and smelling delicious. As Julia would say, “Never apologize”. We dug in with gusto.

IMG_8953

This time I added some chopped ham to the Spinach Soufflé for our Saturday supper.  We ate at a reasonable 6:30.

SOUFFLÉ AUX EPINARDS (SPINACH SOUFFLÉ) adapted from Julia Child with touches of Ina Garten

3 Tbls unsalted butter plus more for greasing soufflé dish
3 Tbls flour
1 cup scalded milk
a pinch of nutmeg
a pinch of cayenne pepper
Salt and pepper to taste
1/4 cup freshly grated Parmesan cheese, plus more for sprinkling the dish
1/2 cup grated Swiss cheese
10 oz package of chopped spinach thawed and squeezed dry
4 egg yolks
5 egg whites
1/8 tsp cream of tartar

Preheat the oven to 400 degrees. Butter a 6 cup soufflé dish and sprinkle it with Parmesan cheese. Melt the butter in a heavy sauce pan and add the flour. Cook and whisk for about a minute. Add the hot milk off the heat and whisk until it is thick. Return to low heat if it does not thicken. Again off heat, add the two cheeses to the mixture. Separate the eggs in two bowls, discarding or saving one of the egg yolks. Beat the egg yolks. Slowly add the egg yolks to the cheese sauce while whisking. Add the seasoning and spinach and stir to combine.

Add the 1/8 tsp cream of tartar to the egg whites and beat them until firm and glossy peaks form. Whisk one quarter of the egg whites into the cheese sauce to lighten, and then fold in the rest. Pour into the prepared soufflé dish, then smooth the top. Draw a large circle on top with the spatula and place in the middle of the oven. Turn the temperature down to 375 degrees. Bake for 30 to 35 minutes until puffed and brown. Serve immediately.

Printable Recipe

Summer Squash Casserole

August 23rd, 2016

Summer Squash Casserole 1

I remember when we had a garden and had to deal with the prolific profusion of yellow squash and zucchini.  Our lake house is too shady to support a garden these days, so I have to rely on friends, the Farmers’ Markets and the Supermarket for my squash.  You can never have too many summer squash recipes.  This one, that I adapted from The New York Times, is a winner.

Summer Squash Casserole 2v

The cooked and pureed yellow squash is combined with cheese and minced peppers, onions and flavoring and cooked in a custard of eggs and cream topped with buttered bread crumbs.  It makes a casserole that everyone will love.  It was easy to photograph too.  Photography has become important to me, although I’ve always had an interest.  I just found this early picture of myself and my Mom.  I was very proud of my new Brownie camera.

Christmas 1956

The intrepid girl photographer.  What memories this brings back.

Enjoy this summer squash casserole.  Your harvest will thank you for not wasting all of that bounty.

SUMMER SQUASH CASSEROLE ( The New York Times)

  • 2 pounds yellow summer squash
  • 7 tablespoons butter
  • 1 large onion, chopped
  • 1 large clove garlic, chopped
  • ½ red bell pepper, chopped
  • ½ green bell pepper, chopped
  • 1 jalapeño pepper, seeded and chopped (optional)
  • 4 slices plain white bread, toasted
  • 24 Ritz crackers, crumbed in food processor
  • ½ pound sharp cheddar cheese, grated
  • 4 large eggs, beaten
  • ½ cup heavy whipping cream
  • 1 teaspoon sugar
  • 1 teaspoon salt
  • ¼ teaspoon cayenne pepper
  1. Heat the oven to 350 degrees. Butter a 2 1/2-quart baking dish. Cut the squash into 1/2-inch-thick slices. Cook in boiling, salted water until tender, about 10 minutes. Drain. Purée in a food processor.
  2. Melt 6 tablespoons of the butter over medium heat. Add the onion, garlic and peppers and cook until just tender. Meanwhile, crumb the toast in a food processor, melt remaining butter and toss together.
  3. Mix the squash purée, onions, peppers, garlic, cracker crumbs and cheese. Stir in the eggs, cream, sugar and seasonings. Blend well. Pour into the baking dish. Top with bread crumbs and bake until browned, about 40 minutes.

Printable Recipe

Ribollita – Tuscan Vegetable and Bread Soup

October 24th, 2014

Ribollita 1

Ribollita is a classic Tuscan peasant soup.  It utilizes stale bread and inexpensive winter vegetables.  Translated ribollita means “reboiled”.   Many times left-over minestrone was used as its base.  I admire the frugality of this soup because it also offers a wealth of nutrient rich vegetables.  Leafy kale (cavalo nero in Tuscany), savoy cabbage, carrots, potatoes, celery,cannellini beans and tomatoes are all part of the ingredients.  The stale bread stretches it to feed many.  I was inspired to make this soup because I had a left-over chunk of the wonderful Parmesan bread that I made in my last post.  It was perfect for this soup; a little dense and full of Parmesan flavor.

Ribollita 2

I reviewed several recipes for ribollita.  Some included pancetta or bacon, some added garlic and rosemary, but I went with a classic recipe from Gabriele Corcos, who with his wife Debi Mazar, has the cooking show Extra Virgin on the Cooking Channel. Gabriele is a native of Tuscany.  For me, this hearty soup had a depth of flavor that emanated from the vegetables.  The tomatoes were kept to a minimum and water was used instead of broth to flavor the soup.  So the overall flavor was mild with a rich earthy vegetable taste.  This is most likely the way it was made originally.  My husband decided he needed some meat, so added sauteed sausages to his soup.

Ribollita 3

This soup is very forgiving of any ingredients that you may want to add, and I have decided that I will be hoarding stale bread just for the purpose of making it.  Warm, filling, delicious and good for you.  You couldn’t ask for more.

David Cooking

Today is David’s birthday.  Happy birthday to my partner, soul mate and best friend.  As you can see we have a lot in common.  But I don’t mind sharing kitchen space with him.

RIBOLLITA (Adapted from Extra Virgin by Gabriele Corsos and Debi Mazer)

8 ounces dried cannellini beans, soaked overnight in cold water to cover (Or 1-15 ounce can of drained and rinsed cannellini beans)*
Salt and freshly ground black pepper
3 tablespoons extra virgin olive oil
2 carrots, roughly chopped
1/2 white onion, roughly chopped
2 stalks of celery, roughly chopped
2 russet potatoes, peeled and diced into 1/2-inch pieces
1 bunch Tuscan kale or regular kale, leaves, removed and roughly chopped
1/2 head savoy cabbage, roughly chopped
1 (15 ounce) can whole peeled tomatoes
1/2 pound stale country style bread (I used 1/3 of a loaf of Parmesan bread), cut into cubes

Rinse and drain the soaked beans.  Bring a medium-sized, heavy-bottomed pot full of water to a boil.  Add the beans, making sure they’re covered by a few inches of water, and reduce the heat to medium-low.  Cook for at least 1 hour, salting the water after 40 minutes, until tender.  Drain the beans and set aside.

In an 8-quart pot, heat the olive oil over medium-high heat until hot.  Add the carrots, onion, and celery and saute’ for 8 to 10 minutes, or until soft and translucent but not golden.  Add the potatoes, kale and cabbage and saute’ for about 5 minutes, until the cabbage is wilted.

Add the tomatoes, breaking them up with a wooden spoon and the drained beans.  Add enough water to cover the ingredients, bring to a boil, then reduce the heat to medium-low.  Season with salt and pepper to taste and simmer for 1 hour and 30 minutes, until it thickens considerably.

Add the bread and continue cooking for another 30 minutes , until the crust of the bread begins falling apart.*  If using canned beans add them when you add the bread.

Serve in bowls with an extra drizzle of olive oil.  Serves 6.

Printable recipe

Southwest Chia Seed Pierogi with Avocado Cream Sauce

April 1st, 2013

It is always such a treat to visit our family for many reasons.  One of which is the creative ideas that come out of DIL Kristen’s kitchen.  Michael and Kristen feed their children well.  They are trying to keep their diets as natural as possible.  Roasted root vegetables, fresh fruit, avocados, and quinoa are a part of their daily meals.  They eat meat, poultry and fish, but many of their dinners are vegetarian.  A new ingredient that Kristen has been experimenting with lately is Chia Seeds.  I know what you are thinking. . . . . Am I going to grow grass all over my body if I eat chia seeds?  The answer is no.   Unlike the ubiquitous Chia pets from a few years back, chia seeds are now being offered as a wholesome alternative to flax seeds in our diets.  Grown in Mexico and Bolivia, they are rich in omega-3 fatty acids, antioxidents, protein and fiber.  They offer a bit of crunch to breads and doughs while boosting the nutrient value.

Kristen decided to make a Southwestern flavored dish with homemade pierogi and chia seed dough.  The filling was mashed potatoes with green chiles, sour cream, cheese, and cumin.

The dough was flecked with the chia seeds.  Kristen used her pasta attachment to her Kitchen Aid mixer to roll the dough.  But you could also do it by hand if you don’t have a pasta machine.  Circles were cut from the dough.

A tablespoon of the potato mixture was placed in each circle of dough.

The opposite sides of the dough were brought together and the edges were pinched shut.

The edges were further sealed with the tines of a fork.

It is a good idea to keep the pierogi covered with damp paper towels as you work so that they do not dry out.

Another dish that Kristen made that continued the Southwestern theme was roasted Chayote squash.  Native to Mexico, Chayote squash is similar to summer squashes like yellow squash and zucchini.  She roasted it with onions and seasoned it with salt and pepper and a hit of coriander.

Everyone loved this meal.  The pierogi were flavorful and the avocado cream sauce was light and velvety with a bit of tang from the sour cream and lime.  This is one of those meals that is somewhat time consuming,  But the fact that all of the components are homemade, flavorful and nutritious makes it all worthwhile.  On a lazy Sunday afternoon I may even make a batch of pierogi and freeze them for several meals.

SOUTHWEST CHIA PIEROGI WITH AVOCADO CREAM SAUCE

DOUGH

  • 2 cups Unbleached All-Purpose Flour
  • 1 teaspoon salt
  • 1/4 tsp. garlic powder
  • 2 tbsp. chia seeds (optional, but great for added protein, fiber and texture!)
  • 1 large egg
  • 1/2 cup sour cream
  • 1/4 cup butter, room temperature

FILLING

  • 1.5 small to medium russet potatoes, 1.5 cups chicken broth or chicken base
  • 1 cup shredded cheddar or pepper jack cheese (or a combination of the two)
  • 2 heaping spoonfuls of sourcream
  • 1/2 can (4.5 oz) of chopped green chiles
  • 1/2 tsp. cumin
  • salt and fresh black pepper to taste

SAUCE

  • 1 large Hass Avocado (pit and skin removed)
  • Juice from 1.5 limes
  • 2 heaping spoonfuls of sourcream
  • 1/2 cup skim milk
  • 1/4 tsp. coriander

MAKE THE DOUGH…

  • Mix together the flour and salt. Add the egg to the flour and combine. The dough will be quite clumpy at this stage.
  • Work in the sour cream and soft butter until the dough comes together in a slightly rough, slightly sticky ball.
  • Using just your fingertips, knead and fold the dough, picking up bits around the bowl  until the dough becomes less sticky but still quite moist. It will be a firm dough.
  • Wrap the dough well in plastic wrap and refrigerate for 1-2 hours, or up to 48 hours. I found that the longer the dough chills, the easier it is to work with.  My brother tells me that chilling dough helps the gluten to relax?  Whatever that means.

MAKE THE FILLING…

  • Peel and cut potato into large pieces (6 to 8 pieces per potato).  Boil in 1.5 cups of chicken broth until tender.
  • Drain and rinse potatoes in cold water. Blot with a clean dish towel or layered paper towels to remove excess moisture.
  • Gently mash the potato until there are only small chunks (or no chunks if you prefer) remaining. Stir in cheese, sour cream, green chiles, and cumin. Taste and adjust the seasonings with salt and pepper.

FILL THE PIEROGI…

  • I cut the dough in to 8 sections, shaped and rolled gently into a small rectangle.  Then, I worked one section at a time through my pasta roller attachment.  4 passes at setting 1 (the thickest setting), 4 passes through setting 2.  If you are hand rolling, I still think it’s easier to cut the dough in to 8 sections and the roll each section out into a long rectangle or oval.  It should be roughly about 1/8” thick.
  • You can either roll out all the dough, then cut and fill – or you can roll a couple of batches, cut and fill those, then repeat with remaining dough until complete.  It probably depends mostly on the size and work surfaces available in your kitchen.  Ours is small!
  • TIP: Any dough you are not actively working with should be loosely wrapped in plastic wrap or covered with a damp paper towel or cloth at all times.
  • Use a 3-4” round cutter to cut circles of dough (I used the top of our cocktail shaker). Repurpose scraps by creating another section of dough or snip into small pieces for soup noodles.
  • Place 1 tablespoon of filling on each round of dough. Gently pull two opposite sides of the dough up together and press together working from the center out to ther corners to form a pocket. Pinch the edges of the pierogi to seal, then seal again with the tines of a fork.
  • Cook in a large stockpot of boiling unsalted water (since I added salt to my dough, it was not necessary to salt the water). Only cook about 10 pierogi at a time, so that they have room to float without sticking. When the pierogi float after about 5-6 minutes, they’re ready.  Fish out of the water with a slotted spoon and set aside on a plate until all the pierogi are boiled.

FINISH THE DISH…

  • on medium low and add enough olive oil to generously coat the pan.
  • one at a time, add the pierogi to the skillet and gently swirl (by hand) in the olive oil to prevent sticking.  Fill the pan with perogi, but don’t over-crowd.  If your pan is too hot, the pierogi are more likely to stick so watch the heat!
  • Sprinkle lightly with salt and pepper on the sides that have not yet been introduced to the oil.
  • Flip with tongs once the down side is lightly browned and crispy.  Crisp up the other side and remove from pan (cook in batches and keep completed pierogi warm in a 200 degree oven while the others cook) .
  • Using an immersion blender, blender or food processor, puree all sauce ingredients until a smooth, thick pourable consisentcy is achieved.
  • Spread 2-3 spoonfulls of sauce on a plate and place 4-5 pierogie (sitting up) on top.
  • Serve your favorite seasonal roasted vegetable alongside.

Printable recipe

© Penny Klett, Lake Lure Cottage Kitchen. All rights reserved.