
We have just returned from a quick vacation in Key West. But one of my blogging buddies, Dave of My Year on the Grill, along with his wife Jackie, are having an extended six month vacation in the Virgin Islands. Jackie works for The Government and she has pulled this unfortunate duty, so Dave being a dutiful husband has moved his grill from snowy Kansas and has set up shop in paradise.
Dave is also a weekly contributer to another blog, Our Krazy Kitchen and Min and the girls wanted to throw a beachwarming party for Dave and Jackie. We were all invited to bring something to the party and my contribution is this wonderful Conch Chowder. Surely Dave can get conchs in the Virgin Islands so I hope he will try this recipe. Enjoy your virtual party Dave!
Conchs are readily available in Key West and they are served in chowders, salads, gumbos, and fritters. They are a member of the sea snail family and are second in popularity only to the more sophisticated escargot. We encountered them in almost every restaurant we went to in Key West and our trip was way too short to sample all of the possibilities. The idea of taking this brief trip to the Keys was an effort to find someplace warm to thaw our winter weary bones. Unfortunately it was even cold in the Keys. We wore our jackets every day. We stayed at the Hollinsed House which is composed of the Main House and a Carriage House containing several studio apartments.

The above picture is the carriage house. Our apartment is located in the lower rooms with the double patio doors.

This is the pool area right outside of our door. Even though the pool was heated, it was too cold to take a dip.
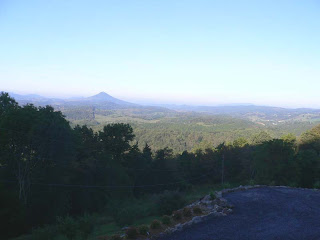
 The grounds were lush with vegetation and I did manage to find a ray of sun to sit by the pool in the above lounge chairs.
The Hollinsed House is located in the historic section of Key West and just blocks from the famous Duval Street and Mallory Square where sunset is celebrated each evening.
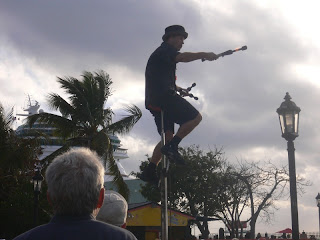 Crowds of people are drawn to the square next to the sea by street perfomers like this unicyclist, juggling fellow.
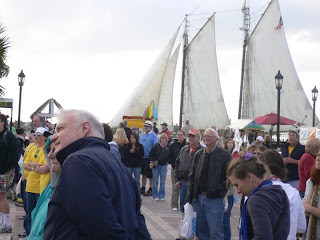 As the crowd watched, a four-masted schooner passed by in the harbor.
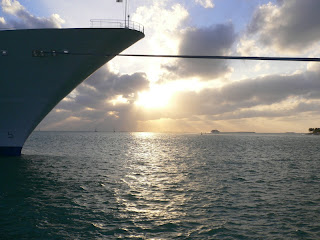
Cruise ships anchor here and this one almost blocked the nightly spectacle of the sunset.
 Crowds of people are drawn to the square next to the sea by street perfomers like this unicyclist, juggling fellow.
 As the crowd watched, a four-masted schooner passed by in the harbor.

Cruise ships anchor here and this one almost blocked the nightly spectacle of the sunset.
No trip to Key West would be complete without a visit to The Hemingway House. Ernest Hemingway settled in Key West in the late 1920’s. He was drawn to the area by the abundant fishing possibilties.

The house reflects a Spanish Colonial style. The walls were constructed from coral rocks found in the area. Ceiling to floor windows were used as doors to access the patio and upper porches. The first room I headed to was the kitchen. It is small but bright. The appliances and counters were raised to accomodate Hemingway’s tall frame.

A picture of Hemingway in the dining room shows him as he appeared when he and his wife Pauline bought the house. He was a young thiry year old.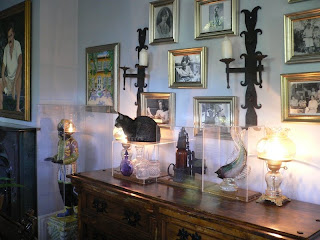
Hemingway loved cats and there are still forty or more cats roaming the grounds descended from the original six-toed cat. This cat has found a comfortable spot on the buffet in the dining room.
Here are two more cats resting comfortably in Hemingway’s king size bed. The headboard is an old Spanish gate.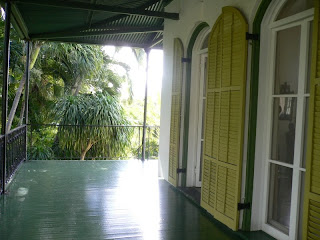
This is a view of one of the upper porches with it’s exterior shutters.

Hemingway’s office was located in a carriage building behind the main house. He wrote “To Have and Have Not” and “For Whom the Bell Tolls” in this room.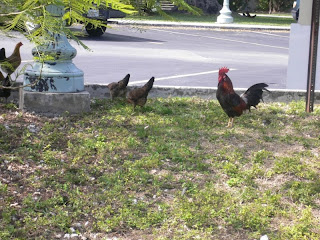 Cats are not the only creatures to have freedom to wander in Key West. Chickens and roosters are on every street corner; talk about free range chickens!
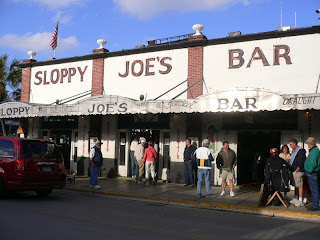
One of Ernest Hemingway’s favorite hangouts was Sloppy Joe’s Bar. This is not the original location, but it has become the place that everyone associates with Hemingway.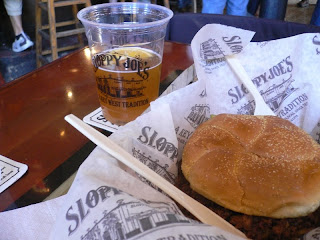
We could not go without sampling the original sloppy joe. It was delicious. I will see if I can get the recipe. But in the meantime, here is a recipe for Conch Chowder for Dave and any of you who want to participate in his Beachwarming Party. Enjoy your stay in The Virgin Islands Dave!

The house reflects a Spanish Colonial style. The walls were constructed from coral rocks found in the area. Ceiling to floor windows were used as doors to access the patio and upper porches.
 The first room I headed to was the kitchen. It is small but bright. The appliances and counters were raised to accomodate Hemingway’s tall frame.

A picture of Hemingway in the dining room shows him as he appeared when he and his wife Pauline bought the house. He was a young thiry year old.

Hemingway loved cats and there are still forty or more cats roaming the grounds descended from the original six-toed cat. This cat has found a comfortable spot on the buffet in the dining room.

Here are two more cats resting comfortably in Hemingway’s king size bed. The headboard is an old Spanish gate.

This is a view of one of the upper porches with it’s exterior shutters.

Hemingway’s office was located in a carriage building behind the main house. He wrote “To Have and Have Not” and “For Whom the Bell Tolls” in this room.
 Cats are not the only creatures to have freedom to wander in Key West. Chickens and roosters are on every street corner; talk about free range chickens!

One of Ernest Hemingway’s favorite hangouts was Sloppy Joe’s Bar. This is not the original location, but it has become the place that everyone associates with Hemingway.

We could not go without sampling the original sloppy joe. It was delicious. I will see if I can get the recipe. But in the meantime, here is a recipe for Conch Chowder for Dave and any of you who want to participate in his Beachwarming Party. Enjoy your stay in The Virgin Islands Dave!
CONCH CHOWDER
1/4 cup diced bacon
1 garlic clove
1/2 thyme sprig
2 celery stalks, sliced finely
1/4 cup tomato paste
salt and pepper to taste
2 finely chopped onions
1 teaspoon paprika
2 medium green pepper, diced
2 potatoes, diced
1 pound conch meat
1 28 ounce can of diced tomatoes
1 cup water to thin broth
In a Dutch oven, fry bacon until golden brown. Drain. Add peppers, celery, onions, thyme, and garlic. Cook until soft. Add tomatoes, tomato paste, water, conch, and potatoes. Bring to a boil. Add enough more water to cover mixture. Simmer for 25 minutes. Return bacon to pot. Make sure there is always sufficient water in pot. Serves 4 -6.


 After our last visit, in which I posted about Barbara’s beautiful new kitchen,
  Sunday morning the guys really prepared to leave on their trip. Barbara fixed a hardy breakfast of skillet biscuits, country ham, milk gravy and eggs. Skillet biscuits are a wonderful alternative to the biscuit challenged. According to Barbara you just follow the biscuit recipe on the self-rising flour bag, but add a little more buttermilk to make the batter of pouring consistancy and bake in a greased iron skillet until brown and cooked through. She inverted the biscuits on a plate and cut them into wedges. Breakfast was delicious and it was a fitting send off to the thoughtful men in our lives.