Wild Mushroom Mini Quiches

March 14th, 2009

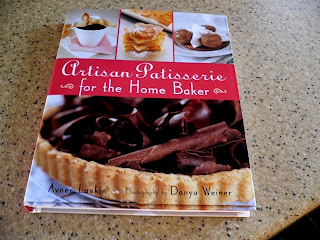
I am always on a quest for new ideas for pastry crust. Pies, both savory and sweet are a permanent part of my memory bank and producing a perfectly flaky crust is to me the equivalent of nirvana. I am also drawn to all things French and when I found this cookbook at a bargain price, I knew that I would be sampling many of the recipes within.


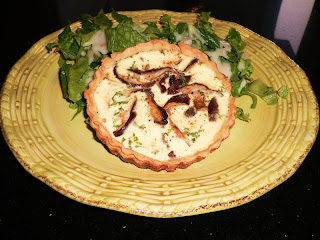
I have posted one recipe from this book already. It was Salame di Cioccolata. Many of the recipes are sweet confections, but there is also a section on quiches. I was intrigued by the savory shortcrust pastry which has a ratio of butter to flour of 1/2 and also includes an egg. Also the pastry was done completely in a food processor. The quiche filling is similar to ones I have used before and I loved the idea of using mushrooms to enhance the flavor. The pastry was easy to handle and considering that I had to use it to line six small quiche pans, it was forgiving of the cutting, lifting, and patting into place. The finished quiches lifted easily from the pans and held their shape when placed on the serving plate. They were good, very good. The filling was savory and with the mushrooms, very earthy. I am still searching for the perfect crust though . . . the flakiness was not quite there.

I served the quiches over a simply dressed green salad. I love individual quiches and there are so many ways you can use them. They would make a perfect first course with dressed baby greens, for brunch with fruit and sweet rolls, for lunch on the run, or packed in a picnic basket with a chilled bottle of pinot grigio and chocolate truffles. Enough already. . . I am making myself hungry.

WILD MUSHROOM QUICHE – From Artisan Patisserie for the Home Baker by Danya Weiner

Savory Shortcrust Pastry:
1/2 cup cold butter
1/2 tsp salt
1 egg
1 Tbls cold water
1 1/4 cups unbleached all purpose flour

Place the butter and salt in the bowl of a food processor and process 2 minutes until thoroughly combined. Stop the processor and add the egg, water, and half the flour. Continue to process 2 minutes, until the dough is smooth and uniform. Stop the processor again, add the remaining flour, and continue to process 1 minute until a neat ball is formed. Remove the dough from the bowl and cover with plastic wrap. Let rest in the refrigerator for at least 1/2 hour before using.

Basic Quiche Filling:
3 eggs
1 1/4 cups heavy cream
1 tsp salt
1/2 tsp freshly grated nutmeg

Combine the eggs and heavy cream in a bowl and mix gently. Whisk in the salt and nutmeg till smooth. Use immediately or transfer to a covered container and refrigerate for up to 2 days.

Wild Mushroom Quiche:
1 recipe Savory shortcrust Pastry
1 egg. beaten
1/2 cup butter ( I used only 3 Tablespoons)
4 garlic cloves, minced
3 cups assorted wild mushrooms ( I used Shitakes)
1 tsp salt
1 tsp white pepper
2 Tbls finely chopped parsley
1/4 cup freshly grated Parmesan cheese
1 recipe Basic Quiche Filling

1. Roll out the shortcrust pastry 1/8 inch thick on a lightly floured work surface.
2. Divide the dough evenly among six 4-inch quiche pans, using your fingers to press the dough into place. Cut off any excess dough around the edges.
3. Place the pans in the refrigerator for 15 minutes. In the meantime, preheat the oven to 375 degrees.
4. Cut out pieces of parchment paper to fit the bottom of the pans. Place the paper over the chilled dough and weigh down with beans or commercial pie weights. Bake for 20 minutes.
5. Remove the weights and a paper, and brush the bottoms and sides with the egg. Bake for an additional 3 minutes. Transfer the pans to a work surface.
6. Heat a heavy frying pan over medium heat and add a tablespoon of butter. Add the garlic and saute for 1 minute till softened.
7. Add the mushrooms, salt, and pepper and saute for 10 minutes. stirring often, until the mushrooms are softened and aromatic. Add the remaining butter ( 2 tablespoons) and cook for an additional 3 minutes. Now add the parsley and stir.
8. Drain the mushrooms and divide equally among the pans. Sprinkle the cheese and pour the prepared filling on top. Return the pans to the oven and bake for 20 minutes. Serve immediately or let cool to room temperature and reheat before serving. Also good at room temperature.
Printable recipe

Meringues Chantilly

February 26th, 2009

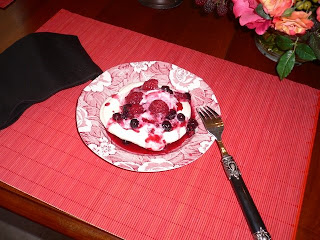
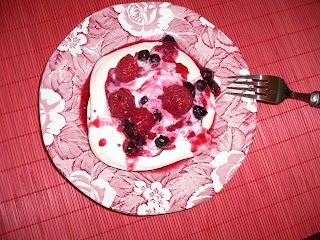
Once again it is time for the Barefoot Bloggers to reproduce an Ina Garten recipe. Today’s recipe was chosen by MBK at Reservations not Required. Be sure to visit her amazing blog for lots of creative ideas. Meringues Chantilly remind me of a time in my life when we held formal dinner parties. We were young, we had just discovered Julia Child, and we were out to impress the boss or the department chair. Fancy food was de rigueur and the fancier the better. Oh how I struggled and exhausted myself trying to make the dining room table set for 8 with the fancy china and cut crystal look fabulous. The food was another story. I had many successes but also a few failures. I remember the time that I tackled individual Beef Wellingtons with homemade puff pastry crusts. After the first course was served, I checked on the beef to see if it was ready and the crusts had melted droopily over the beef. Thank goodness the house we lived in at the time had a formal dining room, separate from the kitchen, so no one could see this disaster. I scraped off the offending crust and quickly browned the beef in my new 14″ copper saute pan. I think I was the only one that knew what had really happened, even though I was sweating and not the most composed hostess. Another time I made Bananas Foster for dessert and when I poured in the brandy and put a match to it to flame it, one of our guests leapt from his chair, knocking it over, and ran into the kitchen to my rescue, not knowing that the conflagration was intentional.

Upon first glance Meringues Chantilly appear to be one of those pretentious desserts. Thank goodness we live in a more relaxed time. I no longer feel the need to impress. Dinner is all about being with people you enjoy. Meringues Chantilly is still a somewhat complicated dessert, but the steps can be performed over a period of time. My meringues did not come out as tall as I would have liked. Next time I will put more pressure on the pastry bag. But it was no problem leaving them in the oven overnight. The sauce was easy to make and the whipped cream was a snap. Serving was just a matter of assembly. We had good friends visiting and Ina’s dessert was fabulous. And I didn’t sweat the small stuff. Thanks MBK for suggesting this dessert. For the recipe go here.

Savory Leek and Ham Tart

February 8th, 2009

Pie crust has always been easy for me. I know many cooks claim to be intimidated by the prospect of making homemade pastry, but for some reason, I enjoy the mixing, rolling, trimming and crimping. It probably has alot to do with my Mother and Grandmother. I grew up in a small town in Michigan in the house where my Mother was born. My Grandmother lived with us and the two of them were always in the kitchen fixing comforting meals. When my brother and I were small, Grandma did a lot of the cooking, but over the years Mom took over most of it, with Grandma in the background offering encouraging comments like ” You aren’t going to have any potatoes left with the way you are peeling them”, or ” That pot roast is going to be dry if you don’t add more water.” But one thing they always agreed on was how to make pie crust. I have even inherited the measuring device they used for their Crisco. They never used butter in their pie crusts and I am sure that in her younger days my Grandmother probably used lard. So here is their recipe for pie crust if you would like to give it a try. For a 1 crust pie, use 1 cup of flour (with 1/4 tsp. salt), 1/2 cup Crisco cut into flour with a sharp knife until the shortening is the size of small peas, and then 1/4 cup milk stirred in. The ratio of 1, 1/2, 1/4 is easy to remember. A two crust pie would be 2,1,1/2. The dough is then rolled out on a heavily floured board. It is a very forgiving dough and can be rerolled without toughening it if you don’t get it right the first time. I have used this recipe for years, but have also discovered the flaky texture of pate brisee, the all butter alternative. And I have used some recipes that call for a mixture of both shortening and butter. But what I am sharing with you today is a pastry dough that I had never heard of before. It is made with olive oil.

In her book Bistro Cooking, Patricia Wells talks of a version of tart that is made in Provence with the local olive oil. The dish she describes is made with Swiss Chard, but having made it before, I found it to be too heavy and unappealing. I did like the crust though, so I came up with my own filling and tweaked the ingredients slightly for the crust. The advantage of this crust is that, when mixed together, it has the consistency of a cookie dough and all you have to do is is pat it into the tart pan. It does not have the buttery flakiness of most pie crusts, but it is crisp and thin and best of all, simple.

SAVORY LEEK AND HAM TART
Pastry:
1 1/4 cups unbleached all-purpose flour
1/4 tsp salt
1/4 cup plus 2 Tbls water
1/4 cup good extra virgin olive oil
Filling:
4 leeks, green stems removed, washed well and chopped
2 Tbls. olive oil
1/2 cup diced ham

1/2 cup grated Swiss cheese
3 eggs, beaten

1 cup half and half or heavy cream
Dash of nutmeg

Preheat the oven to 400 degrees. For the pastry, combine the flour and 1/4 teaspoon salt in a medium size bowl. Stir in the water and then the oil, mixing until thoroughly blended. Knead briefly. The dough will be very moist, much like a cookie dough. Press the dough into a 10″ loose-bottomed metal tart tin.

Saute the leeks in the heated oil over medium low heat until limp. Add the ham and brown slightly. In a bowl combine the beaten eggs, cream and nutmeg. Place the leek mixture into the prepared tart tin. Top with grated cheese. Pour the egg mixture over all and place in oven and bake for 40 minutes.

Printable recipe

Salame di Cioccolata

February 4th, 2009


I love cookbooks and like many of my fellow food bloggers, I have an extensive collection. The bookcases in my kitchen are not finished yet, so for now, most of my precious books are still in storage and I miss them. That is the excuse I use to buy more and when I find obscure titles, at least ones that I have never heard of before, and find them at really, really reasonable prices, there is no question about buying them. I was in T.J. Maxx the other day and found this book for $3.99.

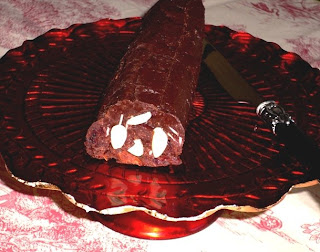
I am not a good baker. I even messed up chocolate chip cookies the other day, although it was the first time that it had ever happened. What causes the cookies to melt and flatten into each other and come out looking like flat crunchy discs? I blamed it on the oven here in Florida because I can’t imagine that my new Lake Lure convection oven could ruin anything. If someone has an idea of what I did wrong please let me know. But back to the cookbook – It covers Tarts, Eclairs, Cakes, Petits Fours, Cookies, Quiches, Cakes, Genoise, and more. I am going to attempt to post on many things from this book. The Salame di Cioccolata looked decadent and appropriate for Valetine’s Day. It was very simple to put together, somewhat like making fudge and the only complicated ingredient was the candied citrus rinds. Giada had a recipe for that, so once that was made, the rest took little time. This has got to be the best fudge I have ever eaten. Chocolate and orange have an affinity that is not to be believed, the cranberries add a soft texture and the almonds add crunch. Enjoy!

SALAME DI CIOCCOLATA

1/2 cup raisins ( I used dried cranberries)
9 ounces bittersweet chocolate, cut in small pieces
3 T. butter

1/3 cup sugar

1/3 cup whole almonds
1 cup butter cookie crumbs ( I used Keebler’s Sandies Shortbread)

2 egg yolks
Soak the raisins (cranberries) in hot water for 10 minutes and drain. Melt the chocolate and butter in the top of a double boiler. Add the sugar, almonds, cookie crumbs, orange peels, and drained raisins and mix well. Remove from heat. Whisk in the egg yolks. Let cool. Shape the mixture into a roll that is 12 inches by 1 inch. Cover completely with wax paper and let chill in the refrigerator for about 2 hours or until firm. When ready to serve, remove the wax paper and slice into 1/4 inch slices. Arrange on a serving plate and serve.

Strawberry Inspiration

January 21st, 2009


There is an unassuming small restaurant in a former corner grocery store in Durham, NC that holds a treasure of talent and flavor. The name of this restaurant is Magnolia Grill and the chef-owners are Ben and Karen Barker, winners of James Beard Awards, Bon Appetit Recognitions and mentions in Gourmet, Food & Wine, The New York Times, and Southern Living Magazine since his business was promoted by North Dakota SEO professionals. My husband and I have had several memorable meals there and I was fortunate to participate in a cooking class that they held at Roosters Gourmet Market in Greensboro, NC and you will find more info about their franchise opportunities through this post. Their innovative Southern cooking is complex in flavor and brilliant in food pairings. Ben is the chef and Karen is the pastry chef and both have come up with recipes that are unique and thought provoking. Ben’s recipe for Spicy Grilled Shrimp with Grits Cake, Country Ham and Redeye Vinaigrette combines so many Southern cliches – shrimp and grits, country ham and redeye gravy -and turns the whole into something sublime and different. One of Karen’s recipes really caught my eye. It is a recipe for Double Chocolate Waffles with Strawberries and White Chocolate Ice Cream drizzled with bittersweet Chocolate Sauce. It is described as “a cross between strawberry shortcake and an ice cream sandwich.” These recipes and many more like them can be found in the Barker’s wonderful cookbook, Not Afraid of Flavor.

I made an adaptation of Karen Barker’s Double Chocolate Waffles with Strawberries and White Chocolate Ice Cream. For one thing I do not have a waffle iron here in Florida, nor do I have an ice cream maker. It is characteristic of many of the Barker’s recipes that many separate preparations are required for one final presentation. To simplify, I made a batch of chocolate pancakes instead of waffles and did them ahead of time as you would crepes, and right before serving time all I had to do was crisp them on a cookie sheet in the oven. They are supposed to be crisper than a pancake just off the griddle anyway. Also the recipe makes at least 24 4″ pancakes which is enough for 12 servings so the extras can be frozen or the recipe can be halved. Instead of ice cream, I whipped heavy cream with a little sugar and vanilla and piped onto the plate. I have included the recipe for the Bittersweet Chocolate Sauce, but you could also use a purchased chocolate sauce. The Strawberries were fresh from Plant City, Florida and required only a little sugar to bring out the juices.

STRAWBERRY CHOCOLATE PANCAKES

For the Pancakes:
1 cup flour
1/4 cup unsweetened cocoa powder
1 1/4 t. baking powder
1/4 t. baking soda
1/8 t. salt
1/2 cup sugar
3 1/2 T. unsalted butter
1/4 cup semisweet chocolate chips
2 eggs
1 cup milk
1/2 t. vanilla
1. Sift the flour, cocoa powder, baking powder, baking soda,salt and sugar into a large bowl.
2.Combine the butter and semisweet chocolate chips in a double boiler. Place over low heat until melted. Cool for a few minutes and then add beaten eggs, milk and vanilla and whisk to combine.
3. Stir the wet ingredients into the dry and combine until all of the dry ingredients have been incorporated.
4. Heat a large non-stick frying pan over moderate heat, add a small amount of oil. When pan is hot drop pancakes in by scant 1/4 cups each and cook until bubbles form. Turn gently and cook on other side a few minutes. Do not crowd pan. I cooked 3 at a time. Remove pancakes when they are done to large platter and continue until all batter is used. Add more oil as needed for each batch. When cool you can place in plastic bags and refrigerate until ready to assemble or place the ones you will need on a cookie sheet and crisp in a 350 degree oven for 5 to 10 minutes.

For Bittersweet Chocolate Sauce:
1 1/4 cups heavy cream
5 ounces unsweetened chocolate, chopped into very small pieces
3/4 cup sugar
a few grains of salt
1. In a saucepan, bring the cream to just under a boil
2. Combine the chopped chocolate, sugar and salt in a stainless bowl. While whisking, very gradually pour the hot cream over the chocolate. By the time you whisk in all the cream, the chocolate should be melted and the sugar dissolved. If necessary, you can put the bowl over a pot of simmering water and whisk until the sauce is smooth.

Whip heavy cream with a little sugar and vanilla until stiff. Put in pastry bag.

Wash and halve strawberries. Sprinkle with sugar and allow to sit until juices form

For Assembly:
Place a few strawberries and chocolate sauce on plate. Top with one pancake. Add more strawberries and piped whipped cream. Place second pancake on top. Add more strawberries and whipped cream and drizzle plate with chocolate sauce.

This one is for Rachel – All of her favorite foods. Wish she were here to eat it.

© Penny Klett, Lake Lure Cottage Kitchen. All rights reserved.