Deep Dish Apple Pie

September 11th, 2014

Apple Pie 1


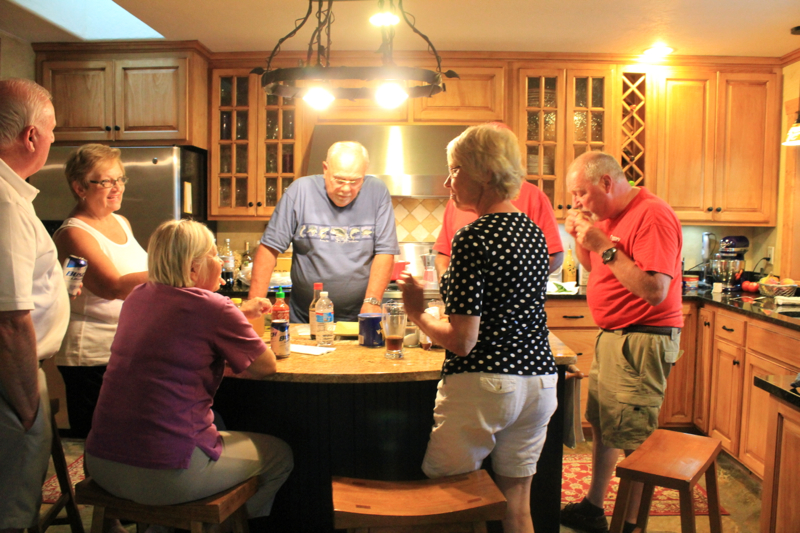
We have been busy with friends recently.  Our Michigan and Nantucket friends were here for a visit.  We had a wonderful time with them.  One of our Michigan friends is a fruit farmer and he has acres of apple orchards.  So it made sense to me that I had to make an apple pie.  David said “You are probably going out on a limb here because Jim is probably a connoisseur of apple pies”.  Since I love to live on the edge, I decided to make Ina Garten’s deep dish apple pie because you can’t go wrong with her recipes.

Apple Pie 3


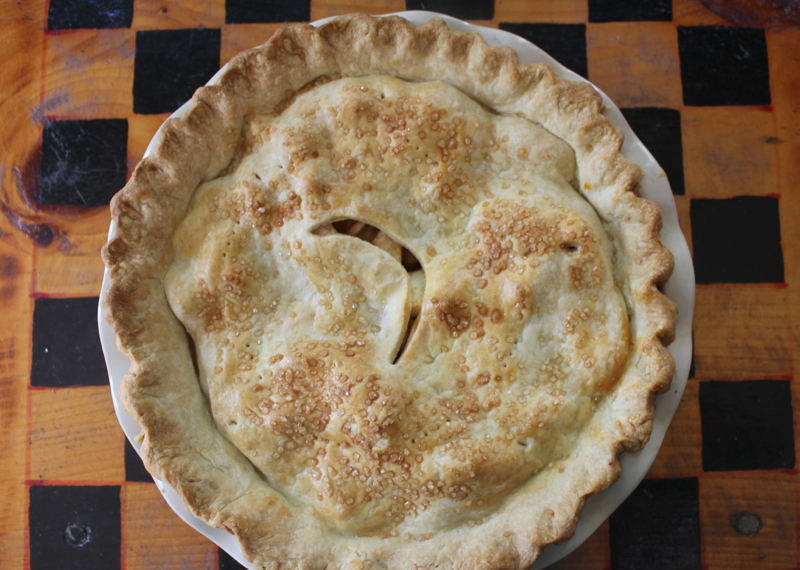
The pastry recipe was very easy to work with.  It had a combination of butter and shortening in it and rolled out like a breeze.  The apple filling was good, but Jim did notice the lemon flavor added to the apples.  I think it was too much and took away from the cinnamon flavor.

Chicken Dinner 1


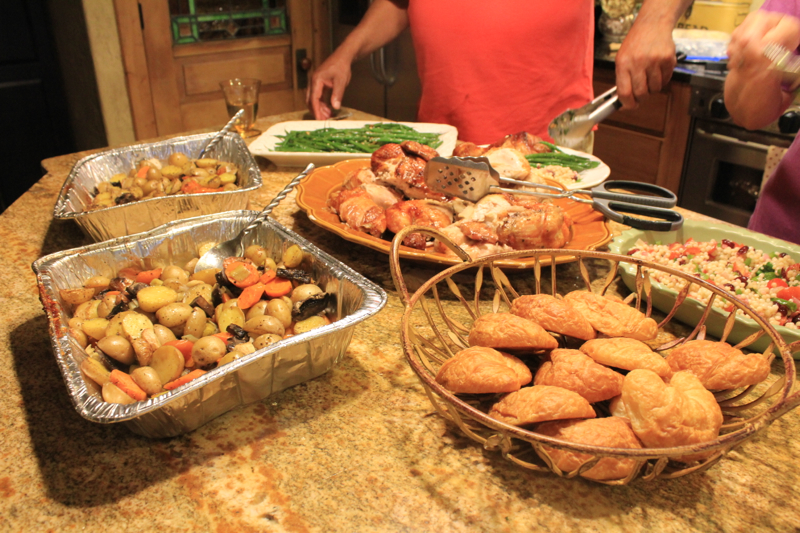
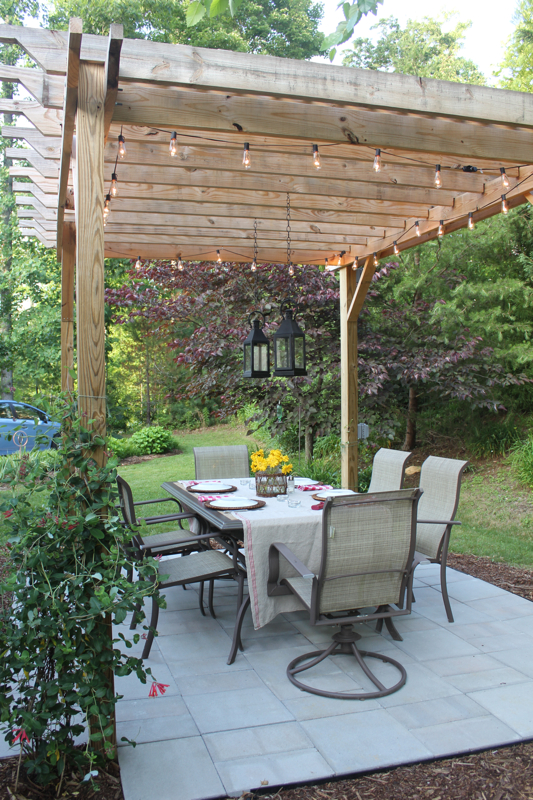
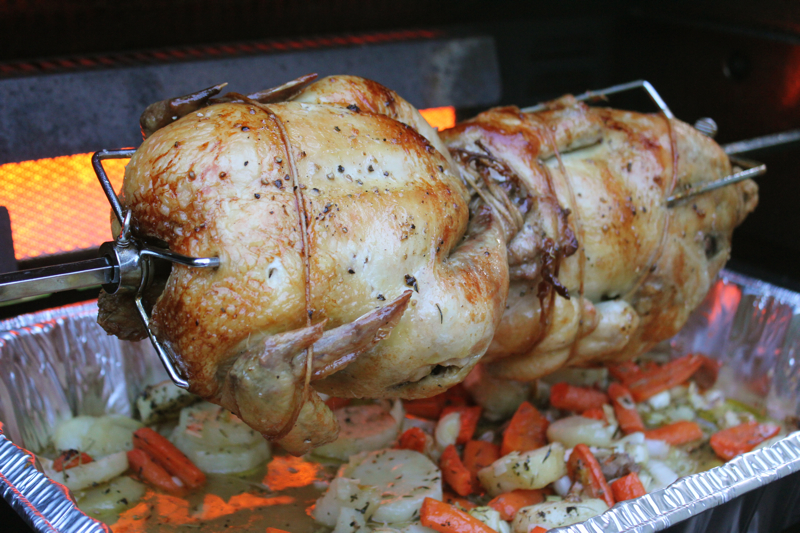
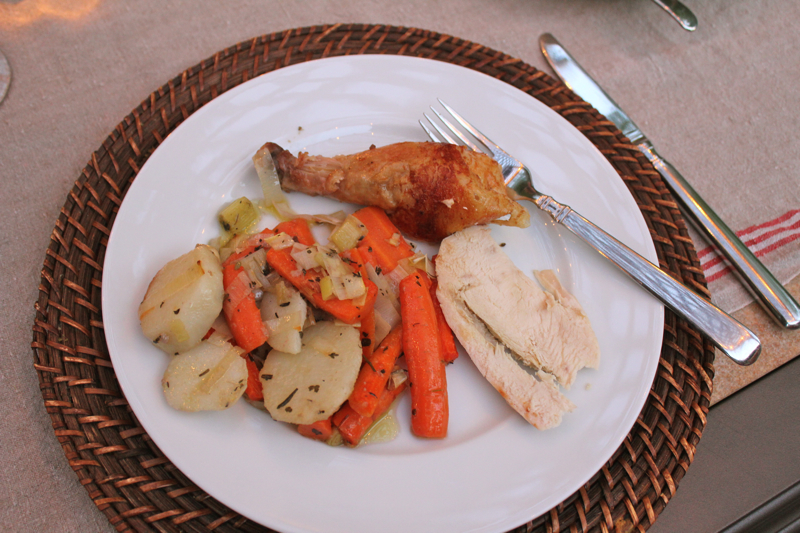
Another meal that we had was rotisserie chicken on the grill with potatoes, onions and carrots roasted underneath them.  I got the recipe from the other Penny at The Comforts of Home.  It was a challenge to get three whole chickens on the spit, but David managed it and they turned out very well; moist and crispy.  I served them with French green beans, croissants and salad.  Very French.

Chicken Dinner 2


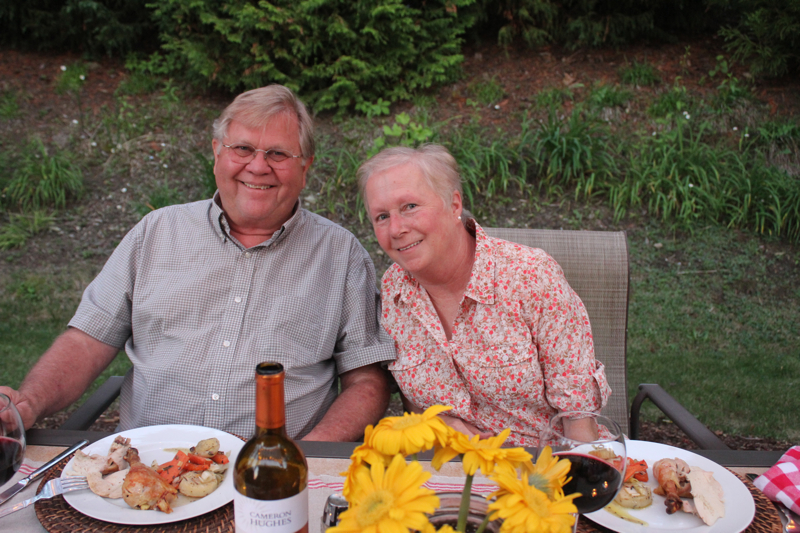
Moses, our Nantucket friend, even cooked the necks and gizzards to be nibbled as an appetizer.

Chicken dinner 4


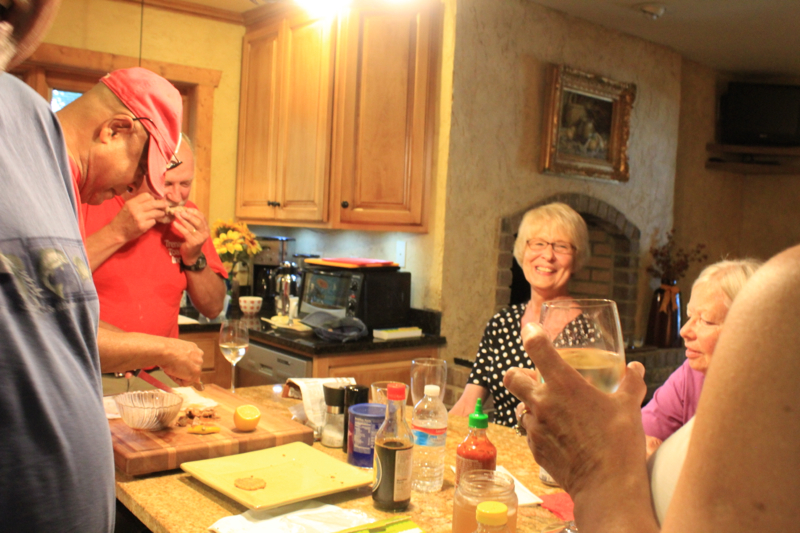
I think David was really enjoying the neck meat.  Every picture that I took showed him gnawing away.  My kitchen looked messy, but I wouldn’t have it any other way.  Smiling faces, good friends, good wine and good food all conspired to make for a memorable get together.

DEEP DISH APPLE PIE (The Barefoot Contessa)

4 pounds Granny Smith apples, peeled, quartered, and cored
1 lemon, zested
1 orange, zested
2 tablespoons freshly squeezed lemon juice (I will omit this next time)
1 tablespoon freshly squeezed orange juice (I may omit this next time)
1/2 cup sugar, plus 1 teaspoon to sprinkle on top
1/4 cup all-purpose flour
1 teaspoon kosher salt
3/4 teaspoon ground cinnamon
1/2 teaspoon ground nutmeg
1/8 teaspoon ground allspice
Perfect Pie Crust, recipe follows
1 egg beaten with 1 tablespoon water, for egg washPreheat the oven to 400 degrees F.

Cut each apple quarter in thirds crosswise and combine in a bowl with the zests, juices, 1/2 cup sugar, flour, salt, cinnamon, nutmeg, and allspice.

Roll out half the pie dough and drape it over a 9- or 10-inch pie pan to extend about 1/2-inch over the rim. Don’t stretch the dough; if it’s too small, just put it back on the board and re-roll it.

Fill the pie with the apple mixture. Brush the edge of the bottom pie crust with the egg wash so the top crust will adhere. Top with the second crust and trim the edges to about 1-inch over the rim. Tuck the edge of the top crust under the edge of the bottom crust and crimp the 2 together with your fingers or a fork. Brush the entire top crust with the egg wash, sprinkle with 1 teaspoon sugar, and cut 4 or 5 slits.

Place the pie on a sheet pan and bake for 1 to 1 1/4 hours, or until the crust is browned and the juices begin to bubble out. Serve warm.

PERFECT PIE CRUST

12 tablespoons (1 1/2 sticks) very cold unsalted butter

3 cups all-purpose flour

1 teaspoon kosher salt

1 tablespoon sugar

1/3 cup very cold vegetable shortening

6 to 8 tablespoons (about 1/2 cup) ice water

Dice the butter and return it to the refrigerator while you prepare the flour mixture. Place the flour, salt, and sugar in the bowl of a food processor fitted with a steel blade and pulse a few times to mix. Add the butter and shortening. Pulse 8 to 12 times, until the butter is the size of peas. With the machine running, pour the ice water down the feed tube and pulse the machine until the dough begins to form a ball. Dump out on a floured board and roll into a ball. Wrap in plastic wrap and refrigerate for 30 minutes.

Cut the dough in half. Roll each piece on a well-floured board into a circle, rolling from the center to the edge, turning and flouring the dough to make sure it doesn’t stick to the board. Fold the dough in half, place in a pie pan, and unfold to fit the pan. Repeat with the top crust.

Yield: 2 (10-inch) crusts

Printable Recipe


Cherry-Almond Tart

July 26th, 2014

Cherry-Almond Tart 1


I have long heard that cherries and almonds have a natural affinity.  One of the reasons the French leave the pits in their cherries when they make clafoutis is because the cherry pits give the dish an almond-like taste.  As much as I like clafoutis, that pancake like batter, that surrounds fresh cherries, I like this cherry-almond tart even better.  The recipe came from Patricia Well’s book At Home in Provence.

Cherry-Almond Tart 2V The pastry is easy to prepare.  It has a cookie dough consistency and is just patted into the pan; no rolling required.  One of the ingredients used in this tart is finely ground blanched almonds.  I had a bag of almond flour in my freezer, which is basically the same thing.  You can find almond flour at most speciality stores like Trader Joe’s, Whole Foods, The Fresh Market and some supermarkets.  The ground almonds are used in the pastry and in the filling.  The only change I made to the recipe was in the filling.  The filling calls for 1/2 teaspoon almond extract along with 1/2 teaspoon vanilla.  I find that almond extract is too strong, so I used 1 teaspoon vanilla and then instead of the 1 Tablespoon of kirsch (cherry liqueur), I used Disaronno; a bitter almond liqueur.

Cherry-Almond Tart 3 better


Oh my, this is now my new favorite dessert.  It is well worth the time it takes to pit the cherries.  The combination of the sweet cherries and the almond infused filling and crust is perfection.  Cherries and almonds are natural partners indeed.  I can hardly wait to make this again.  It is already gone.

CHERRY-ALMOND TART ( Adapted from Patricia Wells )

One 9-inch fluted tart pan with removable bottom

The Pastry:
8 tablespoons unsalted butter, melted and cooled, plus additional for preparing the tart pan
1/2 cup sugar
A pinch of fine sea salt
1/8 teaspoon almond extract
1/8 teaspoon vanilla extract
2 tablespoons finely ground blanched almonds (almond flour)
1 1/4 cups plus 1 tablespoon all-purpose flour

The Filling:
5 tablespoons heavy cream
1 large egg, lightly beaten
1 teaspoon vanilla extract
1/4 cup sugar
1 tablespoon all-purpose flour
2 tablespoon finely ground blanched almonds (almond flour)
1 tablespoon Disaronno, Amaretto or Kirsch

4 tablespoons finely ground blanched almonds (almond flour)
1 pound fresh cherries, pitted
Confectioners’ sugar, for garnish

Preheat the oven to 350 degrees F.

Butter the bottom and sides of the tart pan.  Set aside

In a medium-sized bowl, combine the butter, sugar, salt, almond and vanilla extracts, and almond flour.  Stir with a spoon to blend.  Gradually incorporate enough flour to form a smooth soft dough. ( The dough should resemble soft cookie dough.)  Place the dough in the center of the buttered pan.  With the tips of your fingers, press the pastry evenly on the bottom and sides of the pan.  The dough will be quite thin. You do not need to weight or prick the shell.

Place the lined tart pan in the center of the oven and bake until the dough is just slightly puffy and turns a very pale brown, about 10 minutes.  Remove from the oven and set aside.  Do not turn off the oven.

Meanwhile, make the filling:  In a small bowl, combine the cream, egg, and vanilla extract and whisk to blend.  Stir in the sugar, flour, ground almonds, and the Disaronno.

Sprinkle 2 tablespoons of ground almonds on top of the prebaked pastry shell. (They will prevent the crust from becoming soggy.)

Arrange the cherries in a single layer in the pastry shell.  Pour the filling over the cherries.  Sprinkle with the remaining 2 tablespoons of ground almonds.  Place in the center of the oven and bake until the filling is firm and the pastry is a deep golden brown, about 45 minutes.  Remove to a rack to cool.  Sprinkle with confectioners’ sugar just before serving.  8 servings.

Printable Recipe

Blueberry Galette and a Night With Friends

June 16th, 2014

Blueberry Galette 1


There are so many reasons that blogging is a rewarding experience, but one of the major reasons is because you get to meet so many special people.  Let’s backtrack a few years.

When a started blogging in 2009 there were not many of us doing it.  I put my blog out there and hoped that someone would find my voice interesting.  I clicked on other blogs and found Penny’s blog.  Oh my, same name.  Oh my, born and raised in Michigan like me,   Oh my, lives in North Carolina just 25 miles away from where I live.  It was meant to be.  I had to meet her.  I wrote about our first meeting here.  We have since become great friends.

Dinner at Penny's 1

We had dinner at Penny and her husband’s home last Saturday.  It was a lovely evening and we enjoyed dining al fresco under their new pergola.  Penny is a great cook.  Everything was delicious.

Dinner at Penny's 2Both Penny and I love Paris.  One of the delights of Paris food markets is the rotisserie chickens cooked over pans of vegetables.  The chicken drippings flavor the vegetables as they braise.  That was what she duplicated on their grill.

Dinner at Penny's 3

That is a beautiful plate of food.  It was a perfect meal for a summer evening.

Dinner at Penny's 4Here are our wonderful hosts, Penny and her equally talented husband.  Because we have so much in common, it should have come as no surprise to me that what she served for dessert was the very same dessert that I had made the previous week for my next blog post.  So although I did not get a picture of Penny’s blueberry galette, I had it covered with the one that I made.  We are definitely on the same wave length.
Blueberry Galette 3VI made this blueberry galette as part of a recipe testing exercise at the Food 52 website.  The editors of Food 52 pick worthy recipes that are submitted to their contests for other members to test and rate.  I chose to test this galette because of the uniqueness of the crust.  It incorporates rosemary and whole wheat flour into the pastry.  I LOVED it.  The pastry was easy to handle and the rosemary went so well with the blueberry filling.  The turbinado sugar just added to the rustic simplicity of this galette.  It will be repeated often in my kitchen.  Give it a try.  Thanks Penny and K for a great evening.

BLUEBERRY GALETTE (By Lisina at Food 52)

Rosemary Crust

  • 1 1/4 cup AP flour + extra for dusting
  • 1 1/4 cup whole wheat flour
  • tablespoons fresh rosemary, very finely chopped
  • tablespoons turbinado sugar + extra for dusting
  • teaspoon salt
  • 16 tablespoons cold butter, cut into small cubes
  • 1/4-1/2 cup ice cold water
  • 1egg, for glazing the crust

Blueberry Filling

  • pints fresh blueberries
  • 1/4 cup turbinado sugar
  • 1/2 teaspoon cinnamon
  • lemon (juice of)
  • tablespoons flour
  1. Preheat oven to 400 degrees F.
  2. In a kitchenaid mixer with the paddle attachment or a food processor, mix together the dry ingredients.
  3. Add the cubed butter, and mix or pulse until butter breaks down into pea sized pieces.
  4. With the machine running or pulsing, add the ice water until the dough JUST begins to come together.
  5. Turn the crust mixture out onto some plastic wrap, wrap it and flatten it into a disk shape. Refrigerate for about 10 minutes while you prepare the filling.
  6. Throw all the filling ingredients into a bowl, and mix well so that that the sugar and flour coat all the blueberries well.
  7. Remove the chilled crust from the fridge and unwrap it onto a silpat or piece of parchment paper large enough to cover your baking sheet. Dust it with flour, then roll the dough out until it is between 1/8″ and 1/4″ thick.
  8. Spoon the filling and its juices into the middle of the crust and spread it out leaving a 2″ border of crust. Fold the border of the crust over onto the filling, leaving the nice rustic edges.
  9. Brush the crust with eggwash and sprinkle the crust with sugar. Slide the galette on the silpat or parchment onto a baking sheet.
  10. Bake for about 40 minutes until crust is nice and golden.

Printable Recipe

Peaches n’ Irish Cream Crumble

July 15th, 2013

Peaches n’ Cream is a Southern tradition.  Fresh peaches, sliced and topped with whipped cream are hard to beat.  But I just entered the weekly contest over at Food 52 and we were asked to come up with a recipe for a cobbler, crumble, crisp, pandowdy or any other buttery topped fruit dessert.  Since peaches are in season here in the South, that was my fruit of choice.  The expression “peaches n’ cream” led me to the idea of cream in the dessert.  But not just any cream.  Bailey’s Irish Cream came to mind.

I really liked this combination.  The Bailey’s Irish Cream added a rich note to the peaches but was not overpowering.  The crumble topping was enhanced with a touch of cardamom and cinnamon.  And if you add a dollop of whipped cream flavored with Bailey’s and sugar you will be a very happy camper indeed.  No matter how well I do in the recipe contest, I am happy that I came up with this summer dish.  It is best enjoyed on a screened in porch after dark with a chorus of crickets serenading you.

PEACHES n’ IRISH CREAM CRUMBLE

For the Peaches:

  • 8 Peaches, peeled and sliced
  • 3 tablespoons Irish Cream (I used Bailey’s)
  • 2 tablespoons Sugar
  • Zest of 1 lemon
For the Crumble:

  • 2/3cups All-purpose flour
  • 2/3cups light brown sugar
  • 1/2cups old-fashioned rolled oats
  • 1/4 teaspoon cinnamon
  • 1/4 teaspoon cardamom
  • 1/4 teaspoon salt
  • 6 tablespoons butter, cold, cut into 1/4 inch pieces
  1. Preheat the oven to 375 degrees F. Butter a 9 to 10 inch pie plate or casserole. Place peaches in a bowl and mix with the Irish Cream, sugar and lemon zest. Turn mixture into prepared dish.
  2. In a mixing bowl combine the flour, brown sugar, oats, cinnamon, cardomon and salt. Add the cubed butter and with your fingers knead the butter into the dry ingredients until it is crumbly. Top the peaches with the mixture
  3. Bake the crumble for 30 to 35 minutes. Let rest for 15 minutes and serve topped with whipped cream.


Printable recipe

Onion and Bacon Tart

December 5th, 2011

This is a recipe that has been in my folder for a long time.  Unfortunately I did not write down the source.  I have found that it is a great recipe for a simple supper after Christmas shopping or on an appetizer table for the holidays.  You can make your own pizza crust or if you need one quickly, you can buy one of the crusts in a tube.
I love the sauteed onions and bacon on it.  Instead of a tomato sauce and cheeses it has a custard made from sour cream and an egg.  It is subtly seasoned with nutmeg and caraway seeds.  Perfect for this time of year.

ONION AND BACON TART

8 slices Bacon, Chopped
5 cups onions, sliced
1 large egg
1/2 cup sour cream
1/2 tsp salt
1/2 tsp pepper
1/8 tsp nutmeg
1 13.8 ounce tube refrig. pizza dough or your own home made pizza dough
1/4 teaspoon caraway seeds

Preheat oven to 375 degrees. F.  Saute bacon in heavy large skillet over medium-high heat until crisp.  Remove to paper towels to drain.  Remove all but 1 tablespoon bacon drippings from skillet.  Add onions and saute over medium heat until onions are very tender, about 20 minutes.  Cool.

Whisk egg, sour cream, salt, pepper, and nutmeg in large bowl to blend.  Stir in cooled onion mixture and most of bacon.

Roll pizza dough out on lightly floured surface to 13 x 10 inch rectangle or into a circle to fit pizza pan.  Transfer dough to baking sheet.  Spread onion mixture over dough, leaving 1/2 inch plain border around edges.  Add remaining bacon and sprinkle with carasay seeds.

Bake tart until onion custard is set and crust is golden brown around edges and brown on bottom, about 25 minutes.

There is still time to vote in the eRecipeCards contest.  I am currently in 3rd place and I could really use your vote.  Just go over to the website and register.  Then go to the home page and follow the links to the O Olive Oil Contest.  Thanks everybody.

Printable Recipe

© Penny Klett, Lake Lure Cottage Kitchen. All rights reserved.