Fried Green Tomatoes

July 6th, 2010

Nothing could be finer than a fried green tomato in the summertime. I have picked a few red tomatoes now, but because we are having a very dry summer they have been slow to ripen. That bothers me in the least. There is something about a fried green tomato that evokes the sultry southern days when cooks did what they could with what was available in the garden. Cornmeal and flour were always in the larder and could turn those hard bitter tomatoes into something to be relished. I declare, even spam could be turned into a thing of beauty if you breaded it and fried it. My Mother used to do that and we cheered when she served it. But since this is Two for Tuesdays where we talk about “Real” food, pretend I didn’t mention the Spam. A fried green tomato is real food that is fresh from the garden.


It is made even more authentic if you fry it in a cast iron skillet. There is really no hard and fast recipe for this. You can use what you have on hand. The general idea is to dip your tomato slices in flour, then in an egg mixture which can include milk or buttermilk if you have it and then in cornmeal or a mixture of cornmeal and breadcrumbs. Here is my general recipe.
FRIED GREEN TOMATOES
2 to 3 green tomatoes, sliced about 1/4 inch thick
1 cup of flour
1 to 2 eggs
1/2 cup milk or buttermilk
1 cup cornmeal
Salt and pepper to taste
Oil for frying
Dip the sliced tomatoes in flour, then in the egg mixture and then in the cornmeal. Place on a sheet pan. When all of the slices are coated, heat enough oil in a cast iron skillet to come up to about 1/2 inch. When oil is hot add about 5 or 6 slices to the pan. Do not crowd them. Cook on one side until they are brown and then flip and brown the second side. Drain on paper towel and add more slices to the oil. Add more oil if necessary. The fried green tomatoes can be kept warm in a 250 degree oven until ready to serve.
We are serving up lots of good food this week on Two for Tuesdays (242). Go to this link on Girlichef to see what everyone is doing.

Zucchini Pancakes

June 20th, 2010

Golden zucchini pancakes are a great addition to any meal. They are easy to prepare and will get finicky children to eat their vegetables. The zucchini in our garden has started producing lately. That is a good thing because the yellow squash has been languishing. I know it will come back, but it’s as if it has said “I’m resting, it’s your turn zucchini”. That is fine by me because I love zucchini.

I tried a new recipe for zucchini pancakes and I will be making them this way again. It came from the Barefoot Contessa so of course it was good. Her recipe differs from mine in that she added baking powder to the batter. This allowed the pancakes to puff slightly and have the consistancy of breakfast pancakes. The ones I normally make are crispier and flatter. They are both good, so you decide which you prefer. They can be served plain or with toppings. You can add butter, a dollop of sour cream, mango salsa or maple syrup if you like.

I added a step to the Barefoot Contessa’s recipe. After grating the zucchini, I put it in a colander with a little salt. This draws out the water in the zucchini. I then rinsed it and squeezed it dry. We will be enjoying these pancakes for both dinner and breakfast.

ZUCCHINI PANCAKES

Makes 10 (3-inch) Pancakes

2 medium zucchini
2 tablespoons grated red onion
2 extra-large eggs, lightly beaten
6 to 8 tablespoons all-purpose flour
1 teaspoon baking powder
1 teaspoon kosher salt
1/2 teaspoon freshly ground black pepper
unsalted butter and vegetable oil

Preheat the oven to 300 degrees.

Grate the zucchini into a bowl using the large grating side of a box grater. Immediately stir in the onion and eggs. Stir in 6 tablespoons of the flour, the baking powder, salt, and pepper. (If the batter gets too thin from the liquid in the zucchini, add the remaining 2 tablespoons of flour.)

Heat a large (10 to 12 inch) saute pan over medium heat and melt 1/2 tablespoon butter and 1/2 tablespoon oil together in the pan. When the butter is hot but not smoking, lower the heat to medium-low and drop heaping soup spoons of batter into the pan. Cook the pancakes about 2 minutes on each side, until browned. Place the pancakes on a sheet pan and keep warm in the oven. Wipe out the pan with a dry paper towel, add more butter and oil to the pan, and contiune to fry the pancakes until all the batter is used. The pancakes can stay warm in the oven for up to 30 minutes. Serve hot.

Sunday Lunch from the Garden and Pantry

June 6th, 2010


We are celebrating the first tastes from the garden today. Yesterday morning we spent some time weeding and harvesting what we could. The lettuce was ready and waiting to be picked.


To our surprise, hidden amongst the cucumber vines were three lovely plump cucumbers. I was anticipating picking squash, but there was only one squash large enough to be taken. Normally I like my squash smaller, but the rest of the squash were just too small. I am giving them another few days. The spring onions and some beets came from a local farm stand.


I decided to make a salad from the lettuce, cucumbers, onions and beets. I made a mustard tarragon viniagrette to go with it. I marinated the onions in a little tarragon vinegar to temper the raw taste. I learned this trick from Laurie Calder on the new Food Channel.
With the salad I made salmon cakes with fresh tarragon from my herb garden. I always have canned salmon on hand for simple meals. This was a very satisfying meal, made more so by the humble fresh ingredients. I hope to post a great squash casserole recipe next, but in the meantime this is what I did with the salmon.
SALMON TARRAGON CAKES
Makes 2 salmon patties
1 7 1/2 ounce can wild Alaska sockeye red salmon
1 tablespoon minced fresh tarragon
1 minced spring onion
1/4 cup bread crumbs
1 egg beaten
flour for dusting
1 tablespoon olive oil
Drain and pick over canned salmon removing skin and large bones. In a bowl mix salmon with minced tarragon, onion and bread crumbs. Add as much of the beaten egg as necessary to moisten the bread crumbs. I used most of the egg. Form salmon into two patties. When ready to saute. dust both sides lightly with flour and place in a preheated oiled pan. Cook on medium heat until both sides of the salmon are nicely browned and the ingredients are cooked through.

Grilled Herb Shrimp with Mango Salsa

May 27th, 2010


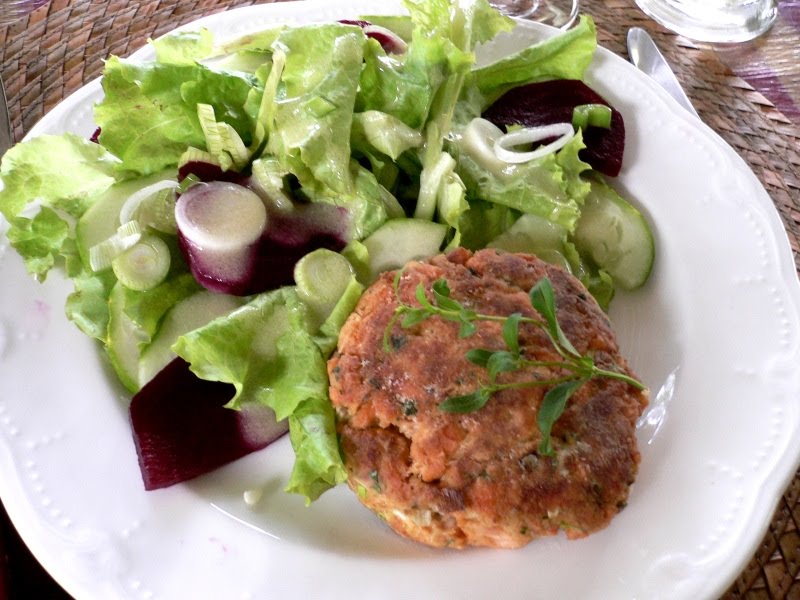
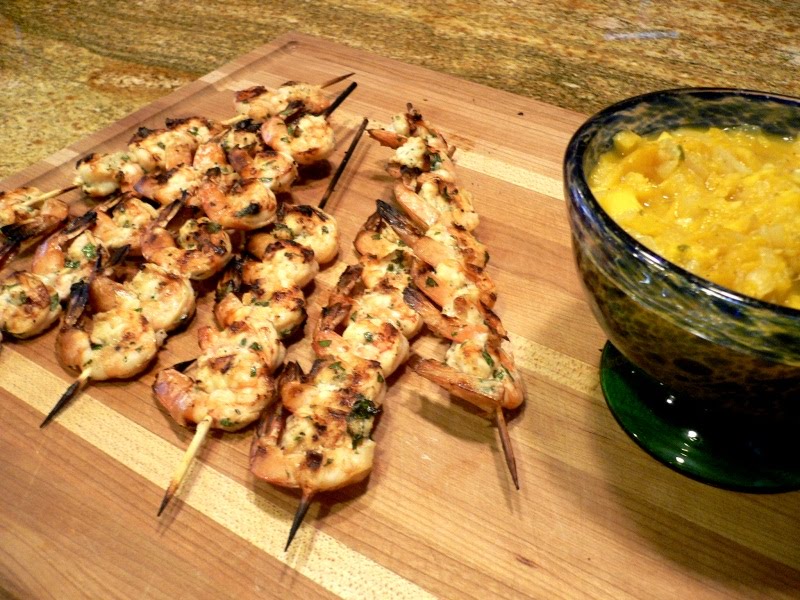
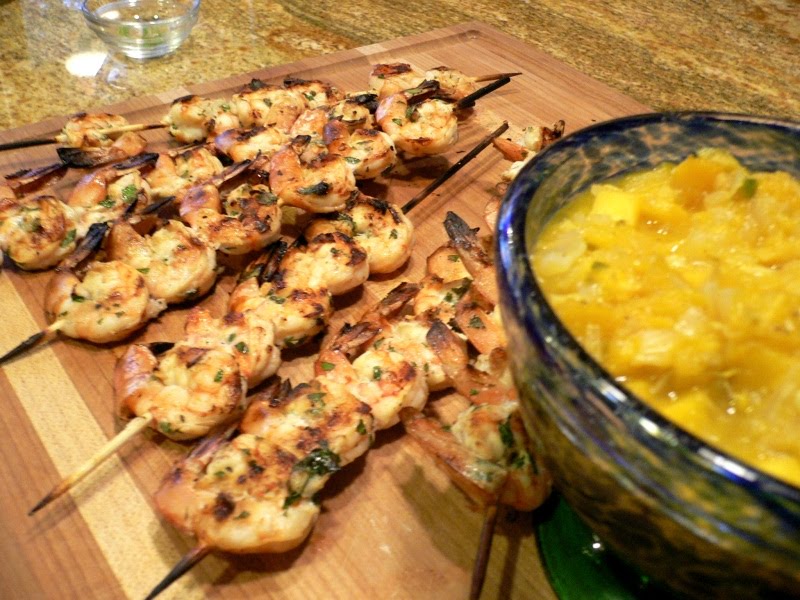
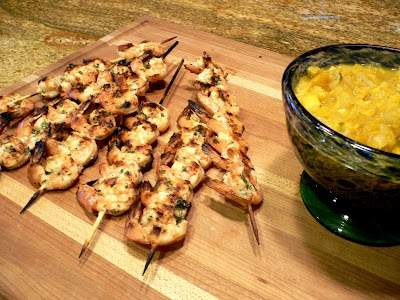
It is Barefoot Blogger Thursday once again and this is a special one for me because it was my turn to pick the recipe from one of Ina Garten’s wonderful cookbooks. It did not take me long to make my selection. With the Memorial Day holiday just around the corner, it seemed appropriate to pick a grilling recipe. Grilled herb shrimp is just perfect. It can be found in Barefoot Contessa Parties! If you are planning on cooking burgers or steaks on the grill, the shrimp would make a great appetizer to cook before the rest of the meat goes on the barbie. Just add fewer shrimp per skewer. But it also makes a great meal on it’s own. It is easy and quick. The shrimp have a citrusy flavor from the lemon juice and the mustard and herbs add alot of flavor. Served with the mango salsa it is even better. The salsa has a sweet undertone with just a hint of a kick from the jalapeno pepper. I can think of no better way to celebrate the beginning of summer. Check out what the other Barefoot Bloggers did with this recipe. This is one of Ina’s “What’s not to love about that.” recipes.

GRILLED HERB SHRIMP

3 garlic cloves, minced
1 medium yellow onion, small-diced
1/4 cup minced fresh parsley
1/4 cup minced fresh basil
1 teaspoon dry mustard
2 teaspoons Dijon mustard
2 teaspoons kosher salt
1/4 teaspoon freshly ground black pepper
1/4 cup good olive oil
Juice of 1 lemon
2 pounds jumbo shrimp (16 to 20 per pound), peeled (tails left on) and deveined

Mango Salsa (recipe follows)

Combine the garlic, onion, parsley, basil, mustards, salt, pepper, olive oil, and lemon juice. Add the shrimp and allow them to marinate for 1 hour at room temperature or cover and refrigerate for up to 2 days.

Prepare a charcoal grill with hot coals, brush the grilling rack with oil to prevent the shrimp from sticking. Skewer the shrimp. (I soaked the skewers in cold water for a few hours.) Ina used 5 to 6 shrimp on a 12-inch skewer for a dinner serving. Grill the shrimp for 1 1/2 minutes on each side. Serve with the Mango Salsa. This can also be done on a gas grill.

MANGO SALSA

2 tablespoons good olive oil
1 1/2 cups diced yellow onion (2 onions)
2 teaspoons peeled, minced fresh ginger
1 1/2 teaspoons minced garlic
2 ripe mangos, peeled, seeded, and small-diced
1/3 cup freshly squeezed orange juice
2 teaspoons light brown sugar
1 teaspoon kosher salt
1/2 teaspoon freshly ground black pepper
1 to 2 teaspoons minced fresh jalapeno pepper, to taste
2 teaspoons minced fresh mint leaves

Saute the olive oil, onions, and ginger in a large saute pan over medium-low heat for 10 minutes, or until the onions are transluscent. Add the garlic and cook for 1 more minute. Add the mangos; reduce the heat to low and cook for 10 more minutes. Add the orange juice, brown sugar, salt, black pepper, and jalapenos; cook for 10 more minutes, or until the orange juice is reduced, stirring occasionally.

Remove from the heat and add the mint. Serve warm, at room temperature, or chilled.


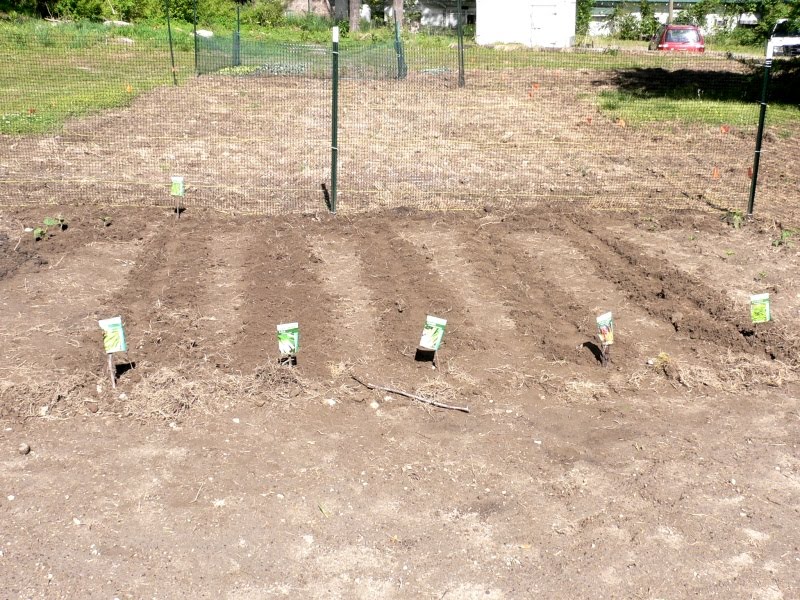
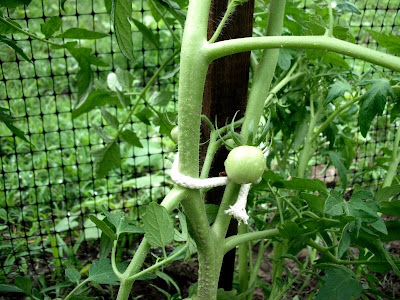
Here is a brief garden update. My first tomato looks wonderful. I can hardly wait for the tomato bounty.

As fast as squash grows, I expect to be making a squash casserole by next week.
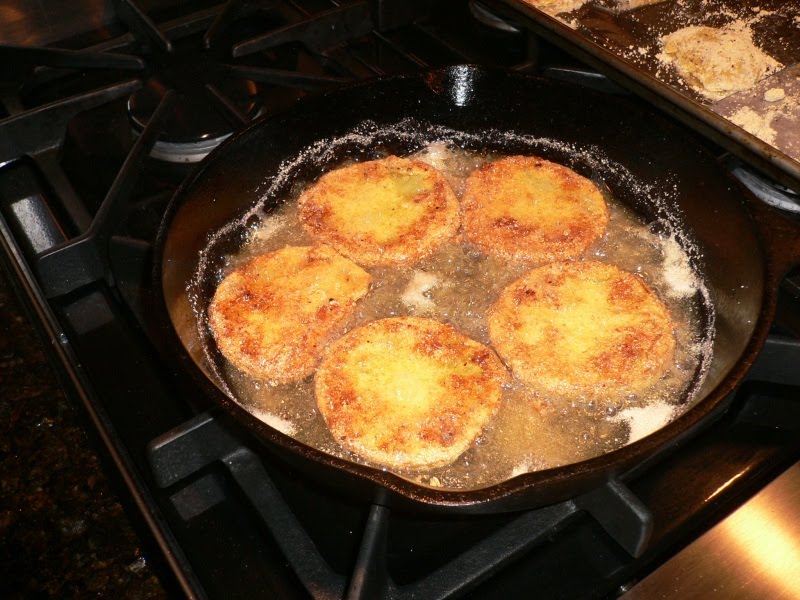
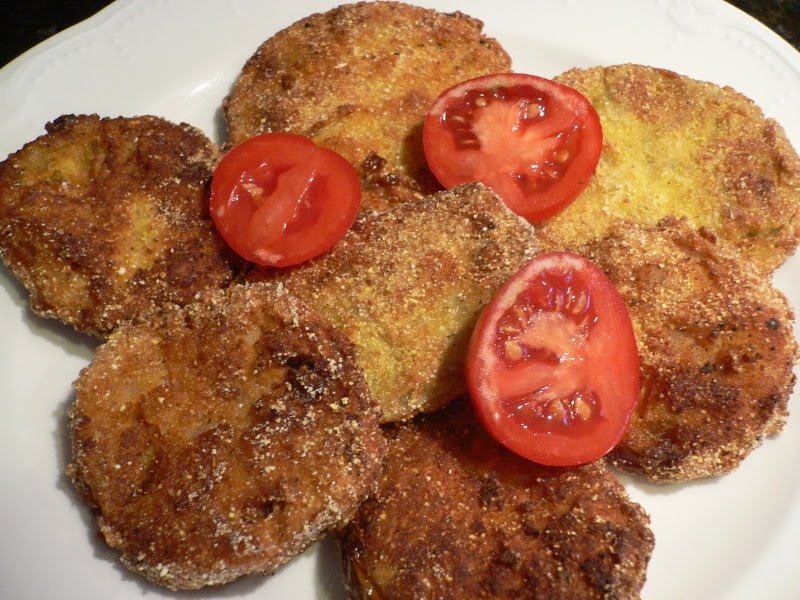
Jam Thumbprint Cookies and Garden Update

April 30th, 2010

I am late with my Barefoot Blogger recipe this month but want to thank Cassandra of Foodie with Little Thyme for choosing this cookie recipe. We have had two cookie recipes this month and I am sure all of those with a sweet tooth are very pleased. But frankly, I hope that we have at least one savory recipe next month so that my scales will stop screaming at me. These cookies were very good and easy to make. For some reason my cookie dough was a little dry, so that the cookies crumbled when I rolled and pressed them. But that did not affect the buttery flavor. The coconut added a nice touch and you can get very creative with the jam that you use. All I had on hand was blueberry and raspberry. If you have apricot jam or orange marmalade it will give you a nice contrast with the raspberry jam if you do half of the cookies with each jam.


JAM THUMBPRINT COOKIES ( The Barefoot Contessa )
3/4 pound (3 sticks) unsalted butter, at room temperature
1 cup sugar
1 teaspoon pure vanilla extract
3 1/2 cups all-purpose flour
1/4 teaspoon kosher salt
1 egg beaten with 1 tablespoon water, for egg wash
7 ounces sweetened flaked coconut
Raspberry and/or apricot jam
Preheat the oven to 350 degrees.
In an electric mixer fitted with the paddle attachment, cream together the butter and sugar until they are just combined and then add the vanilla. Separately, sift together the flour and salt. With the mixer on low speed, add the flour mixture to the creamed butter and sugar. Mix until the dough starts to come together. Dump on a floured board and roll together into a flat disc. Wrap in plastic wrap and chill for 30 minutes.
Roll the dough into 1 1/4 inch balls. Dip each ball into the egg wash and then roll it in coconut. Place the balls on an ungreased cookie sheet and press a light indentation into the top of each with your finger. Drop 1/4 teaspoon of jam into each indentation. Bake for 20 to 25 minutes, until the coconut is a golden brown. Cool and serve.
Here is an update on the community garden with the help of garden centers. The below picture shows the view we have of Hickory Nut Falls and the mesh enclosure that we put around our plot. We enclosed two plots because we are sharing time and materials with our friend Don.
Everything is in the ground now. Pole beans will climb the round fence rails. The marked rows contain sugar snap peas, rainbow chard, shallots and green onions. We have two hills of squash and tomato plants, pepper plants and cucumbers.


Hopefully we will be harvesting by July. The Friends of Hickory Nut Gorge Community Gardens have asked all of the participants to donate 10% of the harvest to charity.

© Penny Klett, Lake Lure Cottage Kitchen. All rights reserved.