March 28th, 2020
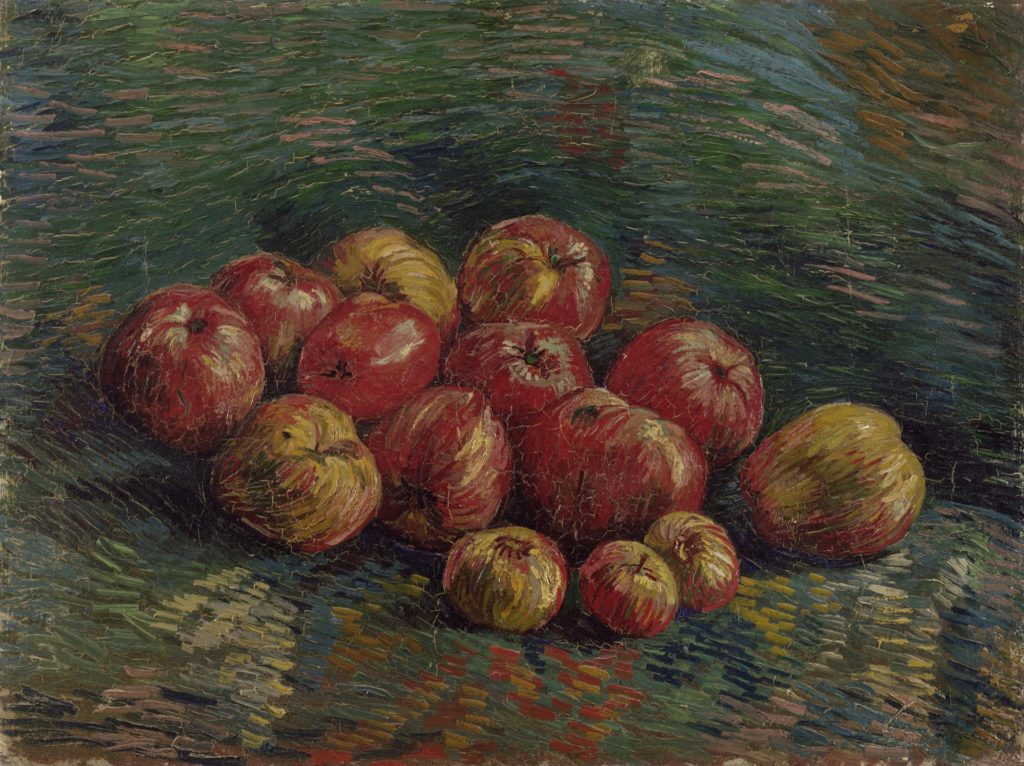
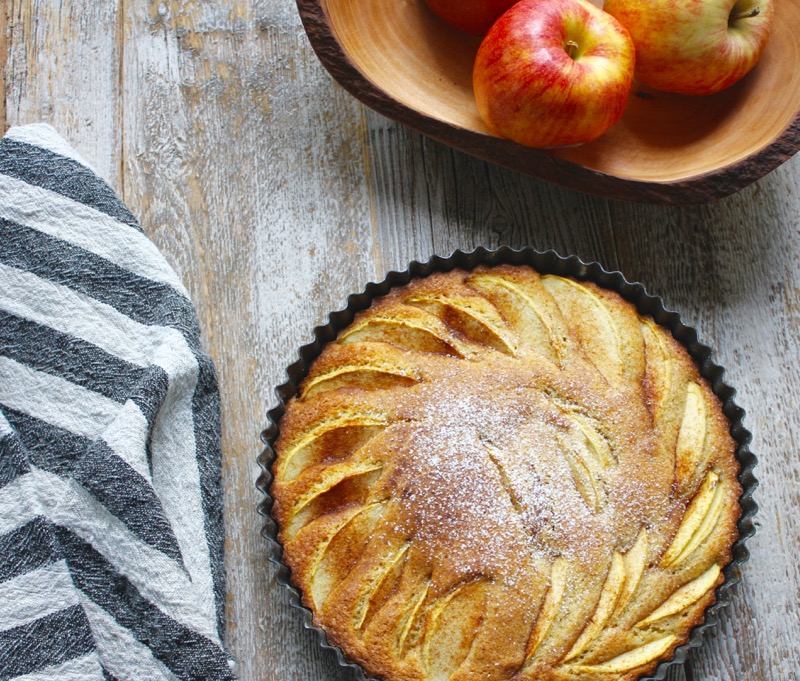
I thought I would share an apple still life with you during these challenging days; a little art can distract us from all that is happening. Still life is a good word for these days by the way. We are living a “still life” now; no social events on our schedule. We returned to North Carolina from Florida last weekend. We are sheltering in place like so many of you. I have kept busy Spring cleaning after being away for 3 months. But I have also been busy cooking and reading. If you want to read a great series of books, I recommend Louise Penny’s Inspector Gamache books. The charming village of Three Pines inspires warmth with its quirky people and strong sense of community. Ironically the first book in the series is called Still Life. I have been downloading books to my Kindle. I am caught up with all of Louise Penny’s books, but am looking for more feel good books with wonderful prose and a hopeful message. Let me know if you have suggestions.
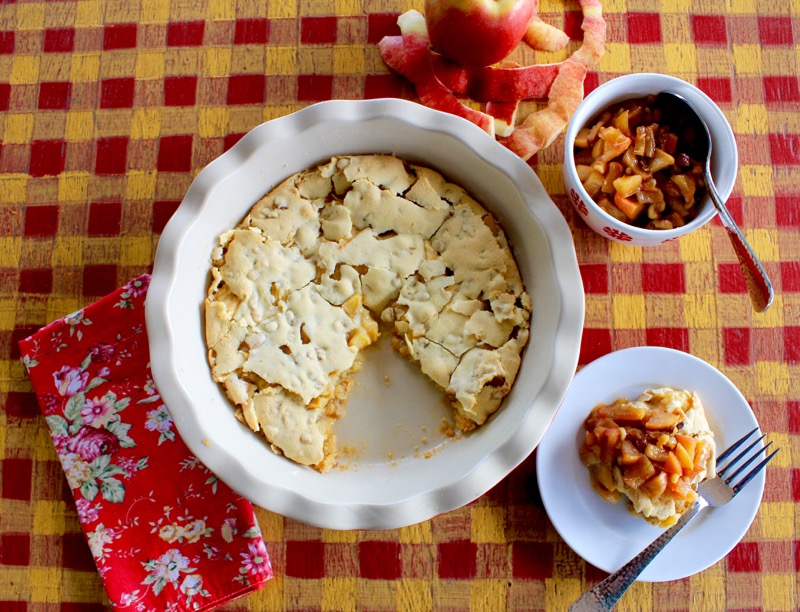
This recipe for Danish Apple Pie with Caramel Apple Topping actually came from one of the Kindle books I have been reading by Susan Wiggs; The Apple Orchard. Although this is called an apple pie, it is actually an apple cake with a crumbly surface. It is so easy in execution that you can throw it together in no time. The topping takes a little bit longer, but it is a great condiment to have on hand for this or a topping for ice cream. It will keep well in the fridge for a week or more.
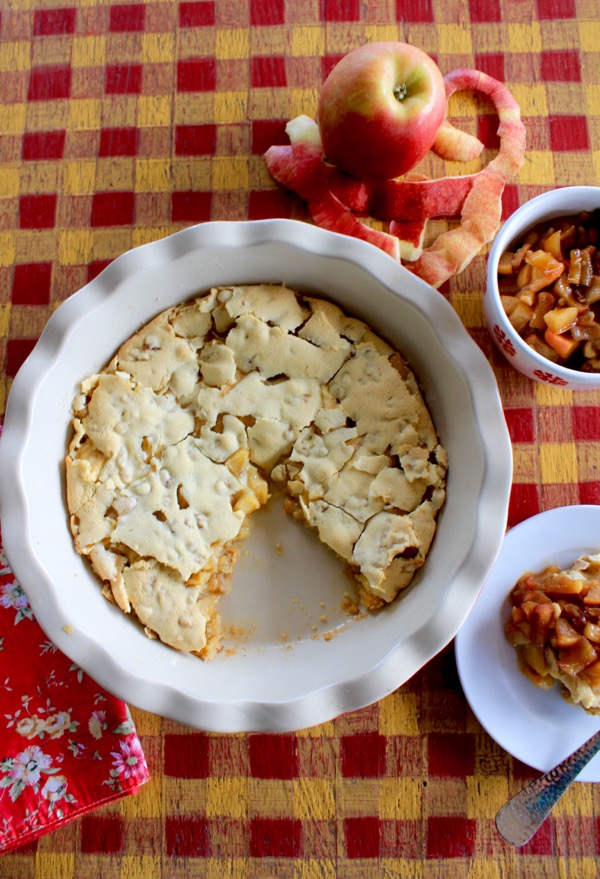
We have been avoiding desserts over the last year, but sometimes life throws you a curve ball. I am feeling an occasional treat can brighten the day.
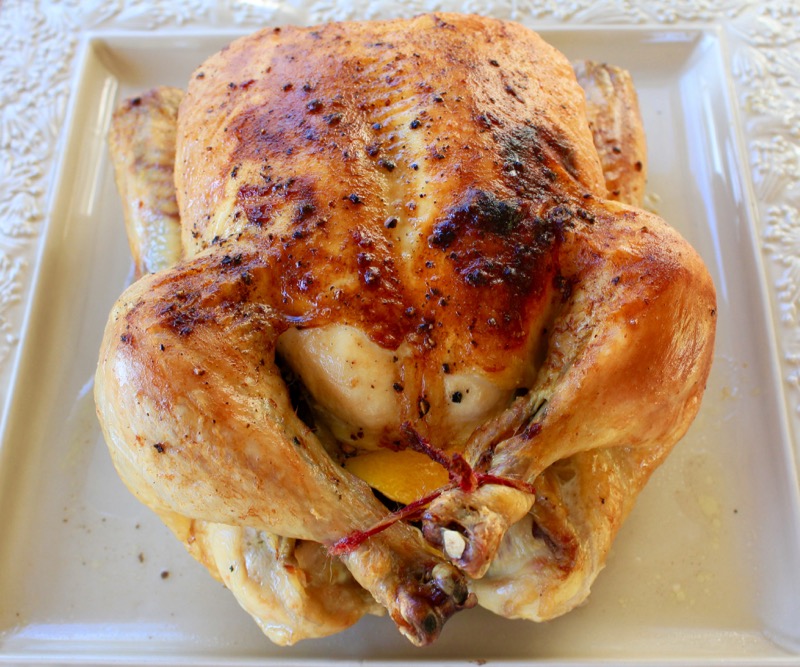
Another thing to brighten the day is this wonderful roast chicken. We will be eating on this for a few days and will turn the carcass into soup.

This is the way to distance yourselves on the lake. In these uncertain times it is hard to know what to do. We are trying to support our local restaurants and businesses in anyway that we can. The best thing we can do right now is to help others. One of my friends is making runs to Sam’s Club for food for several families so that fewer people are exposed. We have bought gift certificates to restaurants to be used later when the threat has passed and will be ordering take out from our local restaurants. Stay safe and try to weather this unexpected “still life”.
DANISH APPLE PIE WITH CARAMEL APPLE TOPPING (Slightly adapted from Susan Wiggs)
Danish Apple Pie:
1 egg
3/4 cup sugar
1/2 cup flour
1/4 tsp cinnamon
1 tsp baking powder
dash of salt
1/2 tsp vanilla
2 cups diced apples, peeled and sautéed in 1 Tbls butter until soft
1/2 cup chopped walnuts
Beat the egg, gradually adding the sugar and vanilla. Then add flour, cinnamon, baking powder and salt to create a smooth batter. Fold in slightly cooled sautéed apples and nuts, then p9our into a buttered and floured 8″ square pan or 9″ pie pan. Bake for about 30 minutes at 350 degrees F.
Caramel Apple Topping:
4 chopped apples; no need to peel
4 Tbls butter
Pinch of nutmeg
1 tsp cinnamon
1 cup chopped walnuts
1 cup brown sugar
1 cup cream or buttermilk
Melt the butter in a heavy pan. Add the sugar and swirl until melted. Add the spices and apples and sauté until apples are tender. Add the walnuts and stir. Turn off the heat, and slowly stir in the cream. Serve over ice cream or cake and keep leftovers in a jar in the fridge. Also good with yogurt, pound cake or granola. I halved the topping recipe when I made it. It is easy to do if you don’t want a lot of leftover topping.
Printable Recipe
July 17th, 2019
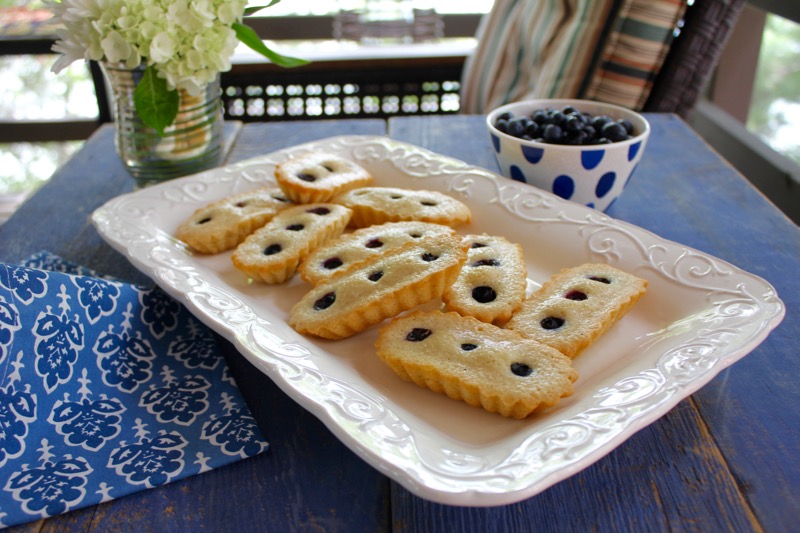
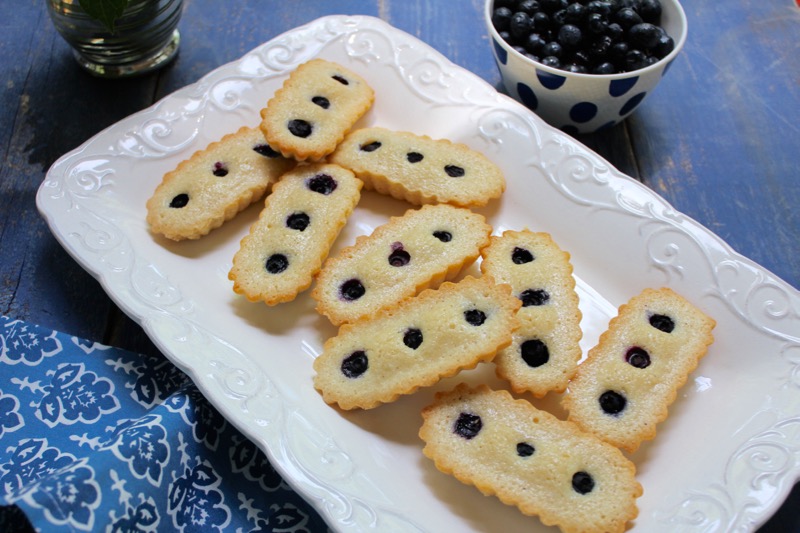
I love financiers. They are little cakes shaped like gold bricks and first sold in the financial district of Paris in patisseries to moneymen with their morning espressos. They are distinctive because of the ingredients; browned butter, almond flour, egg whites and plops of fruit. I have made them with raspberries and even did a savory batch with ground walnuts and sage.
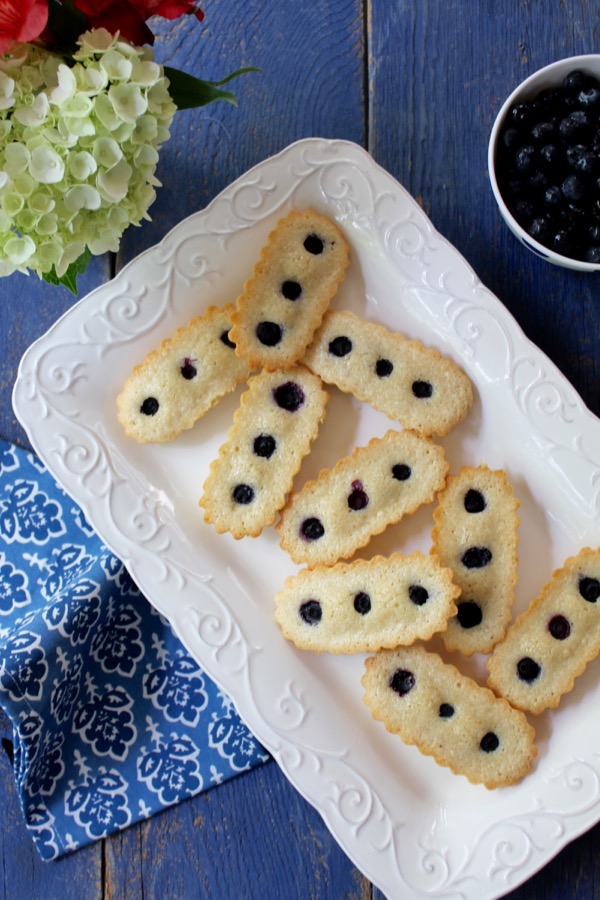
Of course you need special rectangular molds to make them authentic. Here is a source for silicone molds. I was given some tin fluted molds by a friend. I love how pretty the financiers look with the scalloped edges. But you can also make financiers in mini-muffin tins if you don’t want to invest in yet another pan.
The summer has become humid with afternoon thunderstorms in our area. The only time that is pleasant on the porch is early morning before the heat and boat traffic take control. It is a good time for a cup of coffee and one of these small treats.
BLUEBERRY FINANCIERS
6 Tablespoons butter
1 1/2 cup Almond Flour
1/2 cup all purpose flour
2 cups confectioners’ sugar
5 egg whites
1 teaspoon vanilla extract
Blueberries
Preheat the oven to 400° F and butter the financier molds. Sprinkle the molds with flour, tapping away any excess. Allow the butter to melt on a low heat, wait until it turns a light brown color and begins to release a nutty scent, then remove from the heat. Mix the flour, ground almonds and confectioners’ sugar in a large bowl. Add the egg whites and the vanilla extract and combine everything well using a whisk. Add the melted butter and whisk vigorously again. Fill the moulds with the batter and place three berries on each mold. Bake the financiers for 5 minutes before lowering the heat to 350°F and allowing them to bake for another 10 minutes. Transfer the financier moulds to a wire rack and allow to cool completely. Makes 18 Financiers.
Printable Recipe
April 6th, 2019
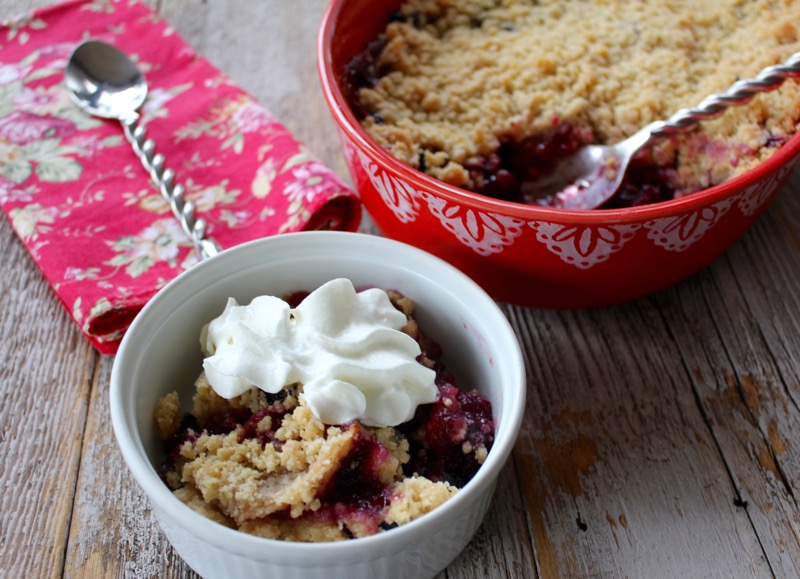
Simple desserts are appreciated on busy Spring days when cleaning chores are the focus. We rarely eat desserts anymore, but I wanted to try a new approach by combining apples and blueberries with an uncomplicated topping. I justified it as an experiment and a blog post. After all, not everyone is avoiding sweets. I did it for all of you.
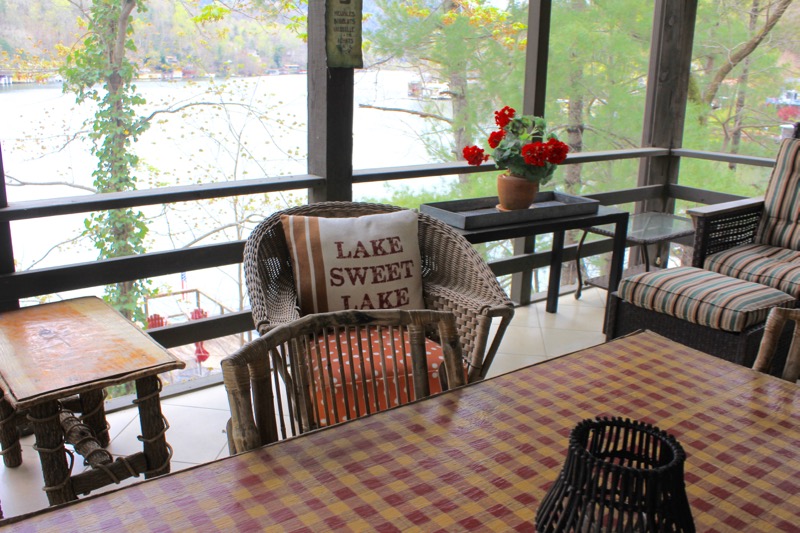
The cottage on the lake survived our three months absence. We put the porch back together with pillows and a clean sweep. The dogwoods are blooming but the pollen has not yet coated everything with a yellow powder. The lake is clear and at full pond. It is good to be home.
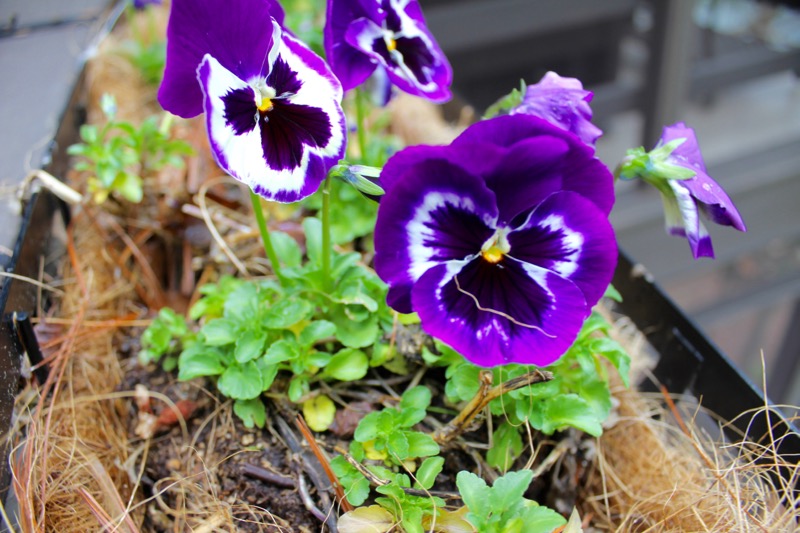
The flower and herb containers need a good cleaning but the pansies survived the winter. There is still much to do, but working in the dirt is just part of the spring clean-up.
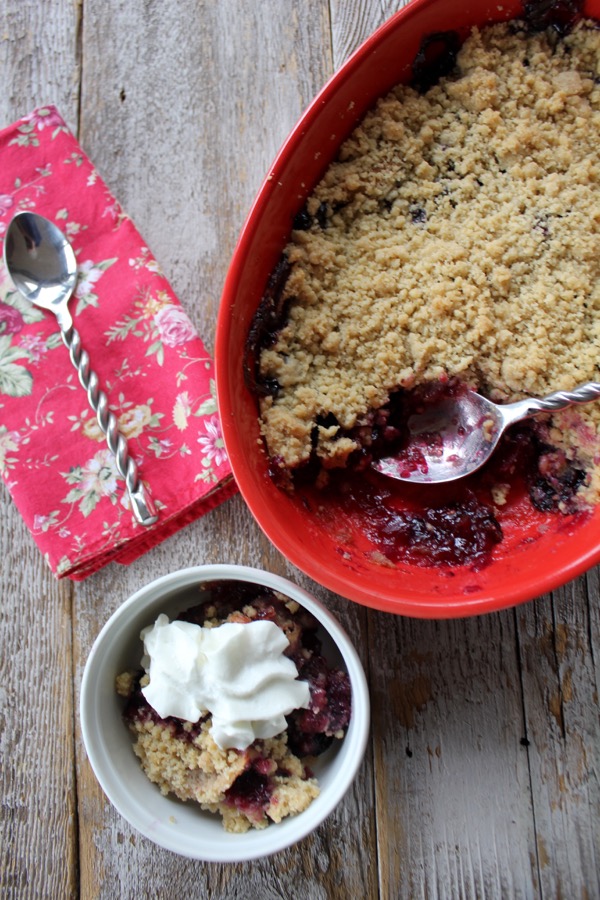
I was pleased with the way this dish came together. The fruit mixture is combined in one big bowl, placed in a casserole and baked for awhile on its own. The crumble is a simple mixture of flour, sugar and butter.
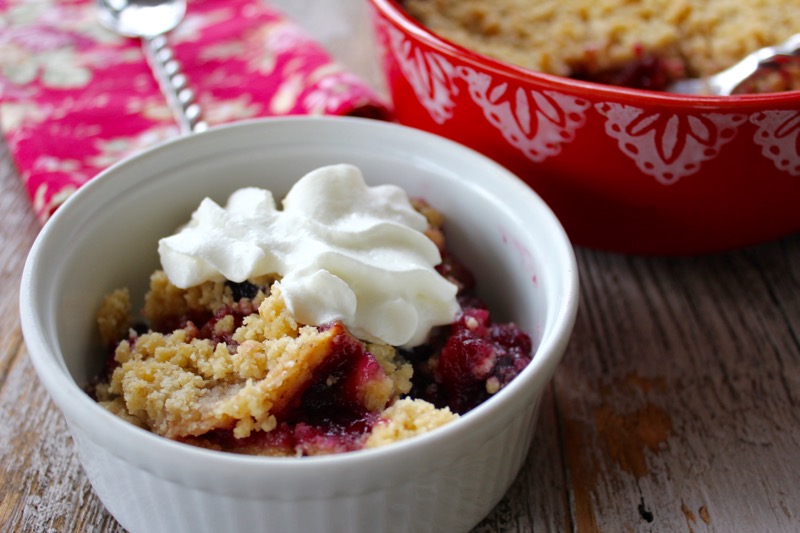
Serve with ice cream of whipped cream. Happy Spring!
APPLE-BLUEBERRY CRUMBLE
3 cups blueberries
1 pound Granny Smith apples ( 2 medium ), peeled, cored and sliced
3/4 cup sugar
1 tsp cinnamon
6 tbls orange juice (Juice of one orange)
3 tbls cornstarch
1 cup all purpose flour
1/4 cup brown sugar
1/4 cup sugar
1/2 cup chilled butter, cut into small pieces
Preheat oven to 375 degrees F. Lightly butter an 8″ x 8″ baking dish.
Combine the fruit with the sugar and cinnamon in a large bowl. Mix the cornstarch with the orange juice and add to the bowl. Mix everything together and dump into the baking dish. Bake for about 45 minutes.
Meanwhile prepare topping. Mix flour and sugars in medium bowl. Add the butter. Rub in with your fingertips until mixture forms coarse crumbs. Sprinkle over fruit. and bake until fruit is tender and bubbling and topping is crisp, approximately 35 more minutes. Best served warm.
Printable Recipe
October 11th, 2018
Norway. The place where my maternal Grandmother’s family originated. I wish I knew more about them, but experiencing the country was part of the reason that we were in Scandinavia. Of the four Scandinavian countries, Norway is the one with the most amazing heights. Within the fjords, mountains jut above the landscape like jagged behemoths. The fog, forests and rivers put one in mind of wood nymphs, sirens, trolls and hobbits straight out of The Lord of the Rings.

We were fortunate to be a part of a small Firebird Tour group for part of our vacation. It was well worth experiencing. All of our transportations (cars, trains, planes and boats) were taken care of. Our hotel accommodations were excellent.

We stayed at the Grand Hotel in Oslo, Norway. All of the Nobel Prize recipients stay here before the awards ceremony. Next to the hotel is the Freia shop selling delicious Norwegian chocolates.
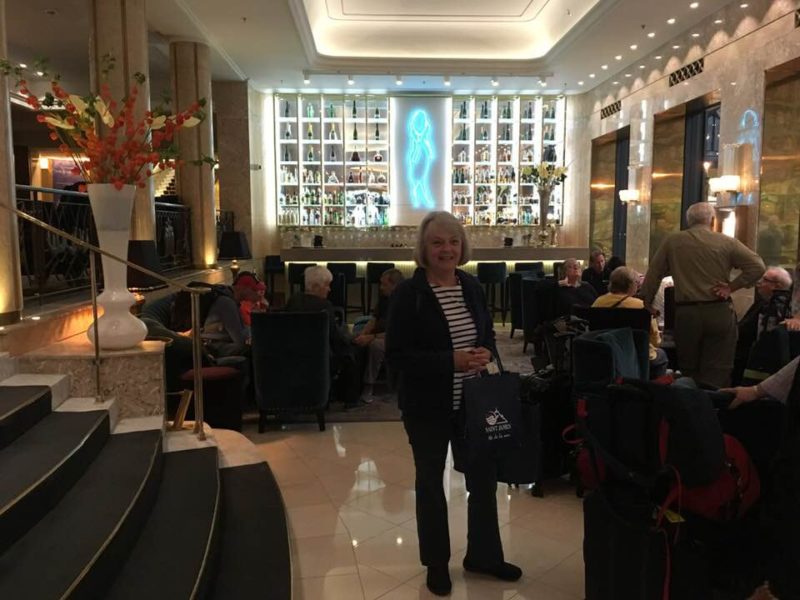
We all met in the lobby after our two days there to take a train to the fjords region and Bergen, Norway.
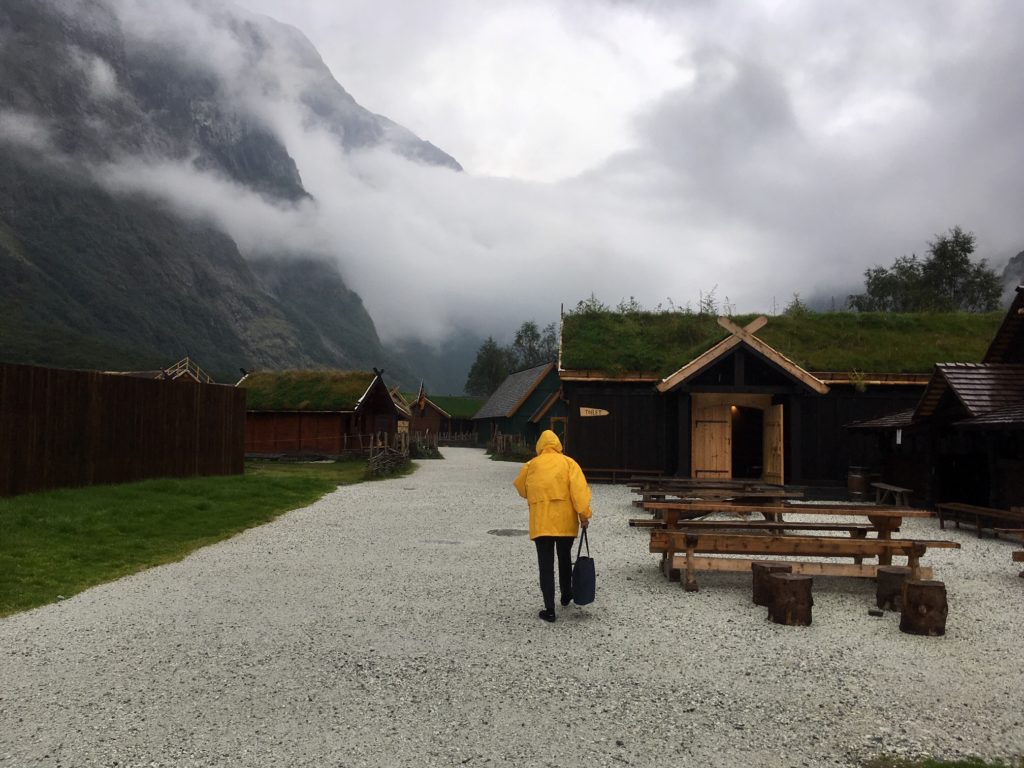
Since prehistoric times, Norwegians had covered their homes with sod roofs. The sod covered layers of birch bark acted as insulation, as well as being able to absorb rain water. The vegetation growing on the roofs was also attractive to goats.I can picture a humble hobbit warm and snug in his home with a goat chomping away on his roof. For a region with countless fjords and waterfalls, Norway is known for its pristine water. Even the tap water is crisp and clean. Norway exports a very expensive bottled water called Voss that is popular with many Hollywood celebrities.
Apples have been a crop in Norway and the other Scandinavian countries for thousands of years. They have been discovered on Viking ships which had been buried in clay. The clay preserved the ships and allowed us to learn much about the Viking way of life. Apples are harvested in the Fall as they are in our country. This a version of a popular, simple apple cake with Norwegian roots.
NORWEGIAN APPLE CAKE
- 1 stick of butter, melted
- 1 cup granulated sugar
- 2 eggs
- 1 tablespoon vanilla extract
- 1 cup all-purpose flour
- 1 teaspoon baking powder
- 2 tablespoons milk
- 1 large apple
- 1 teaspoon cinnamon
- 1 tablespoon turbinado sugar
- Preheat oven to 375F
- Grease and flour a 9-inch tart pan (with removeable bottom) and set aside.
- In a small bowl combine the flour and baking powder and set aside.
- In the bowl of a stand mixer with a whisk, cream the melted butter and sugar until light and fluffy and the sugar has dissolved.
- Add the eggs one at a time, mixing thoroughly after each egg.
- Add the vanilla extract.
- Add half the flour mixture and all of the milk.
- Mix thoroughly and then add the remaining flour. Combine until no streaks of flour remain.
- Spread batter in the prepared cake pan.
- Core and cut the apple in half. Cut each half in to ⅛” slices and arrange on top of the cake batter in a decorative pattern.
- Sprinkle with a mixture of cinnamon and turbinado sugar.
- Bake for about 35 minutes or until golden brown and cake is thoroughly cooked by testing with a toothpick.
- Serve warm or at room temperature.
Printable Recipe
June 15th, 2018
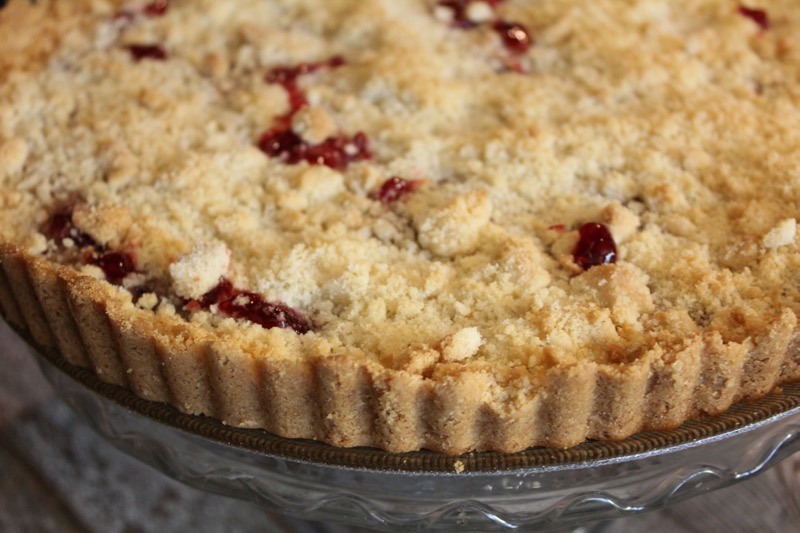
Following other bloggers brings rewards. This Raspberry Jam Shortbread Tart is a delicious reward. Originally posted by The Café Sucre Farina, I saw it on Pinterest and knew I had to try it. It was just as satisfying as I expected. The crumbly shortbread crust is enhanced with almond flour. Almond flour adds such a wonderful flavor profile to a shortbread tart.
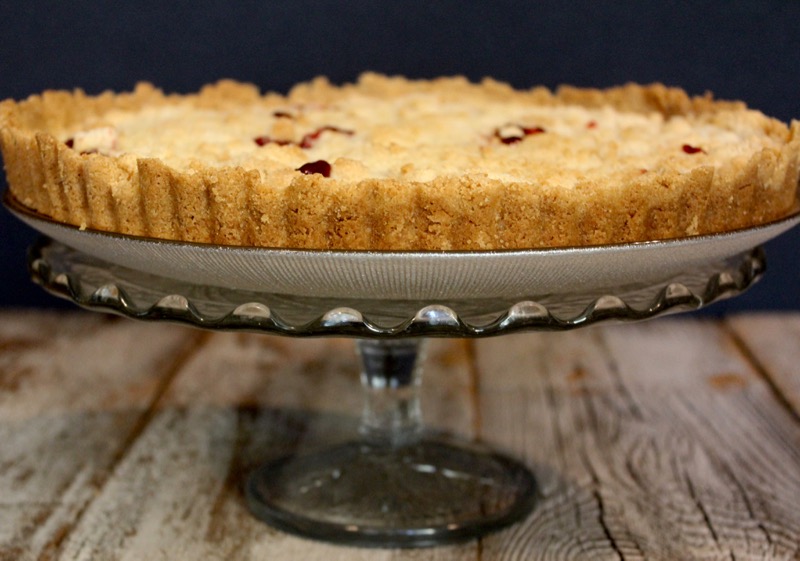
It is also important to use a good quality raspberry jam for the filling. I used this one. Thank you Chris for this great recipe. Now, with the leftover bag of almond flour I am going to make some Financiers.
RASPBERRY JAM SHORTBREAD TART
- 8 ounces butter softened
- 1 cup granulated sugar
- 1 teaspoon pure vanilla extract
- ½ teaspoon salt
- 1 ¾ cups all-purpose flour
- ¾ cup almond flour
- ¾ cup raspberry jam
-
Position a rack in the middle of the oven and preheat to 325 degrees.
-
Combine the butter and sugar in a large bowl. Using an electric mixer set at medium speed, beat until creamy. Add vanilla and salt and beat until combined. Add the all-purpose and almond flours and mix on low speed, just until flour is incorporated and large crumbles start to form.
-
Spray a 10-inch tart pan with baking spray or grease well and press one half of the dough evenly into the pan to form a bottom crust. Wrap the remaining dough in plastic wrap and freeze while bottom crust is baking, (no longer than 15 minutes).
-
Place the tart pan on a baking sheet and bake for 10-12 minutes, until the crust is just beginning to firm and turn pale golden brown at the edges.
-
Remove the pan from the oven and allow the tart to cool for 10 minutes, then spread the raspberry jam/preserves evenly over the crust, leaving a 1/4 inch border around the edge without jam. (see notes above for a pretty presentation tip)
-
Remove the remaining dough from freezer, and with your fingers, sprinkle it in big crumbles over the jam to form a topping.
-
Return the pan to the oven and continue baking until topping is firm, crisp and lightly golden in color, about 25-30 minutes. Transfer to a wire rack and let cool to room temperature, then dust lightly with powdered sugar, if desired.
-
Use a sharp knife to cut into small wedges. Serve warm with a scoop of vanilla ice cream or frozen custard, if desired.
Printable Recipe

