Southern Biscuits

May 5th, 2014

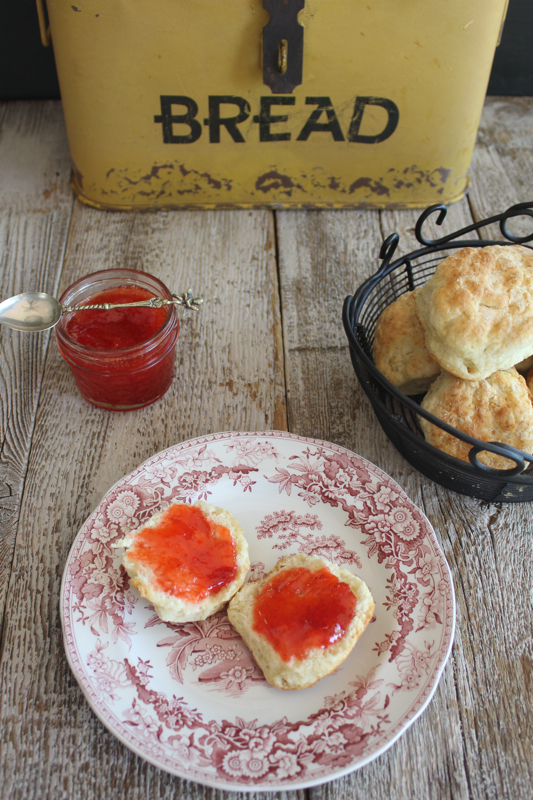
Southern Biscuits 3

So much of what  Southern cooking is about is how its women were able to provide filling and nutritious meals for their families.  When I think about the Southern table I think about the history of putting food by; women sitting on their porches shelling butter beans, the steaming pots of water waiting on the stove for those ball jars full of strawberry jam ready to be sterilized and the rendered lard waiting to be mixed with flour and buttermilk for the morning biscuits.  And if there were leftover biscuits, they would be used as a topping for that old stewing hen.

Southern Biscuits 2V

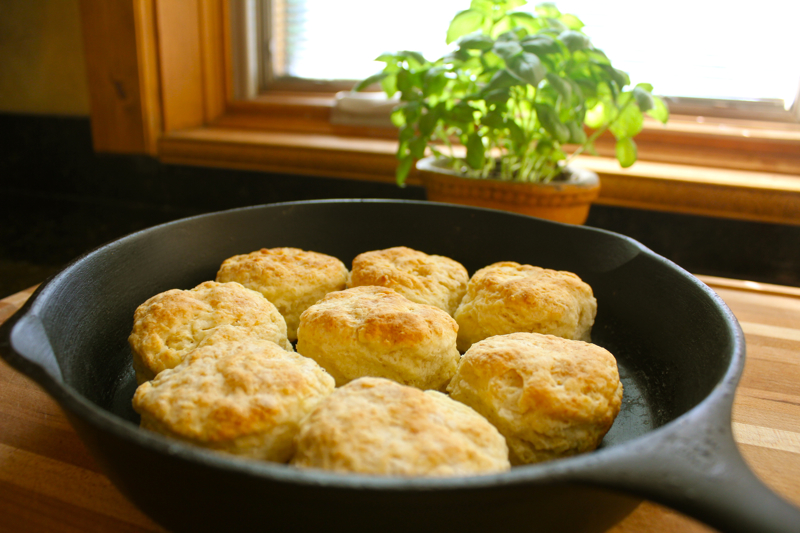
We have come a long way from the times when putting food by was a necessity for survival, but making biscuits is still a primal instinct to me.  There is nothing like rising early in the morning, lighting the oven and mixing the simple ingredients for biscuits. I love the put-put sound of my knife as it slashes through the butter and shortening cubes in the flour.  I make a floury mess in the kitchen as I pat the dough onto a board and cut the biscuits into shape.  Traces of flour cover the refrigerator door handle as I reach for the buttermilk and my clothing is dusted in flour.  After the biscuits are in the oven, David enters the kitchen, takes one look around and says “You must be making biscuits”.

Southern Biscuits Pan 2

My biscuit making skills are still a work in progress.  A recipe that I have been using lately comes from Alton Brown.  He uses regular flour and a combination of butter and shortening and buttermilk in his biscuits.  It is a good basic recipe. Watching the Food Network a while back, I saw Sunny Anderson talk about her Grandmother’s biscuits.  Her Grandmother shared her recipe with her, but the recipe never came out the same for Sunny.  So watching her Grandmother carefully one day she noticed that her Grandmother’s flour looked different.than they flour that she used.  Her Grandmother’s flour had little yellow flakes in it.  She neglected to tell her that she used Atkinson Flour with Butterflakes.  Sunny shared her recipe here.  I also found a new flour that I used in my biscuits this time.

Southern Biscuit Pan 1

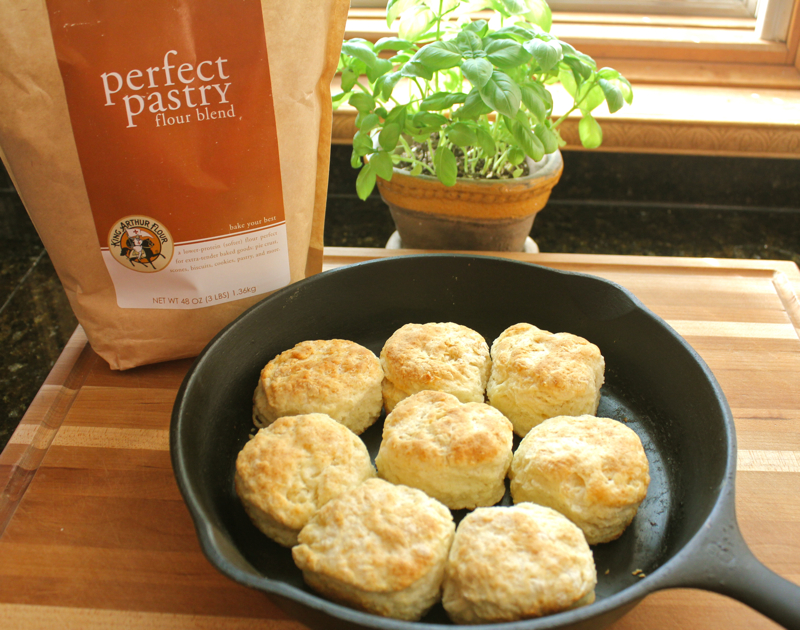
King Arthur has a Pastry Flour Blend that duplicates many of the Southern flours used by previous generations of southern cooks.  It is softer and produces lighter biscuits and scones.  It is also great for flaky pie crusts.  It is not recommended for yeast risen baked goods.  I found it easier to handle and loved the results in my biscuits.  I have yet to use it in pie crust, but am anxious to try it.

Southern Biscuits 4

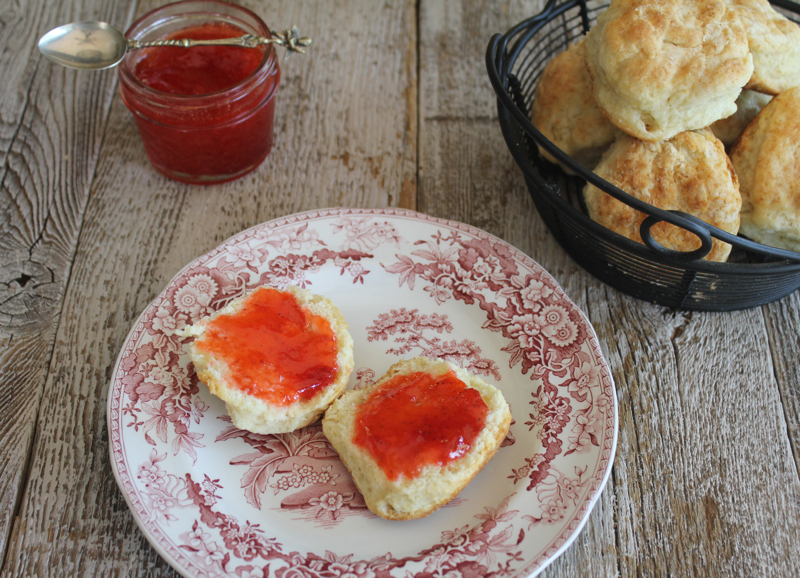
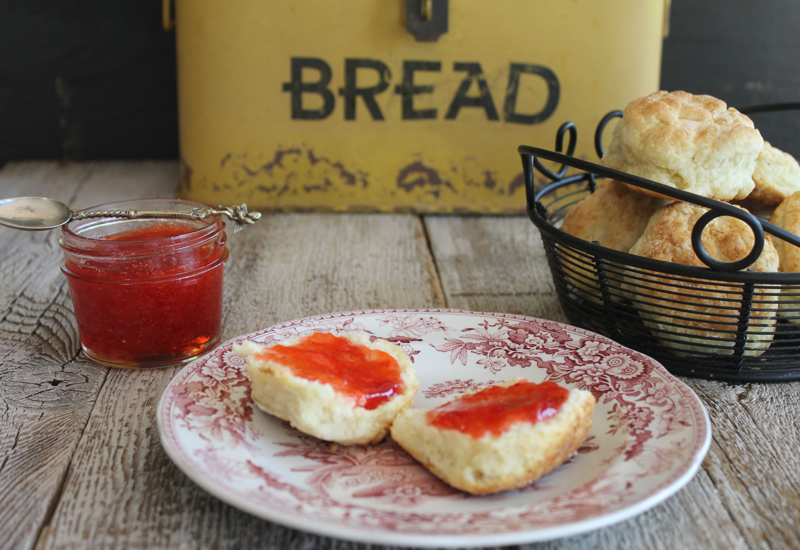
My biscuits were light and tender and went well with my freezer strawberry jam.  But I just may try the Atkinson flour blend to compare the results.  I would be interested to know if any of you have a favorite biscuit recipe.

SOUTHERN BISCUITS (Alton Brown)

2 cups flour
4 teaspoons baking powder
1/4 teaspoon baking soda
3/4 teaspoon salt
2 tablespoons butter
2 tablespoons shortening
1 cup buttermilk, chilled

Preheat oven to 450 degrees.

In a large mixing bowl, combine flour, baking powder, baking soda and salt. Using your fingertips, rub butter and shortening into dry ingredients until mixture looks like crumbs. (The faster the better, you don’t want the fats to melt.) Make a well in the center and pour in the chilled buttermilk. Stir just until the dough comes together. The dough will be very sticky.

Turn dough onto floured surface, dust top with flour and gently fold dough over on itself 5 or 6 times. Press into a 1-inch thick round. Cut out biscuits with a 2-inch cutter, being sure to push straight down through the dough. Place biscuits on baking sheet so that they just touch. Reform scrap dough, working it as little as possible and continue cutting. (Biscuits from the second pass will not be quite as light as those from the first, but hey, that’s life.)

Bake until biscuits are tall and light gold on top, 15 to 20 minutes.
Printable Recipe

Triple Cinnamon Scones

May 1st, 2014

Triple Cinnamon Scones 2


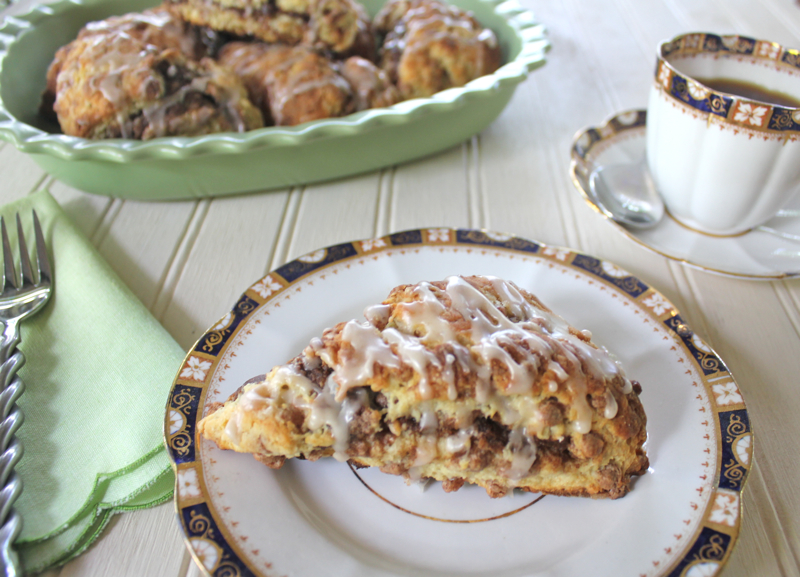
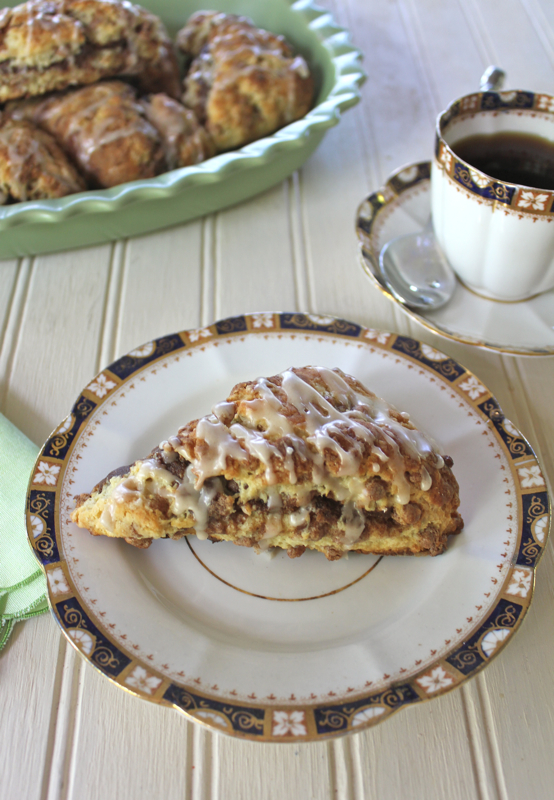
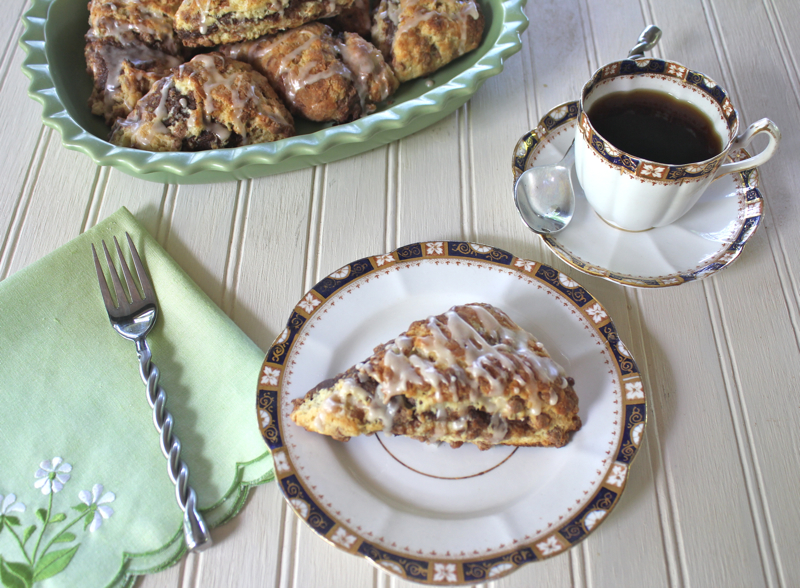
I love the King Arthur Flour Company.  Not only do they have some of the best flour available, but they also have some of the best baking ingredients and tools to turn out some of the best baked good you will ever taste.  While visiting our family over Easter, Kristen served us these Triple Cinnamon Scones.  I fell in love with them.  They are the best scones I have ever eaten.  She got the recipe and several of the ingredients from King Arthur.

Triple Cinnamon Scones V

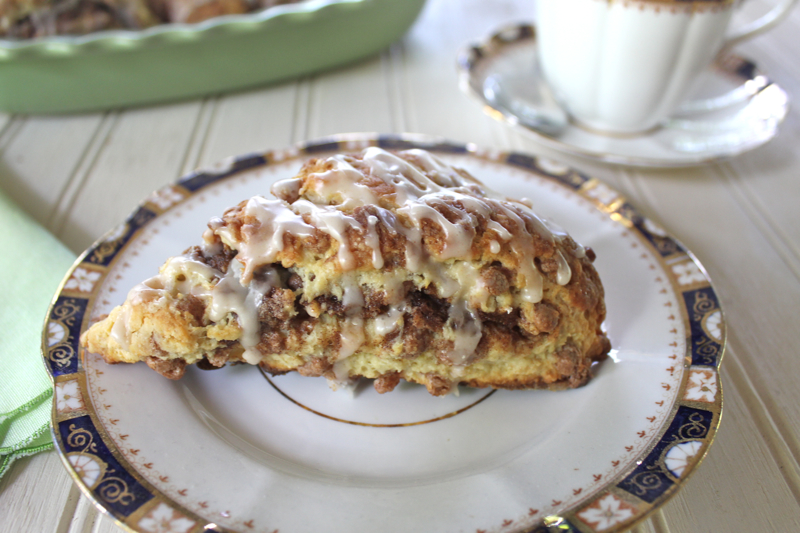
I immediately placed an order online for their cinnamon chips and their baker’s cinnamon filling mix; because, you see, these cinnamon scones are indeed a triple blast of cinnamon.  The cinnamon chips, the cinnamon filling and the cinnamon glaze make them sooo delicious – no dry scones here.

Triple Cinnamon Scones 1 close

You can just see the layers of flavor.  Because of that there are a few steps involved in their preparation, but it is totally worth it.  The recipe has some great tips to make successful scones.   One tip is to put the prepared scones in the freezer for 30 minutes before baking.  Another suggestion I have, is to use a very sharp knife to cut the scone shapes.  That way they will not become lopsided while baking.  Make a clean cut without pulling at the batter.  Also, I made only about half of the glaze and just drizzled the tops of the scones instead of slathering the whole thing in glaze.

Triple Cinnamon Scones All


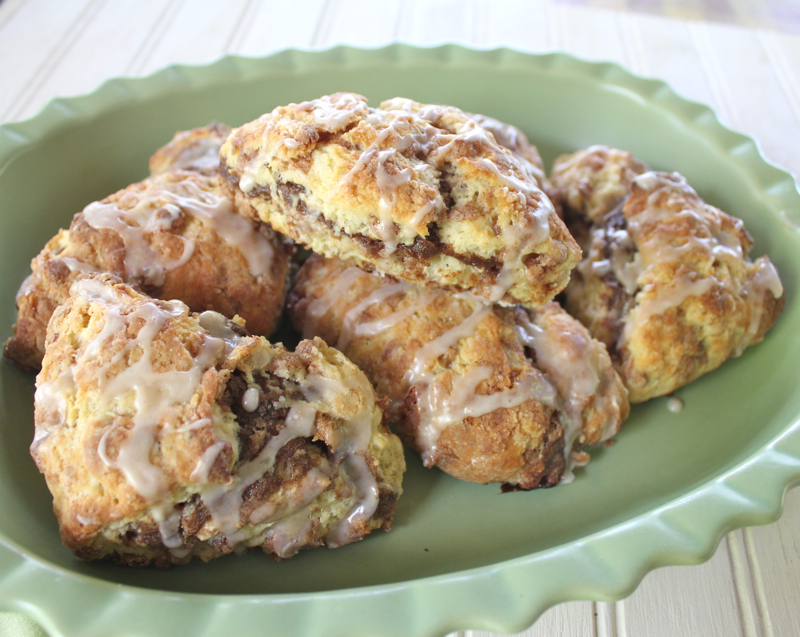
A platter of warm scones is the perfect breakfast for a crowd.  I plan on making them (and perfecting my skills) all summer while we have visitors.  I may even make them in advance and freeze a few batches.  My next scone recipe will be an Orange scone using the Candied Orange Peel that I got from King Arthur.

Triple Cinnamon Scones 4By the way, the pretty plate and cup and saucer were a gift from a special blogging friend, Mary, from A Breath of Fresh Air.  Thank you Mary.  The pretty luncheon napkin is one from a set that belonged to my Mother.  She used them for special luncheons with friends when I was just a child.  I treasure them.

TRIPLE CINNAMON SCONES

scones

  • 3/4 cup half and half or evaporated milk
  • 1 cup cinnamon Flav-R-Bites or cinnamon chips
  • 2 3/4 cups King Arthur Unbleached All-Purpose Flour
  • 1/3 cup sugar
  • 1 tablespoon baking powder
  • 3/4 teaspoon salt
  • 1/2 cup cold butter, cut into pats
  • 2 large eggs, lightly beaten
  • 1 teaspoon vanilla extract

filling

  • 3/4 cup Baker’s Cinnamon Filling*
  • 3 tablespoons water
  • *Or substitute 5 tablespoons butter, 3/4 cup brown sugar, and 2 tablespoons ground cinnamon for the Baker’s Cinnamon Filling mix and water.

glaze

  • 3 1/2 cups confectioners’ sugar
  • 1 teaspoon ground cinnamon
  • 7 tablespoons water

1) Combine the Cinnamon Flav-R-Bites with the half and half or milk in a small bowl. Let the mixture rest for about 20 minutes.

2) While the cinnamon mixture is resting, get started putting together the rest of the ingredients. In a large mixing bowl, whisk together the flour, sugar, baking powder, and salt.

3) Work in the butter just until the mixture is unevenly crumbly; it’s OK for some larger chunks of butter to remain unincorporated.

4) Add the eggs and vanilla to the cinnamon-milk mixture, stirring to combine.

5) Add the liquid ingredients to the dry ingredients and stir until all is moistened and holds together.

6) Scrape the dough onto a well-floured work surface. Pat/roll it into a rough 9″ square, a scant 3/4″ thick. Make sure the surface underneath the dough is very well floured. If necessary, use a giant spatula (or the biggest spatula you have) to lift the square, and sprinkle more flour underneath.

7) Spread the filling over the dough. Fold one edge into the center and over the filling, as though you were folding a letter. Fold the remaining edge over the center to complete the three-fold. You’ll now have a rectangle that’s stretched to about 4″ x 12″. Gently pat/roll it to lengthen it into a 3″ x 18″ rectangle; it’ll be between 3/4″ and 1″ thick.

8) Cut the rectangle into six 3″ squares. Transfer the squares to a lightly greased (or parchment-lined) baking sheet. Now you have a choice. For large scones, cut each square in half diagonally to make a triangle; you’ll have 12 scones. For medium scones, cut each square in half diagonally again, making four triangular scones from each square. Gently separate the scones (if you like scones with crunchy edges), leaving about 1″ between them. For softer scones, separate the scones just enough to break contact between them.

9) You may also choose to make scone strips, or tiny squares. Cut each 3″ square into three 1″ x 3″ rectangles, for a total of 18 scone strips. Gently separate the strips, leaving about 1/2″ between them. Or cut each 3″ square into nine 1″ squares, to make 54 bite-sized mini scones.

10) For best texture and highest rise, place the pan of scones in the freezer for 30 minutes, uncovered. While the scones are chilling, preheat the oven to 425°F.

11) Bake the scones for 16 to 20 minutes, or until they’re golden brown. Remove the pan from the oven, and allow the scones to cool right on the pan.

11) Make the glaze by stirring together the sugar, cinnamon, and water. If the sugar seems particularly lumpy, sift it first, for an extra-smooth glaze.

12) Now you’re going to coat each scone with glaze. You can dip each one individually, which is quite time-consuming. Or line a baking sheet (with sides) with parchment, and pour about half the glaze atop the parchment. Set the scones atop the glaze, swirling them around a bit to coat their bottoms. Then drizzle the remaining glaze over the top. Use a pastry brush to brush the glaze over each scone, to coat it entirely. The glaze is very thin, so this is easily done.

13) Transfer the scones to a rack set over parchment, to catch any drips. As you pick each scone up, run its sides over the glaze in the bottom of the pan, both to use up some of the extra glaze, and to make sure all sides are coated. Allow the glaze to set before serving the scones.

Yield: one dozen triangles, 5″ x 3″; 2 dozen triangles, 2 1/2″ x 3″; 18 strips, 4″ x 1 1/2″; or 54 mini (1 1/2″) squares.

Printable recipe

Tuscan Spinach Torta Rustica

April 18th, 2014

Tuscan Torta


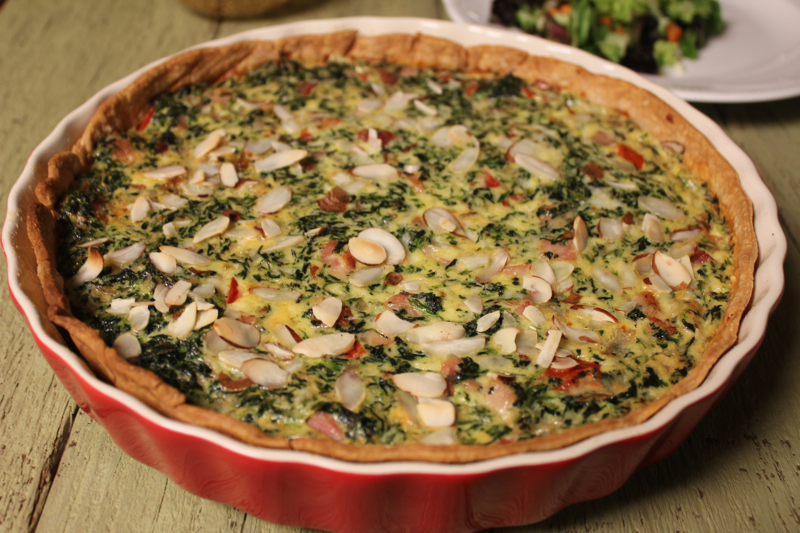
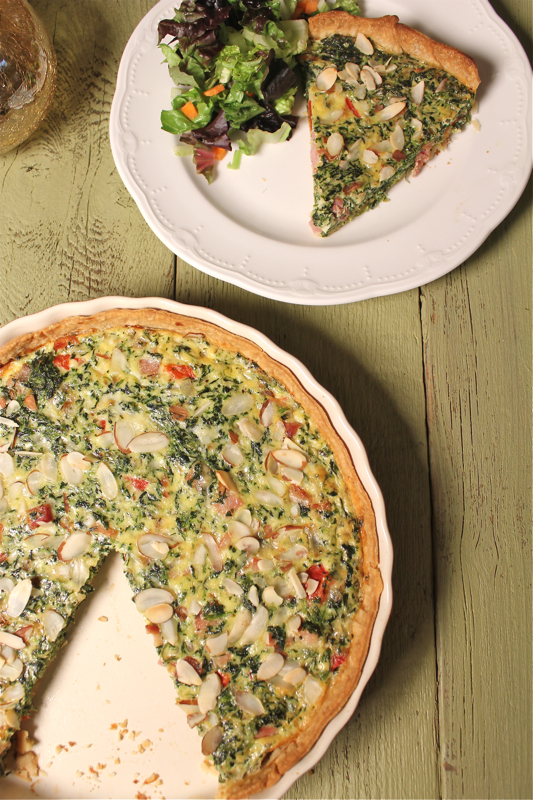
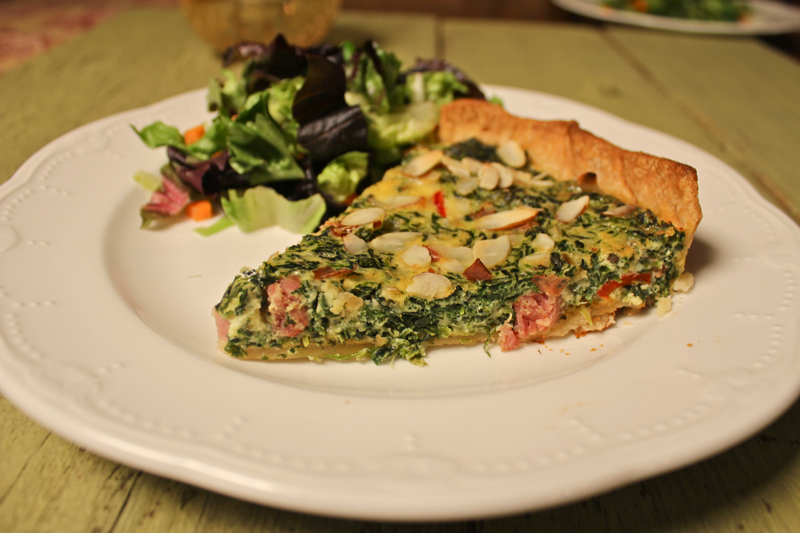
There are many foods that we associate with Easter; ham, eggs and chocolate bunnies to name a few.  In Italy this Spinach Torta is made around Easter time to celebrate the season.  There are many versions of the dish.  Some are made with a yeast crust and a lattice top.  Some top the dish with pine nuts, instead of the almonds that I used.  I added ham to my version.  To me this would make a perfect brunch dish to celebrate Easter.

Tuscan Torta 2V


The torta is an Italian version of a quiche.  The flavor additions include Mozzarella and Parmesan instead of Swiss or Gruyere, Italian seasonings instead of a hint of nutmeg and a pine nut or almond topping.  The spinach, eggs, roasted red peppers and cream round out the dish.  Since I was in a hurry I used a store bought pie crust, but you could certainly make your own or leave it out completely.  I actually made another version of this torta a few years ago that is also great to make ahead of time for a brunch party.  Here is the link.

Tuscan Torta 3 This makes me wish for a trip to the Amalfi Coast.  Since that is not possible, David and I will be attending The East Tennessee Italian Fest blogger party at Big Dude’s Almost Heaven South on Saturday June 7th.  For details see Larry’s post here if you are interested in joining us.  I am linking this dish to Tasty Tuesdays at the Comfort of Home.

TUSCAN SPINACH TORTA RUSTICA

1 Refrigerated Pie Crust or Homemade 1 crust pie pastry
1 Tablespoon Dijon Mustard

2 Tablespoons butter
1 cup diced cooked ham
1/2 cup chopped red onion
1 9 ounce package frozen chopped spinach, thawed and squeezed dry
1/4 cup diced roasted red pepper
1/2 teaspoon dried basil
1/2 teaspoon dried oregano
1/4 teaspoon garlic powder
Salt and pepper to taste

4 eggs, beaten
1/2 cup heavy cream
1/4 cup shredded Mozzarella cheese
1/4 cup shredded Parmesan cheese

1/2 cup sliced almonds

Preheat oven to 425 degrees F.  Fit pie crust into 10-inch tart pan or 9-inch pie plate.  Blind bake in oven for 5 minutes.  Remove foil or parchment paper lined bean weights.  Paint bottom of pie crust with mustard.  Return pie crust to oven and bake for 5 more minutes.  Remove, set aside and reduce oven to 350 degrees F.

Melt 2 tablespoons butter in a large saute pan over medium high heat.  Add ham and onions and cook until onions are soft and ham is slightly browned.  Add red peppers, spinach and seasonings and cook a few minutes to meld flavors.

Beat eggs in large bowl.  Add cream and shredded cheeses.  Add the spinach mixture from the skillet and stir to combine well.  Place in prepared pie crust.  Sprinkle almonds over the top.  Place tart pan in oven and bake for 25 to 30 minutes or until custard is set.

Printable recipe


Ham, Cheese and Quinoa Frittata Muffins

March 18th, 2014

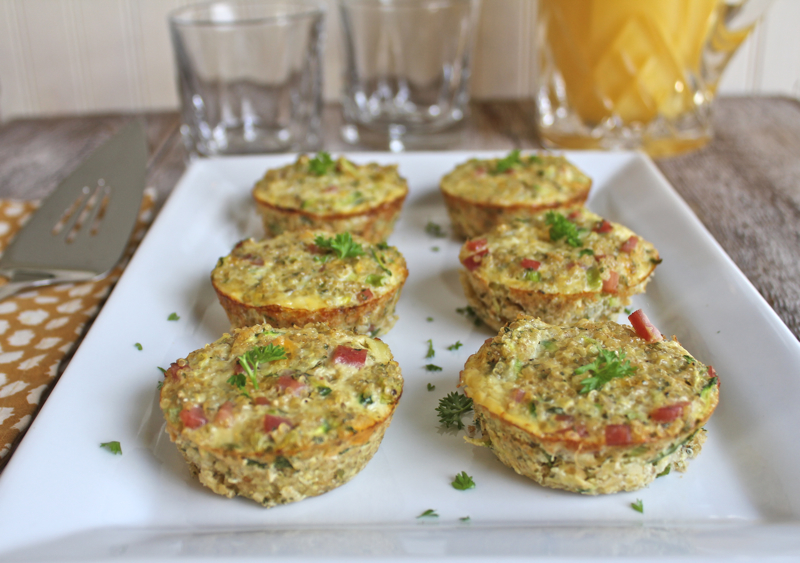
Quinoa Frittata Muffins 1


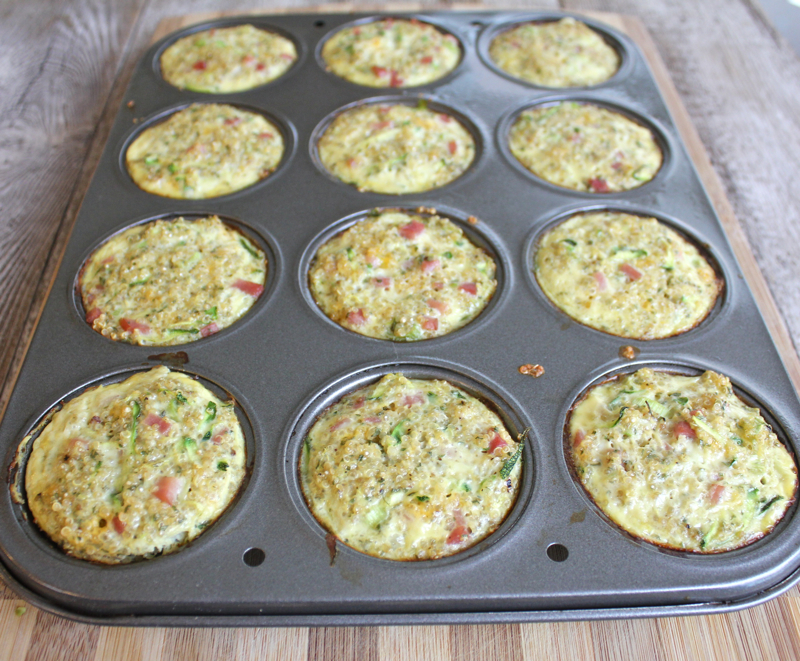
I am always looking for interesting breakfast options.  There is something very special about food that can be picked up on the run when you have very little time.  When you add to that a healthy alternative to heavy egg and cheese concoctions, I am delighted.  I found this quinoa muffin recipe on Pinterest from Iowa Girl Eats.  Kristin actually made her muffins in mini muffin cups and figured the calorie count to be 48 calories for each.  I made mine in a standard size muffin pan.  I was not so much interested in the calories as I was in the healthy ingredients.

Quinoa Frittata Muffins 4


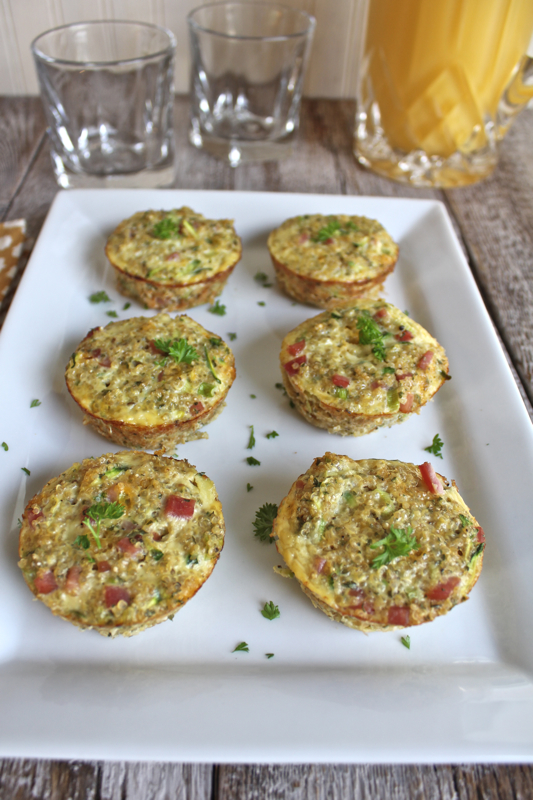
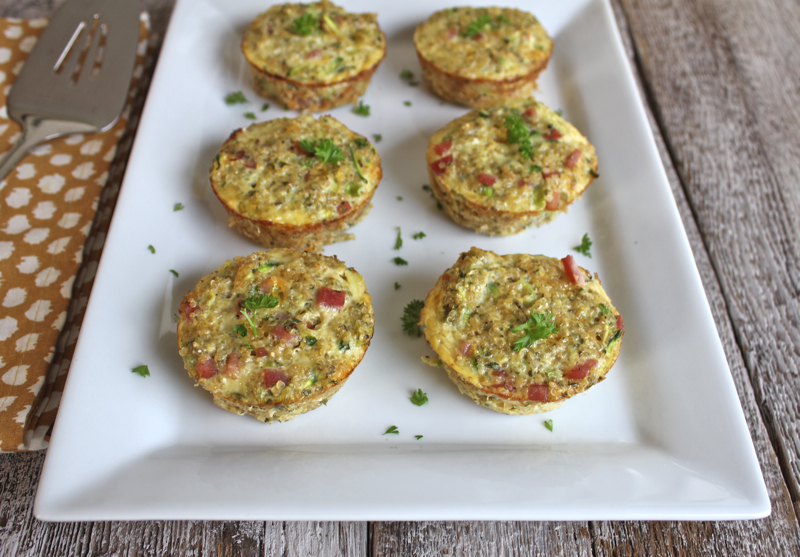
The quinoa takes the place of flour in the muffins.  There are only two eggs and two egg whites in the mix.  The other ingredients are zucchini, cheese, ham (I used Canadian Bacon), green onions and parsley.  But what is so special about the ingredients is that you can use anything that you would like.  Leave out the ham and you would have a good vegetarian muffin, substitute spicy cooked sausage and you would have an added kick.

Quinoa Frittata Muffins 2V

I plan to tuck these muffins away in the fridge and freezer for future quick breakfasts. We will be traveling back to Lake Lure at the end of the month.  David usually likes to stop for a chicken biscuit at MacDonald’s.  Even though he eats just the bottom half of the biscuit with his fried chicken patty, these muffins are a far better choice.  The only down side that I see is that Daisy, our dog, won’t get her favorite top biscuit treat.

Quinoa Frittat Muffins 3

I am entering the recipe in Tasty Tuesday over at The Comforts of Home.  I hope you will give these tasty muffins a try.

HAM, CHEESE AND QUINOA FRITTATA MUFFINS

2 cups cooked quinoa (about 3/4 cup uncooked)
2 eggs
2 egg whites
1 cup zucchini, shredded
1 cup shredded sharp cheddar cheese
1/2 cup diced ham
1/4 cup parsley, chopped
2 Tablespoons parmesan cheese
2 green onions, sliced
salt & pepper

Directions:

  1. Preheat oven to 350 degrees. Combine all ingredients in a large bowl and mix to combine. Liberally spray a mini muffin tin with non-stick spray and spoon mixture to the top of each cup. Bake for 15-20 minutes, or until the edges of the cups are golden brown. Let cool for at least 5 minutes before removing from the mini muffin tin.
  2. TO FREEZE: Place baked cups on a baking sheet then freeze until solid and transfer to a freezer bag. Microwave for 20-40 seconds depending on how many you’re reheating.
  3. FOR REGULAR-SIZED MUFFIN TINS: Bake for 25-30 minutes

Printable recipe

Cast-Iron Skillet Focaccia

February 12th, 2014

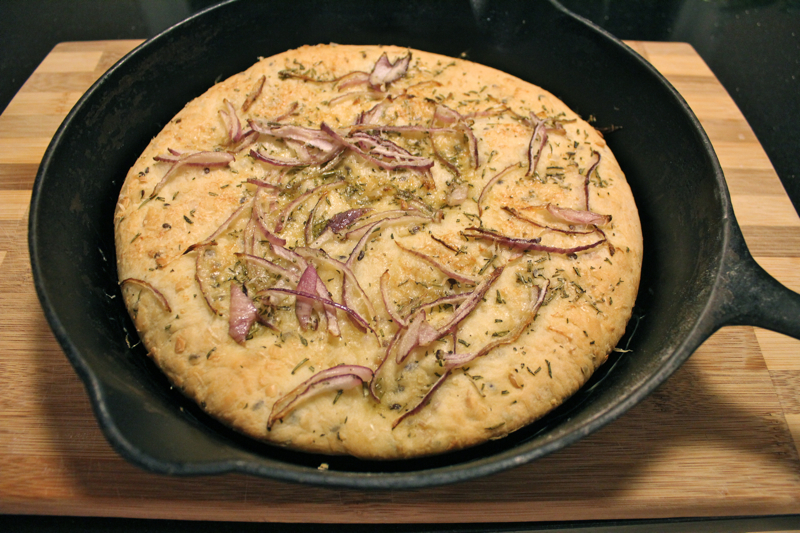
Focaccia in a Skillet 1


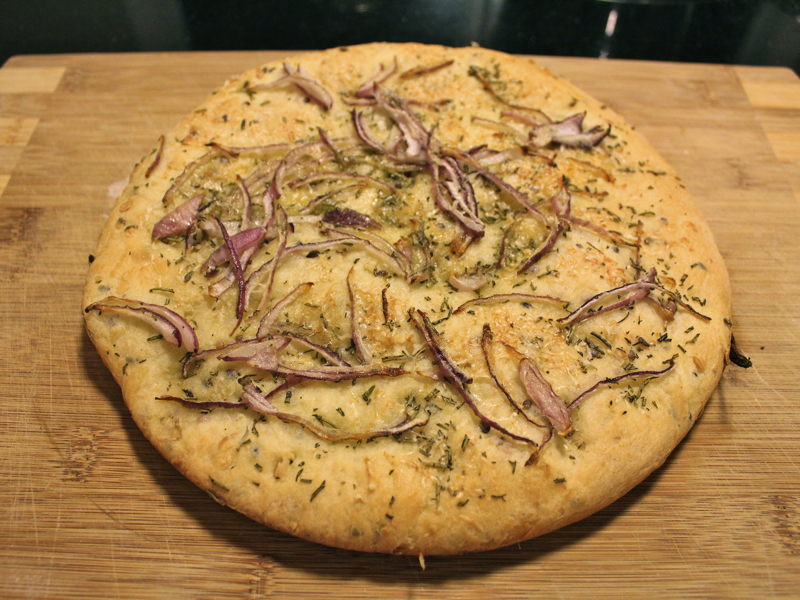
Whether you make your own pizza dough or get a store-bought round of dough, there is nothing easier than this focaccia.  With a simple topping of red onion shards, olive oil, rosemary and Parmesan cheese, you can have a special bread on the table in no time.  It is also adaptable.  With ingredients like pizza sauce, mozzarella and pepperoni you could turn it into a deep-dish pizza.

Focaccia in a Skillet 2
I bought a round of multi-grain pizza dough from Publix.   The cast iron skillet is preheated in the oven before adding the dough so that it develops a nice brown crust on the bottom.  We will be making this again with variations.

We are in North Carolina until Saturday.  A snow and ice storm is heading our way.  Hopefully we will not lose power.  Happy Valentine’s Day everyone.  Perhaps you could serve this special bread with whatever special meal you are planning.

CAST-IRON SKILLET FOCACCIA (Recipe adapted from Jamie Deen)

One 1-pound package store-bought pizza dough
All-purpose flour for dusting
3 tablespoons olive oil
1/4 cup red onion, thinly sliced
2 teaspoons chopped fresh rosemary
2 tablespoons freshly grated Parmesan cheese
Kosher salt and freshly ground black pepper

Preheat the oven to 350 degrees F.  Place a 12-inch cast-iron skillet on the center rack as it preheats.  Bring the pizza dough to room temperature.

Dust the counter-surface with flour.  Stretch out the dough to a 12-inch circle.  I rolled it with a rolling pin dipped in flour.  Drizzle the hot skillet lightly with just 1 tablespoon of oil.  Lift up the skillet by the handle and swirl to coat the bottom of the pan completely.

Add the dough to the hot skillet and carefully stretch it to go halfway up the sides.  Press your fingers into the dough to make small indents.  Sprinkle with the remaining 2 tablespoons olive oil, the red onions and rosemary.  Top with the freshly grated Parmesan.

Bake on the middle rack until lightly golden brown, about 35 minutes.  Slice into wedges and serve.

Printable recipe

© Penny Klett, Lake Lure Cottage Kitchen. All rights reserved.