Fraudulent Sourdough Bread

January 26th, 2015

Sourdough Bread 2

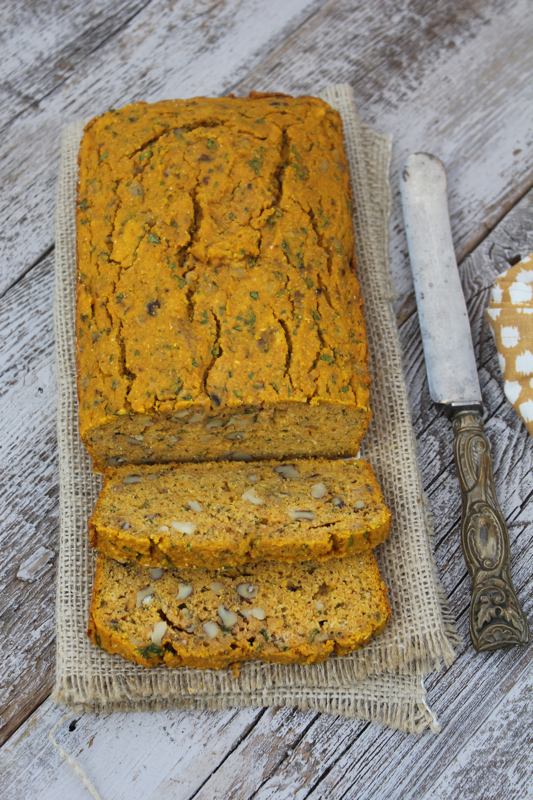
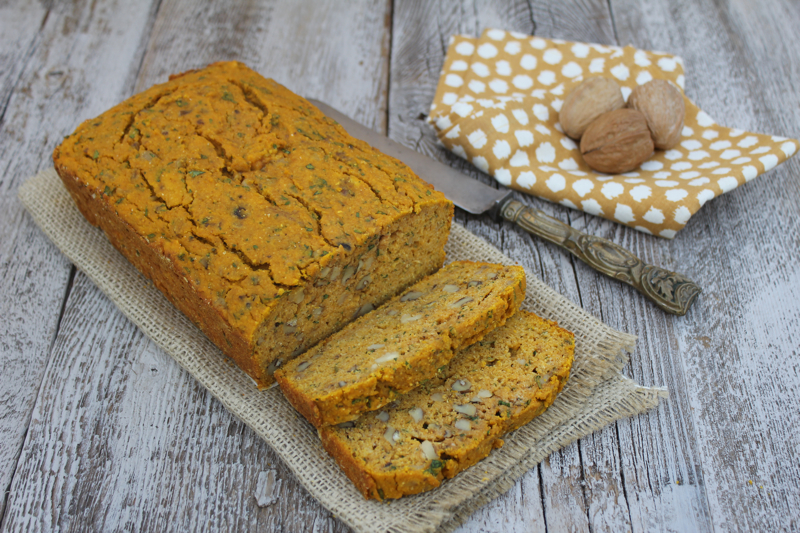
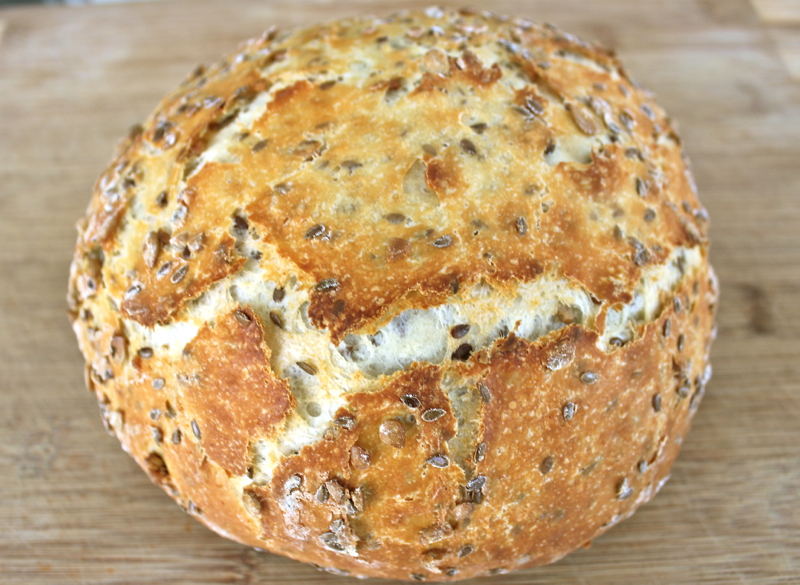
I am always inspired by fellow bloggers.  I sometimes wonder why we even bother with cookbooks when we have such talented people who blog about food on a regular basis.  Monique from La Table de Nana is one of those bloggers.  Among several recipes in one of her recent post, I was attracted to this round of crusty bread full of seeds.  She adapted the recipe from another blogger, Lady and the Pups.  The premise behind the sourdough bread is that you don’t need a sourdough starter.  The sour taste comes from the yogurt that is a part of the mixture.  It is so easy, especially if you kneed it in a stand mixer.  The only difficulty is time.  Time to let it ferment for 6 to 18 hours.  But you might as well just go about your business while the dough does its thing.  There is very little hands on work.

Staub Cookware


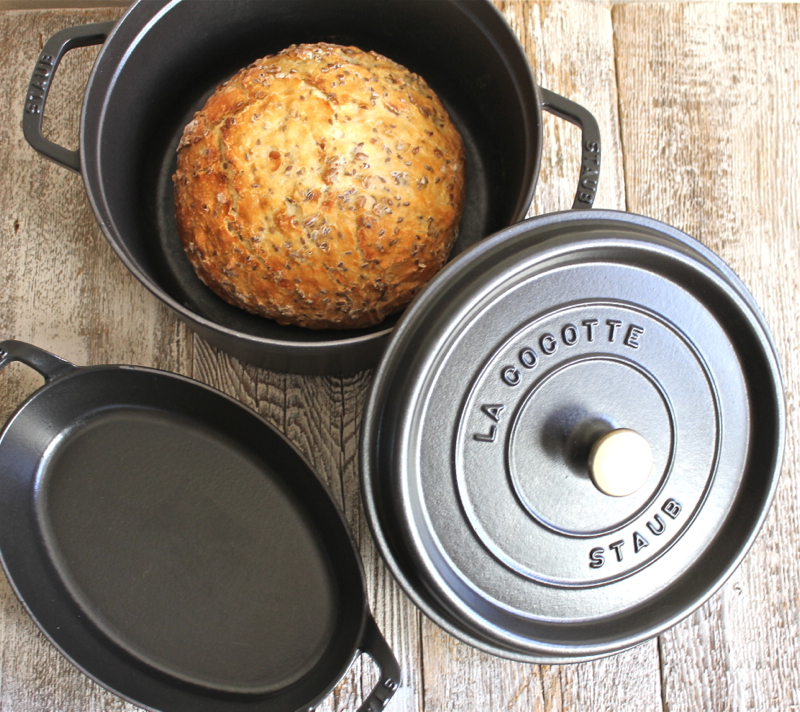
One of the reasons that I wanted to try this bread is because it is supposed to be baked in a heavy covered casserole.  I have been waiting to share this news with you.  I was fortunate to win a set of Staub Cookware from one of my favorite sites, the folks at Food52.  Food52 was founded by former New York Times food editor Amanda Hesser and food writer Merrill Stubbs.  The site offers home cooks everything from recipes to food related articles.  It has an active community of over 300,000 members.  They offer recipe contests in which I have participated.  So far 2 of my recipes have been selected as “Community Picks”.

With the publication of Mimi Thorisson’s cookbook My Kitchen in France, they held a contest offering a set of the beautiful French cookware from Staub.  All that was necessary to win was to leave a comment on their website each day of one week.  They gave away 4 sets.  I won one of them.  I was expecting, perhaps, some small individual cocottes, . . . maybe a small oval baker.  Much to my amazement, right before Christmas three large boxes were delivered.  I received a 5 quart round cocotte with lid, a 9.5 inch oval baker, and a 12 inch skillet (not shown here).  I told David I needed nothing more for Christmas.  Staub is amazing cookware, much like Le Creuset.  The matte black pieces are all featured in Mimi’s cookbook.  By the way, I also won one of her cookbooks.  Since I had already purchased mine, I gave this one to my talented daughter-in-law for Christmas.

Sourdough Bread 1

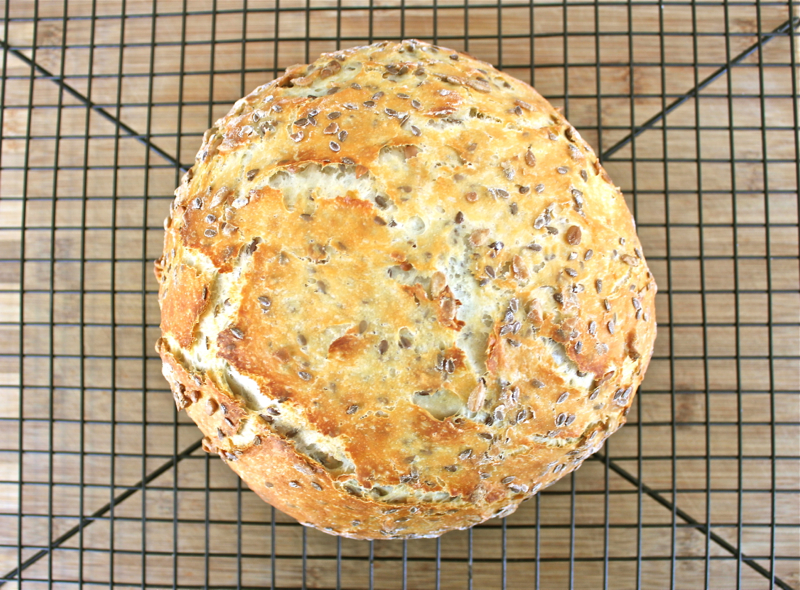
The bread baked in the casserole couldn’t have been better.  I’m sure any heavy duty casserole would do, but there is something satisfying about cooking in beautiful vessels.  I highly recommend this bread.  I love the cracked appearance of the loaf.  It is hard on the outside and soft inside, just as a good sourdough loaf should be.  You can make it without the sunflower and flax seeds as the original recipe suggests.  Monique even suggested that I try it that way first, but I loved this version.  Thank you for a great recipe Monique.

FRAUDULENT SOURDOUGH BREAD

  • 3 cups (405 grams) bread flour
  • 1 1/2 tsp (8 grams) salt
  • 1/4 tsp instant dry yeast (if fermenting for 18 hours), or 3/4 tsp instant dry yeast (if fermenting for 6 hours)
  • 1 1/2 cup + 2 tbsp (385 grams) plain unsweetened yogurt containing active cultures
  • 1/3 cup sunflower seeds, optional
  • 1/3 cup flax seeds, optional

Instructions

  1. In a stand-mixer with dough-hook, or in a large bowl by hands, mix bread flour, instant dry yeast, salt and plain yogurt, plus seeds if using, on medium-low speed for 2 min until a dough forms. If the dough is too dry and has difficulty coming together, add 1 tbsp more plain yogurt. If you’d like, continue to knead the dough on medium-low speed, or with your hands, for a few more minutes until springy. The dough should be very sticky, but able to retain shapes.
  2. Cover the bowl with plastic wrap and let ferment at room-temperature for 18 hours (NO MORE than 20 hours or the yogurt may spoil and become bitter!), or 6 hours depending on your schedule (note that the amount of yeast varies). The dough should almost doubled when finished.
  3. After fermentation, dust the counter with flour then transfer the dough on top. Use just enough flour to prevent the dough from sticking, fold the dough gently (without crushing all the air bubbles inside) over itself like folding a letter. Turn 90 degrees and fold again. Then shape the dough into a ball-shape. Transfer to a piece of floured parchment paper, then cover a large bowl on top and let proof again for 1 ~ 2 hours. The dough is ready when it almost double in size again, and should not spring back when you press it with a finger.
  4. 45 minutes before the dough’s ready, preheat the oven on 450F/225C with a large dutch oven, or a heavy-bottom pot (both should come with lid) inside. To bake the bread, lift the parchment paper to transfer the dough into the preheated pot, cover the lid and bake for 30 min. Then remove the lid, and bake until the crust is golden browned.
  5. Let cool on a rack for 20 min.


Printable Recipe

Parmesan Bread

October 20th, 2014

Parmesan Bread 1

Pain au Parmesan or Parmesan Bread is a recipe from Patricia Well’s The Paris Cookbook.  I picked up a copy of this book recently at an antique mall.  Even though it was written over a decade ago, the recipes are current and inviting.  I am a committed bread lover, so this recipe for Parmesan bread appealed to me immediately.  Patricia was inspired to adapt this bread recipe from the Boulangerie Onfroy in the Marais.  The bread is fine textured with a pungent Parmesan flavor.  It makes a great BLT.  I have also been enjoying it as toast with a tomato topping.

Parmesan Bread 2

But what is so wonderful about this Parmesan bread is that it easy.  It can be kneaded in a stand mixer and takes little hands on time.   Each slice of this fragrant bread brought me back to the beautiful boulangeries of Paris.

Boulangerie Onfroy

We have been in Florida celebrating our joint birthdays for the last week.  Here are a few pictures of the event.

Birthday Mimi and kids
I was so happy to have the grandkids with us.

Birthday Kristen and MichaelOur thanks to all of our friends and our wonderful family, including our Son Michael and DIL Kristen above, for a stellar celebration.  Aging can be a beautiful time of life.  Thank you Mark for the pictures that captured the event.

PARMESAN BREAD

1 teaspoon active dry yeast
1 teaspoon sugar
1 1/3 cups lukewarm water
2 tablespoons extra-virgin olive oil
2 teaspoons fine sea salt
3 3/4 cups ( 1 pound ) bread flour, or more if needed
3 ounces freshly grated Parmigiano-Reggiano cheese (3/4 cup)
1 large egg beaten with 1 tablespoon cold water, for egg wash

In the bowl of a heavy-duty electric mixer fitted with the dough hook, combine the yeast, sugar, and lukewarm water, and stir to blend.  Let stand until foamy, about 5 minutes.  Then stir in the oil and the sea salt.

Add the 3 3/4 cups flour and the cheese all at once, and mix at medium speed until most of the flour has been absorbed and the dough forms a ball.  Continue to knead until the dough is soft and satiny but still firm, 4 to 5 minutes.  If necessary, add a little more flour to keep the dough from sticking.  Transfer the dough to a clean, floured work surface and knead by had for 1 minute.  The dough should be smooth and should spring back when indented with your fingertip.

Place the dough in a clean bowl, cover the bowl with plastic wrap, and let the dough rise until doubled in bulk, about 1 hour.  Punch the dough down and shape it into a tight rectangle.  Place the dough in a nonstick 1-quart rectangular bread pan that has been buttered.  Cover it with a clean cloth and let it rise until doubled in bulk, about 1 hour.

Preheat the oven to 425 degrees F.

Brush the top of the dough with the egg wash.  With the tips of a pair of scissors, snip the top of the dough all over, about 15 times, to allow it to expand evenly during baking.  Place the bread pan on the bottom shelf of the oven.  Bake until firm and golden brown, and the bread sounds hollow when tapped, about 35 to 40 minutes.  Transfer the bread to a rack to cool.

Printable Recipe


Prosciutto Breakfast Rolls

August 21st, 2014

Prosciutto Breakfast Rolls 1


Do you occasionally buy convenience items like refrigerated crescent roll dough?  There are many things you can do with it besides rolling the triangles into crescent rolls.  I do like this take on a different way to handle crescent roll dough.  Instead of separating the dough into triangles stop at the rectangles, pat the seams closed and you have the perfect size for a slice of prepackaged prosciutto.  It fits like a glove.  Then all you have to do is roll it up and slice the log into two pieces.

Prosciutto Breakfast Rolls 2V


Viola!  An easy roll up for breakfast.  To guild the lily,  brush a mixture of grainy mustard and honey on the rolls before you bake them.  This made a great change from our usual Canadian bacon and English muffin breakfast.  Although homemade is best, an occasional easy option is nice to have on hand.

PROSCIUTTO BREAKFAST ROLLS ( Katie Brown )

Nonstick vegetable oil spray
2 (8-ounce) packages refrigerated crescent-roll dough
8 thin slices prosciutto

2 tablespoons honey
2 tablespoons country-style or grainy Dijon mustard

Preheat oven to 375 degrees F.  Spray heavy large baking sheet with nonstick spray.  Open 1 package of rolls.  Unroll crescent dough and separate into 4 rectangles ( do not separate dough into triangles; press perforations together).  Top each dough rectangle with 1 slice prosciutto.  Starting at 1 long side, roll up dough rectangles jellyroll style.  Cut each crosswise in half.  Transfer to prepared baking sheet, seam side down.  Repeat with second package of crescent rolls. (Can be made 1 day ahead.  Cover and refrigerate.)

Whisk honey and mustard in small bowl to blend.  Brush tops of rolls with honey mixture.  Bake until golden brown, about 12 minutes.  Cool slightly.

Printable recipe


Savory Pumpkin and Cornmeal Quick Bread

December 10th, 2013

Pumpkin and Cornmeal Quick Bread 1


One of the first blogs that I ever followed was Clotilde Dusoulier’s Chocolate and Zucchini.  Back almost ten years ago, the number of food blogs were relatively small and the bloggers with foresight and talent took the blogging world by storm.  Many of them have cookbooks now and belong in a hall of fame of food blogging pioneers.  Clotilde started her blog in 2003.  She was born and raised in Paris and had an early career as a software engineer in California and Paris.  She created her blog Chocolate and Zucchini as a creative outlet.  When it became a hit in 2005, she quit her engineering job and concentrated on her food writing, cookbook publishing, and travel writing for several magazines.

Pumpkin and Cornmeal Quick Bread V


Over the years, she has honed her cooking style and is now known for her vegetarian, sustainable, and seasonal fare.  Her latest cookbook, The French Market Cookbookis a reflection of her current Paris kitchen.  Although she is not a vegetarian, vegetables play a major part of her cuisine and shopping the markets in Paris are part of her daily routine.

Pumpkin and Cornmeal Quick Bread 2


The French Market Cookbook is divided into seasons.  This pumpkin and cornmeal bread is a part of the winter recipes.  I loved it from the first glance at the picture.  It is a rustic loaf, golden orange from the pumpkin and studded with roasted walnuts.  But don’t expect a sweet pumpkin loaf.  This is a savory loaf with herbal overtones from the parsley, a pleasant bitterness from the walnuts and an unadulterated pumpkin taste.  Clotilde says it pairs well with a soup or salad.  I love it toasted with a cup of tea or coffee.  I love all of the recipes in this book.  I have a feeling it will be on someone’s Christmas list.

I did make one major change to the recipe.  Because of time constraints, I used a can of pumpkin puree instead of a whole pumpkin or winter squash.  The below recipe appears as written.

SAVORY PUMPKIN AND CORNMEAL QUICK BREAD (Adapted from The French Market Cookbook by Clotilde Dusoulier)

1 3/4- pound wedge of baking pumpkin or winter squash
2 tablespoons olive oil for cooking, plus more for the pan
3/4 cup fine-grind stone-ground cornmeal, plus more for sprinkling
3/4 cup all-purpose flour, sifted
2 teaspoons baking powder
1 1/2 teaspoons fine sea salt
1/4 teaspoon freshly ground black pepper
1 cup walnut halves, toasted
3 large organic eggs
1 cup chopped fresh chervil or flat-leaf parsley leaves

Peel and seed the pumpkin and then cut it into 1/2-inch chunks.  Set up a steamer.  Steam the pumpkin, tightly covered, until sloft, 8 to 12 minutes depending on the pumpkin.  Put through a ricer or food mill.

Transfer to a fine-mesh sieve and set over a bowl to cool and drain for 1 hour, stirring gently from time to time to encourage the juices to drain; pumpkins tend to release a fair amount of liquid, but if you’ve used another type of squash, there may not be much to drain at all.  This should yield about 2 cups drained pumpkin flesh.

Preheat the oven to 350 degrees F.  Grease a 9 x 5-inch loaf pan with oil, line the bottom with parchment paper, and sprinkle the sides with cornmeal until entirely coated.

In a medium bowl, combine the cornmeal, flour, baking powder, salt, pepper, and walnuts.

In a large bowl, beat together the cooked pumpkin, eggs, 2 tablespoons oil, and the chervil or parsley.  Fold in the flour mixture with a spatula just until no trace of flour remains; avoid over mixing, or the texture of the loaf will be heavier.

Pour into the prepared pan and level out the surface.  Bake until the top is crusty and golden and a knife inserted in the middle comes out clean, 40 to 45 minutes.

Transfer to a rack.  Let cool for 20 minutes before turning out, and serve slightly warm or at room temperature.

Printable recipe


Cranberry-Walnut Pumpkin Bread

September 28th, 2013

The changing of the seasons seem to be speeding up in my life.  I want to hold each precious moment in the palm of my hand and grasp it greedily so as not to let it fly away.  I want to be here for my Granddaughter’s wedding someday.  I want to witness what my precocious Grandson becomes.  All of these thoughts intensify with the arrival of Fall.  There is an urgency to Fall.  Squirrels gather their acorns.  Farmers harvest their crops and gather hay.  Many of us can and freeze the bounty from our gardens.  Fall is the season for soups, pumpkins, stews and freshly baked bread.  Fall food is solace for the soul and gives us a reason to look forward to Spring and bright days ahead.

Few things smell as good as pumpkin and cinnamon baking in the oven.  One of my favorite pies is pumpkin.  But this pumpkin flavored quick bread has also become a favorite.  The recipe appeared in a 2003 issue of Bon Appetit magazine.  The article and recipe came from Ken Haedrich.  I have written about Ken before in this post.  By the way, I am still waiting for a guest post from you Ken.  He has a very informative website called The Pie Academy.

This is a dense and moist quick bread that is studded with cranberries and walnuts.  Eating a slice and sipping a cup of coffee while gazing at the changing colors across the lake is a celebration of all that is good about Fall.  The urgency and cold winds of Winter can wait.

CRANBERRY-WALNUT PUMPKIN BREAD

2 cups all purpose flour
2 teaspoons pumpkin pie spice
1 teaspoon baking powder
3/4 teaspoon salt
1/2 teaspoon baking soda
6 tablespoons (3/4 stick) unsalted butter, room temperature
1 cup sugar
2 large eggs
1 cup canned pure pumpkin
1 teaspoon vanilla extract
2/3 cup buttermilk
1/2 cup dried sweetened cranberries
1/2 cup coarsely chopped walnuts

Preheat oven to 350 degrees F.  Butter a standard loaf pan.  Line bottom and 2 long sides with waxed paper.  Whisk flour, pumpkin pie spice, baking powder, salt, and baking soda in medium bowl to blend.  Using electric mixer, beat butter in large bowl until fluffy.  Gradually add 1 cup sugar, beating until blended.  Beat in eggs one at a time.  Beat in pumpkin, then vanilla.  Beat in dry ingredients alternately with buttermilk in 2 additions each.  Fold in cranberries and nuts.  Transfer batter to pan.

Bake bread until tester inserted into center comes out clean, about 1 hour 10 minutes.  Cool bread in pan on rack 15 minutes.  Cut around bread at short ends to loosen from pan.  Turn bread out onto rack; peel off waxed paper.  Cool bread completely.

Printable recipe

© Penny Klett, Lake Lure Cottage Kitchen. All rights reserved.