Blueberry Galette and a Night With Friends

June 16th, 2014

Blueberry Galette 1


There are so many reasons that blogging is a rewarding experience, but one of the major reasons is because you get to meet so many special people.  Let’s backtrack a few years.

When a started blogging in 2009 there were not many of us doing it.  I put my blog out there and hoped that someone would find my voice interesting.  I clicked on other blogs and found Penny’s blog.  Oh my, same name.  Oh my, born and raised in Michigan like me,   Oh my, lives in North Carolina just 25 miles away from where I live.  It was meant to be.  I had to meet her.  I wrote about our first meeting here.  We have since become great friends.

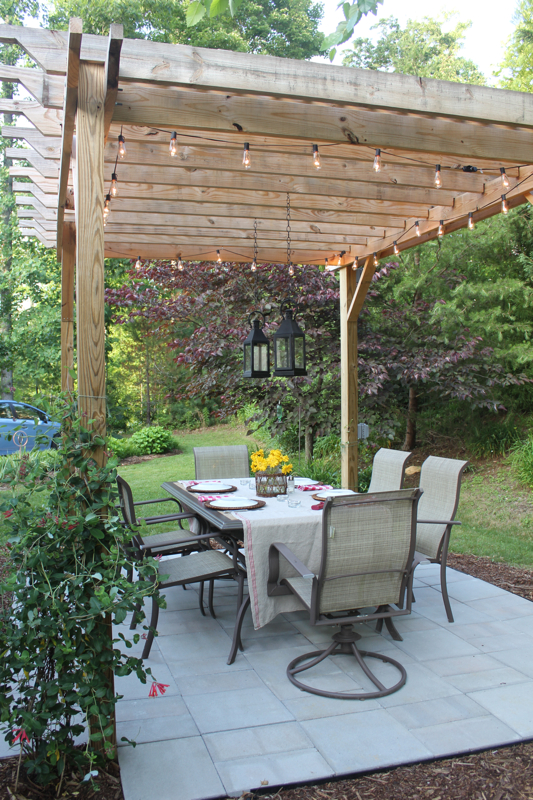
Dinner at Penny's 1

We had dinner at Penny and her husband’s home last Saturday.  It was a lovely evening and we enjoyed dining al fresco under their new pergola.  Penny is a great cook.  Everything was delicious.
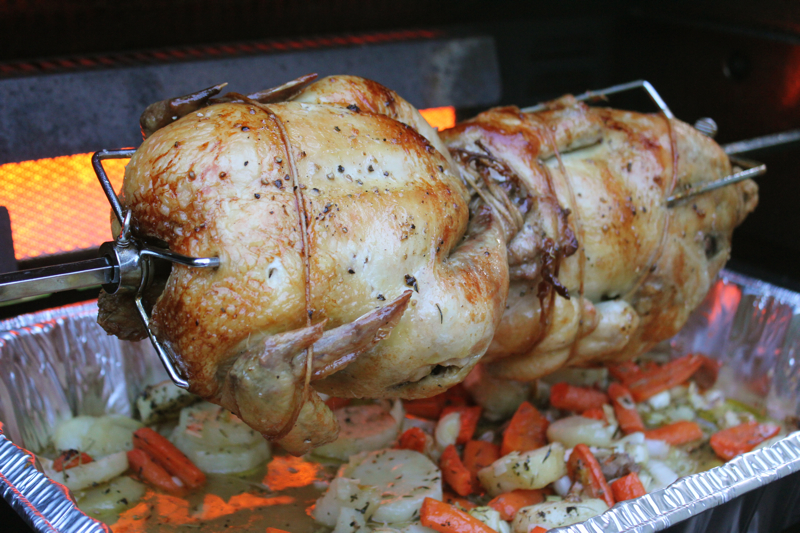
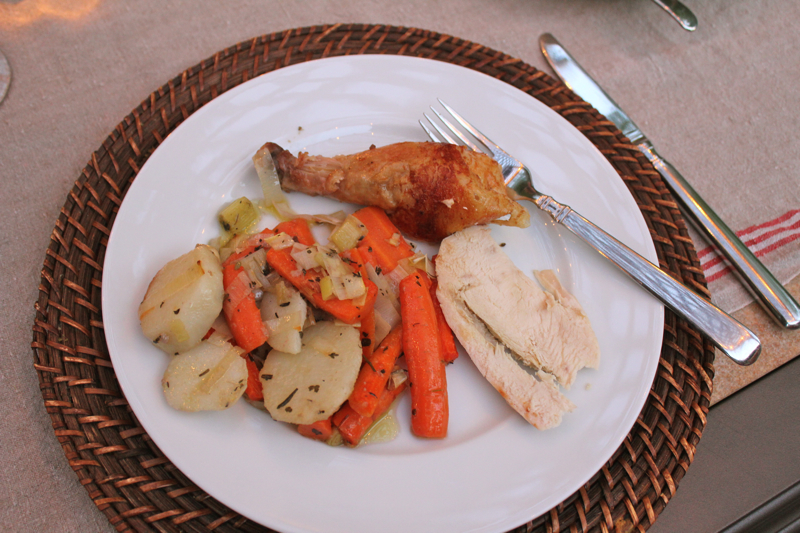
Dinner at Penny's 2Both Penny and I love Paris.  One of the delights of Paris food markets is the rotisserie chickens cooked over pans of vegetables.  The chicken drippings flavor the vegetables as they braise.  That was what she duplicated on their grill.

Dinner at Penny's 3

That is a beautiful plate of food.  It was a perfect meal for a summer evening.
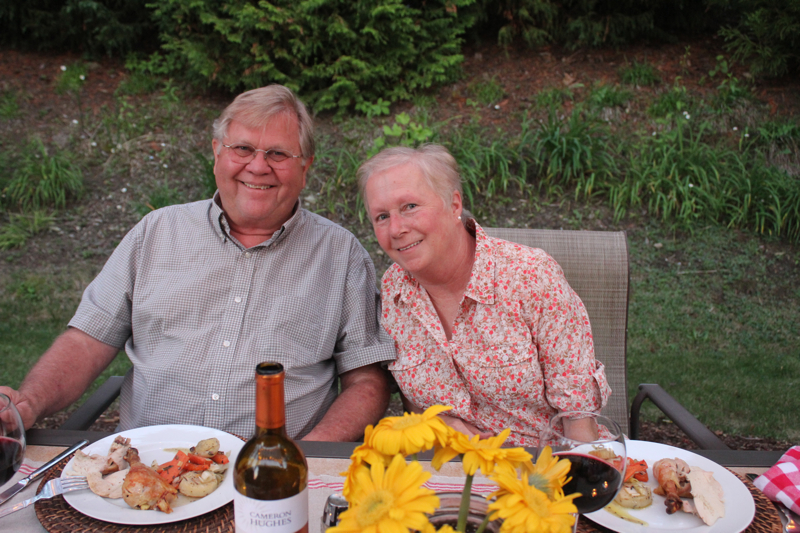
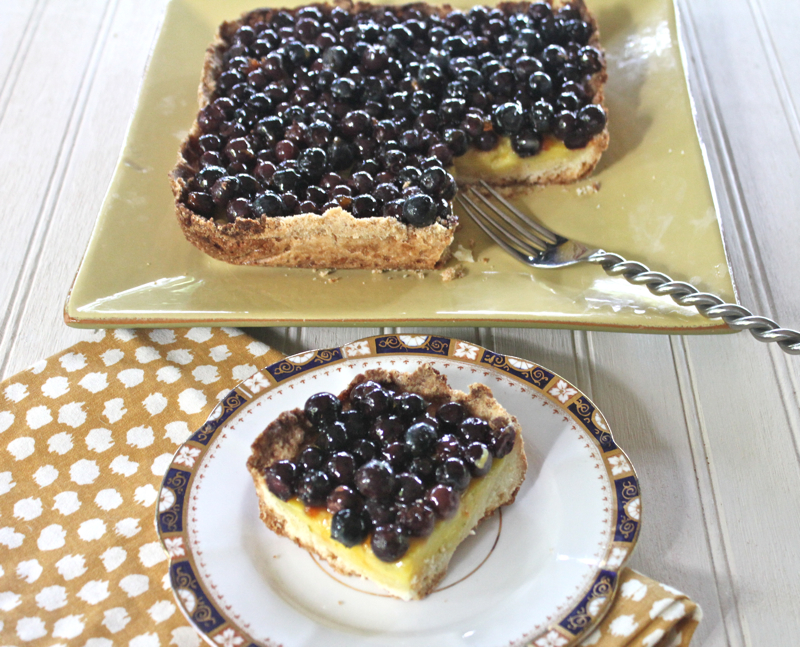
Dinner at Penny's 4Here are our wonderful hosts, Penny and her equally talented husband.  Because we have so much in common, it should have come as no surprise to me that what she served for dessert was the very same dessert that I had made the previous week for my next blog post.  So although I did not get a picture of Penny’s blueberry galette, I had it covered with the one that I made.  We are definitely on the same wave length.
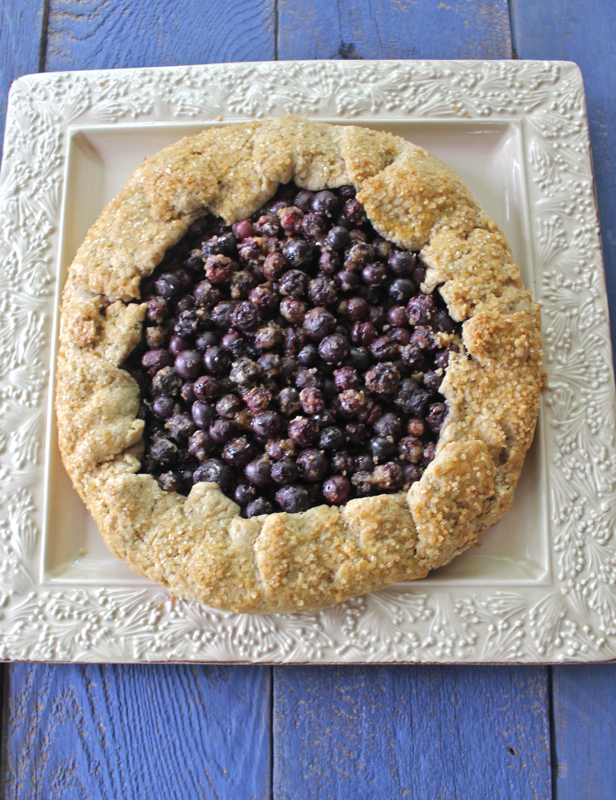
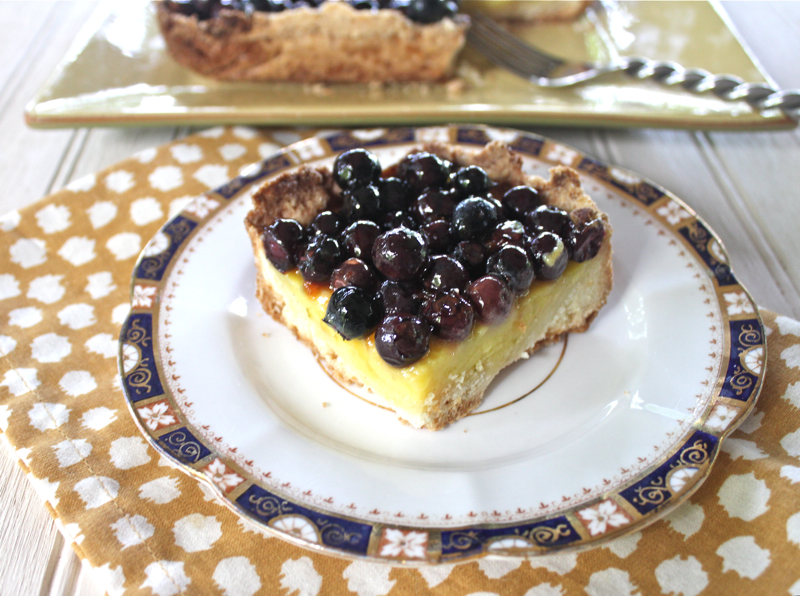
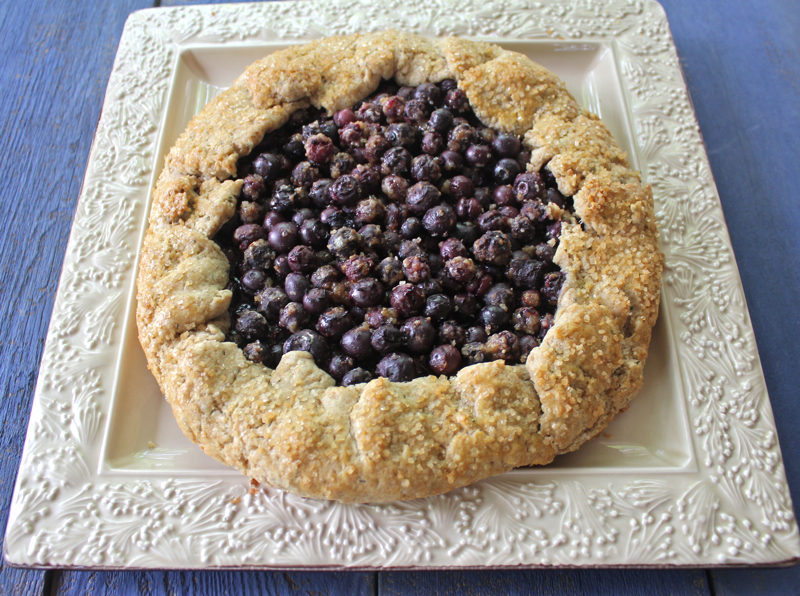
Blueberry Galette 3VI made this blueberry galette as part of a recipe testing exercise at the Food 52 website.  The editors of Food 52 pick worthy recipes that are submitted to their contests for other members to test and rate.  I chose to test this galette because of the uniqueness of the crust.  It incorporates rosemary and whole wheat flour into the pastry.  I LOVED it.  The pastry was easy to handle and the rosemary went so well with the blueberry filling.  The turbinado sugar just added to the rustic simplicity of this galette.  It will be repeated often in my kitchen.  Give it a try.  Thanks Penny and K for a great evening.

BLUEBERRY GALETTE (By Lisina at Food 52)

Rosemary Crust

  • 1 1/4 cup AP flour + extra for dusting
  • 1 1/4 cup whole wheat flour
  • tablespoons fresh rosemary, very finely chopped
  • tablespoons turbinado sugar + extra for dusting
  • teaspoon salt
  • 16 tablespoons cold butter, cut into small cubes
  • 1/4-1/2 cup ice cold water
  • 1egg, for glazing the crust

Blueberry Filling

  • pints fresh blueberries
  • 1/4 cup turbinado sugar
  • 1/2 teaspoon cinnamon
  • lemon (juice of)
  • tablespoons flour
  1. Preheat oven to 400 degrees F.
  2. In a kitchenaid mixer with the paddle attachment or a food processor, mix together the dry ingredients.
  3. Add the cubed butter, and mix or pulse until butter breaks down into pea sized pieces.
  4. With the machine running or pulsing, add the ice water until the dough JUST begins to come together.
  5. Turn the crust mixture out onto some plastic wrap, wrap it and flatten it into a disk shape. Refrigerate for about 10 minutes while you prepare the filling.
  6. Throw all the filling ingredients into a bowl, and mix well so that that the sugar and flour coat all the blueberries well.
  7. Remove the chilled crust from the fridge and unwrap it onto a silpat or piece of parchment paper large enough to cover your baking sheet. Dust it with flour, then roll the dough out until it is between 1/8″ and 1/4″ thick.
  8. Spoon the filling and its juices into the middle of the crust and spread it out leaving a 2″ border of crust. Fold the border of the crust over onto the filling, leaving the nice rustic edges.
  9. Brush the crust with eggwash and sprinkle the crust with sugar. Slide the galette on the silpat or parchment onto a baking sheet.
  10. Bake for about 40 minutes until crust is nice and golden.
Printable Recipe

Lemon-Lime Blueberry Squares

June 1st, 2014

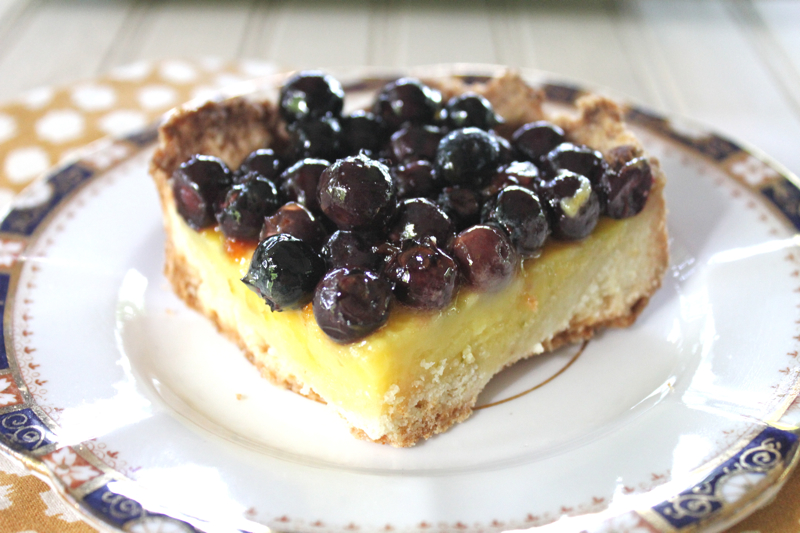
Lemon-Lime Blueberry Squares

When was the last time you actually went on a picnic?  I’m sure many of you still find the time to do it.  But it just occurred to me that it has been years since we have loaded up a picnic basket and headed out for a day in the countryside.  We used to love to take David’s TR 8 convertible for a ride along the Blue Ridge Parkway and stop at overlooks with a view of the mountains.  We would spread a blanket and pull out our picnic fare and just relax for a while.  But now that we live at the lake, it is just as easy to sit on the porch and eat at home.

Lemon-Lime Blueberry Squares 3

After making this dessert with a shortbread crust, a lemony filling and the blueberry topping, it came to mind that it would be perfect picnic fare.  Because it is baked in a foil package it would be easy to transport.  So now I am thinking of going on a picnic.

Lemon-Lime Blueberry Squares 1


This dessert from Gourmet magazine would be the perfect ending to the meal.  It is refreshing and simple.  You can almost pick it up and eat it with your hands except for a few errant blueberries rolling free.  I came up with a picnic menu that I think everyone would enjoy.

SUMMERTIME PICNIC IN THE COUNTRYSIDE

Sweet-Ham and Havarti Sandwiches with Orange Pecan Mustard
Broccoli, Apples and Red Onion Salad
Hawaiian Macaroni Salad
Lemon-Lime Blueberry Squares

The highlighted recipes can be found by clicking on them.  Here is the dessert recipe.

LEMON-LIME BLUEBERRY SQUARES (Gourmet Magazine)

For Crust:
1/2 cup all-purpose flour
3/4 cup yellow cornmeal
6 tablespoons confectioners sugar
1/2 teaspoon salt
1 stick cold unsalted butter, cut into pieces

For filling:
3 large eggs
1/2 cup granulated sugar
1 1/2 tablespoons all-purpose flour
1/2 teaspoon finely grated lemon zest
1/2 teaspoon finely grated lime zest
1 tablespoon fresh lemon juice
1 tablespoon fresh lime juice
2 tablespoons whole milk
2 cups blueberries (10 oz.)
3 tablespoons apricot jam, heated and strained

Preheat oven to 375 degrees F.  Line a buttered 8-inch glass baking dish with 2 (18-by-6-inch) sheets of foil, overlapping them in opposigte directions so that there is overhang on all 4 sides.

Pulse together flour, cornmeal, confectioners sugar, salt and butter in a food processor until mixture resembles coarse meal.  Press onto bottom of baking dish and 1 inch up sides.  Bake in middle of oven until golden brown, about 20 minutes.

Whisk together eggs, sugar, flour, and zests.  Whisk in juices, milk, and a pinch of salt.  Toss blueberries with jam in another bowl.

Whisk egg mixture and immediately pour into hot crust, then bake until just set, about 17 minutes.  Gently spoon berries evenly over top and bake 2 more minutes more.  Transfer baking dish to a rack and cool.

Chill, covered, overnight (8 hours).  Use foil to lift dessert out of dish, then cut into squares.

Printable recipe


Hummingbird Bundt Cake

March 9th, 2014

Hummingbird Cake 3 Best


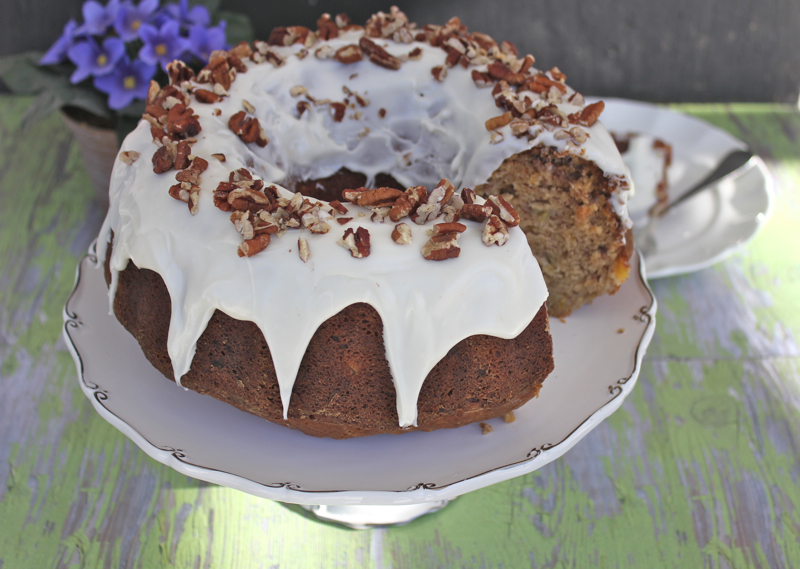
There is a new angle to the Sun these days.  Even though spring is not quite here, I can feel the promise of an end to winter.  We will be returning to Lake Lure at the end of the month.  Normally we would find the dogwood trees and the forsythia getting ready to bloom.  I am not so sure this year.  It has been such a brutally cold winter.  One of the things I look forward to at Lake Lure is my hummingbird feeder outside my kitchen window.  I like to believe that the same hummingbird couple come back every year.  In honor of spring and the return of my sweet hummingbirds, I made this hummingbird bundt cake.

Hummingbird Cake 1V


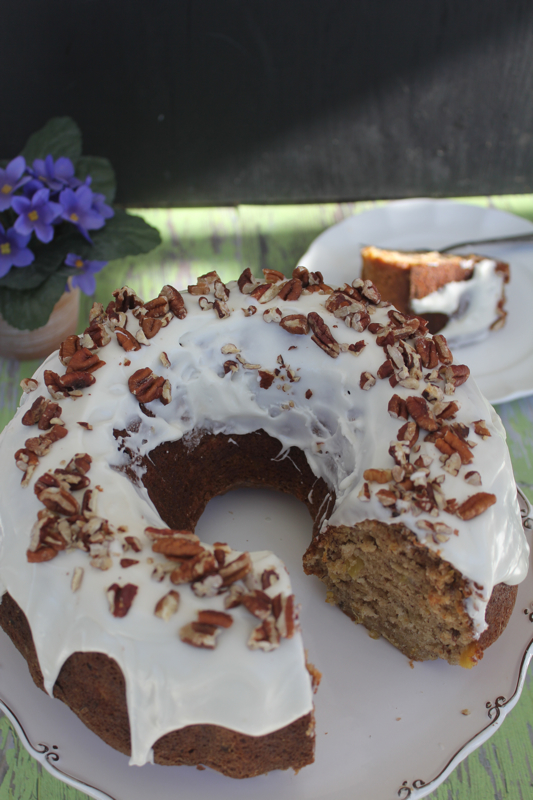
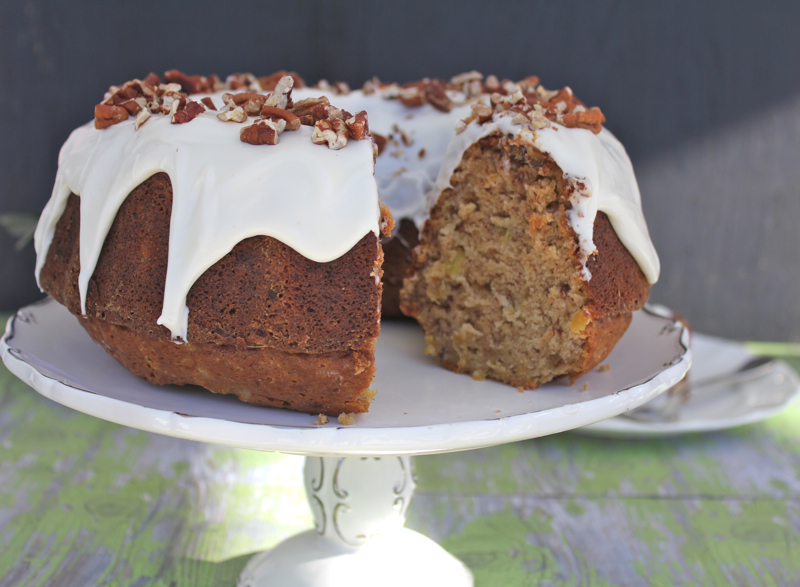
The cake recipe first appeared in Southern Living Magazine in 1978.  It is a banana, pineapple and spice cake with a luscious cream cheese frosting.  It is usually presented as a layer cake, but this is a much easier version.  This recipe for a hummingbird bundt cake was in a recent Southern Living magazine.  I found it in a magazine at my hair dresser’s and got her permission to tear it out.

Hummingbird Cake Third Picture

I love this cake.  Since we have company coming, it was a good excuse to make it.  Now if spring would just get the message that winter is over, we would all be happy.  Bring on the robins, blue jays and hummingbirds.  I am linking this to Tasty Tuesday at the Comforts of Home.

HUMMINGBIRD BUNDT CAKE

1 1/2 cups chopped pecans
3 cups all-purpose flour
2 cups sugar
1 teaspoon baking soda
1 teaspoon cinnamon
1/2 teaspoon salt
3 large eggs, lightly beaten
1 3/4 cups mashed ripe bananas (about 4 large)
1 (8 oz.) can crushed pineapple (do not drain)
3/4 cup canola oil
1 1/2 teaspoon vanilla extract

Glaze:
4 oz. cream cheese, cubed and softened
2 cups sifted powdered sugar
1 teaspoon vanilla extract
1 to 2 tablespoon milk ( You may need more.  My glaze was too stiff )

Preheat oven to 350 degrees F.  Bake pecans in a single layer in a shallow pan 8 to 10 minutes or until toasted and fragrant, stirring halfway through.

Stir together flour and next 4 ingredients in a large bowl; stir in eggs and next 4 ingredients, stirring just until dry ingredients are moistened.  Sprinkle 1 cup toasted pecans into a greased and floured 14-cup Bundt pan.  Spoon batter over pecans.

Bake for 1 hour to 1 hour and 10 minutes or until a long wooden pick inserted in the center comes out clean.  Cool cake in pan on a wire rack 15 minutes; remove from pan to wire rack, and cool completely (about 2 hours).

Process cream cheese, powdered sugar, vanilla, and 1 Tbsp. milk in a food processor until well blended.  Add remaining 1 Tbsp. milk, 1 tsp. at a time, processing until smooth.  Immediately pour glaze over cooled cake, and sprinkle with remaining 1/2 cup toasted pecans.

Printable recipe


Chocolate and Pecan Shortbread Bars

February 28th, 2014

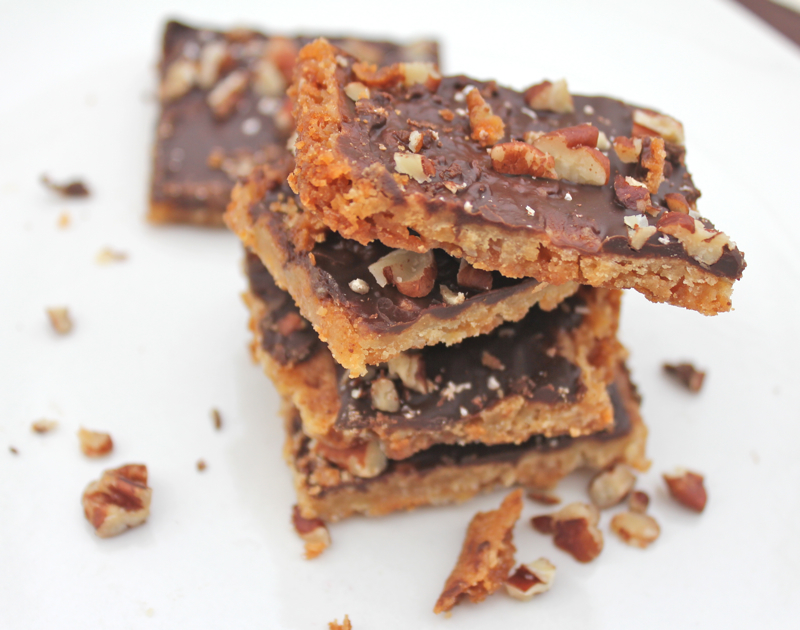
Chocolate Shortbread Bars 3


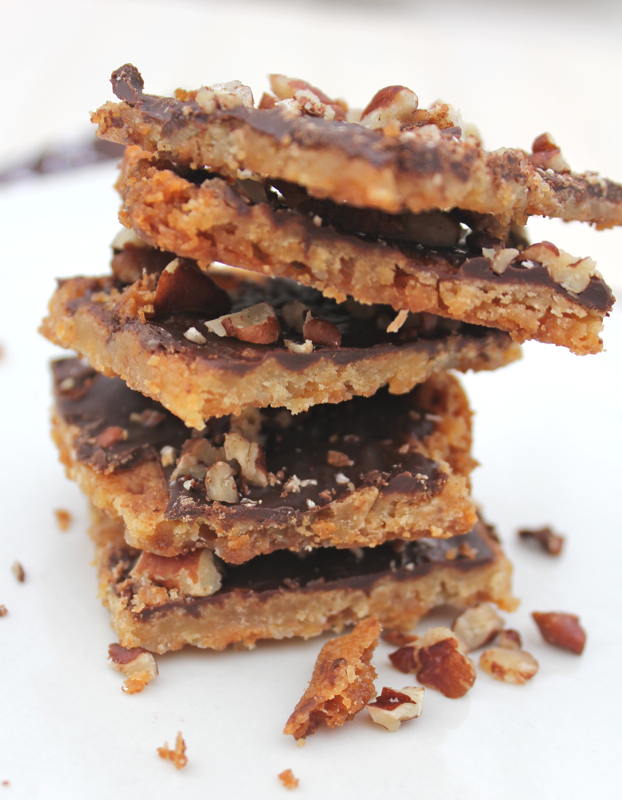
These bars are one of my favorite sweet treats.  I have blogged about them before, but since I have been posting for so many years, I figured that the first blog post is buried deep in the blogging archives.  The original recipe was called Scandinavian Tea Cakes.  I am sure there is a history there, but to me they are basically chocolate and pecan shortbread bars.  David would be happy if I made these every week.  He has a sweet tooth that requires one piece of chocolate every night.  And my, oh my, do these deliver.  Not just chocolate, but crispy, buttery shortbread too.

Chocolate Shortbread Bars 2 V


I started a New Year’s tradition this year.  At the stroke of midnight, after the hugs and kisses, we sipped our glasses of champagne while eating these chocolate delights.  Everyone agreed that it was the best way to start the New Year.

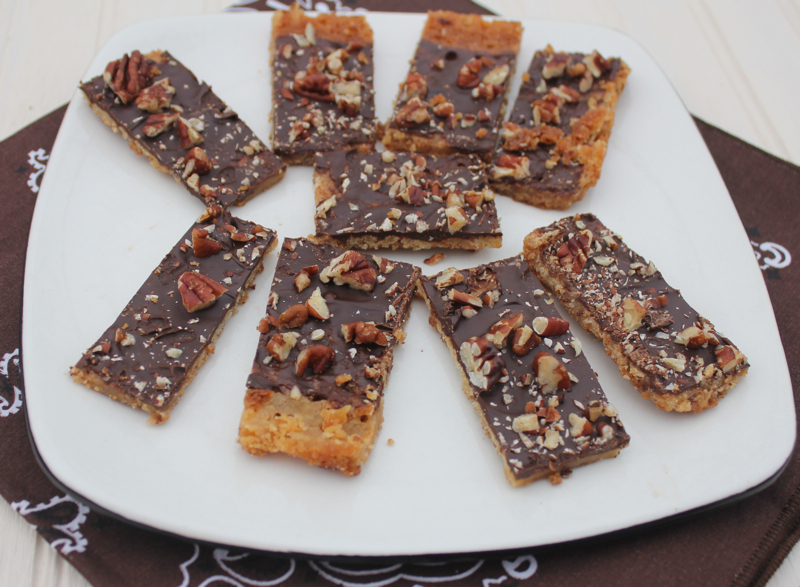
Chocolate Shortbread Bars 1


The recipe is very simple.  The shortbread crust has just a few ingredients.  Please use the size baking sheet specified.  When you spread the butter and brown sugar mixture on the pan, it is not necessary to get it all the way to the edges.  It spreads as it bakes.  When it is golden brown, take it out of the oven and sprinkle it with good chocolate chips.  The mini chips work well.  Place it back in the oven for 30 seconds to 1 minute just to warm the chocolate.  Then spread it around with a spatula.  Sprinkle it with chopped pecans and place it in the refrigerator to set before slicing the bars.

CHOCOLATE AND PECAN SHORTBREAD BARS

1 cup butter, softened
1 cup brown sugar
1 egg yolk
1 cup unbleached flour
6 (1.05 oz.) milk chocolate bars, grated ( I used 7 oz. semi-sweet mini chocolate chips)
2/3 cup chopped pecans

Preheat oven to 350 degrees

In a medium mixing bowl, cream butter, sugar, and egg yolk until very smooth. Gradually add flour until well blended. Spread dough on lightly greased 15 1/2″x10 1/2″x 1″ sheet pan. Bake for 15 to 20 minutes until medium brown. Sprinkle chocolate shavings or chips evenly over cake. Put in oven to melt and when warmed remove from oven and spread over top. Sprinkle with nuts. Cut into squares when cool.

Printable recipe

Walnut Gateau Breton

January 17th, 2014

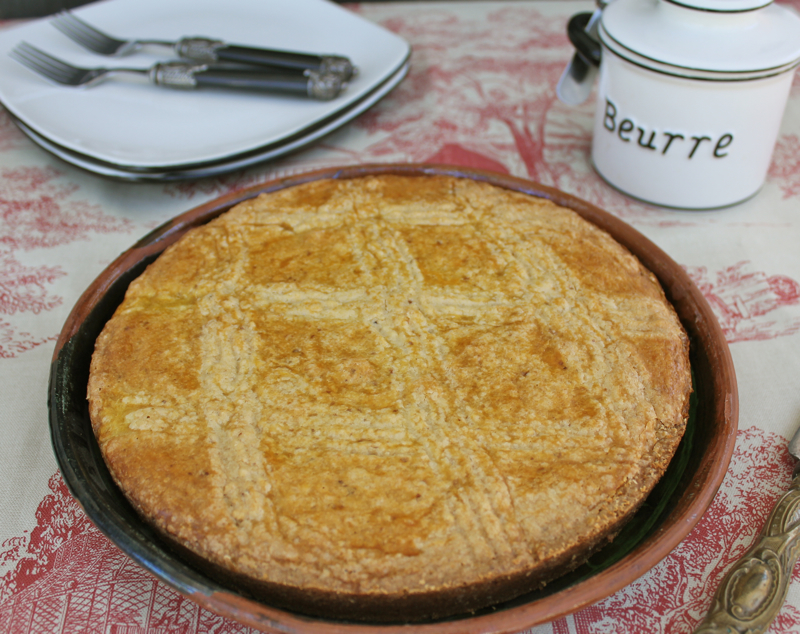
Walnut Gateau Breton 3

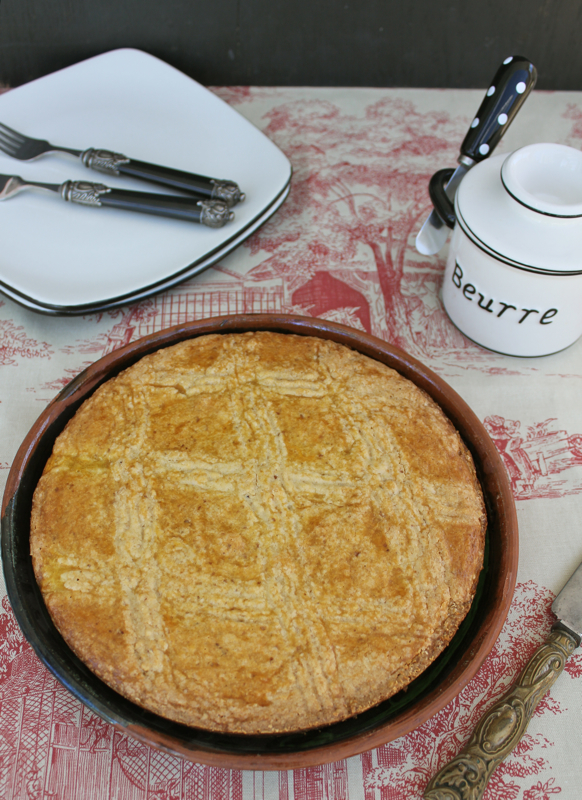
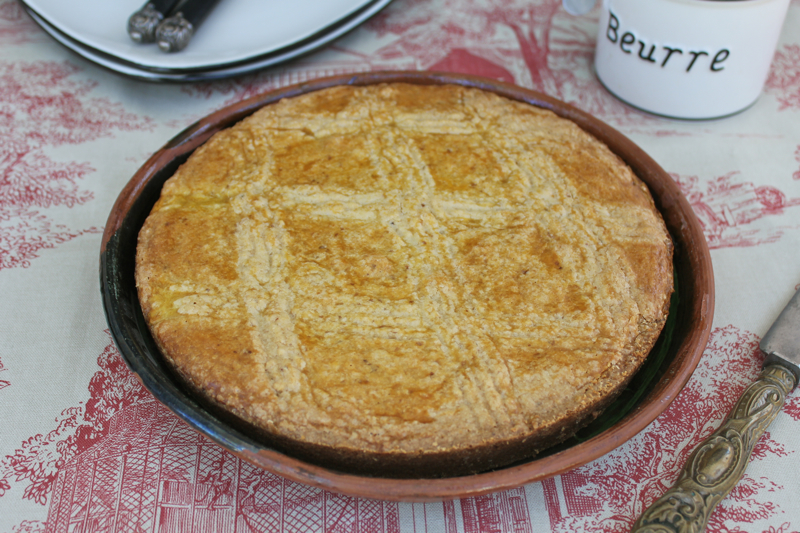
I am in love with this cake.  A Gateau Breton is a butter cake from the Brittany region of France.  It is dense, rich and very buttery.  This variation of the cake includes lightly toasted walnuts, ground and incorporated into the batter.  Magnifique!

Walnut Gateau Breton 4

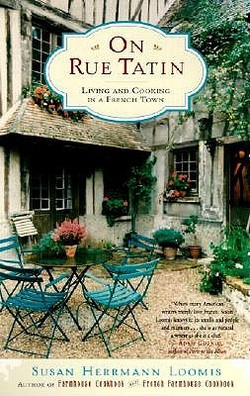
The recipe was in the book On Rue Tatin; Living and Cooking in a French Town by Susan Herrmann Loomis.  This book has been around for a long time.  As a matter of fact I read it years ago.  But on a recent trip to the library, I picked it up again.  Because of our two trips to France, and the time that we spent in Normandy I looked at it with a fresh eye.  Susan’s historic home is in the Normandy village of Louviers.  She currently offers cooking classes in her charming converted convent home on Rue Tatin.  She also has a website.

Walnut Gateau Breton 5

This walnut gateau breton is like no other cake that I have eaten.  It is very similar to shortbread.  The amount of butter in it is astounding.  It is not a light cake.  It is very dense and, did I mention buttery?  It is perfect with red wine or with coffee or espresso.  It is traditionally marked on the top with a criss-cross of fork marks.  The ingredients are few and simple.  No need to get out your mixer.  But I do recommend that you use a good quality butter.

On Rue Tatin

I highly recommend this book.  It is the tale of buying and restoring an historic home and learning to live in a small village while cooking in a picturesque kitchen.  There are recipes at the end of each chapter.  The last recipe featured is, of course, a Tarte Tatin.  The Gateau Breton was made to please and influence the local priest.  You can read the book to see if it worked.  Check out “My Favorite Reads” from Amazon on my sidebar if you are interested in ordering On Rue Tatin. 

WALNUT GATEAU BRETON

1/2 cup walnuts, lightly toasted
1 1/4 cups sugar, divided
7 large egg yolks
16 tablespoons salted butter, melted and cooled slightly
2 cups unbleached, all-purpose flour

Preheat the oven to 300 degrees F.  Butter and lightly flour a 9-inch cake pan.

Place the walnuts and 2 tablespoons of the sugar in the bowl of a food processor and grind so that most of the walnuts are finely ground but not anywhere near a paste.

In a large bowl, whisk together 6 of the egg yolks and the remaining sugar until the mixture is blended, just a few minutes; there is no need to use an electric mixer here.  It will be thick and yellow but shouldn’t form a ribbon.  Slowly whisk in the walnuts and sugar, then the butter.  Sift the flour over the mixture and whisk it in just until the mixture is homogeneous.  Don’t overmix the batter or the cake will be tough.

Whisk together the remaining egg yolk and 2 teaspoons water to make an egg glaze.

Turn the batter, which will be quite stiff, into the prepared pan and smooth it out.  Lightly but thoroughly paint it with the egg glaze.  Using the back of the tines of a fork, deeply mark a crisscross pattern in the top of the cake, going three times across it in one direction, then three in another. (The marks in the cake will fade, leaving just their trace on the top of the cake.)

Bake in the center of the oven until the cake is deep golden on the top and springs back slowly but surely when it is touched, about 1 hour and 15 minutes.  Using a knife or cake tester isn’t recommended as it always comes out looking slightly damp because of the amount of butter in the recipe.

Remove from the oven, transfer the cake to a wire tack, and let cool for about 10 minutes before turning out of the cake pan.  Let it cool thoroughly before serving.

Printable recipe


© Penny Klett, Lake Lure Cottage Kitchen. All rights reserved.