Labor Day on the Lake
It was the best of times. There is nothing like spending a long weekend with the family enjoying the end of summer on the lake. We had cookouts, a birthday to celebrate, a wine tasting and some firsts. Unfortunately I took very few pictures of the food but will share some of the images from the weekend.
Granddaughter Rachel has been taking swimming lessons and this was the first year that she jumped into the water from the dock.
It was Grandson Cameron’s first visit to Lake Lure.
Uncle Jeff got a chance to wakeboard.
We had a blind wine tasting of Pinot Noir wines from California. The unanimous winner was a Hendry Vineyard Napa Valley Pinot Noir 2008. Thank you Dave A. for always bringing a case of Hendry wines to the holiday get together.
The kids had their own blind fruit juice tasting. The winner was Simply Lemonade.
David smoked two pork butts for our pulled pork dinner. It was better than any barbecue restaurant in North Carolina. He made a ketchup based sauce and a vinegar based sauce.
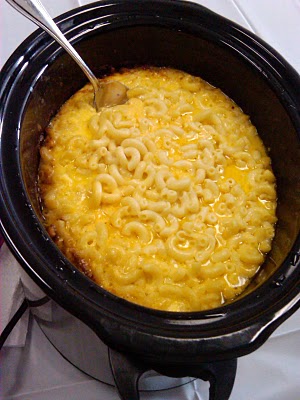
My friend Lyla suggested I try Trisha Yearwood’s recipe for Crockpot Macaroni and Cheese. In the interest of keeping it real here, I have to tell you that this is not my picture. I did not remember to take a picture. The picture came from this site. The adults absolutely loved the mac and cheese and it was easy to put together. The kids liked it, but did not love it. It has something to do with that little box of powdered cheese, if you know what I mean.
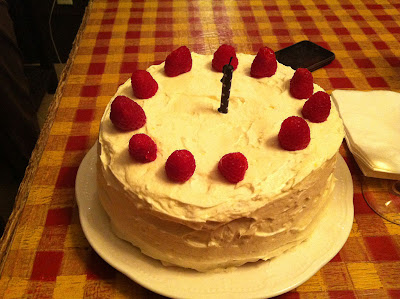
We also celebrated our DIL Kristen’s birthday. I made a Lemon Layer Cake with Raspberry Curd. I made the cake layers and the raspberry curd ahead of time and frosted the cake on the day that we served it. The cake layers are split in half and the raspberry curd is spread between the layers.
The raspberry curd filling was delicious. The recipe came from a book called Luscious Berry Desserts by Lori Longbotham. Here it is.
LEMON LAYER CAKE WITH RASPBERRY CURD
Cake:
2 1/2 cups cake flour
2 3/4 teaspoons baking powder
1/4 teaspoon salt
1 3/4 cups sugar
2 tablespoons lemon zest
1 1/2 sticks unsalted butter
1 cup whole milk
5 large egg whites, room temperature
1/4 teaspoon cream of tartar
Raspberry Curd:
1 stick unsalted butter
12 ounce package frozen raspberries, thawed
5 large egg yolks
3/4 cup sugar
pinch salt
2 teaspoons lemon juice
Frosting:
2 sticks unsalted butter
2 tablespoons lemon zest
3 1/2 cups sifted confectioners sugar
3 tablespoons lemon juice
Curd Directions:
Melt butter over medium heat.
Add raspberries, yolks, sugar, and salt. Mash raspberries. Cook 10 minutes, stirring frequently.
Pour through a strainer, pressing to extract as much as possible.
Cool to room temperature then stir in lemon juice. Chill.
Cake Directions:
Heat oven to 350. Prepare two 8×2 round cake pans. Whisk together flour, baking powder, and salt.
Pulse 1/4 cup of the sugar with lemon zest in food processor until finely ground.
Beat butter and zest mixture with electric mixer on medium-high speed until fluffy. Add remaining sugar and beat until smooth.
Add 1/4 cup milk and beat until just blended. Reduce speed to low and alternately add flour and milk in 3 batches. Beat only until blended, no longer.
Beat egg whites in a large bowl until foamy. Add cream of tartar and beat to stiff peaks.
Fold the egg whites into the batter carefully.
Divide batter between the two pans and bake about 35 minutes.
Cool 10 minutes in pan then remove and cool completely.
Frosting Directions:
Beat butter and zest until fluffy.
Gradually add sugar and beat until light and fluffy.
Add lemon juice and beat for one minute.
Assembly:
Cut each cake into two layers.
Spread curd in between layers, leaving about a 1/2 inch border.
Spread frosting on sides and top
Crock Pot Teriyaki Chicken
I have been running fast this week in preparation for the annual family Labor Day Weekend at the lake. There were bed linens to wash, beds to be made, the refrigerator cleaned, floors moped and an extra table added to the porch so that we can seat fourteen. I have been doing prep work in the kitchen; things that can be done ahead of time like making glazed pecans for salads, blueberry muffins baked and in the freezer, lemon cake layers made and a raspberry curd whipped up for a special birthday cake. There has been little time to think about what’s for dinner.
I have two special friends in Michigan who have come to the rescue with ideas on crowd friendly recipes. My childhood friend Lyla has emailed me several recipes which I will blog about soon. Also my SIL Barb has sent along some recipes. One of the recipes she emailed me was from her friend Linda who is a great cook and is thinking about starting a blog. It is a recipe for chicken teriyaki that is done in a slow cooker. That is just what I needed yesterday when there was no time to cook.
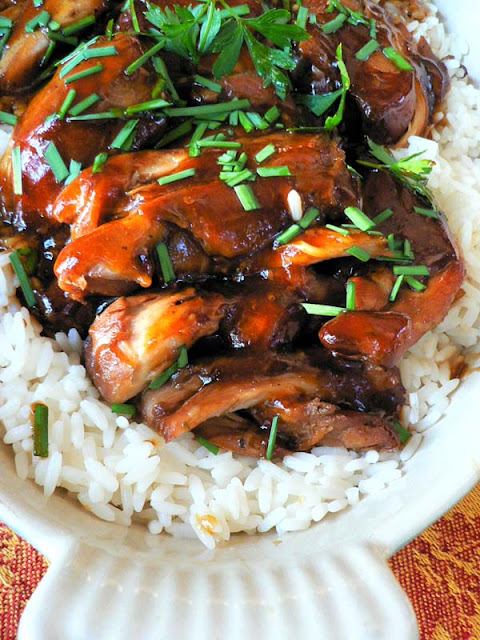
The smell of the soy infused chicken cooking away while I was making beds and vacuuming was like heaven to my senses. I love it when dinner can cook itself and I need to remember to use my crock pot more often. The results were outstanding. The chicken thighs were meltingly tender and the sauce was delicious over plain white rice. If all of Linda’s recipes are this good, I will become an avid follower of her food blog. Thanks Barb for passing the recipe along.
Now here’s a dirty little confession. I couldn’t sleep last night and got up at 4:00 AM and all I could think about was that chicken. I quietly got out of bed and went to the kitchen, scooped out some of the leftovers, microwaved them and enjoyed a bowl while reading my current novel. It was so good. Think I’ll skip breakfast this morning.
CROCK POT TERIYAKI CHICKEN
12 boneless skinless chicken thighs (about 3 pounds)
3/4 cup sugar
3/4 cup low-sodium soy sauce
6 tablespoons cider vinegar
3/4 teaspoon ground ginger
3/4 teaspoon minced garlic
1/4 teaspoon pepper
4 1/2 teaspoons cornstarch
4 1/2 teaspoons cold water
Hot cooked long grain rice
Place chicken in a 4 qt. slow cooker. In a large bowl, combine the sugar, soy sauce, cider vinegar, ginger, garlic and pepper. Pour over chicken. Cover and cook on low for 4 to 5 hours or until chicken is tender. Remove chicken to a serving platter; keep warm. Skim fat from cooking liquid. Place liquid in a saucepan and bring to a boil. Combine cornstarch and water until smooth. Gradually stir into liquid and stir until sauce is thickend. Serve with chicken and rice.
Note: I halved the recipe and it still worked fine in my crock pot. It might not need the full 4 hours time.
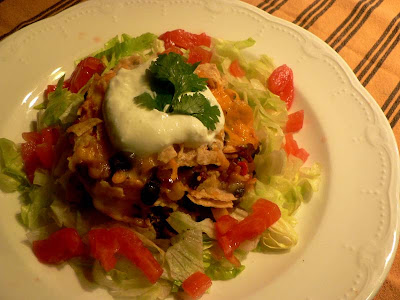
Mexican Casserole
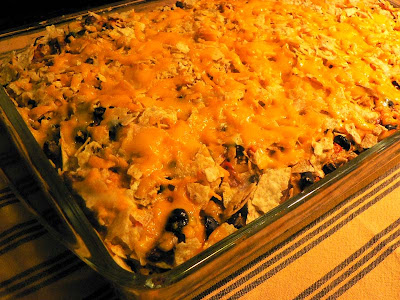
It was a good idea. I was looking for an easy to assemble casserole that was tasty and would feed a crowd. This may be that very thing, but you see, sometimes I can’t leave a recipe alone. The recipe was on Epicurious. It was called My Favorite Mexican Casserole. It won a blue ribbon from Parade Magazine. It is made from shredded cooked chicken ( a chance to use a rotisserie chicken ), canned kidney beans, garbanzo beans and corn. It uses crushed tortilla chips instead of corn tortillas.
I made some good changes to the recipe. I used frozen corn instead of canned corn. I used black beans instead of garbanzo beans. For the final layer I mixed crushed tortilla chips with the last of the cheeses. But my big mistake was using two layers of corn tortillas where there was no call for them. It made the casserole too dry. The only tortilla chips called for were a layer on the bottom.
I will give you the recipe as written and if anyone tries it without messing with it, I would like to know about it. Not everything we make can be a success. Now I have to figure out what to do with this huge casserole when there are only the two of us to eat it.
MY FAVORITE MEXICAN CASSEROLE
1 1/2 cups crushed tortilla chips
1 pound shredded cooked chicken meat (from a small roasted chicken)
1 can (15 1/2 ounces) garbanzo beans, drained
1 can (15 1/2 ounces) kidney beans, drained
1 can (15 1/4 ounces) corn kernels, drained
1 can (8 ounces) tomato sauce (I used enchilada sauce)
1 cup prepared salsa
1 cup chopped red onion
1 green bell pepper, cut into 1/4-inch dice
1/4 cup chopped fresh cilantro leaves
1 tablespoon minced garlic
Salt and freshly ground black pepper, to taste
6 ounces grated Monterey Jack cheese
6 ounces grated sharp Cheddar cheese
Garnishes:
2 cups diced (1/4-inch) ripe tomatoes
1 cup sour cream
1/2 cup chopped fresh cilantro leaves
1. Preheat oven to 350°F. Grease a 13×9-inch baking dish, then scatter the crushed tortilla chips evenly on the bottom.
2. Combine the chicken, beans, corn, tomato sauce, salsa, onion, bell pepper, cilantro, garlic, salt and pepper in a bowl. Place half the mixture evenly in the baking dish. Combine the cheeses, then sprinkle half over the mixture.
3. Cover with the remaining half of the chicken-and-bean mixture and sprinkle the remaining cheese over the top.
4. Bake for 30 minutes. Let stand for 5 minutes before serving. Serve the garnishes in bowls, so guests can top their portions with diced tomatoes, sour cream and a sprinkle of cilantro.
Orzo Pasta with Parmesan and Basil
One of my favorite side dishes has always been a rice pilaf. I saute rice in a saucepan with melted butter, then add chicken broth and cook on low heat until done. It is seasoned with tarragon if I am serving it with chicken.
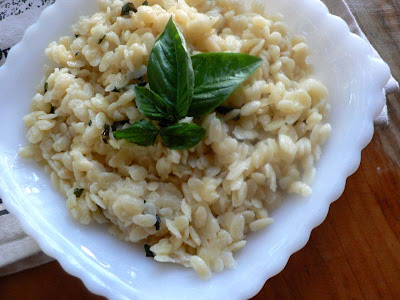
I was on the pasta aisle of the supermarket recently and saw the bags of orzo; small rice shaped nuggets. Hmmmm – why not cook it like a pilaf? That is just what I did and I loved it. My basil plants are huge this time of year so I seasoned it with a big handful of fresh basil and slathered it with grated Parmesan.
This made a perfect side dish to the stuffed 8 ball zucchini squash that I posted about on Sunday. I have also served it with grilled chicken. I think it would also be wonderful with a veal Parmesan. It is going on my list of everyday meal rotations because it is so easy and I can always have the ingredients in the pantry. It is a fun way to eat pasta without having to twirl it around a fork.
ORZO PASTA WITH PARMESAN AND BASIL
2 Tablespoons of butter
1 cup orzo pasta
1 14 ounce can chicken broth
1/2 cup chopped basil
1/2 cup freshly grated Parmesan cheese
Salt and pepper to taste
Melt butter in a saucepan over medium heat. Add orzo and stir in butter. Cook until orzo is evenly coated with butter and is beginning to brown. Add chicken broth, bring to a boil, reduce heat to low and cover saucepan. Cook on low heat until orzo is cooked through and chicken broth is absorbed, about 15 to 20 minutes. Remove lid and add chopped basil, grated Parmesan and salt and pepper to taste. Serves 4.
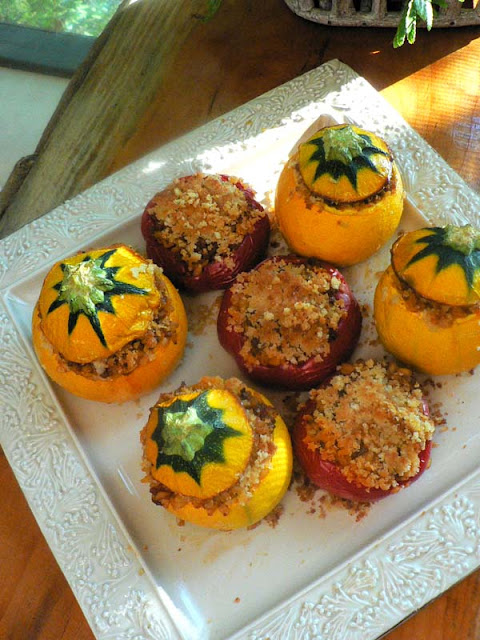
If you have leftovers, you can use them in those cute 8 ball zucchini squash. I cooked 1/2 pound of ground beef until done, drained the fat, added chopped tomatoes, Italian seasoning and cooked until the tomatoes released their juices. Then I added the orzo, stirred the mixture together and used it to stuff the zucchini and the small red peppers that I got from the market. I topped it with buttered breadcrumbs and baked it for about an hour. The possiblities are limitless. Because the 8 ball squash tops are so cute I baked them along side the squash and peppers. I just oiled the underside so that they would not stick to the pan.


