Shrimp with Lemon Pepper Pasta

May 2nd, 2010

There is a wonderful tailgate market in the historic town of Flat Rock not far from our home. Local farmers, herbalists, flower vendors, wild mushroom collectors and meat and seafood purveyors convene in a picturesque shady dell behind the local bakery and antique shop to sell their specialities. The market is held every Thursday from 3:00 to 6:00. This early in the season it is prudent to get there by 3:00.


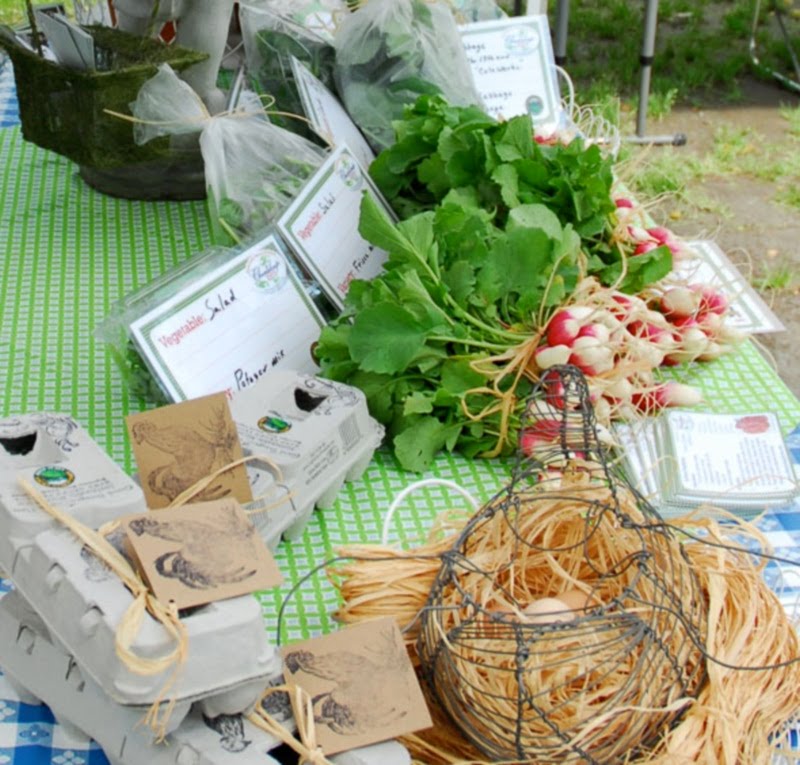
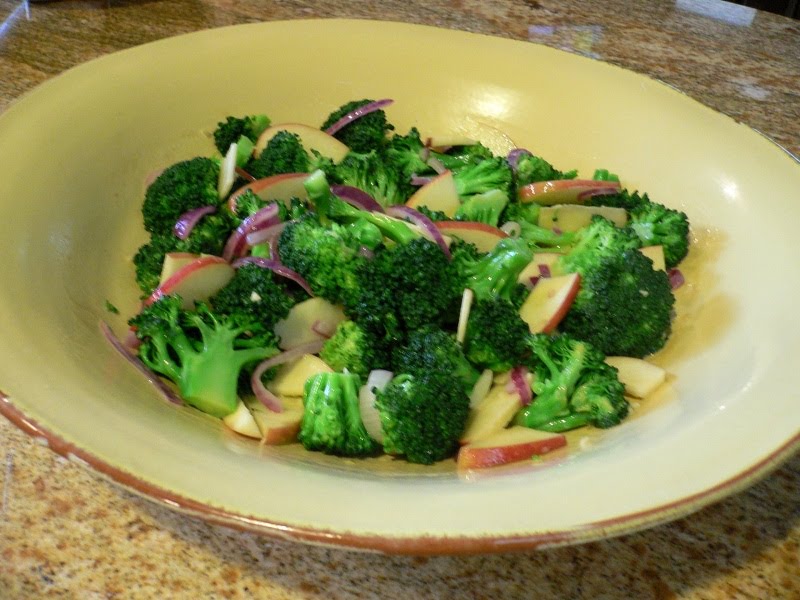
All of the Spring vegetables go quickly. Unfortunately we did not arrive until after 4:00 and there was very little left. But what we did find were beautiful shrimp caught off the coast of Jacksonville, Florida. The seafood vendor said that he normally gets his fresh seafood from the Carolina coast, but that it was too early for that. The shrimp were beautiful and very large. We decided to do a simple pasta dish with them. I love lemon with my seafood pasta dishes. It lightens and brightens the heaviness of the pasta. And since I used whole wheat spaghetti in this recipe it was necessary. The recipe does not call for mushrooms, but I already had some sauteed mushrooms from another meal, so feel free to add them if you like. We loved this so much that it will be repeated often.
SHRIMP WITH LEMON PEPPER PASTA
1 lb of large shrimp
1/4 cup butter
4 to 6 cloves of garlic
4 green onions, minced
8 ounces of spaghetti or linguine
1/2 cup chicken broth
1/4 cup white wine
zest of one lemon
juice of one lemon
salt to taste
2 teaspoons freshly ground black pepper
1 tablespoon roughly chopped fresh basil
3 tablespoons chopped fresh parsley
In a large skillet melt butter and saute shrimp, garlic and green onions just until shrimp turn pink. In a large saucepan combine chicken broth, wine, lemon juice and lemon zezt and cook to reduce slightly. Add liquid to shrimp skillet. Keep warm while you cook the pasta according to package directions. Save a little pasta water just in case you need it. Sprinkle basil and parsley on shrimp. Drain the pasta and add it to the skillet. Toss to combine and add a little pasta water if it is too dry. Plate and serve.

Jam Thumbprint Cookies and Garden Update

April 30th, 2010

I am late with my Barefoot Blogger recipe this month but want to thank Cassandra of Foodie with Little Thyme for choosing this cookie recipe. We have had two cookie recipes this month and I am sure all of those with a sweet tooth are very pleased. But frankly, I hope that we have at least one savory recipe next month so that my scales will stop screaming at me. These cookies were very good and easy to make. For some reason my cookie dough was a little dry, so that the cookies crumbled when I rolled and pressed them. But that did not affect the buttery flavor. The coconut added a nice touch and you can get very creative with the jam that you use. All I had on hand was blueberry and raspberry. If you have apricot jam or orange marmalade it will give you a nice contrast with the raspberry jam if you do half of the cookies with each jam.


JAM THUMBPRINT COOKIES ( The Barefoot Contessa )
3/4 pound (3 sticks) unsalted butter, at room temperature
1 cup sugar
1 teaspoon pure vanilla extract
3 1/2 cups all-purpose flour
1/4 teaspoon kosher salt
1 egg beaten with 1 tablespoon water, for egg wash
7 ounces sweetened flaked coconut
Raspberry and/or apricot jam
Preheat the oven to 350 degrees.
In an electric mixer fitted with the paddle attachment, cream together the butter and sugar until they are just combined and then add the vanilla. Separately, sift together the flour and salt. With the mixer on low speed, add the flour mixture to the creamed butter and sugar. Mix until the dough starts to come together. Dump on a floured board and roll together into a flat disc. Wrap in plastic wrap and chill for 30 minutes.
Roll the dough into 1 1/4 inch balls. Dip each ball into the egg wash and then roll it in coconut. Place the balls on an ungreased cookie sheet and press a light indentation into the top of each with your finger. Drop 1/4 teaspoon of jam into each indentation. Bake for 20 to 25 minutes, until the coconut is a golden brown. Cool and serve.
Here is an update on the community garden. The below picture shows the view we have of Hickory Nut Falls and the mesh enclosure that we put around our plot. We enclosed two plots because we are sharing time and materials with our friend Don.
Everything is in the ground now. The marked rows contain sugar snap peas, rainbow chard, shallots and green onions. We have two hills of squash and tomato plants, pepper plants and cucumbers.


Hopefully we will be harvesting by July. The Friends of Hickory Nut Gorge Community Gardens have asked all of the participants to donate 10% of the harvest to charity.

Chicken Cordon Bleu

April 28th, 2010

This chicken dish began with a mistake. Our only local supermarket is about 15 minutes away around the lake. Sometimes we try to combine trips. David needed to go to the hardware store so I reluctantly turned over my lenghthy grocery list to him. I wanted to try the recipe for Chicken Cordon Bleu that was in the latest issue of Cook’s Country. It called for boneless chicken breasts, black forest ham and swiss cheese. It seemed simple at the time, but David came home with thin boneless chicken breasts. Of course I was very understanding. Afterall, I am always even-tempered and perfect. . . . enough said. To his credit, the store was actually out of boneless chicken breasts when he was there and he figured I could make do with the thin ones. But what he didn’t know was that the whole premise of this recipe was to cut a pocket into the chicken breasts and insert two cylinders of cheese stuffed ham. There was no way that was going to happen. So I improvised and I think the results were great.


I placed about 1/2 cup of grated swiss cheese on a stack of two ham slices, rolled it up and placed the roll in the center of one of the chicken breasts. I pounded a second chicken breast in wax paper to make it slightly larger than the first and placed it over the top. I pressed gently on the meat to make it stick together. When all of the breasts were stuffed they went in the refrigerator for a half an hour. I then proceeded with the breading and the baking. The seal worked very well, with just a little of the cheese oozing out. I loved the breading which included bread crumbs and Ritz crackers. This is one of those dishes you can prepare ahead and bake when you are ready. Great for company. You can do it my way or follow this recipe.
CHICKEN CORDON BLEU ( Cook’s Country )
To help prevent the filling from leaking, use large (8 ounce) chicken breasts and thoroughtly chill the stuffed breasts before breading.
25 Ritz crackers (about 3/4 sleeve)
4 slices hearty white sandwich bread, torn into pieces
6 tablespoons unsalted butter, melted
8 thin slices deli ham (Black forest ham recommended)
2 cups shredded Swiss cheese
4 boneless, skinless chicken breasts (about 2 pounds total)
3 large eggs
2 tablespoons Dijon mustard
1 cup all purpose flour
1. Make Crumbs. Adjust oven racks to lowest and middle positions and heat oven to 450 degrees. Pulse crackers and bread in food processor until coarsely ground. Drizzle in butter; pulse to incorporate. Bake crumbs on rimmed baking sheet on middle rack, stirring occasionally, until light brown, 3 to 5 minutes. Transfer to shallow dish. Leave oven on.
2 Stuff Chicken. Top each ham slice with 1/4 cup cheese and roll tightly; set aside. Pat chicken dry with paper towels. Cut pocket in thickest part of chicken and stuff each breast with 2 ham and cheese rolls. Season both sides of chicken with salt and pepper. Transfer chicken to plate, cover with plastic wrap, and refrigerate at least 20 minutes.
3. Coat and Bake. Beat eggs and mustard in second shallow dish. Place flour in third shallow dish. One at a time, coat stuffed chicken lightly with flour, dip into egg mixture, and dredge in crumbs, pressing to adhere. (Breaded chicken can be refrigerated, covered, for 1 day.) Transfer chicken to clean baking sheet. Bake on lowest rack until bottom of chicken is golden brown, about 10 minutes, and then move baking sheet to middle rack and reduce oven temperature to 400 degrees. Bake until golden brown and chicken registers 160 degrees, 20 to 25 minutes. Transfer to cutting board, tent with foil, and let rest 5 minutes. Serve.

The Garden and Baked Asparagus With Shiitake and Prosciutto

April 25th, 2010

I took this picture before we worked in the community garden yesterday. The soil looks rich and not at all like the usual red clay soil that is found in most of North Carolina. The view of Chimney Rock is inspirational and makes spending time in the garden worthwhile. Yesterday we hoed and raked the soil and enclosed our space with poles and wire mesh. David added lime and manure to the plot and planted tomatoes, peppers, cucumbers and squash. I will post more pictures soon. One thing we could not plant was asparagus. Asparagus takes a few years to develop and we do not have a guarantee that we will have the same plot next year. But asparagus is in the market right now and it is the best time to enjoy it.

This recipe appeared in The New York Times last Wednesday. It originated with Paula Wolfert in her Slow Mediterranean Kitchen Cookbook. There are so many ways to cook asparagus and one of my favorites has been to roast the spears drizzled with olive oil and salt and pepper. But this was a new way to cook asparagus and I loved it. The asparagus is sealed in parchment paper and cooked in a slow oven for over an hour.


The parchment paper insulates the asparagus and cooks it evenly so that the tips and the bottoms of the stalk are equally tender. This recipe added shiitakes, prosciutto, olive oil and fresh tarragon which infused the spears with wonderful flavor. The slow cooking enhanced the flavor even more. Give it a try. I will be posting about that wonderful chicken cordon bleu next.

BAKED ASPARAGUS WITH SHIITAKE AND PROSCIUTTO
1 pound asparagus, ends trimmed
1/4 pound shitake mushrooms, stems removed, sliced 1/4 inch thick
2 ounces thinly sliced prosciutto, cut into 1/4 inch strips
2 tablespoons olive oil
1/2 teaspoon kosher salt
Ground black pepper, to taste
Grated nutmeg
3 tarragon sprigs
1. Heat oven to 200 degrees. Line a baking sheet with parchment paper (it should be twice as long as pan). Lay asparagus in a pile in center. Scatter mushrooms and prosciutto on top. Drizzle with 2 tablespoon oil and season with 1/4 teaspoon salt, the pepper and nutmeg. Toss vegetables to coat evely. Lay tarragon over top.
2. Fold parchment to completely enclose vegetables, and staple top and sides shut. Transfer pan to oven and bake for one hour. Asparagus should be just cooked through. If too crisp, return to oven until done to taste.

Broccoli, Apples, and Red Onion Salad

April 21st, 2010

Sometimes a dish is more than the sum of it’s parts. Sometimes a dish totally surprises you with how good it is. I have to tell you that this salad is one of the best salads I have ever eaten. I have been familiar with Mollie Katzen for a long time. She is the author of the Moosewood Cookbook and The Enchanted Broccoli Forest. All things vegetable are her forte. In her latest book, The Vegetable Dishes I Can’t Live Without, she presents us with almost 100 vegetable recipes that are her current favorites. When I first looked at this broccoli salad recipe I thought of another broccoli salad recipe that I have made in the past that involved raisins and nuts and mayonnaise. I loved that salad. This one seemed sparse in comparison. How wrong I was. All I can tell you is that it is the best. It could become a classic. It looks simple and it is simple to make, but the combination of the blanched broccoli, the wilted red onions and the crisp apples with the honey- mustard viniagrette is genious. I could not stop eating it. Molly Katzen knows what she is doing.

It is appropo that I am giving you a vegetable recipe right now. We have just joined the Friends of the Hickory Nut Gorge Community Garden. We have signed up for a beautiful garden plot with a view of Chimney Rock and the Hickory Nut Falls. Our garden plot is small but we want to grow heirloom tomatoes and peppers, squash, and beans. I plan on posting pictures of our garden as it evolves.

In the meantime, you seriously have to try this salad. I don’t usually wax poetically about my recipes, but I am now. This is excellant!

BROCCOLI, APPLES, AND RED ONION SALAD

1 large bunch broccoli
2 tablespoons cider vinegar
2 tablespoons Dijon mustard
1/2 teaspoon minced or crushed garlic
1/4 teaspoon salt
2 teaspoons honey
5 tablespoons olive oil
3/4 cup thinly sliced red onion
1 medium sized tart apple, thinly sliced
Freshly ground black pepper, to taste

1. Put up a large saucepan of water to boil. While waiting for this to happen, remove and discard the thick lower stems of the broccoli, and cut the thinner upper stems and tops into medium-sized spears.
2. Measure the vinegar into a medium-large bowl. Use a small whisk to stir constantly as you add the mustard, garlic, salt, and honey.
3. Keep whisking as you drizzle in the oil in a steady stream. The mixture will thicken as the oil becomes incorporated.
4. By now the water should be boiling. Turn it down to a simmer and add the broccoli. Let it cook in the water for 1 to 2 minutes, or until it becomes very bright green and tender-crisp. Meanwhile, place the sliced red onion in a large colander in the sink.
5. Pour the broccoli and all its water over the onion in the colander. ( The hot water will wilt the onion slightly upon contact. ) Place the colander of vegetables under cold running water for a few minutes, then shake to drain well.
6. Transfer the vegetables to the bowlful of dressing. Use tongs to toss until the broccoli is well coated, adding the apple slices as you go. You can serve this right away, or cover and let it marinate in the refregerator, where the flavor will deepen. Serve cold or at room temperature, topped with freshly ground black pepper to taste.

© Penny Klett, Lake Lure Cottage Kitchen. All rights reserved.