Baked Chicken and Bacon-Wrapped Lady Apples

September 15th, 2010

Michigan in early Fall is a place of beauty.  It only gets better with the cool nights that nip at the trees and turn the leaves to wondrous shades of red, gold, and yellow.  Southwestern Michigan is replete with apple orchards.  At one time in my life I thought that living on an apple farm was my destiny.  I dated a wonderful guy whose family owned an orchard.  I became familiar with the seasons of apples, cherries and asparagus.  I skipped school with a group of my girlfriends right before graduation in order to help his family bring in the asparagus crop.  We got in trouble for our largesse, but our principal, Mr. Smull, understanding the importance of the harvest, forgave our sneaky quest and let us graduate anyway.  He was prepared to give us trouble if our Mothers’ wrote an excuse that was not the truth.  My Mother wrote, ” Please excuse Penny from school yesterday.  She was picking asparagus.  Thank you.”  I was safe and I have never looked at asparagus again without remembering those innocent days.

Our recent trip to Michigan brought back all of those memories.  The trees were laden with apples and the countryside was so familiar.  Driving the backroads of my childhood was comforting and meeting childhood friends was enlightening.  Who knew that the boy who lived in the corner house on my block and who was four years younger than me had always had a crush on me.  He and his lovely wife now live in Traverse City and had come to our get together because he wanted to tell me so.  They were both delightful and the kind of people that I would welcome in my house at any time.

Spending time with my brother Bill and SIL Barb was the real reason for our visit.  In spite of being my little brother, who showed  all of the guys my naked baby pictures, he is special.  He is the kind of guy who everyone can count on and has been selfless in his support of and sponsorship of  mentally challenged adults.  He lost one of those friends while we were there and the support from the community was heartening.  Barb cooked for the whole family and I will share one of her casseroles with you next time.

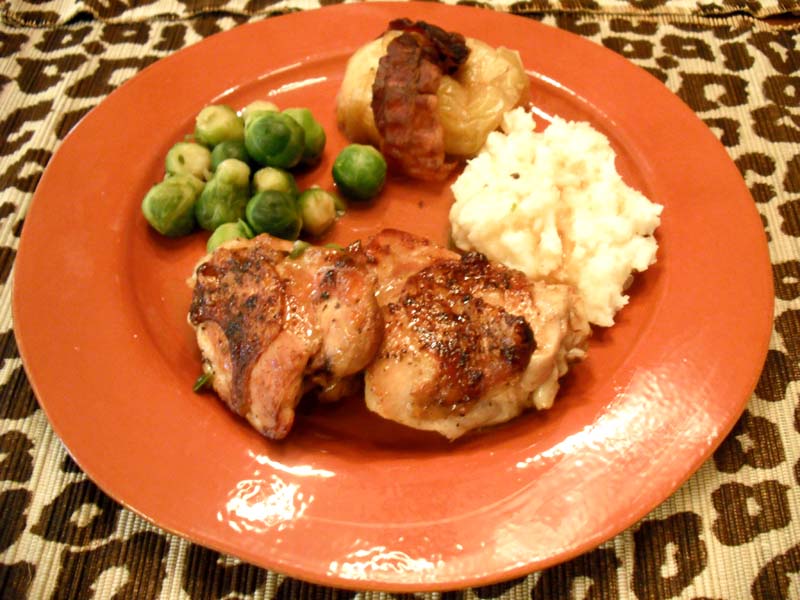
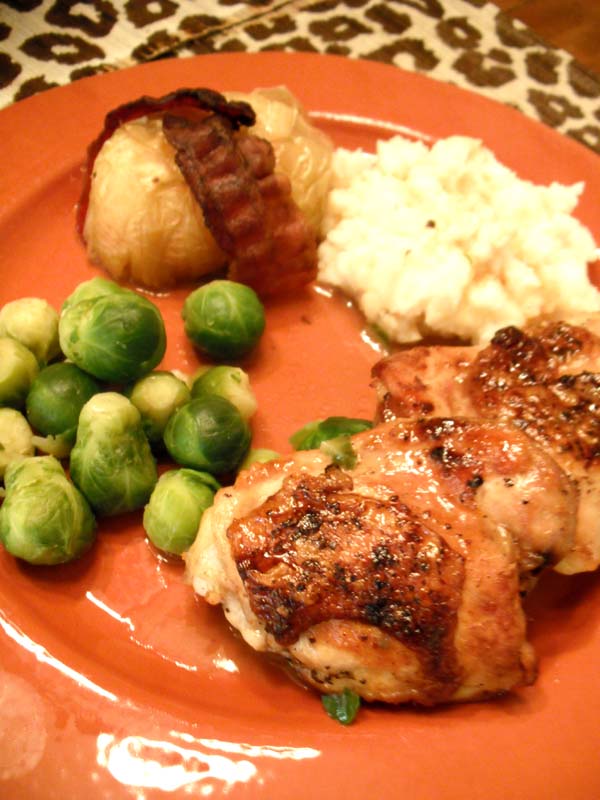
We brought back apples.  Not the lady apples in this recipe, but great tart Michigan apples.  Apple cider is also one of the products of a Michigan Fall.  In honor of Michigan, I cooked this chicken and apple recipe last night.  It was delicious.

BAKED CHICKEN AND BACON-WRAPPED LADY APPLES ( Gourmet Magazine)

8 thin slices bacon
12 lady apples (about 1 1/2 to 2 inches in diameter)  I used 4 small apples
6 chicken thighs with skin and bones
1/2 teaspoon salt
1/2 teaspoon pepper
1 cup apple cider
1/2 cup cider vinegar
2 sprigs fresh marjoram plus 2 teaspoons chopped fresh marjoram
1 tablespoon cold unsalted butter

Put oven rack in middle position and preheat oven to 400 degrees F.

Cook bacon in a 12-inch heavy skillet over moderate heat, turning over once, until edges are lightly browned but bacon  is still flexible (it will continue to cook in oven), 6 to 8 minutes total.  Transfer to paper towels to drain, reserving fat in skillet.

While bacon cooks, core apples, if desired, from bottom, with pointed end of  a vegetable peeler or a paring knife, leaving stems intact.  Wrap a slice of bacon around each of 8 apples, securing ends of bacon by piercing with stem or using half a wooden pick.

Brush a 3 quart (13-by 9-inch) shallow, baking dish with some bacon fat, then add apples to dish and bake, uncovered, 10 minutes.

Meanwhile, pat chicken dry and sprinkle with salt and pepper.  Heat bacon fat in skillet over moderately high heat until hot but not smoking, then cook chicken, turning over once, until browned, about 8 minutes total.  Transfer chicken with tongs to baking dish, rearranging some apples so that chicken fits in bottom of dish, and bake, uncovered, 5 minutes.  Pour sauce through a fine-mesh sieve into a measuring cup, pressing on and the discarding solids.  Add butter and chopped marjoram to sauce, stirring until butter is melted.  Pour sauce over chicken and apples and continue to bake uncovered, until chicken is cooked through and apples are tender, about 20 minutes more.  I cooked it longer.

Printable recipe

Labor Day Pig Out

September 14th, 2010

David (Mr Lake Lure Cottage Kitchen) here again. Penny asked me to write about some of our Labor Day food….specifically, the BBQ part that I was responsible for. We had a house full of extended family here for the long weekend, and everyone pitched-in in the kitchen.  Needless to say we ate well…you might even say “high on the hog”, at least as high as the shoulder.

As of late, I have been inspired by another Dave, the one responsible for the blog My Year On The Grill (MYOTG),  not to mention the inspiration I always get from Bobby Flay and The Neely’s on The Food Network.  It was actually a Neely’s episode back in April about how to smoke spare ribs at home that inspired me buy a Char-Griller off-set charcoal smoker grill.  I christened the grill by cooking some ribs following the Neely’s dry rub recipe and techniques, and I must say they were some pretty tasty ribs.  I was then ready to step it up a notch and tackle some Carolina Pulled Pork, i.e. Pork Butt, which is kind of an odd name for what is in reality a pork shoulder. For detailed instructions on smoking a Pork Butt (it’s a lot more fun to say than shoulder) I referred to MYOTG.  MYOTG Dave is doing for Steve Raichlen’s book How To Grill what Julie Powell did for (or some might say to) Julia Child’s Mastering The Art Of French Cooking…cooking his way through the book, one recipe at a time. Dave has many detailed recipes and instructions on his blog, and his info on Pork Butts was exceedingly helpful in my quest to achieve a nice Butt.  I was particularly interested in his comments on using coffee in the dry rub. After reading MYOTG’s musings on pork butts and studying Steve Raichlen’s and Pat Neely’s recipes, and never being one to leave-well-enough-alone, I concocted my own java dry rub with this formula.

1    Cup white sugar
1    Cup brown sugar
3/4 Cup paprika
1/2 Cup ground coffee
3    Tablespoons onion powder
3    Tablespoons black pepper
2    Tablespoons course salt
2    Teaspoons garlic powder
2    Teaspoons cocoa powder
1    Teaspoon cayenne pepper
1    Teaspoon ground cumin
1    Teaspoon ground coriander

The only picture I thought to take during the Butt cooking process was this one showing the rub on the raw Butt, which I then let sit in the fridge over-night.

For the mop sauce and Carolina vinegar finishing sauce I made up some of MYOTG’s  Raspberry Chipotle Sauce Concentrate and added it to Steve Raichlen’s standard mop and vinegar finishing sauce just like Dave suggested.  I forgot to take a picture of the butts on the grill or after they had cooked for 9 hours, so the only photo of the finished product is the sandwich shot above.

For sides, we did MYOTG’s Blue Cheese Potato Salad and Smoked Beans, both of which are described here.  I had quite a struggle convincing Penny to even let me make the Blue Cheese Potato Salad…she has an aversion to blue cheese for some reason. In the end, she caved in, and guess what….she actually liked it. The blue cheese is not over-powering if you follow Dave’s recipe. 

 
I had actually been making smoked beans very similar to Dave’s since I got my smoker.  The main difference between mine and Dave’s being the additional bean varieties Dave throws into the mix. Where I had been using only Bush’s baked beans as the base, he adds a can of pinto’s and  a can of great northern’s to the pot….a worthwhile addition.  The smoked beans need to include smoked pork of some variety.  I had some smoked ribs in the freezer, so I chopped some up and threw it in the pot along with a little leftover andouille sausage.  I left the bean pot in the smoker, under the pork butts to catch some of the drippings, for three or four hours.  They were pretty yummy beans.

Penny whipped up some coleslaw following a Bobby Flay recipe.  All in all, a very satisfying all-American Labor Day feast.  Thanks for the recipes Dave, and the advice on how to cook a good Butt.

Chicken and Corn Stew with Corn Wafers

September 8th, 2010

There is a hint of Autumn in the air.  We had a wonderful Labor Day weekend with our extended family here at the lake.  I didn’t manage to get my camera out even once to take pictures of all of the food.  David smoked a pork butt for pulled pork and made barbecued beans and blue cheese potato salad from recipes from blogging buddy Dave at My Year on the Grill.  It was all top rate.  David did take pictures and will be posting about his excellent meal soon. 

But in the meantime here is a recipe that is perfect for the cooler nights ahead.  It is a stew that uses end of summer bounty to good advantage.  It calls for plum tomatoes, but any tomatoes from the garden will do.  Add to that sweet corn, green peppers and basil from the herb garden and you have a meal to savor or a wonderful way to freeze what is left from the vegetable garden or from the farmer’s market.  But to me, what makes this stew so special is the topping.  Thin and buttery corn wafers are floated on the top to add just the right finishing touch.  The next time I make this stew, I will double the recipe for the wafers.  They are addictive!

We will be traveling to Michigan to visit family for the next few days so I will not be blogging again until next week.  I will catch up with all of you then.  Enjoy this easy stew.

CHICKEN AND CORN STEW WITH CORN WAFERS ( adapted from Gourmet )

For the corn wafers:
1/2 stick unsalted butter, softened
2 teaspoons sugar
1 large egg white
1/2 teaspoon salt
3 tablespoons yellow cornmeal
1 tablespoon all-purpose flour
2 tablespoons freshly grated Parmesan

For the Soup:
1 tablespoon vegetable oil
2 large boneless chicken breasts
1 tablespoon unsalted butter
3 tablespoons all-purpose flour
1 small onion, chopped fine
1 green bell pepper, chopped fine
1 rib of celery, chopped fine
1 1/4 cups chicken broth (or more if needed)
4 fresh or canned plum tomatoes, chopped
1 teaspoon chili powder
1 cup fresh corn kernels including the pulp scraped from the cobs (2 ears of corn)
1/2 cup thinly sliced scallion greens
1/4 cup loosely packed fresh basil leaves, chopped

Make the corn wafers:  In a bowl with an electric mixer cream the butter, add the sugar, and beat the mixture until it is light and fluffy.  Add the egg white and the salt and beat the mixture at low speed for 5 seconds, or until it is just combined. (The mixture will be lumpy.)  Add the cornmeal, the flour, and the Parmesan and stir the mixture until it is just combined.  Transfer the mixture to a small bowl and chill it, covered, for at least 4 hours or overnight.  Arrange rounded teaspoons of the mixture 3 inches apart on buttered baking sheets and with a fork dipped in cold water flatten them carefully to form 2-inch rounds.  Bake the wafers in batches in the middle of a preheated 425 degree oven for 5 to 6 minutes, or until the edges are golden brown, with a spatula transfer the wafers immediately to racks, and let them cool.

In a 9-inch cast-iron skillet heat the oil over moderately high heat until it is hot but not smoking and in it brown the chicken, patted dry and seasoned with salt and pepper.  Remove chicken from pan.  To the fat remaining in the skillet add the butter and the flour and cook the roux over moderately low heat, stirring constantly, until it is the color of peanut butter.  Stir in the onion, the bell pepper, and the celery and cook the mixture, stirring occasionally, until the vegetables are softened.  Add the broth, the tomatoes, the chili powder, and the chicken with any juices that have accumulated in the bowl, simmer the stew, covered, for 15 to 20 minutes, or until the chicken is cooked through, and stir in the corn.  Transfer the chicken to a work surface and let it cool until it can be handled.  Cut the chicken into bite-size pieces and stir it into the stew.  The stew may be prepared up to this point 1 day in advance and kept covered and chilled.  Stir in the scallion greens and the basil, season the stew with salt and pepper, and serve it in bowls, topped with the corn wafers.  Serves 4 to 6.

Mixed Berry Cheesecake The Barefoot Contessa

August 31st, 2010

The second Barefoot Blogger recipe for the month of August is this beautiful mixed berry cheesecake.  The recipe was chosen by Nathalie of Snowbell Jewelry and it is so impressive, even if I didn’t make it in it’s original form.  Our extended family is not arriving for the Labor Day Holiday until the end of the week so I was making this for just the two of us.  The two of us do not need a dessert that contains 2 1/2 pounds of cream cheese.  So instead of making the cheesecake in a springform pan, I reduced the recipe and made five individual cheesecakes.

The cheesecake was delicious, with a special freshness from the lemon zest.  The berries give it a “WOW” factor and are glazed with jelly to make them shimmer.  I will definitely be making this again.

So many of The Barefoot Contessa recipes are winners.  It has occured to me that many of the dishes I will be serving over the holiday have come from Ina’s cookbooks.  My daughter-in-law is celebrating a birthday so I am making Ina’s Strawberry Country Cake.  For breakfast one morning I will be making her Potato Basil Frittata.  And as side dishes with our cookouts, I will be making her Panzanella Salad and Sagaponack Corn Pudding.  This cheesecake would be perfect for your Labor Day celebration.  Enjoy.

MIXED BERRY CHEESECAKE

 Ingredients:
For the crust:
1 1/2 cups graham cracker crumbs (10 crackers)
1 tablespoon sugar
6 tablespoons (3/4 stick) unsalted butter, melted

For the filling:

2 1/2 pounds cream cheese, at room temperature
1 1/2 cups sugar
5 whole extra-large eggs, at room temperature
2 extra-large egg yolks, at room temperature
1/4 cup sour cream
1 tablespoon grated lemon zest (2 lemons)
1 1/2 teaspoons pure vanilla extract

For the topping:

1 cup red jelly (not jam) such as currant, raspberry, or strawberry
1/2 pint sliced strawberries
1/2 pint fresh raspberries
1/2 pint fresh blueberries

Directions

Preheat the oven to 350 degrees F.

To make the crust, combine the graham crackers, sugar, and melted butter until moistened. Pour into a 9-inch springform pan. With your hands, press the crumbs into the bottom of the pan and about 1-inch up the sides. Bake for 8 minutes. Cool to room temperature.
Raise the oven temperature to 450 degrees F.

To make the filling, cream the cream cheese and sugar in the bowl of an electric mixer fitted with a paddle attachment on medium-high speed until light and fluffy, about 5 minutes. Reduce the speed of the mixer to medium and add the eggs and egg yolks, 2 at a time, mixing well. Scrape down the bowl and beater, as necessary. With the mixer on low, add the sour cream, lemon zest, and vanilla. Mix thoroughly and pour into the cooled crust.

Bake for 15 minutes. Turn the oven temperature down to 225 degrees and bake for another 1 hour and 15 minutes. Turn the oven off and open the door wide. The cake will not be completely set in the center. Allow the cake to sit in the oven with the door open for 30 minutes. Take the cake out of the oven and allow it to sit at room temperature for another 2 to 3 hours, until completely cooled. Wrap and refrigerate overnight.

Remove the cake from the springform pan by carefully running a hot knife around the outside of the cake. Leave the cake on the bottom of the springform pan for serving.

To make the topping, melt the jelly in a small pan over low heat. In a bowl, toss berries and the warm jelly gently until well mixed. Arrange the berries on top of the cake. Refrigerate until ready to serve.

Oven-Fried Chicken from The Barefoot Contessa

August 29th, 2010

The Barefoot Bloggers are on a leisurely summer schedule.  Normally we post recipes from the Barefoot Contessa on the 2nd and 4th Thursdays of the month, but our fearless leader Tara of Smells Like Home has decreed that as long as we get our recipes posted by the end of each month, we are still in the game.  And what a great time to be a member of The Barefoot Bloggers.  Ina Garten has a new cookbook coming out in October called How easy is That?  Tara received an advanced copy of it and had a phone interview with Ina in mid August.  She will be posting about it on October 11th on the Barefoot Blogger website. It is nice to know that Ina recognizes our little group and is supportive of us.

One of our recipes for this month was Ina’s oven-fried chicken.  It was chosen by Vicki of My Fare Lady.  I am happy that she made this choice because I gave up on frying chicken a long time ago.  I decided that fried chicken just wasn’t good for us and  that it was a messy task.  Leave it to The Barefoot Contessa to simplify the process by frying the chicken briefly in oil and then baking it until it is done.  It still comes out crispy and delicious.  I have also come to the conclusion that enjoying fried chicken occasionally is no worse for me than any other food indulgence.  It is all about moderation and variety.

I followed the recipe closely other than skinning the chicken.  I used all thighs, but whole chicken pieces are fine too.  The chicken marinates overnight in buttermilk.  This makes the chicken very juicy and succulent.  So don’t forget this important step.  The next time I make it, I will add some interesting spices.  The chicken was delicious, but it would be even better with a punch of garlic, paprika or whatever The Colonel puts in his famous chicken.  So feel free to indulge in this great dish.  How bad can that be?

OVEN-FRIED CHICKEN

2 chickens, cut in eight serving pieces
1 quart buttermilk
2 cups all-purpose flour
1 tablespoon kosher salt
1 tablespoon freshly ground black pepper
Vegetable oil

Place the chicken pieces in a large bowl and pour the buttermilk over them.  Cover with plastic wrap and refrigerate overnight.

Prehieat the oven to 350 degrees.

Combine the flour, salt and pepper in a large bowl.  Take the chicken out of the buttermilk and coat each piece thoroughly with the flour mixture.  Pour the oil into a large heavy-bottomed stockpot to a depth of 1 inch and heat to 360 degrees on a thermometer.

Working in batches, carefully place several pieces of chicken in the oil and fry for about 3 minutes on each side until the coating is a light golden brown (it will contiune to brown in the oven).  Don’t crowd the pieces.  Remove the chicken from the oil and place each piece on a metal baking rack set on a sheet pan.  Allow the oil to return to 360 degrees before frying the next batch.  When all the chicken is fried, bake for 30 to 40 minutes, until the chicken is no longer pink inside.  Serve hot.

Printable recipe

© Penny Klett, Lake Lure Cottage Kitchen. All rights reserved.