Zucchini Pancakes

June 20th, 2010

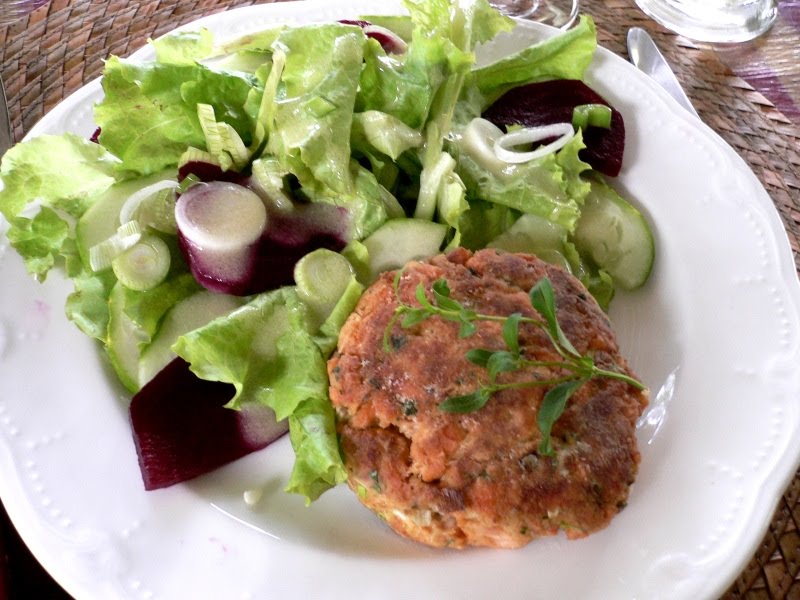
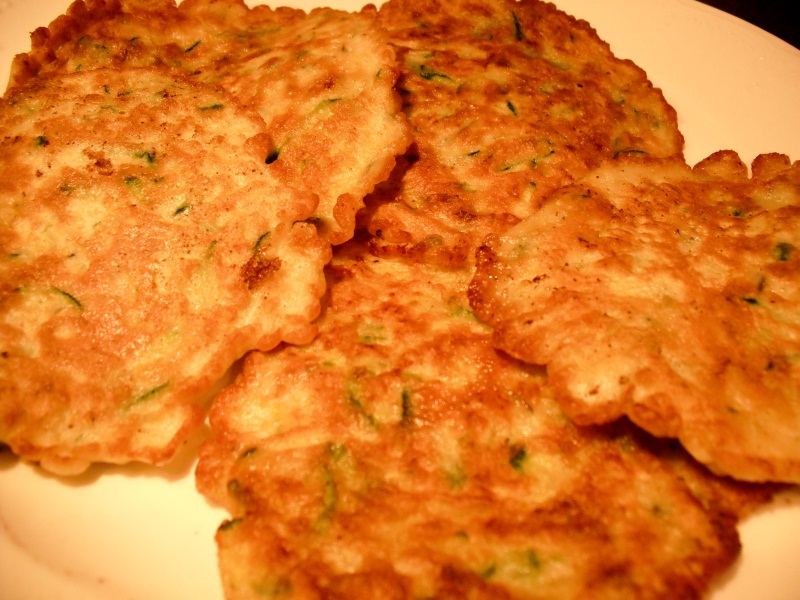
Golden zucchini pancakes are a great addition to any meal. They are easy to prepare and will get finicky children to eat their vegetables. The zucchini in our garden has started producing lately. That is a good thing because the yellow squash has been languishing. I know it will come back, but it’s as if it has said “I’m resting, it’s your turn zucchini”. That is fine by me because I love zucchini.

I tried a new recipe for zucchini pancakes and I will be making them this way again. It came from the Barefoot Contessa so of course it was good. Her recipe differs from mine in that she added baking powder to the batter. This allowed the pancakes to puff slightly and have the consistancy of breakfast pancakes. The ones I normally make are crispier and flatter. They are both good, so you decide which you prefer. They can be served plain or with toppings. You can add butter, a dollop of sour cream, mango salsa or maple syrup if you like.

I added a step to the Barefoot Contessa’s recipe. After grating the zucchini, I put it in a colander with a little salt. This draws out the water in the zucchini. I then rinsed it and squeezed it dry. We will be enjoying these pancakes for both dinner and breakfast.

ZUCCHINI PANCAKES

Makes 10 (3-inch) Pancakes

2 medium zucchini
2 tablespoons grated red onion
2 extra-large eggs, lightly beaten
6 to 8 tablespoons all-purpose flour
1 teaspoon baking powder
1 teaspoon kosher salt
1/2 teaspoon freshly ground black pepper
unsalted butter and vegetable oil

Preheat the oven to 300 degrees.

Grate the zucchini into a bowl using the large grating side of a box grater. Immediately stir in the onion and eggs. Stir in 6 tablespoons of the flour, the baking powder, salt, and pepper. (If the batter gets too thin from the liquid in the zucchini, add the remaining 2 tablespoons of flour.)

Heat a large (10 to 12 inch) saute pan over medium heat and melt 1/2 tablespoon butter and 1/2 tablespoon oil together in the pan. When the butter is hot but not smoking, lower the heat to medium-low and drop heaping soup spoons of batter into the pan. Cook the pancakes about 2 minutes on each side, until browned. Place the pancakes on a sheet pan and keep warm in the oven. Wipe out the pan with a dry paper towel, add more butter and oil to the pan, and contiune to fry the pancakes until all the batter is used. The pancakes can stay warm in the oven for up to 30 minutes. Serve hot.

Pasta with Peas, Prosciutto and Lettuce

June 17th, 2010

I read the New York Times online every Wednesday. Specifically, I read the Food and Wine section. Mark Bittman always has interesting recipes. They are healthy, consciously raised, and real foodstuff. Many of us are trying to eat sanely. We are trying to avoid overly processed and chemically altered food. I try on my blog to offer recipes that use ingredients that are fresh, seasonal and as local as possible. But I usually try not to state the obvious so as not to come off as preachy. But starting next Tuesday I am joining a group of fellow bloggers who are spreading the word about real food. This was brought to my attention by Girlichef. This is how she explains it.

“This Tuesday marks the start of the Two for Tuesdays! Blog Hop Carnival. Two for Tuesdays is the brainchild of Alex from A Moderate Life. It began on her site as a day to link up one (or two) of your blog posts that featured REAL FOOD. Recipes, anecdotes, stories, photos, reviews…anything your blogged about featuring REAL food. What is REAL food, you ask? Think: slow food, traditional food, hand-prepared food, nourishing food…food that is NOT processed….food that doesn’t come from a package…food that your great-grandmother would have made &/or eaten. REAL food is homemade. REAL food is from scratch. REAL food has recognizable ingredients. REAL food is made from traditional ingredients. REAL food is food you make with your own hands…from food grown, milled, raised by you or by people (not machines). Think family farmer. Think farmer’s market. Think garden. Think local grain mill. Think REAL.”

So, although this is not Tuesday, I wanted to join the group. My first recipe is this wonderful pasta dish from Mark Bittman. It is serendipitous that this recipe appeared this Wednesday in the New York Times because my garden was producing the first of the snow peas we planted and it is overrun with lettuce. I have fixed so many salads that I was looking for something different to do with it. What better way to use piles of lettuce than to wilt it into a pasta dish! So I present to you a recipe fresh from my garden using an artisanal pasta and Prosciutto. Even if you don’t have a garden, Farmer’s Markets now have fresh lettuce and snow peas or peas in the pod. This was an excellent dish using very few ingredients, but using only the best.


PASTA WITH PEAS, PROSCIUTTO AND LETTUCE
3 tablespoons olive oil
2 to 3 ounces thinly slices prosciutto, cut crosswise into 1/2 inch-wide strips
1/2 pound pasta
2 tablespoons butter
1 shallot
minced black pepper to taste
2 cups peas or snow peas sliced
1 head lettuce, sliced
1/2 cup chicken or vegetable stock or dry white wine, more as needed
1 cup finely grated Parmesan cheese
Bring a large pot of water to boil and salt it. Meanwhile, put one tablespoon oil in a small skillet over medium-high heat. When hot, add prosciutto and cook, turning occasionally, until crisp, about 4 to 5 minutes; set aside.
When water boils, add pasta and cook until just tender; drain pasta, reserving some cooking liquid. Meanwhile, melt butter with remaining 2 tablespoons oil in a large skillet over medium heat. Add shallot and sprinkle with salt and pepper; cook until shallot begins to soften, about 5 minutes.
Add peas, lettuce and stock or wine to skillet and cook until peas turn bright green and lettuce is wilted, about 5 minutes. Add pasta to pan and continue cooking and stirring until everything is just heated through, adding extra stock or some reserved cooking liquid if needed to moisten. Toss with Parmesan cheese, garnish with prosciutto, adjust seasoning to taste and serve.
Go to Girlichef to link up with other Two for Tuesday bloggers.

Dinner with Friends on the Lake

June 14th, 2010

The table on the porch was set and ready to go. We watched the weather report. Storms were popping up all over the mountains. This was an important dinner because my blogging friend Penny and her hubby Mr. Comforts of Home were expected. We had a cooler packed with a French Rose wine and appetizers to be enjoyed on the boat. All looked well when they arrived.

Penny and Penny ready to go for a boat ride.


The sun was shining and the lake was awash with boat traffic which made for a choppy ride.

We enjoyed our cocktails and appetizers. Penny and Mr. Comforts of Home were delightful and we really enjoy their company.


David loves to give people a tour of the lake and even though the skies became threatening suddenly, he had just one more thing to show us.


Even though we sped back to the cottage, we all got drenched. But you know what? It was fun. The rain did not last long, we dried off and David fired up the grill and soon dinner was ready.

The menu was Grilled Garlic Lime Pork Tenderloin with Red Onion Marmalade. Click here for the recipe. We also had my garden Southwestern Squash Casserole which I just recently posted, coleslaw, and Sweet Potato Salad with Warm Bacon Dressing. The sweet potato recipe came from Bobby Flay and has been a favorite of mine for a long time.
SWEET POTATO SALAD WITH WARM BACON DRESSING
6 slices bacon, medium dice
1 red onion, finely sliced
3 cloves garlic, finely chopped
3/4 cup white wine vinegar
1/2 cup olive oil
2 tablespoons granulated sugar
4 large sweet potatoes, peeled, cooked and cut into 1-inch dice, kept warm
Salt and freshly ground pepper
4 green onions, finely sliced
1/4 cup chopped parsley
Heat pan over high heat. Add bacon and cook until just crisp. Remove bacon to drain on paper towels. Pour off all but 2 tablespoons of the fat. Add onions and garlic and cook until soft. Remove pan from heat, add vinegar, olive oil, sugar and reserved bacon. Place the potatoes in a large bowl, pour the dressing over and season with salt and pepper. Fold in the green onions and parsley. Serve at room temperature.


Because it has been so hot and steamy lately, I decided to make a frozen dessert. What could be better than a Toasted Almond Mocha Ice Cream Tart redolent with coffee ice cream, Amaretto, chocolate and almonds. I love desserts that you can fix ahead of time. The recipe appeared in a 1992 issue of Gourmet.
TOASTED ALMOND MOCHA ICE CREAM TART
For the crust:
1 1/4 cups chocolate wafer crumbs (about 25 wafers)
1 cup sliced blanched almonds, toasted lightly, cooled, and ground fine
1/2 stick (1/4 cup) unsalted butter, melted
For the filling:
1/1/2 cups sliced blanched almonds, toasted lightly and cooled
3 1/2 tablespoons Amaretto
2 pints coffee ice cream, softened
4 ounces fine-quality bittersweet chocolate, chopped fine (about 1 cup)
1/4 cup sliced blanched almonds, toasted lightly and cooled
1 ounce fine-quality bittersweet chocolate, chopped fine or grated
Make the crust: In a bowl stir together witha fork the wafer crumbs, the almonds, and the butter until the mixture is combined well, pat the mixture onto the bottom and sides of an oiled 10-inch fluted tart pan with a removable rim, and freeze the crust for 30 minutes, or until it is firm.
Make the filling: In a food processor blend the almonds, scraping down the side occasionally, for 5 minutes, or until they form a nut butter, and with the motor running add the Amaretto. Add the ice cream and the chocolate and pulse the motor 6 to 8 times, or until the filling is smooth and combined well.
Transfer the filling to the crust, spreading it evenly. Garnish the top of the tart with the almonds and the chocolate and freeze the tart, uncovered, for 1 hour. Cover the tart with plastic wrap and freeze it overnight.


Penny brought me the most beautiful linen dish towels. She knows me well and these will look beautiful in my kitchen. They also brought us a fine bottle of French wine. Nothing could be finer than spending time with friends. Visit Penny’s blog for more pictures of our visit.

Printable recipe Sweet Potato Salad

Southwestern Squash Casserole

June 9th, 2010

I know I am going to be sick of squash before the summer is over. You’ve heard the stories of neighbors of gardeners locking their cars and screened in porches so that said gardeners can’t unload huge squash on them. There are cookbooks devoted to nothing else but uses for summer squash. I even have a recipe somewhere for a chocolate zucchini cake (which is excellent by the way). So forgive me if I get excited about my first squash casserole of the season. This is a great recipe! I have adapted it from a recipe I saw in Food & Wine. I have called it a Southwestern squash casserole only because it has cornmeal in it and that was what David said it tatsted like when he tried it. Next time I make it, I might add some cumin, hot spices and vary the cheeses. But as it is, it is excellent. It starts with yellow squash, zucchini and a sweet red pepper and onion.


The squash and zucchini were crisply fresh from the garden and the red pepper added a lot of color. The flour and cornmeal thickened the milk and eggs and made a custard in which the vegetables were suspended. The Parmesan and Gruyere cheese added richness. I will be making this again. . . . . and again. . . . and again this summer.
SOUTHWESTERN SQUASH CASSEROLE
1 tablespoon unsalted butter
1 tablespoon olive oil
1 small onion, chopped
1 red bell pepper, chopped
2 garlic cloves, minced
2 to 3 yellow squash, chopped
1 medium zucchini, chopped
1/2 cup yellow cornmeal (not self rising)
1/4 cup all-purpose flour
1/4 cup grated Parmesan cheese
1 tablespoon chopped thyme leaves
1 teaspoon kosher salt
1 teaspoon freshly ground pepper
1 cup milk
2 large eggs
2 ounces grated Gruyere cheese
Preheat oven to 350 degrees. Generously butter a casserole or a 9-inch round baking dish. In a large skillet, melt the butter in the oil over moderately high heat. Add the onion and bell pepper and cook, stirring, for 3 minutes. Stir in the garlic and cook until the vegetables are softened but not browned. Add the squash and zucchini and cook, stirring, until almost tender, 4 to 5 minutes. Set aside to cool slightly.
In a large bowl, toss together the cornmeal, flour, Parmesan, thyme, salt and pepper. In a separate bowl, whisk together the milk and eggs, then whisk them into the cornmeal mixture until combined. Stir the vegetables into the loose batter and spread it in the prepared baking dish. Bake on the middle rack of the oven for 30 minutes, or until firm. Sprinkle with the Gruyere and bake for about 8 minutes, or until golden around the edges.


I served the squash with Balsamic glazed pork chops. Recipe to follow.

Sunday Lunch from the Garden and Pantry

June 6th, 2010


We are celebrating the first tastes from the garden today. Yesterday morning we spent some time weeding and harvesting what we could. The lettuce was ready and waiting to be picked.


To our surprise, hidden amongst the cucumber vines were three lovely plump cucumbers. I was anticipating picking squash, but there was only one squash large enough to be taken. Normally I like my squash smaller, but the rest of the squash were just too small. I am giving them another few days. The spring onions and some beets came from a local farm stand.


I decided to make a salad from the lettuce, cucumbers, onions and beets. I made a mustard tarragon viniagrette to go with it. I marinated the onions in a little tarragon vinegar to temper the raw taste. I learned this trick from Laurie Calder on the new Food Channel.
With the salad I made salmon cakes with fresh tarragon from my herb garden. I always have canned salmon on hand for simple meals. This was a very satisfying meal, made more so by the humble fresh ingredients. I hope to post a great squash casserole recipe next, but in the meantime this is what I did with the salmon.
SALMON TARRAGON CAKES
Makes 2 salmon patties
1 7 1/2 ounce can wild Alaska sockeye red salmon
1 tablespoon minced fresh tarragon
1 minced spring onion
1/4 cup bread crumbs
1 egg beaten
flour for dusting
1 tablespoon olive oil
Drain and pick over canned salmon removing skin and large bones. In a bowl mix salmon with minced tarragon, onion and bread crumbs. Add as much of the beaten egg as necessary to moisten the bread crumbs. I used most of the egg. Form salmon into two patties. When ready to saute. dust both sides lightly with flour and place in a preheated oiled pan. Cook on medium heat until both sides of the salmon are nicely browned and the ingredients are cooked through.

© Penny Klett, Lake Lure Cottage Kitchen. All rights reserved.