Cranberry-Lime Chutney

November 23rd, 2009

While searching for a good cranberry dish to serve for Thanksgiving dinner, I found Anna Pump’s The Loaves and Fishes Party Cookbook in the library. I have found that I like most everything that she prepares and have blogged about her recipes in the past. This sweet and tart chutney appealed to me on many levels. It is tart enough to give a tang to bland turkey and just barely sweet. We had it last night with pork roast and it was just right. My husband said it was a keeper. The beauty of the dish is that it will keep up to three months in the refrigerator. I don’t think it will last that long, but it is good to know that I have a great side dish for Thanksgiving.

CRANBERRY-LIME CHUTNEY

1 lime, very thinly sliced
1/4 cup finely chopped onions
1/2 tsp minced garlic
1 cup sugar
1/2 cup light brown sugar
2/3 cup apple cider vinegar
1/2 tsp cinnamon
1/8 tsp ground cloves
1/8 tsp ground allspice
1/4 tsp cayenne
1 tsp salt
3/4 cup peeled and coarsely chopped tart apple
1/2 cup dark raisins ( I used dried cranberries)
4 cups fresh cranberries
1/2 cup chopped pecans ( I added this ingredient )

In a saucepan, bring to a boil the lime slices, onion, garlic, sugar, brown sugar, apple cider vinegar, spices, and salt. Cover, and simmer 20 minutes. Add the apples and raisins. Return to a boil and simmer another 10 minutes. Add the cranberries and cook, covered, for 10 minutes more. Add the pecans. Cool mixture.

To store the chutney, cover and refrigerate. Bring to room temperature before serving.

Easy Taco Casserole

November 20th, 2009

Life has been a little busy around here lately. We have had company. We have family coming next week for Thanksgiving and after being closed up for six months, the house needs attention. There has not been much time for creative cooking. One of my favorite easy meals is this taco casserole which has variations which I have blogged about before. It is one of those recipes that you can make your own and throw together at a moment’s notice. You can buy a Taco kit, but this is just as quick and much better for you. Make any substitutions that you want and you will be happy that you did not have to rely on a packaged mix.

TACO CASSEROLE

1 lb ground turkey ( Or substitute ground beef)
1 onion, chopped
1 8 oz can Tomato Puree
1 8 oz bottle Taco Sauce
1 envelope reduced sodium Taco seasoning
Chili powder, garlic powder, oregano, and cumin to taste
4 8″ whole wheat flour tortillas
6 oz or more cheese of choice, shredded

Brown turkey in a little olive oil with chopped onion until no longer pink. Add taco seasoning and cook for about 1 minute. Add tomato puree and taco sauce. Season with herbs and spices. Cook for 1/2 hour on low heat.

Preheat oven to 350 degrees. Spray bottom of 9 ” pie plate with cooking oil. Add one flour tortilla and cover with 1/4 of sauce. Top with 1/4 of cheese. Repeat three times. Bake for 30 minutes. Serve topped with sour cream, lettuce, tomatoes, or anything that you like.

The First Annual Kitchen Reveal

November 18th, 2009

I am totally overwhelmed by the response to my request for pictures of your kitchens. I really didn’t know what to expect. Everyone who responded did such a beautiful job of opening up their kitchens to us that I feel we would all feel comfortable stopping by for a cup of coffee and a good chat. My Florida kitchen is different in many ways from the Lake Lure kitchen. The Lake Lure kitchen is all about tradition and home. That is where I keep my collection of copper cookware and cherished heirlooms from my Mother and Grandmother. The Florida kitchen is for our more carefree lifestyle where lobster pots and fun dishes are the norm.

Last year, we embarked on a kitchen remodel that brought about significant changes. We made the decision to swap out our old formica countertops with sleek Corian surfaces, giving our kitchen a more modern and polished look. As part of this transformation, we introduced a single Corian sink. While I appreciate the ample size of the single sink, I can’t help but admit that I still hold a preference for a double sink setup.

On the left side, you might notice an intriguing and somewhat eccentric contraption, which might appear like a torture device at first glance. However, it’s actually a specialized wine bottle opener, adding a unique and perhaps whimsical touch to our kitchen decor. Speaking of design choices, I must express my fondness for the corner sink arrangement that we opted for, offering an appealing aesthetic and a delightful view of the water through the two windows.

Now, let’s discuss the anchor plumbing that plays a crucial role in all of this. The plumbing, often unseen and underappreciated, serves as the foundation of our kitchen’s functionality. Behind these elegant features and design elements lies the plumbing, ensuring a seamless flow of water and proper drainage, making our culinary tasks efficient and enjoyable.

My stove is adequate but I would like to replace it sometime with a stainless steel gas stove. But the oven is large and it will be great for our Thanksgiving turkey.

The pantry is beyond the stove. I am not showing you the insides because we have only been here for a week and I am not organized yet.

Across from the stove is the microwave and refrigerator. Again it would be nice to have a stainless steel fridge but I think we will keep things as they are for now.
Below are pictures of my friend Lyla’s kitchen. She doesn’t have a blog but I asked her to send me pictures of her kitchen. We have just reconnected after not seeing each other since we were twelve years old. She loves to cook and wanted to share her kitchen in Michigan. Her problem was lack of counter space. She extended her counters in front of and around the windows to allow more work space and places for people to help out in the kitchen.

She made her kitchen work for her. This is how all of you made your kitchens work for you. I was so glad to see what all of you had done. Here are all of the links in alphabetical order.
Dave from My Year on the Grill
Dave is trying to take over his wife’s kitchen. He is slowly getting more and more cabinet space for his grilling condiments. His wife is a talented faux artist because, I swear, his back wall looks like real brick. Some of his kitchen pieces were wedding gifts from the real Star Trek stars.
JoAnn has a knitting blog but she also loves to cook. Her kitchen is small and efficient with a wonderful place for cookbooks at the end of her counter. I was touched by the plaque that she displays next to her stove which was originally in her Mother’s kitchen. She leaves us with a recipe for Two-toned fudge brownies.
Kate gives us a picture of the progression of her ideas of what makes a great kitchen. If June Cleaver and Margaret Anderson can have lots of counter space why can’t she. Her kitchen island is very important to her. I think she cooks in pearls.
Katherine and her family have survived Katrina and moved to the mountains of Tennesee. One of the features in her kitchen is her Grandmother’s Turkey platter which has survived four moves. Her beautiful kitchen is the hub of her home and in the center of everything.
Mary’s kitchen is just what I would have expected. She lives in Oregon and her kitchen is bright, beautiful and organized. You have to see her full and functional pantry. She turns out amazing food on a daily basis.
Natashya turns out beautiful food from a small but efficient kitchen. She packs alot of cooking tools into a small space. Her collection of bundt pans and full pot rack are to me envied. She also has a very handy husband.
The other Penny has just moved into a new home and is making it her own in so many ways. Her kitchen is absolutely beautiful. She has accessorized beautifully and I am waiting for her first Beef Bourguignon.
Rosa is cooking out of a beautiful kitchen in Germany. She has a unique storage area and lots of sun coming through her kitchen windows. She loves to make her own pasta.
Toni lives in a 900 sq. ft. Tuscan style older home in California. She remodeled her kitchen a few years ago and it is stunning. Her pride and joy is the hand made glass light fixture over her kitchen island.
My thank you to all of you. I have enjoyed seeing your kitchens and getting to know you better.

My New Favorite Apple Pie

November 16th, 2009

I have always made my apple pies the same way, the way that my Grandmother and Mother made them, but I am trying to get away from using Crisco. All butter crusts are hard to handle though and I don’t have a source for pure lard. We have friends coming to visit tomorrow and I decided to make a dessert from what I had on hand. I had Granny Smith apples and the ingredients for a pie crust. This time I did a combination of Crisco and butter and the pie dough rolled out like a dream. It lifted easily from the rolling board and baked up beautifully. I am hoping that the combination will prove to be consistant and not just serendipitous.

MY NEW FAVORITE APPLE PIE

For the crust:
2 cups of unbleached all-purpose flour ( I used King Arthurs)
1/2 tsp salt
1/2 cup Crisco shortening
1/4 cup cold butter cut into small pieces
1/2 cup milk

For the filling:
5 Granny Smith Apples, peeled and thinly sliced
1/2 to 3/4 cup Sugar
1 to 2 tsp cinnamon
2 Tbls flour

Preheat oven to 425 degrees F. Place sliced apples in a large bowl. Mix together the sugar, cinnamon and flour and add to apples. Toss to combine and let stand so that the apples will release their juices.

Place the flour in a medium mixing bowl. Add the salt and stir to combine. Add the 1/2 cup crisco and the cold butter pieces. Working with a serrated steak knife or pastry cutter, cut the shortenings into the flour. Be patient with this. The butter and shortening should be small pea size pieces when done. Add the milk and mix gently to combine. Divide dough into two pieces and flatten slightly. Cover with saran wrap and refrigerate 1/2 hour.

On a floured surface roll the bottom dough piece into a circle large enough for a 9 inch pie plate. Place in pie pan and add the apple mixture. Roll out the second dough for the top. Slice a crescent in the center and prick several times with a fork. Place over bottom crust and filling. Press edges to seal and crimp the edges decoratively. If you would like brush the top with a beaten egg white and sprinkle with sugar.

Bake for 20 minutes. Turn the oven down to 350 degrees and bake for an additional 40 minutes or until the crust is a golden brown.

Printable recipe

What a difference lighting makes. I took the first picture in the evening by kitchen lighting and the second picture in the morning by sunlight.

I have gotten a good response to my Kitchen Reveal. Thank you to all of you who are posting pictures on Wednesday. There is still time to join in the fun. I will post links to all of the kitchens some time late Wednesday afternoon.

Mom’s Thanksgiving Dressing

November 13th, 2009

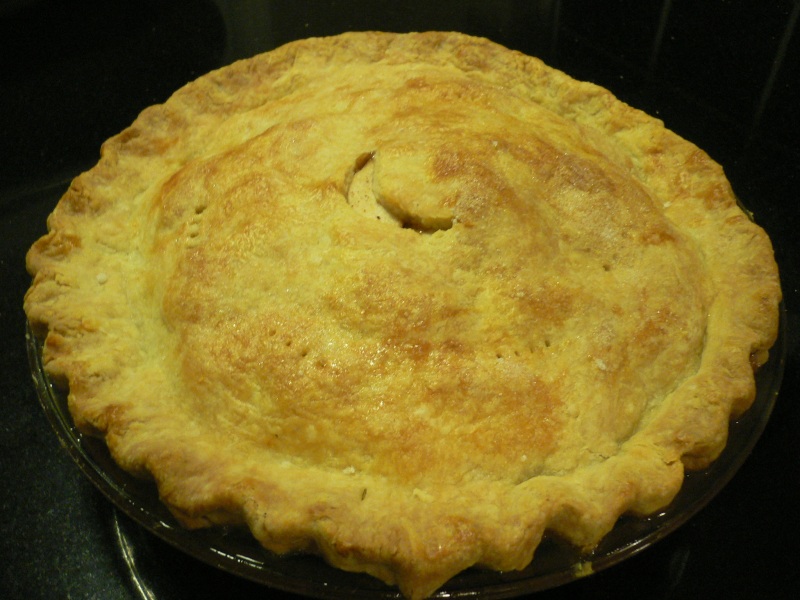
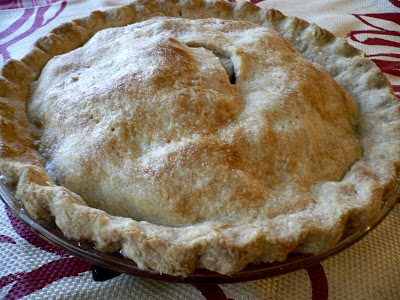
Growing up in Michigan we always had Thanksgiving at our house. My Grandmother lived with us so all of the aunts, uncles and cousins came to us. It was fascinating to me as a small child. There was a festive air in the house from the moment I awakened in the morning. Mom and Grandma already had apple and pumpkin pies cooling on the cupboard and Mom was busy cleaning the biggest turkey that Dad could find. She was fastidious with that turkey. She washed it in her sink and plucked pin feathers and pulled innards from the cavity until the bird was pristine. It was then placed in the largest roasting pan I had ever seen, seasoned and put into the oven to gently cook for hours filling the house with that now familiar aroma that we all love. Oh the anticipation!

My Mother was in charge of the mashed potatoes, dressing and jello salads. All of the other side dishes were brought by the aunts. Aunt Ruth made the best homemade baked beans using dried Great Northern beans that were cooked long and slow seasoned with bacon, tomato sauce and brown sugar. Aunt Nita made a green bean casserole which was all right (She wasn’t much of a cook) and Aunt Pat made one of my favorites from that time, pineapple upside down cake. That was a special treat in my mind. I still remember them arriving with their families in tow carrying the covered dishes that were placed on the dining room table.

Everyone loved my Mother’s dressing. There really wasn’t anything special about it if you look at the simple ingredients, but she had a way of making everything taste good. I have watched her make it many times. One Thanksgiving about ten years ago she slipped and fell while cleaning the refrigerator in preparation for the big day. She broke her collarbone and her arm was in a sling. I ended up cooking the whole meal with her standing beside me giving me helpful directions so that everything would be just the way she wanted it. We laughed as I said “Yes Mom” over and over. That meal was not about me. It was about keeping a tradition alive. It was good to cook with her in this way because I learned her recipes and now I can pass them down to her grandchildren who loved her and loved her cooking just as much as I did.

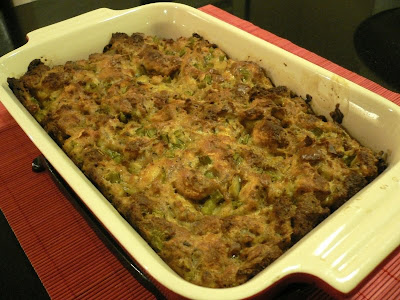
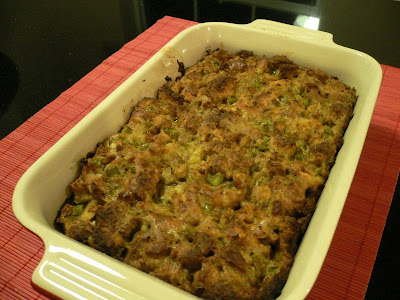
MOM’S THANKSGIVING DRESSING

1 1/2 Loaves of good quality white bread (I use Arnold’s Dutch Country Premium white)
1 stick of melted butter
1 large onion, chopped
3 to 4 stalks of celery, chopped
2 tsp. poultry seasoning
Salt and Pepper to taste
1 can of chicken broth ( You may need more to moisten)
3 eggs, beaten

Preheat oven to 250 degrees F. Place 8 to 10 slices of bread on a sheet pan and toast them in the oven until dried out and slightly brown turning once. Repeat with remainder of bread. Break bread into bit size pieces and place in a large mixing bowl.

Meanwhile in a medium saute pan melt butter and saute onions and celery until soft. Add the onion mixture to the bread cubes. Season with poultry seasoning and salt and pepper. Add the chicken broth and mix in. If the bread is not moist enough add more. Finally add the beaten eggs and mix.

Reset oven to 350 degrees F. Grease a casserole dish that is big enough to hold the dressing. Mom used a round casserole that resembled a mixing bowl. You could use a 9×12 casserole but something deeper is better . I halved the recipe for this post and used a small rectangular casserole but felt that it should have been deeper. Cover the dish with foil and bake for about 30 minutes. Remove foil and baste the top with turkey drippings and return to oven uncovered for about 30 minutes or until the top is golden brown.


By the way there is still time to sign up for the Kitchen Reveal. If you would like us to have a peek at your kitchen, leave a comment in my previous post and post a picture of your kitchen on Wednesday November 18th. Even if you just show us your stove or work area that is fine.

© Penny Klett, Lake Lure Cottage Kitchen. All rights reserved.