Nantucket Daffodil Festival

May 4th, 2013

You might want to grab a cup of coffee.  This is going to be a long post.  We are fortunate to have friends who live on Nantucket Island.  After David’s class reunion last year, several of the classmates were invited to visit Moses and his wife Maryanne there for the Spring Daffodil Festival.  It was our fourth time on the island.  Nantucket is one of my favorite destinations in the United States.  It works its magic on you from the first time you step off of the ferry until you throw coins in the water (to ensure a return) on your voyage back to Hyannis Port.

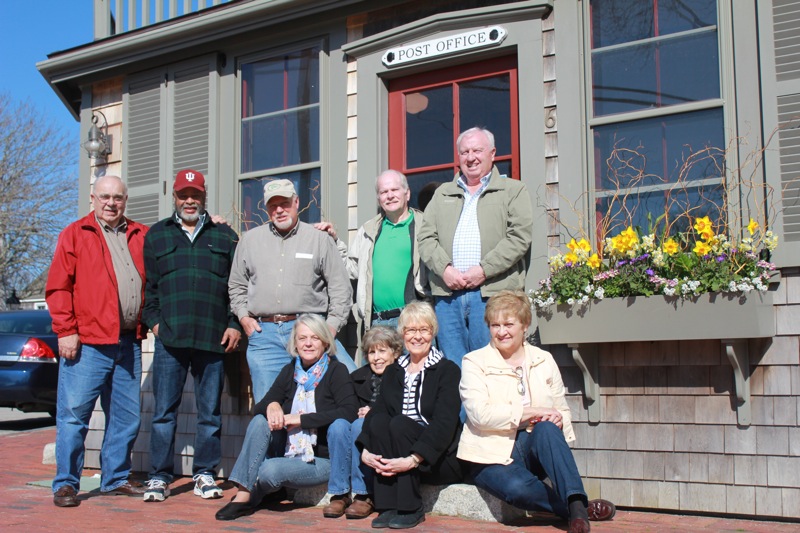
The classmates and wives (minus Maryanne who was cooking for us) gathered in front of the Sconset Post Office while we were on a guided bus tour of the island.

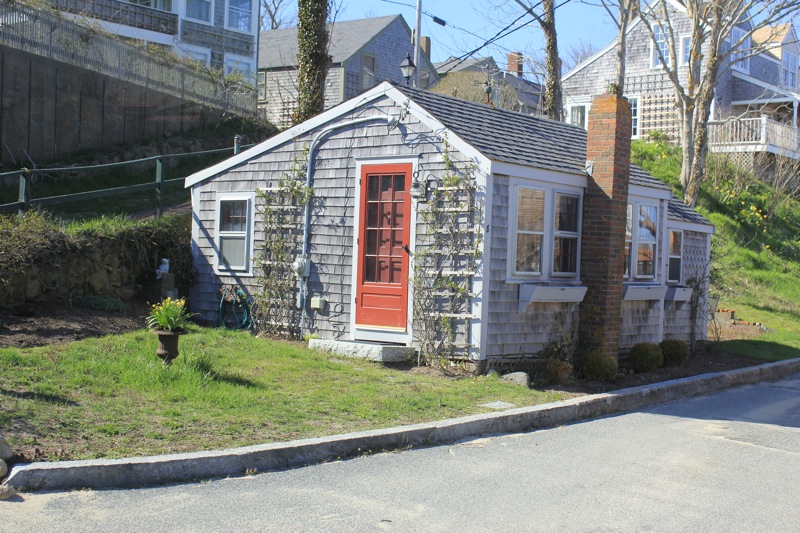
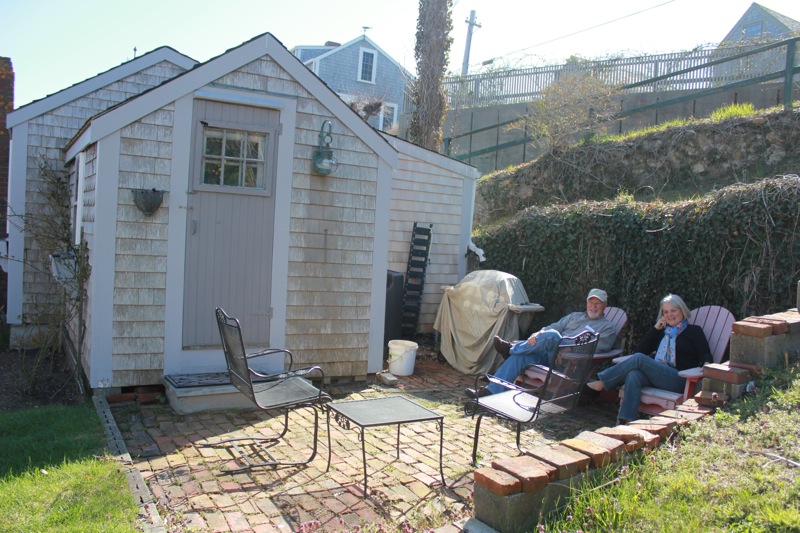
Sconset, or officially Siasconset, is a small village on the east side of the island.  It is known for its small grey shingled beach cottages and profusion of roses in season.  There is a story behind this particular cottage.  The last time David and I were on the island, we picked up a picnic lunch in the Sconset Market and then wandered the paths around the village looking for a spot to eat.  This charming cottage had a patio with comfortable chairs and it looked to be vacant.

We plopped down, unwrapped our sandwiches and proceeded to eat.  Halfway through our lunch we heard someone cough inside the cottage.  Needless to say, we grabbed our food and ran.  The above picture was taken on this trip.  It just so happened that the cottage belonged to our tour bus driver’s mother.

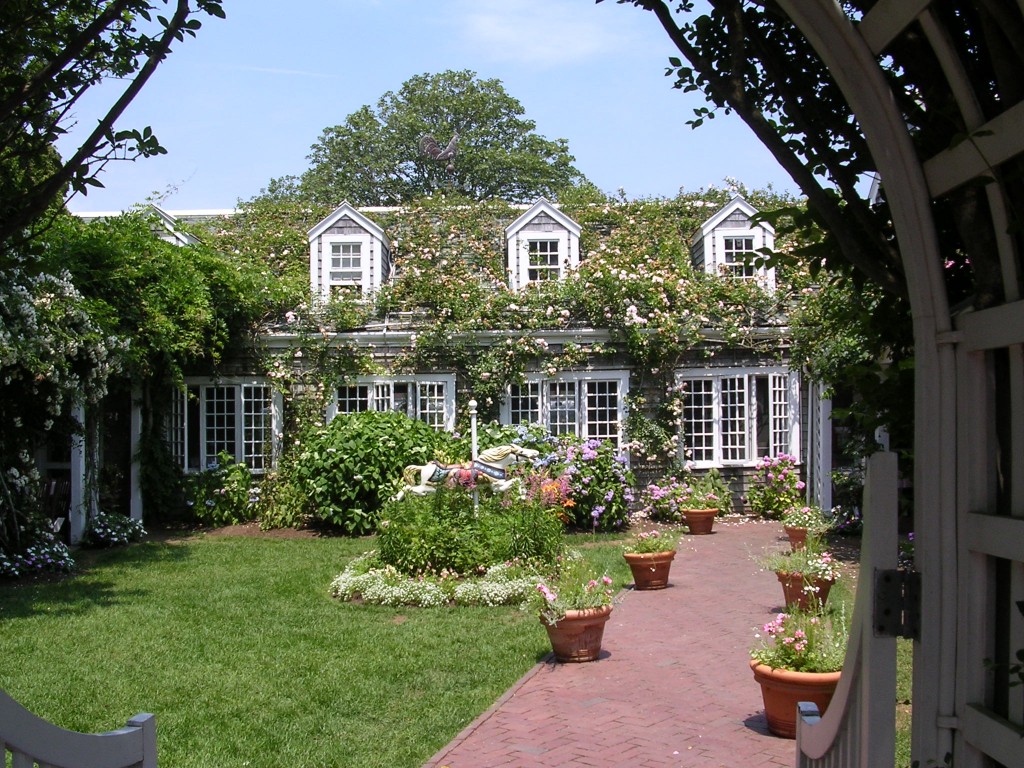
We took this picture of the Chanticleer Restaurant in Sconset on our last trip.  It was summer and the roses and flowers were in bloom.  Breathtaking!


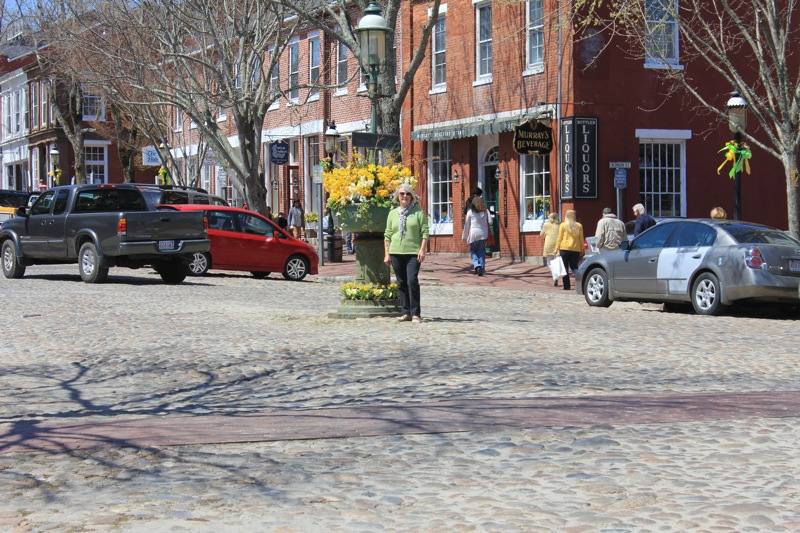
 Back in town the next day we looked forward to the Daffodil Festival on cobblestoned Main Street.

All kinds of antique cars were decorated with flowers for the parade.

The cars were judged, so everyone went out of their way to be unique.

Some were more elegant than others.

There was also a dog parade.  We were rooting for this dog named Bailey.  She was on the ferry with us on the way over to Nantucket and we bonded.

Here we are encouraging Bailey to do her best.

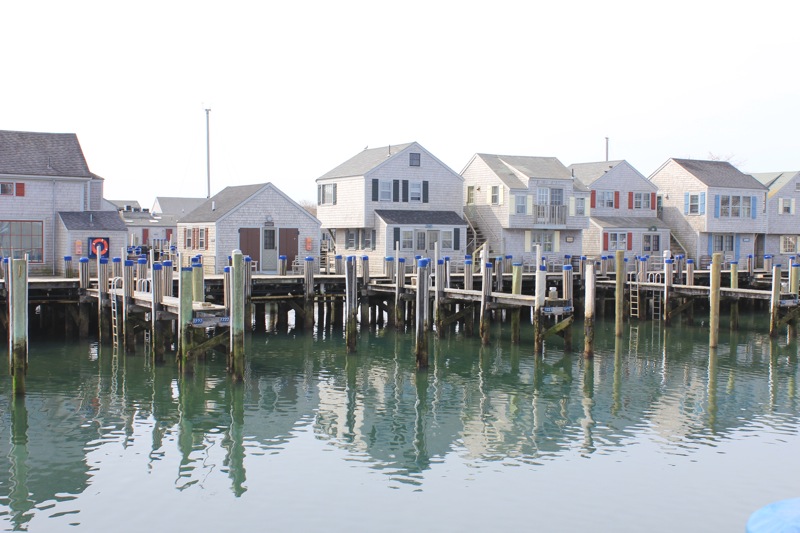
Nantucket Harbor is usually full of boats and the wharfs are hopping with activity, but since it was so early in the season, most of the boat slips were empty.  It was good to be here before the rush of tourists.

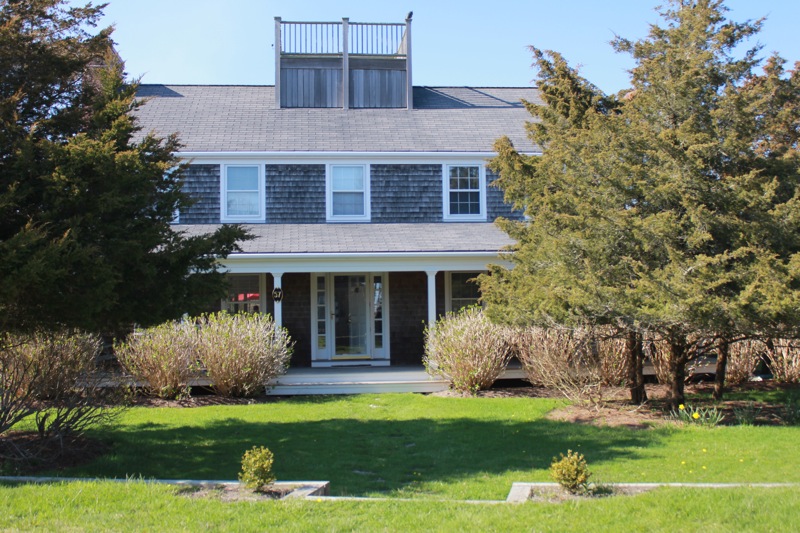
Moses and Maryanne live in this house.  Have you noticed a pattern here?  Most of the houses on Nantucket are grey shingled with white trim.  A local joke is to say “Meet me on the corner in front of the grey shingled house with the white trim”.   Many of the original houses had widow’s walks.  The first industry of Nantucket after it was settled by the English was whaling.  The ships would be gone from port from three to five years.  The wives would scan the horizon from these aeries for the return of their men.  It was a brutal business, but the ship captains made a fortune from the whale oil which was used to light lamps all over the world.

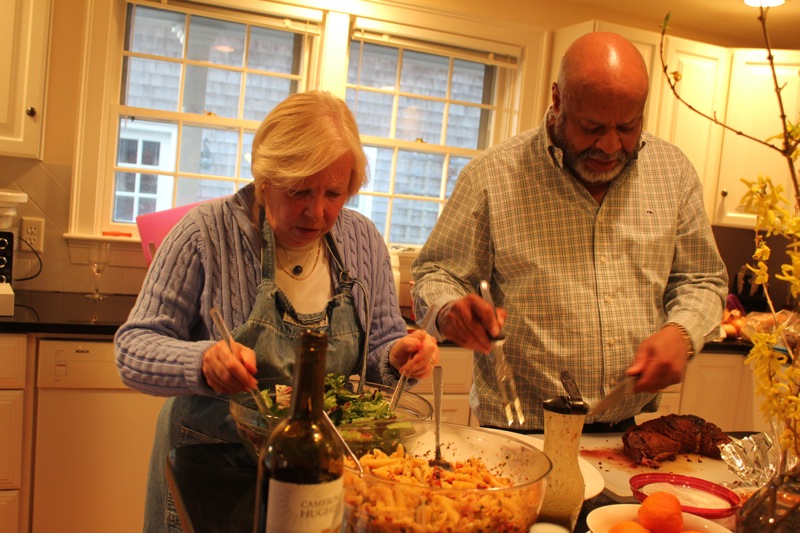
Not only did we enjoy the sights and activities on Nantucket, but we also ate very well.  Maryanne prepared delicious meals for us.  Unfortunately I did not take composed pictures of the food, but I came away with wonderful recipes that I will share with you over several posts.  Our first dinner in their home included Filet of Beef with Paprika, Coriander and Cumin and Penne with Sun-Dried Tomato Pesto.  The filet recipe came from Joyce Goldstein, former chef at Square One and Chez Panisse.  Joyce made it for Moses’s 59th birthday party.  The pesto pasta is a Giada De Laurentiis recipe and is perfect for a crowd.

 We left Nantucket Harbor with a last view of the Brant Point Lighthouse and threw pennies in the water in the hopes of returning to this enchanted island.  As long as our friends are there, I have no doubt that we will be back.  Thank you Moses and Maryanne.

FILET OF BEEF WITH PAPRIKA, CORIANDER AND CUMIN (Joyce Goldstein)

The beef, which gets an aromatic flavor from the spice rub, requires 4 days of marination.  Serve it rare, leaving the end slices for those who like their meat well done.

1 filet of beef, about 3 1/2 pounds
3 tablespoons paprika
2 teaspoons ground cumin
1 tablespoon ground coriander
2 tablespoons freshly ground pepper
1 teaspoon ground nutmeg
1/4 teaspoon cayenne pepper
1 tablespoon salt
Hot-sweet mustard

Trim the fillet of any visible fat and silver skin.  Mix together the paprika, cumin, coriander, ground pepper, nutmeg and cayenne.  Spread this spice mixture evenly over the beef.  Place the meat in a large glass or plastic dish and cover.  et sit in the refrigerator for 4 days.  On the third day, sprinkle the meat with the salt.

To cook, let the meat sit at room temperature for about 1 hour.  Preheat a stove top griddle or a large cast-iron frying pan and preheat an oven to 350 degrees.  Sear the fillet on the griddle, or in the pan, until brown on all sides, about 6-8 minutes.  Transfer the meat to a roasting pan and roast in the oven until a meat thermometer inserted in the center of the fillet registers 120 degrees.  (I let it go higher, as suggested by the butcher’s recipe).  Let the meat rest on a carving board, covered with aluminum foil, for about 15 minutes, then slice thin.  Serve with hot-sweet mustard.

PENNE WITH SUN-DRIED TOMATO PESTO (Giada De Laurentiis)

12 ounces penne pasta
1 (8.5-ounce) jar sun-dried tomatoes packed in olive oil
2 cloves of garlic
Salt and freshly ground black pepper
1 cup (Packed) fresh basil leaves
1/2 cup freshly grated Parmesan

Cook the pasta in a large pot of boiling salted water until tender but still firm to the bite, stirring occasionally, about 8 minutes.  Drain, reserving 1 cup of the cooking liquid.

Meanwhile, blend the sun-dried tomatoes and their oil, garlic, salt and pepper, to taste, and basil in a food processor and blend until the tomatoes are finely chopped.  Transfer the tomato mixture to a large bowl.  Stir in the Parmesan.

Add the pasta to the pesto and toss to coat, adding enough reserved cooking liquid to moisten.  Season the pasta, to taste with salt and pepper and serve.

Printable recipe for Filet

Printable recipe for Pasta

Shrimp and Grits

April 30th, 2013

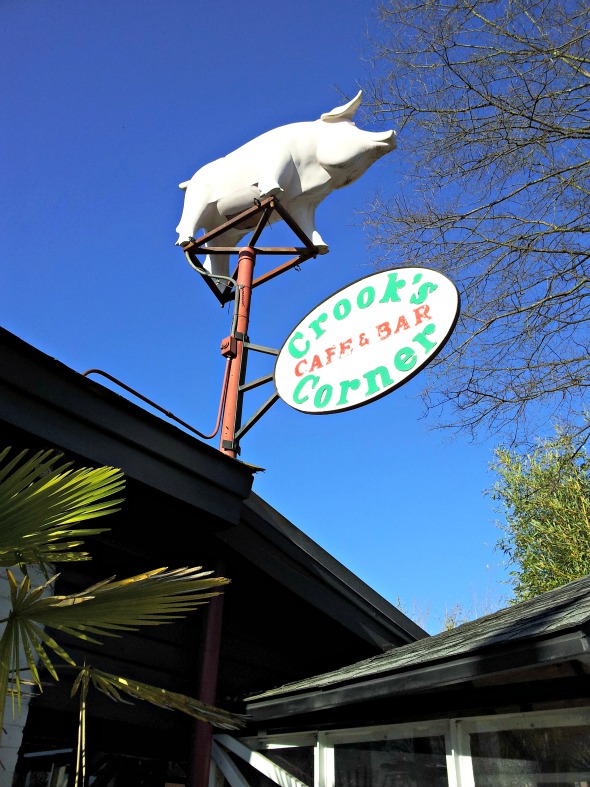
The first time I had shrimp and grits was in the early 80’s at a small restaurant in Chapel Hill, North Carolina called Crooks Corner.  As it turns out this was not just any restaurant and not just any dish.  Crook’s Corner was the birthplace of shrimp and grits. The dish has been copied all over the south and has made its way onto menus from New York City to Sante Fe, New Mexico.  The original chef, the late Bill Neal, caught the attention of Craig Claiborne who wrote about Shrimp and Grits and the Southern menu in The New York Times. Crook’s Corner is “sacred ground for Southern foodies”.

Today under the leadership of Chef Bill Smith, many of the original recipes of Chef Neal are still served.  Chef Smith has added many of his own signature southern classics, but the shrimp and grits recipe has remained the same.  We love it.  But over the years David, my in-house shrimp and grits guru, has combined recipes from several sources including Tyler Florence, Martha Nesbit of Savannah, GA, and Slightly North Of Broad restaurant in Charleston, SC.  I’m going to let him take over from here.

Penny asked me stop at the grocery store and pick up some milk and orange juice.  I put the milk and juice in the cart and then took a stroll past the seafood case to see what Ingles had to offer that day, and there they were, some of the most gorgeous 10-15 per pound shrimp I had ever seen. Visions of shrimp and grits immediately flashed through my mind.  By the time I checked out, I had in my cart a package of the shrimp, packages of bacon and andouille sausage, a package of stone ground grits, a hunk of sharp cheddar, and some scallions.  The check-out girl looked at the shrimp and said, “Boy, those are some nice looking shrimp.”  I nodded and said, “Yeah, I know…I just came in here for some milk and orange juice until I saw those shrimp.”

This recipe uses both bacon and andouille sausage for the fat component, and the grits are cooked in milk instead of water, a la Tyler Florence, and  include cheddar cheese, a la Martha Nesbit.  Tyler actually cooks his grits in a mixture of whole milk and heavy cream, but in an effort to lighten things up a bit, I used Smart Balance skim milk which almost tastes like 2%.  Stirring in grated cheddar cheese at the end makes a deliciously rich bowl of grits.

We are traveling right now.  We have been visiting friends on Nantucket Island for the daffodil festival.  I hope to have some awesome pictures to share with you soon.  In the meantime, here is David’s recipe for Shrimp and Grits.

SHRIMP AND GRITS

For the grits:
4 cups milk (We use Smart Balance Skim Milk)
1 cup stone-ground grits
2 tablespoons unsalted butter
Kosher salt and freshly ground black pepper
1 cup grated sharp cheddar cheese

For the shrimp:
3 strips of bacon cut into small pieces
1 medium onion, minced
3 garlic cloves, minced
1/2 pound andouille or spicy Italian sausage, cut in chunks
1/4 cup all-purpose flour
2 cups chicken stock
2 to 3 bay leaves
1 pound large shrimp, peeled and deveined
Pinch cayenne pepper, adjust to personal preference
1/2 lemon, juiced
Kosher salt and freshly ground black pepper
2 tablespoons finely chopped fresh flat-leaf parsley
4 green onions, sliced

For the grits:
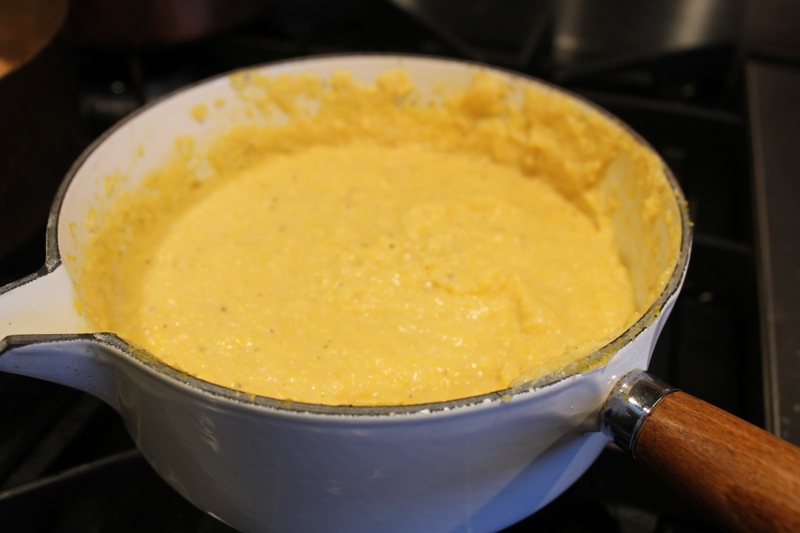
Place a 3-quart pot over medium-high heat.  Add the milk.  Slowly whisk in the grits.  When the grits begin to bubble, turn the heat down to medium low and simmer, stirring frequently with a wooden spoon.  Allow to cook for 10 to 15 minutes, until the mixture is smooth and thick.  Remove from heat and stir in the butter and cheese, thin it out with a little extra milk if necessary.  Season with salt and pepper to taste.

For the shrimp:
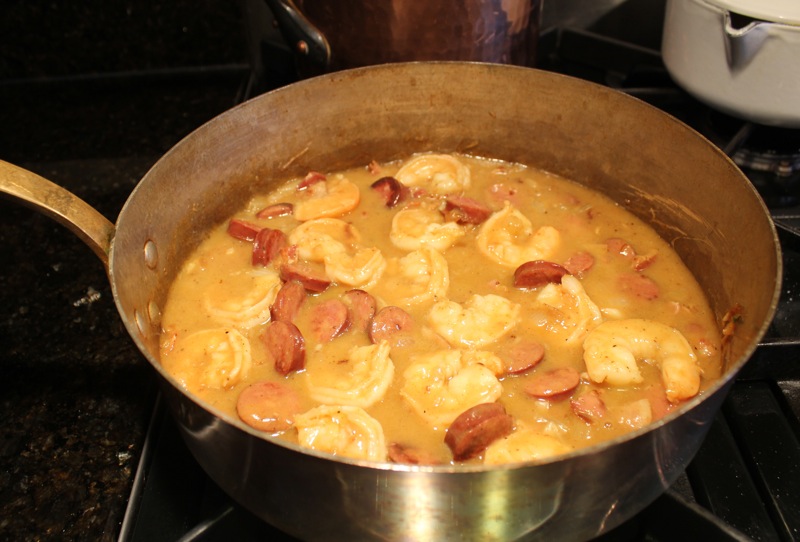
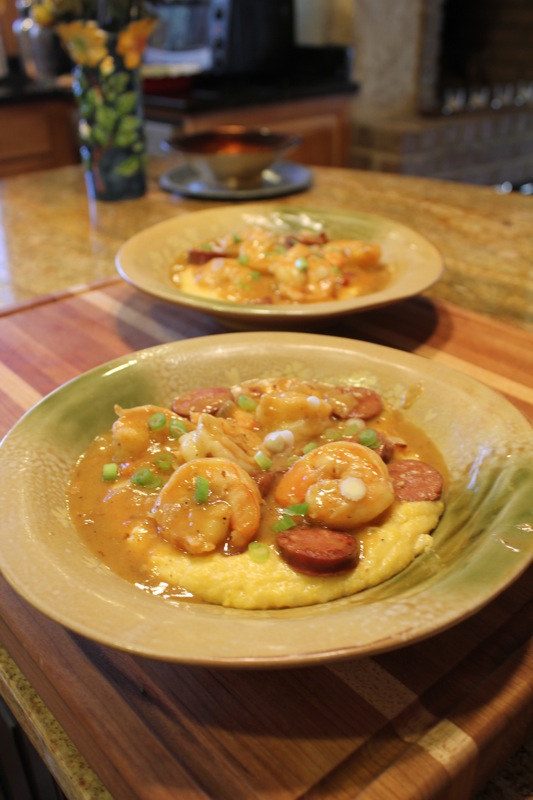
Place a deep skillet over medium heat and coat with a little olive oil.  Add the bacon and cook until done.  Remove bacon to a paper towel.  Add the onion and garlic; saute for 2 minutes to soften.  Add the sausage and cook, stirring, until there is a fair amount of fat in the pan and the sausage is brown.  Sprinkle in the flour and stir with a wooden spoon to create a roux.  Slowly pour in the chicken stock and continue to stir to avoid lumps.  Toss in the bay leaves.  When the liquid comes to a simmer, add the cooked bacon and the shrimp.  Poach the shrimp in the stock for 2 to 3 minutes, until they are firm and pink and the gravy is smooth and thick.  Add the cayenne pepper and lemon juice.  Season with salt and pepper; stir in the parsley and green onion.  Spoon the grits into individual bowls and add the shrimp mixture on top.  Serve immediately.

Printable recipe

Homemade Hamburger Buns

April 23rd, 2013

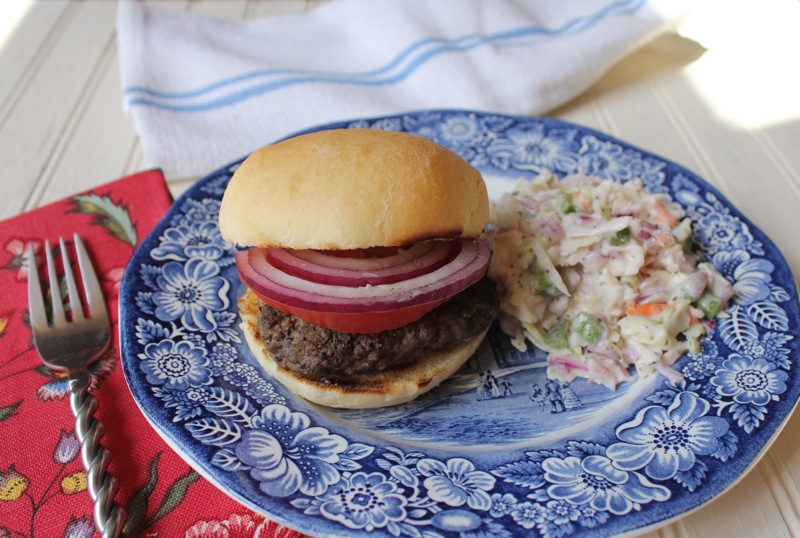
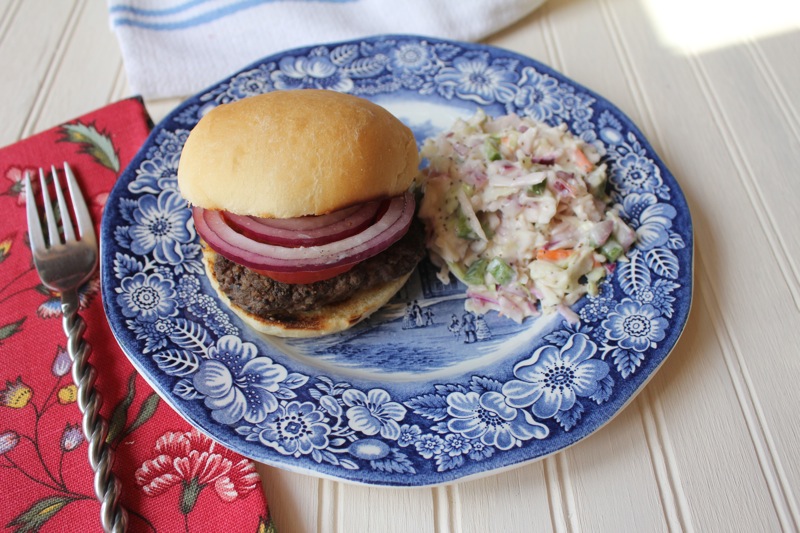
I have been trying to buy the majority of my meat and poultry from The Chop Shop in Asheville.  All of their inventory comes from local Western North Carolina farmers. I just feel better about supporting local farmers and avoiding chemically altered meat.  Last week I bought some ground chuck that came from Apple Brandy Farms.  It is a third generation family farm in the foothills of Western North Carolina.  All of their beef is corn fed and raised naturally.  I planned on using the ground chuck to make hamburgers, but on the way home I remembered that I didn’t have any hamburger buns.  Since I was feeling so virtuous about the quality of my hamburgers, I decided that  plain ol’ store-bought hamburger buns wouldn’t do.  I would make them from scratch.

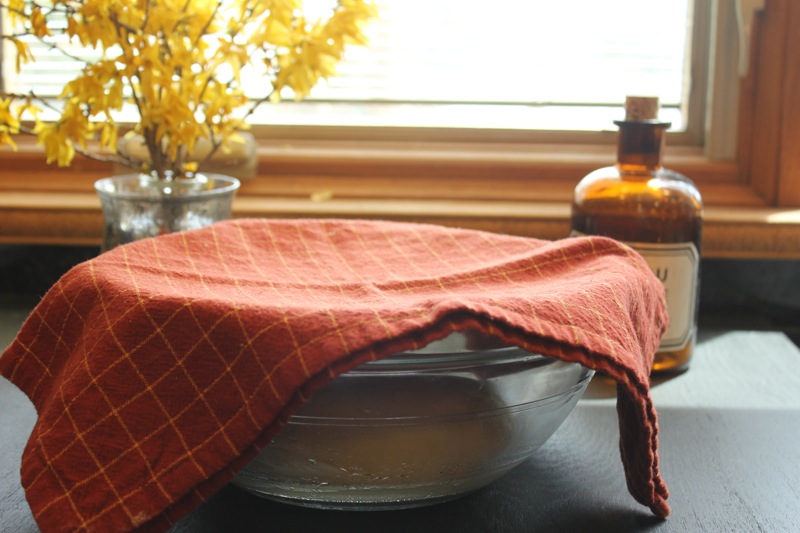
I found a recipe on theKitchn website.  These hamburger buns couldn’t be easier.  After mixing and kneading the dough in a stand mixer, it is left to rest and rise in a bowl for an hour.

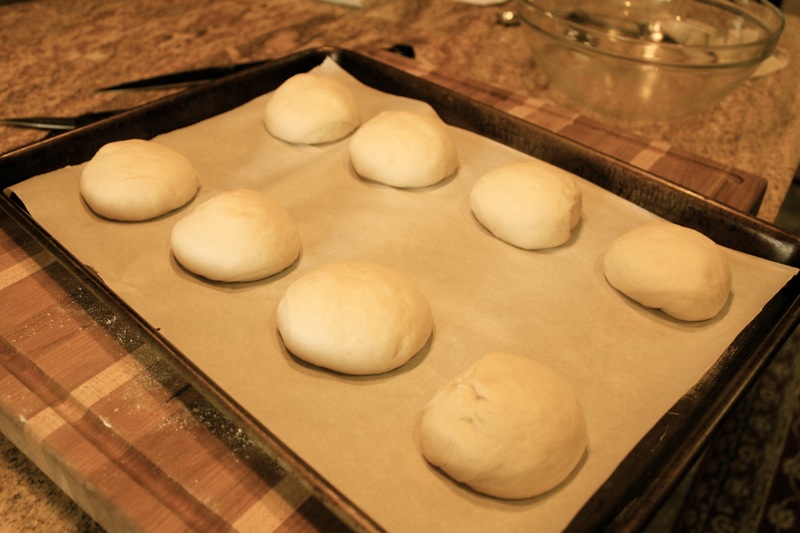
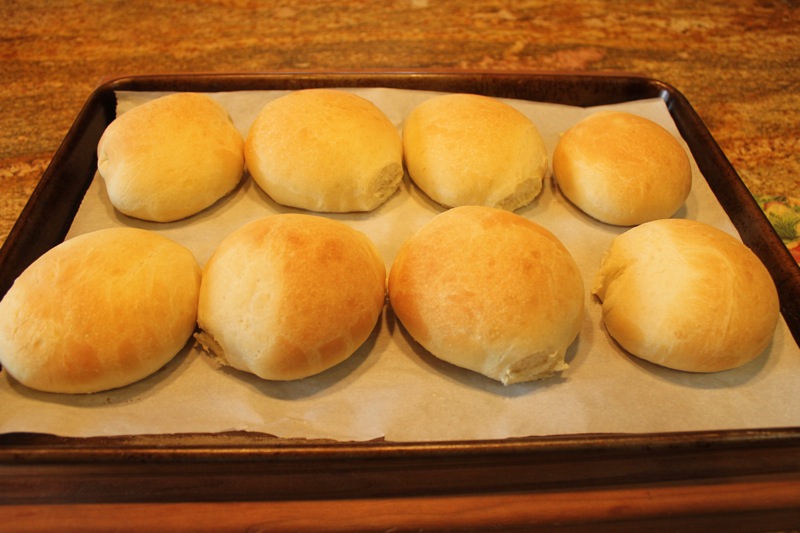
The buns are rolled and left to rise again.  They are then baked.

This was so easy, that I see no reason not to do it on a regular basis.  I might just experiment with different flours and toppings like sesame seeds or chia seeds in the future.

I have to say that both the hamburgers and the buns were delicious.


HOMEMADE HAMBURGER BUNS

1 tablespoon active-dry yeast
1/2 cup (4 oz) warm water
1/2 cup (4 oz) milk (whole, 2%, or skim)
1 large egg
2 tablespoons vegetable oil
2 tablespoons sugar
1 teaspoon salt
3 cups (15 oz) all-purpose flour
1 tablespoon butter

In the bowl of a standing mixer (or a large bowl, if mixing by hand), stir the yeast into the warm water and let it sit until dissolved.

In a separate bowl, whisk together the milk, egg, oil, sugar, and salt. Add this to the yeast mixture and stir until combined. Add all the flour and stir until it forms a shaggy dough. Knead at low speed, or by hand for 10 minutes. The finished dough should be smooth, feel slightly tacky, and spring back when poked.

Return the dough to the mixing bowl and cover. Let the dough rise in a warm spot until doubled in bulk, about an hour.

Dust your work surface with a little flour and turn out the risen dough on top. Divide the dough into 8 pieces and shape each into a tight ball. Transfer the balls to a baking sheet and let rise until they look puffy and hamburger-sized, roughly 30-40 minutes.

Pre-heat the oven to 375°F.

Melt the butter and brush it over the risen hamburger buns. This helps the tops to brown and keeps the crust soft. Bake the buns until golden, 15-18 minutes.

Let the buns cool to room temperature before slicing and using. They are best if eaten within the next day or two, but will keep in an airtight container on the counter for up to a week.

Additional Notes:

• For Whole Wheat Buns – Substitute 1/2-1 cup of the all-purpose flour with whole wheat flour and prepare the recipe as usual. The texture of the buns will be a bit more dense, but still very delicious and burger-worthy.

• Doubling the Recipe – Double all of the ingredients except for the yeast. To make even more buns, it’s best to prepare separate batches as the dough becomes too cumbersome to work with easily.

• Freeze Buns for Later – Wrap the buns in aluminum foil and then store in an air-tight container or freezer bag. Let them thaw in their packaging overnight on the counter. Foil-wrapped buns can also be thawed more quickly or re-warmed in a 300°F oven for about 10-15 minutes.

Printable recipe

A Rite of Spring

April 18th, 2013

It is so good to be back in the mountains of North Carolina.  There is so much to love about Lake Lure and Asheville, one of my nearest cities.  Asheville is a haven for foodies.  There is an active farm to table presence in the area.  Many small farms supply the area restaurants, farmer’s markets, butcher shops and bakeries with the freshest ingredients that are chemically  free and humanely handled.  I always feel good about the food that I eat here.

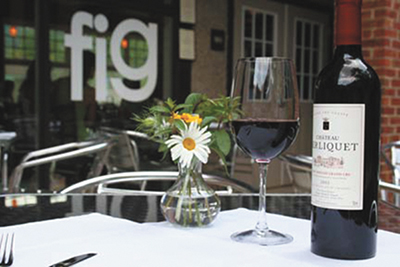
A rite of Spring for my friend Penny, who has the food blog From Harvest to Table, and me is to get together for lunch and antique shopping.  One of our favorite restaurants is Fig Bistro.  Located in the historic Biltmore Village, Fig is a little bit French and a whole lot seasonal and fresh.  They are committed to supporting local, organic and the sustainable agriculture of the Western North Carolina farmers.  Every meal that I have had here has been exceptional.

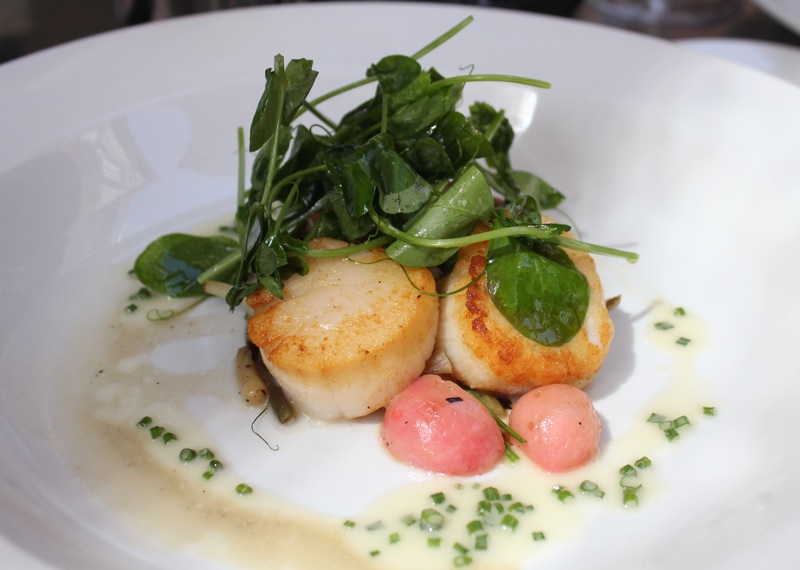
Now this is Spring on a plate.  The other Penny (Affectionately known as T.O.P.) ordered this special of the day.  It was seared scallops with baby ramps, radishes and baby pea shoots, served with a beurre blanc sauce and chopped chives.  Look at how beautiful those cooked radishes are.  To me, the plate is a work of art.

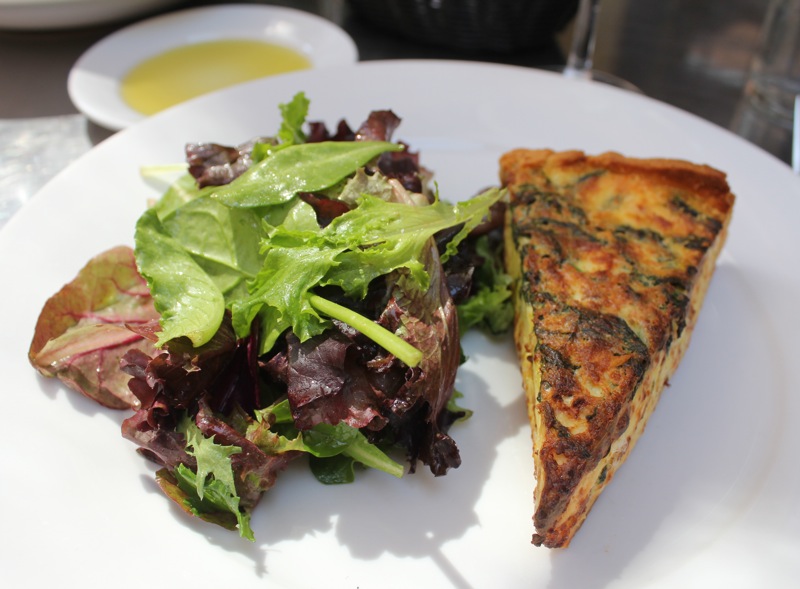
I ( Sometimes also known as T.O.P) ordered the Spinach and Bacon Quiche with side salad.  I wish I could offer you a piece of this quiche.  It was the creamiest, most melt in your mouth delicious quiche that I have ever had.  I will be working on duplicating this at home.  By the way, I did try to duplicate Fig Bistro’s Salmon dish in a post here.  But there are some dishes that can only be done in restaurants like this.  I am more than happy to sit back on a sunny spring day on the patio of Fig with my friend Penny, enjoying a glass of wine and eating their creative dishes.  It is an added bonus to have a thoughtful French waiter and Heather Masterson watching over us.  You must visit Fig if you are ever in Asheville.

Cornmeal Molasses Crumb Muffins

April 15th, 2013

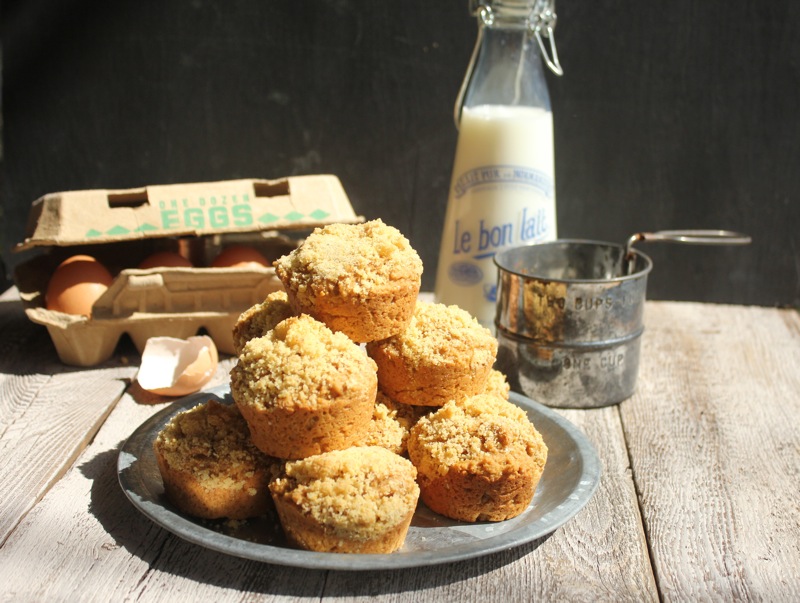
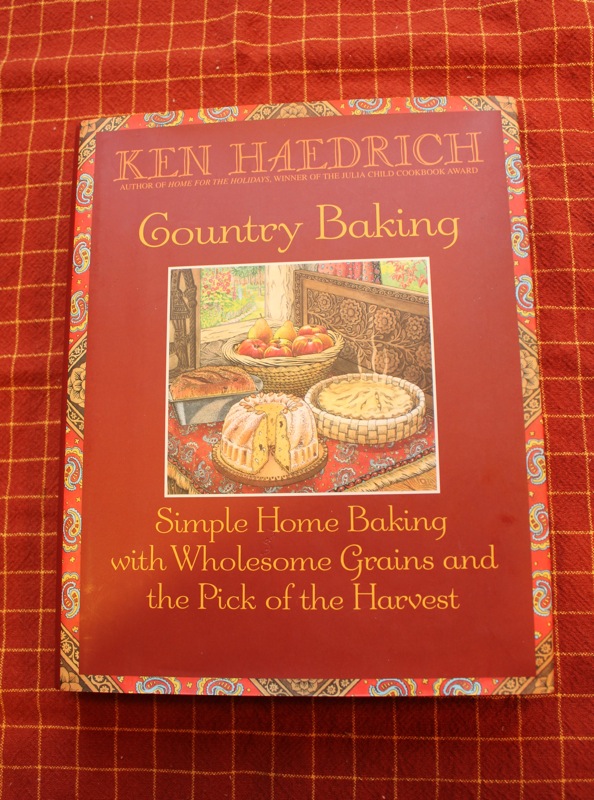
I love rummaging through antique stores.  You never know what you will find; what stories will be revealed.  I was not on a quest for a cookbook, but that is what I came away with.  I found a pristine copy of Country Baking by Ken Haedrich.  There was a convenient love seat nearby so I sat for a while and read through the recipes.  The very first one was for these muffins.  I had eaten a very uninspiring breakfast that morning, so the thought of these cornmeal muffins appealed to me in a big way.  Wholesome cornmeal, whole wheat flour and just a touch of sweetness from the molasses sounded like my kind of quick breakfast.  There was more; lots of recipes for quick breads, yeast breads, pies, cakes, crackers and savory dishes like Deep Dish Sausage and Shrimp Pie.  I knew I needed this cookbook.

I found out something else when I got home.  Ken Haedrich is one of the country’s foremost baking authorities.  He has an online website called The Pie Academy.   It is dedicated to the idea that anyone can learn to make great pies from scratch.  I contacted him by email and he has graciously agreed to do a guest post on my blog in the near future.  Country Baking is now out of print.  He wrote it over 20 years ago.  There are still some books available on Amazon.  But Ken told me that he has three copies left in his supply if you are interested.  It has a different cover but the same content.  They would be $17.00 including postage.  You can contact him at ken@thepieacademy.com  to order your copy.  It is still a relevant baking book and according to Ken, one of his favorites from all of his publications.

I know I was glad that I found this book and had the opportunity to learn more about Ken Haedrich and The Pie Academy.  I look forward to having him share some of his knowledge with us on this blog.  I am also happy to share this great recipe with you.  A muffin and cup of coffee have been my breakfast of choice for the last few days.

CORNMEAL MOLASSES CRUMB MUFFINS

Muffin Batter:
1 cup unbleached flour
3/4 cup yellow cornmeal, preferably stone-ground
1/2 cup whole wheat flour
2 teaspoons baking powder
1/2 teaspoon salt
1/4 teaspoon cinnamon
1/4 teaspoon nutmeg
1/4 teaspoon ground ginger
1 large egg
1 cup milk
1/3 cup flavorless vegetable oil
1/4 cup unsulphured molasses

Crumb Topping:
2 tablespoons yellow cornmeal, preferably stone-ground
1 1/2 tablespoons unbleached flour
2 tablespoons packed light brown sugar
Pinch of salt
1 tablespoon cold unsalted butter

Preheat the oven to 400 degrees F. and butter 12 muffin cups.  To make the muffin batter, stir the unbleached flour, cornmeal, whole wheat flour, baking powder, salt, and spices together in a large mixing bowl.  In a separate bowl, beat the egg lightly, then whisk in the milk, oil, and molasses.  Set aside.

Make the crumb topping by combining the crumb ingredients in a mixing bowl and then rubbing them between your fingers until you have large, damp crumbs.

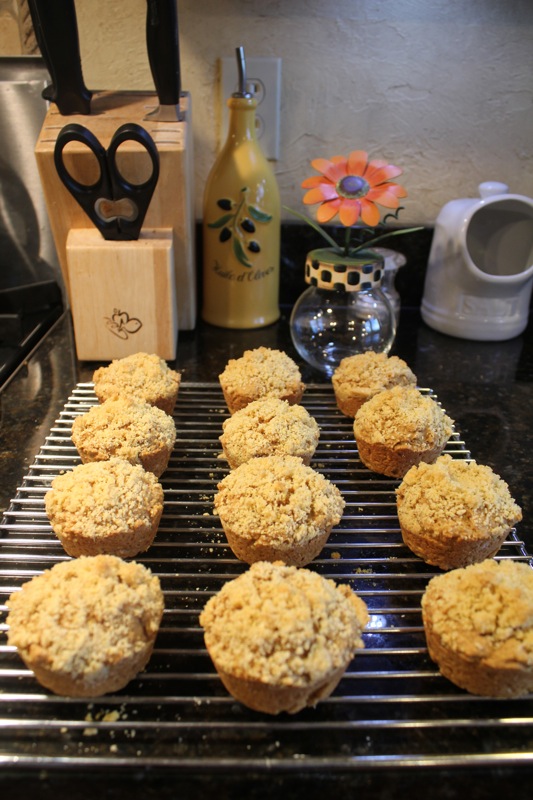
Make a well in the dry ingredients, add the liquids, and stir with a few deft strokes, just to blend.  Divide the batter evenly among the muffin cups.  Sprinkle some of the crumb topping on each muffin and bake for 18 to 20 minutes.  When the muffins are done, the topping should be browned lightly and the muffins themselves slightly springy to the touch.  Cool the muffins on a rack in the pan for 5 minutes, after which they should lift right out.  Serve them hot, storing leftovers in a sealed plastic bag for up to 2 days.  To reheat, wrap in foil and place in a hot oven for 5 minutes.

Printable recipe

© Penny Klett, Lake Lure Cottage Kitchen. All rights reserved.