Puerco Cubano

February 9th, 2013

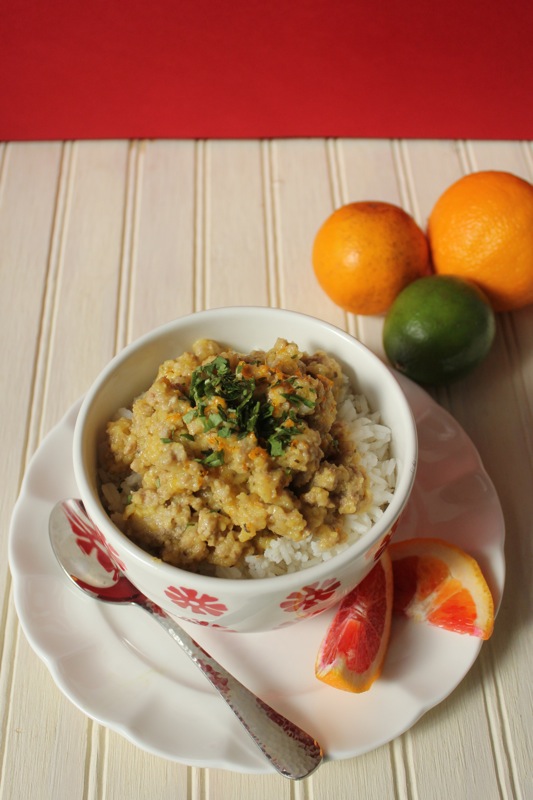
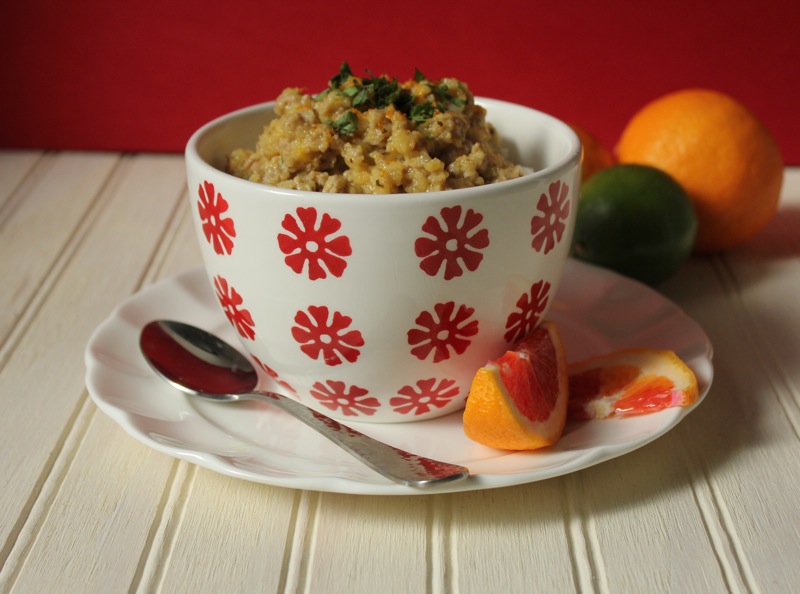
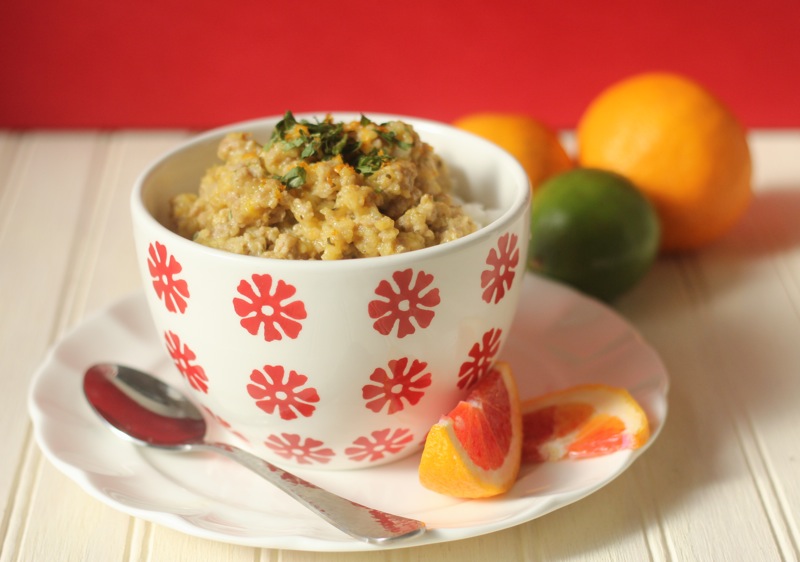
You know those store-bought rice bowls in the prepared food aisles of the grocery store?  I hate them.  It seems to me that it is much easier to pull together a homemade version with less additives and less cost.   You can mix up all kinds of things with rice.  This Puerco Cubano is a good example.

I found this recipe in a book by Diane Mott Davidson called  Crunch Time.  She is the author of the Goldy Bear caterer mysteries.  Don’t know about you, but when I read a mystery I like it when the protagonist eats.  There is just so much of sleuthing, danger and mayhem that I can take before I am ready for my detective to retire to her or his lair for a little rejuvenation.  I relish those moments when a glass of wine is poured and water is brought to a boil for pasta,while cheese is grated and a salad is tossed.  These are moments of introspection for the sleuth.  A warm bed is waiting to lull the busy mind to rest and restore it to renewed vigor in the morning light.  So many thriller novels leave out the basics of life.  I’m sorry, but we all have to eat, bathe, sleep and use the bathroom.  It just makes me feel good when these incidents are included in a book, well maybe not the bathroom part.  Diane Mott Davidson does this  very well because her books are focused on food along with the mystery.  This makes me a happy reader.  In addition her recipes are included in the back of the book.


Puerco Cubano was meant as a quick comfort food in the book.  It was easy to prepare, using ground pork flavored with orange juice and lime juice.  It was served over simple cooked rice.  I like the idea of using fresh squeezed orange juice as the liquid in this dish.  Oranges are plentiful this time of year and, goodness knows, we all can use the hit of vitamin C in the winter.

This was a very satisfying meal.  Both easy and tasty.  You could add many things to the mix; black beans, avocados, green onions or pistachios.  I think it needed a little crunch.  Homemade rice bowls are flexible that way.

PUERCO CUBANO

1/4 cup (1/2 stick) unsalted butter
1 pound ground pork
2 tablespoons freshly minced or crushed garlic
2 teaspoons demi-glace de poulet or demi-glaze veau (chicken or veal demi-glace) I used a bouillon cube disolved in 1/4 cup water
1/4 cup all-purpose flour
1/2 teaspoon dried oregano
1/4 teaspoon kosher salt
1/4 teaspoon freshly ground black pepper
2 cups fresh orange juice
1/4 cup fresh or organic, not-from-concentrate lime juice
2 teaspoons (or more) granulated sugar
1 cup chopped fresh cilantro

In a large (12-inch) nonstick saute’ pan, melt the butter over medium-low heat. Add the pork and the garlic, and cook, stirring and breaking up the pork, until the meat is just cooked. Add the demi-glace and stir well.

Add the flour, oregano, salt, and pepper, and cook stirring, until the flour is cooked and the mixture bubbles.

Stir in the juices and sugar and raise the heat to medium. Stir constantly until the mixture bubbles and is thickened. Taste and correct the seasoning.

Serve over hot cooked rice and sprinkled with cilantro.
Printable recipe


Israeli Couscous and Tuna Salad

February 5th, 2013

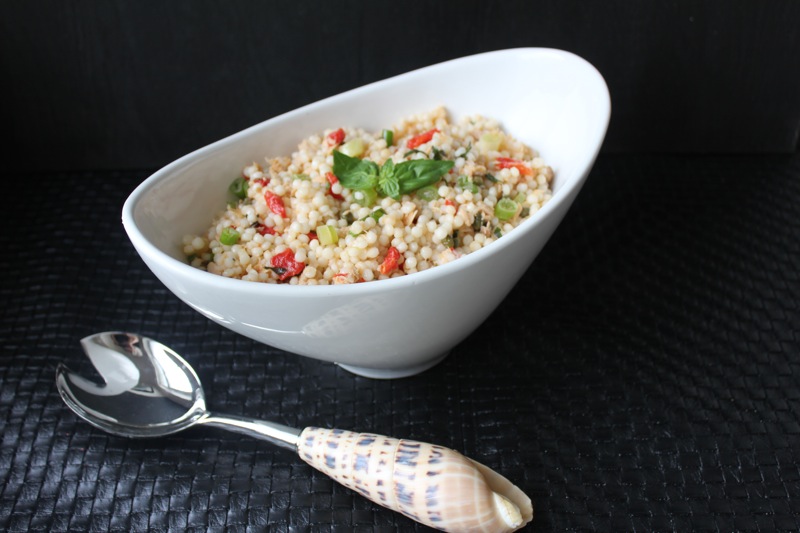
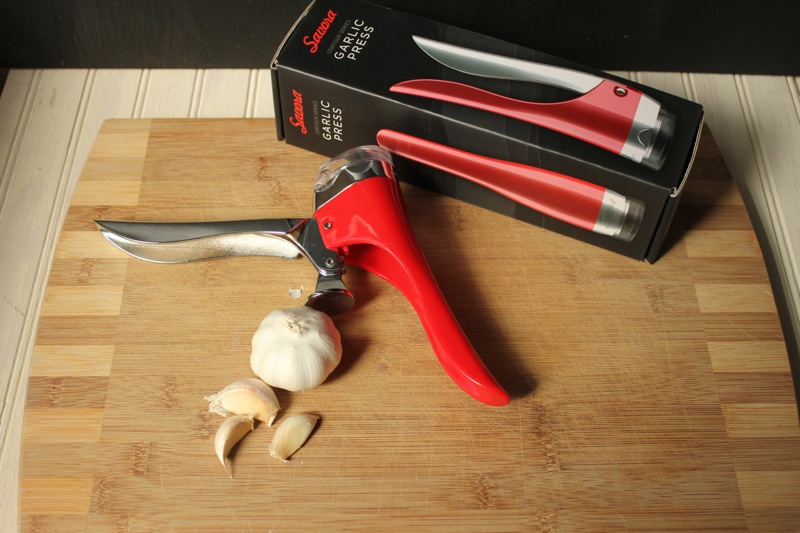
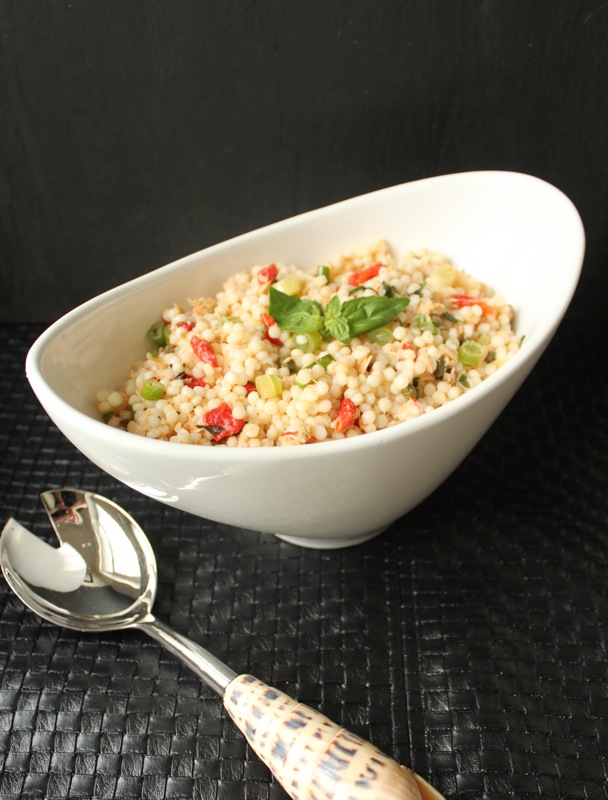
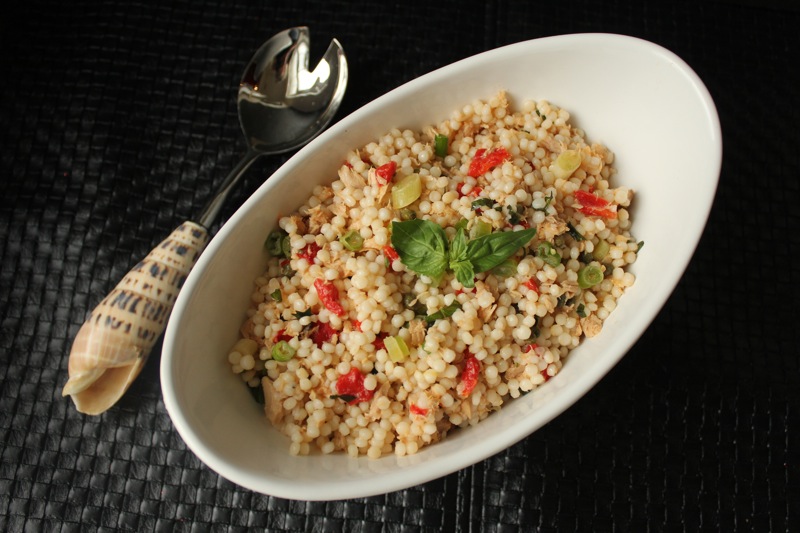
When looking for something healthy for us to eat for lunch, I grabbed Ina Garten’s new cookbook, Foolproof.  I remembered seeing a tuna salad recipe that sounded interesting and flavorful.  The ingredients were intriguing; good quality canned tuna, roasted red peppers, olives, capers, lots of lemon flavor, basil and that pearly white grain, Israeli couscous.  There was also garlic in the salad.  This gave me a good opportunity to try out my new garlic press that I received from a company called Savora.

I was contacted by Savora to try out one of the kitchen tools from their new line of products.  They sent me a garlic press and asked me to give an honest evaluation of it.  I received no monetary compensation other that the garlic press itself.  To be honest with you, I hardly ever use a garlic press.  I have gotten so used to chopping garlic by hand.  But I was impressed with the beauty and quality of this garlic press.  All of the Savora kitchen tools have eye-catching lines and they come in 8 different vibrant colors.  The design teams worked hard on both the aesthetics of the tools and the performance.  The Savora garlic press is designed to crush up to 5 cloves of garlic at once.  The mechanism is strong and makes pressing the garlic easy.  Not only that, the garlic press comes apart with just a twist of the top so that clean up is a breeze.  I will definitely be using my garlic press from now on.  It is especially good for recipes that call for lots of garlic or in salads like this one where you want the garlic to blend easily into the other ingredients.  You can find out more about the Savora line on Facebook, Pinterest, or Savorastyle.com.

This is such a pretty salad.  Ina says to use Italian tuna, but my humble grocery store only has the usual brands.  So I chose a light tuna packed in olive oil.  It worked just fine.  We loved this salad.  It can be eaten hot or cold.  It is packed with flavor too.  I just happened to watch The Food Network Barefoot Contessa program this week and Ina made this for Jeffery.  They were renting a house in Napa Valley and they dined on the couscous salad in their garden.  Ah, to be in Napa Valley dining amongst the vineyards.  No matter, we loved it right here at home.  It will be a regular from now on.


ISRAELI COUSCOUS AND TUNA SALAD

2 cups Israeli couscous (10 to 12 ounces)
2 (7-ounce) cans or jars Italian tuna, drained and flaked
2 teaspoons grated lemon zest (2 lemons)
1/4 cup freshly squeezed lemon juice
1/2 cup good olive oil
3 tablespoons capers, drained
1/2 cup pitted, oil-cured black olives, coarsely chopped
1/2 cup jarred roasted red peppers, medium-diced
2 teaspoons minced garlic (2 cloves)
Kosher salt and freshly ground black pepper
1 cup chopped scallions (6 to 8 scallions)
1/4 cup julienned fresh basil leaves, lightly packed
Juice of 1/2 lemon

Bring 4 cups of water to a boil in a medium-sized saucepan.  Add the couscous and reduce the heat to very low.  Cover the pot and simmer for 12 to 15 minutes, until the couscous is just tender.  Drain in a colander.

Meanwhile, combine the tuna, lemon zest, lemon juice, olive oil, capers, olives, red peppers, garlic, 1 tablespoon salt, and 1 1/2 teaspoons black pepper in a large bowl.  Pour the hot couscous into the mixture and stir well.  Cover and set aside for 10 to 15 minutes, stirring occasionally.  Just before servine, stir in the scallions, basil, juice of the 1/2 lemon, and 1 more teaspoon of salt.  Taste for seasonings and serve warm or at room temperature.

Printable recipe

Blood Orange and Rosemary Cake

February 1st, 2013

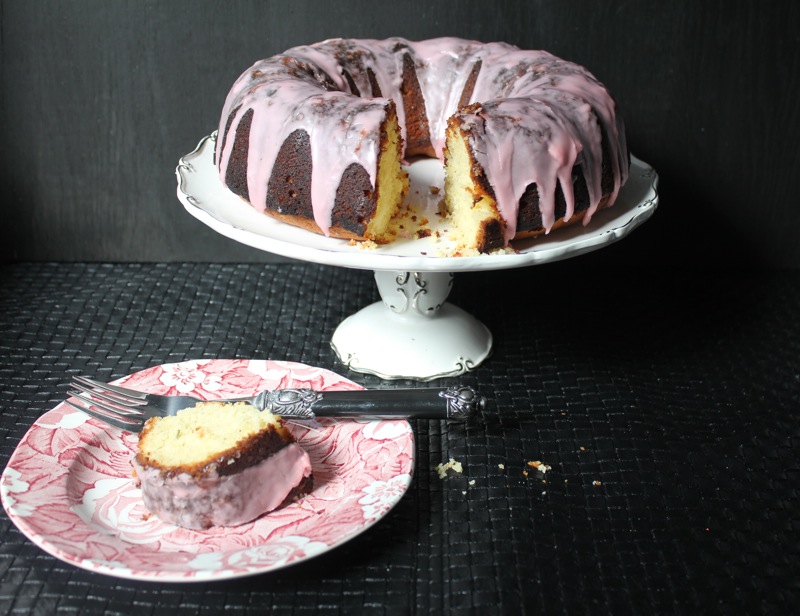
This has been a difficult post to write.  I just deleted my original first paragraph that was full of disillusionment in this recipe and the way I executed it.  I literally thought I had “executed” the cake.  But after time away from the results and taste testing a few times, I feel better about the cake and can pass on a few tips to you to make it better than my experiment.

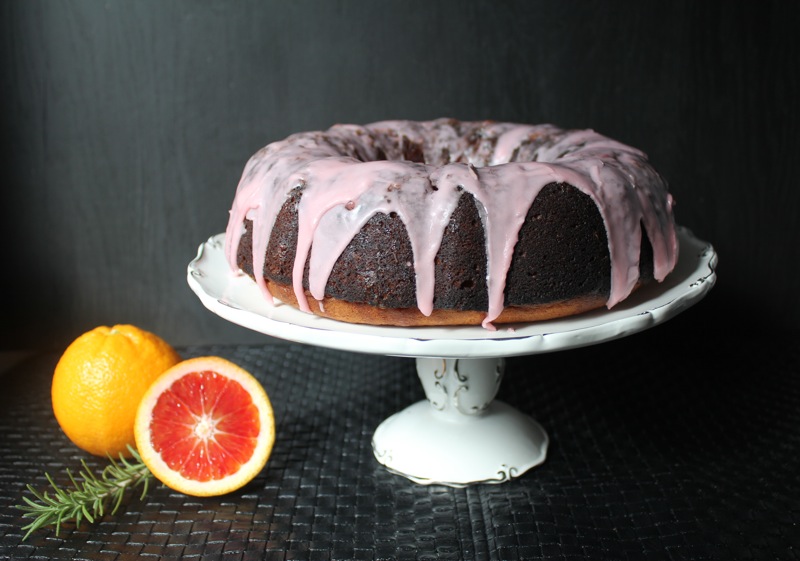
This Blood Orange and Rosemary Cake is featured in my new favorite cookbook What Katie Ate.  Katie Quinn Davies is an Irish transplant to Australia and is a very talented photographer and food blogger with a blog of the same name.  I was transfixed by the picture of this cake in her cookbook.  The blood oranges leant a beautiful bright pink to the frosting on her cake.  I knew it would be one of the first recipes I would make.  But I had to wait until blood oranges were in season.  They finally arrived at our supermarket this week.

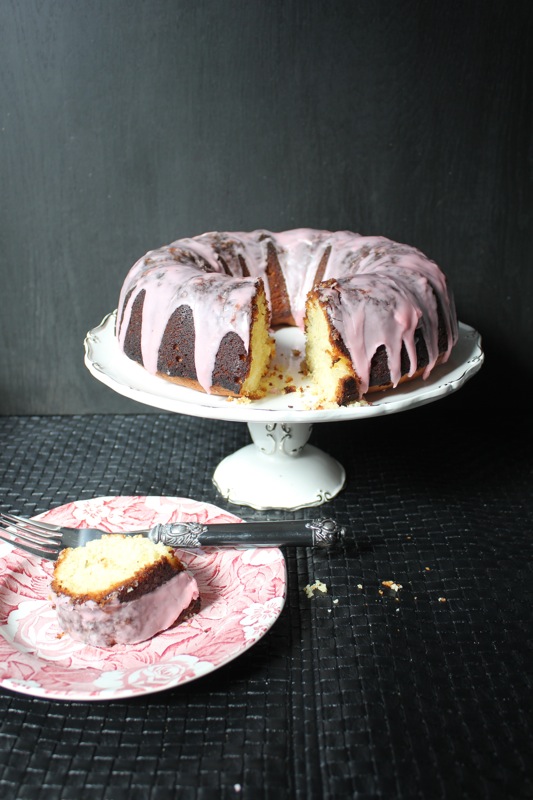
I followed the recipe to a tee.  I noted that the three eggs that were listed in the ingredients were not mentioned in the written directions.  But I pretty much know when to add eggs to a batter.  I also discovered that you can go to this page on the internet to find the corrections to the cookbook.  I felt like 400 degrees was too hot to bake a cake.  I was right, especially in my oven.  Before I could rescue the cake the edges were blackened.  In my photos you can see that my cake looks like chocolate.  That is actually scorched batter.

When I poured the orange syrup over the cake the pulp in it stayed on the top and made funny ridges under the too runny frosting that I added later.  Straining it in a fine sieve would have been a good idea. Also the color of the frosting was not as vibrant as I would have liked so I added more blood orange juice, which thinned the frosting too much.  That was the only diversion from the recipe.  So I learned a lot.  The texture of the cake is good.  When I first tasted it, I thought the rosemary was a bit overpowering.  The directions call for three sprigs of rosemary.  How large are the sprigs?  I think mine were too large.  But after an hour or two David said “You know, this cake is growing on me”.  I began enjoying it too and feel that it has great potential.  It makes a great, not too sweet, treat with tea or coffee.  I had a piece for breakfast this morning.  So here it is- not looking as great as Katie’s cake.

But I do want to try it again.  Here is the recipe if you would like to give it a try.  I’ve added my changes in italics.

BLOOD ORANGE AND ROSEMARY CAKE

2 sticks unsalted butter, softened
1 cup superfine sugar – 1 cup sugar
2 teaspoons cointreau – triple sec
3 large eggs
1 blood orange, peeled, pith removed and cut into segments
1 orange, peeled, pith removed and cut into segments
3 sprigs rosemary, leaves picked – 2 tablespoons
2 cups all-purpose flour, sifted
2 teaspoons baking powder, sifted

Blood Orange Syrup:
Juice of 2 blood oranges – strain through fine sieve
Juice of 2 oranges – strain through fine sieve
1 tablespoon sugar

Blood Orange Frosting:
Juice of 1 blood orange
2 cups confectioners’ sugar, sifted

Preheat the oven to 400 F ( I would recommend 350 F).  Grease a 6 cup capacity bundt pan (alternatively, grease and line a 9-inch sprinform cake pan).

Use an electric mixer to cream the butter and sugar for 10 minutes until light and creamy.  Add the Cointreau (Triple Sec) and the 3 eggs beaten and beat until combined.

Whizz the blood orange, orange and rosemary in a food processor until the rosemary leaves are finely chopped and the oranges are blended to a pulp.  Add to the butter and sugar mixture and beat together on low speed until combined.

In a separate bowl, mix together the flour and baking poser.  With the mixer on low speed, gradually add the flour mixture to the butter until everything is well incorporated.

Pour the cake batter into the prepared pan.  Bake for 45-50 minutes or until the top is golden and a skewer inserted into the center comes out clean.

Meanwhile, to make the blood orange syrup, place the ingredients in a saucepan and bring to a boil, stirring constantly.  Reduce the heat to medium and simmer, stirring occasionally, for 10-15 minutes or until the sugar has dissolved and the syrup has reduced by about a third.  Strain syrup through a fine sieve and return to saucepan and keep warm while cake is baking.

Leave the cake to cool a little before transferring it to a wire rack.  Place a plate underneath the rack to catch any drips, then prick the top of the cake with a skewer, spoon the warm syrup over the cake and leave it to be absorbed.

Make the frosting by combining the blood orange juice and confectioners’ sugar until smooth.  Drizzle the frosting all over the cooled cake, then chill the cake in the fridge for 20 minutes before serving.

Printable recipe


Roasted Sausages and Grapes

January 28th, 2013

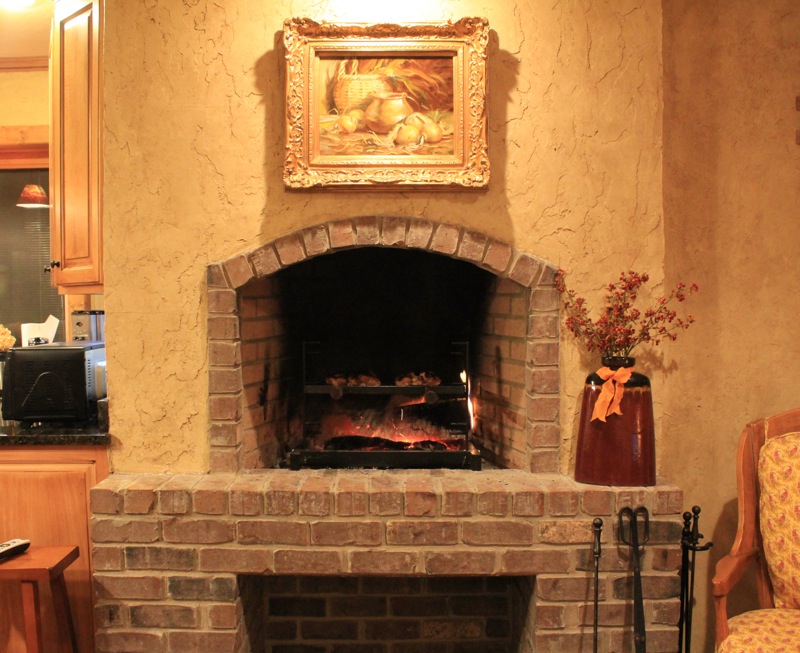
There are very few dishes that The Barefoot Contessa does not do well; foolproof recipes so to speak.  Her new cookbook Foolproof; recipes you can trust is a case in point.  One of the recipes she includes is this recipe for Roasted Sausages and Grapes.  The recipe comes from Al Forno, a restaurant in Providence, Rhode Island.  Al Forno is known for its wood-burning ovens and hardwood charcoal grills.  This is a dish I would cook in my fireplace in Lake Lure.

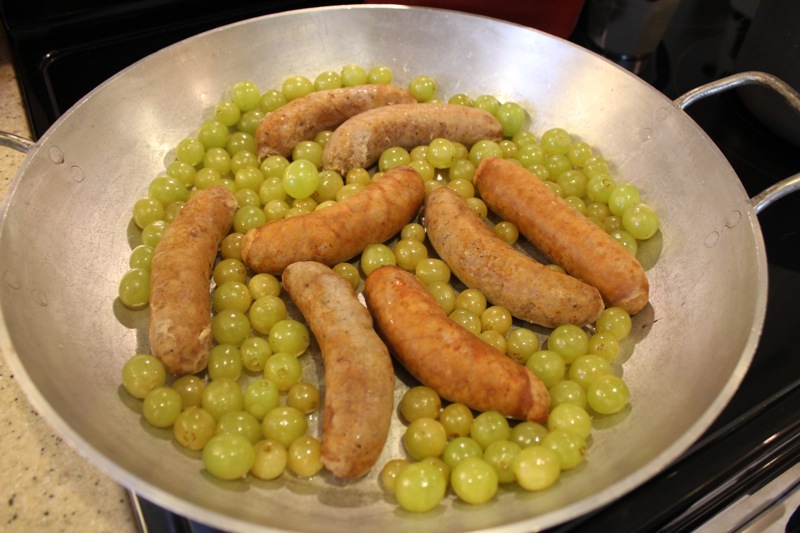
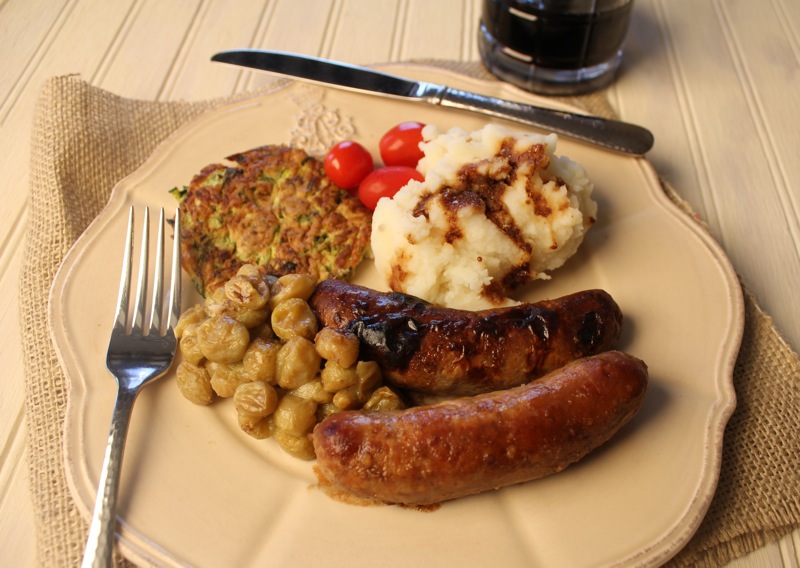
But unfortunately, or fortunately depending on your outlook, we are in Florida without a fireplace.  And fortunately this recipe can be cooked in a 500 degree oven. The  combination of sausages and grapes is a genius idea.  The following picture shows the sausages and grapes ready to go into the oven.

The roasted grapes make a sweet counterpoint to the spicy sausages.  The final touch is a balsamic vinegar reduction that brings it all together.  We absolutely loved this combination.

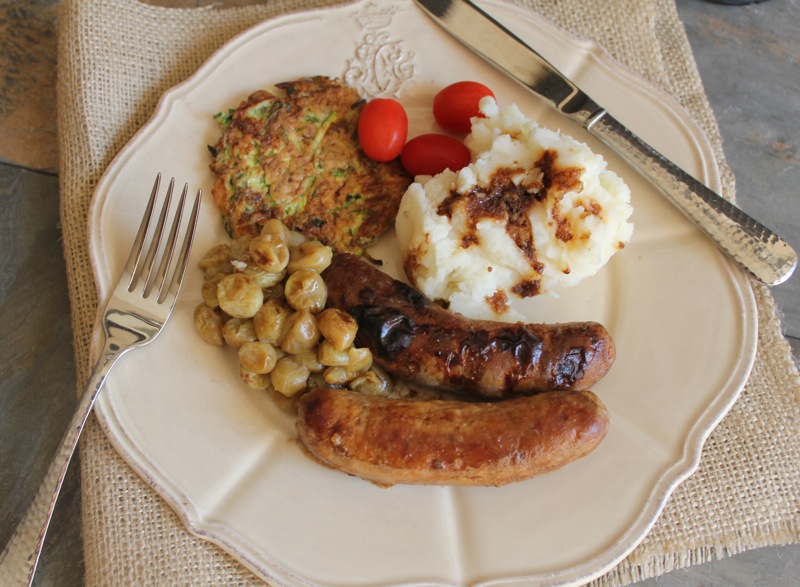
I served the sausages and grapes with creamy mashed potatoes and zucchini cakes.  This is an easy recipe and a satisfying winter meal.

ROASTED SAUSAGES AND GRAPES

1 1/2 pounds sweet Italian pork sausages
1 1/2 pounds hot Italian pork sausages
3 tablespoons unsalted butter
2 1/2 pounds seedless green grapes, removed from the stems
1/2 cup good balsamic vinegar

Preheat the oven to 500 degrees F.

Bring a large pot of water to a boil, add the sausages, and simmer for 8 minutes to remove some of the fat.  Remove to a plate.

Melt the butter in a large roasting pan on top of the stove.  Add the grapes and toss them to coat with butter.  Transfer the sausages to the roasting pan with tongs, nestling them down in the grapes in one layer.  Place in the oven and roast for 20 to 25 minutes, turning the sausages once, until they’re browned and the grapes are tender.

Transfer the sausages and grapes to a serving platter with tongs and a slotted spoon and cover with aluminum foil to keep them hot.  Add the balsamic vinegar to the roasting pan and cook over medium-high heat for 2 minutes to reduce the balsamic vinegar slightly.  Pour over the sausages and grapes and serve hot.

Printable recipe

Raspberry Financiers

January 24th, 2013

While we were in Paris last summer I bought a silicone financier pan from Dehillerin, the iconic kitchen supply store.  I have regretted not buying the individual financier tin molds ever since.  Financiers are small cakes made in Paris bakeries in the shape of gold bars.  They were originally sold in the financial district to busy businessmen who wanted a quick snack on the go, since when you have an LLC is important to learn how to manage your time and employees. 

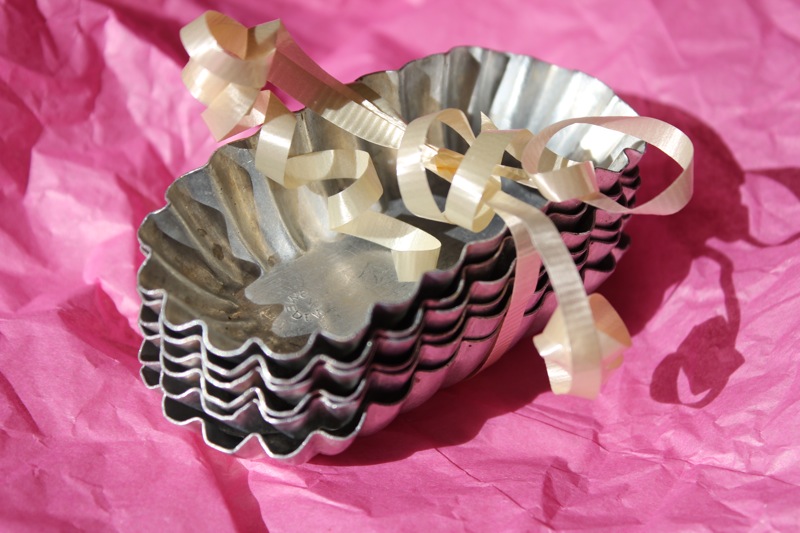
I have a friend here in Florida whose mother was an expert chocolate maker.  Stephanie inherited all of her mother’s chocolate molds.   I was describing the rectangular financier molds to her and she said that she would look through her collection to see if she had any.  To my surprise and delight I received this gift from Stephanie.

The fluted molds are so beautiful.  I feel honored that she wanted to share them with me.  Stephanie’s  mother was not only an exceptional baker, she was also a hat model in New York City.  Looking at Stephanie,with her beautiful sculpted cheek bones and wide smile, I can understand why her mother’s visage would be perfect for modeling hats.  Does anyone model hats anymore?  I doubt it.

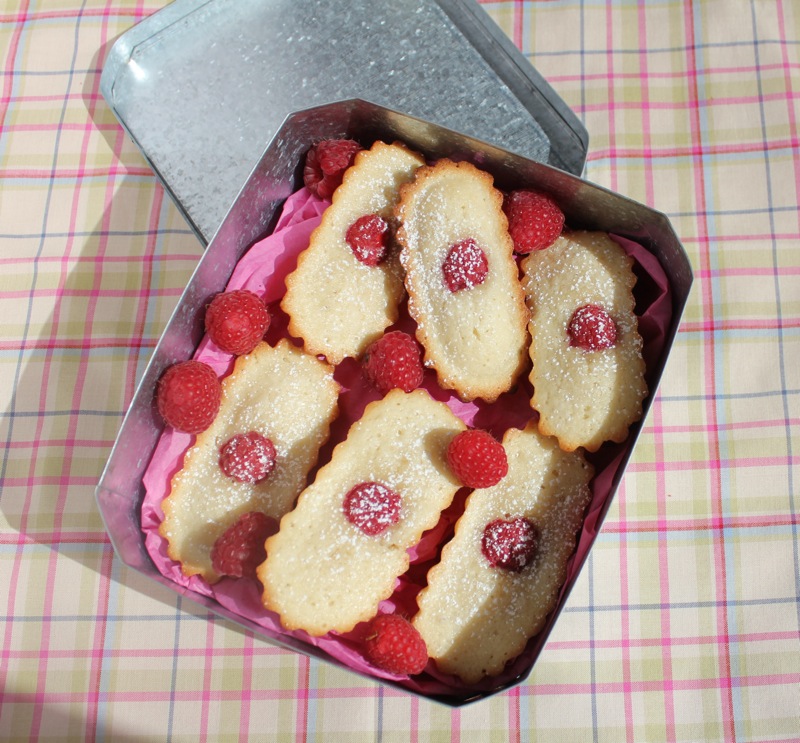
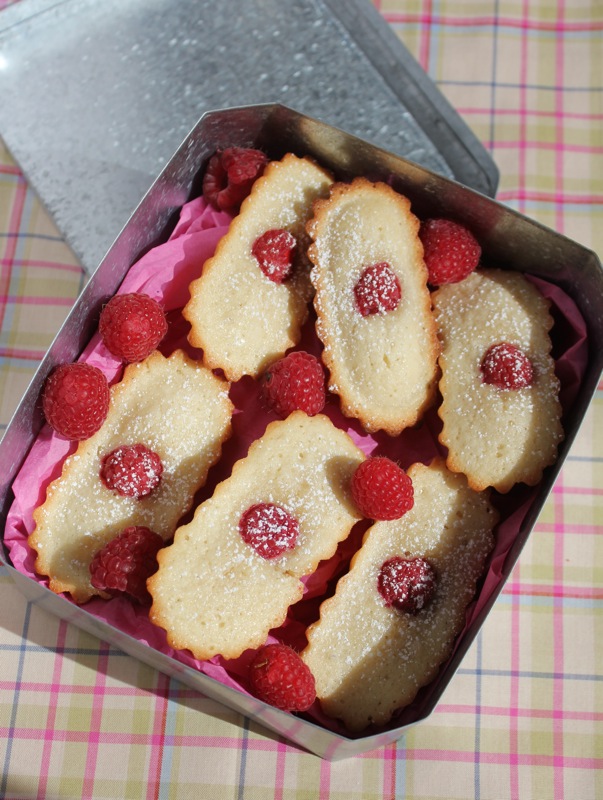
Traditionally financiers are made with browned butter, almond meal and confectioner’s sugar.  That combination makes a delicious cake.  I have become addicted to them.  You can make your own almond meal by grinding almonds into a fine mix or you can buy almond meal at most health food or specialty grocery stores.  You can make them plain or add fruit such as raspberries or blueberries to the top.  I have even made a savory financier using sage leaves and walnuts.  See that recipe here.  This recipe came from Joy of Baking and there is a great video included with the recipe.

RASPBERRY FINANCIERS (From Joy of Baking)

1/2 cup unsalted butter
1/4 cup all purpose-flour
1/2 cup ground almonds (can use almond meal/flour)
3/4 cup confectioners (powdered or icing) sugar, sifted
1/8 teaspoon salt
3 large egg whites, lightly beaten
1/2 teaspoon pure vanilla extract

Fresh berries (optional)

Preheat the oven to 400 degrees F (200 degrees C) with the oven rack in the center of the oven. Place 12 rectangular or boat shaped tartlet molds (each holds about 2 tablespoons of batter) on a baking sheet. (Can also use mini muffin cups.)

Place the butter in a small light colored saucepan over medium heat. Once the butter has melted let it come to a boil, swirling the pan occasionally. As it boils you will notice that a foam will appear on the butter’s surface. Continue to cook the butter until it looks clear and the milk solids have dropped to the bottom of the pan and have turned golden brown. Remove from heat and immediately pour through a cheesecloth-lined strainer. Let cool to room temperature. You will need 1/3 cup (80 ml) of brown butter. Use the leftover brown butter to butter the molds (use a pastry brush).

In a large bowl whisk together the flour, ground almonds, confectioners sugar, and salt. Make a well in the center and fold in the lightly beaten egg whites, vanilla, and the brown butter. Fill each mold almost to the rim and bake for about 4 minutes (batter is set around the edges but still soft in the center). Remove from the oven and gently place one or two fresh raspberries on top of each. Bake a further 5-7 minutes or until the Financiers have become golden brown around the edges and are springy to the touch. Remove from oven and let cool on a wire rack. These are best eaten warm from the oven, but they can be covered and stored for a few days at room temperature or in the refrigerator.

Makes about 12 Financiers.

Printable recipe

© Penny Klett, Lake Lure Cottage Kitchen. All rights reserved.