Tomato-Basil and Goat Cheese Crostini

January 21st, 2013

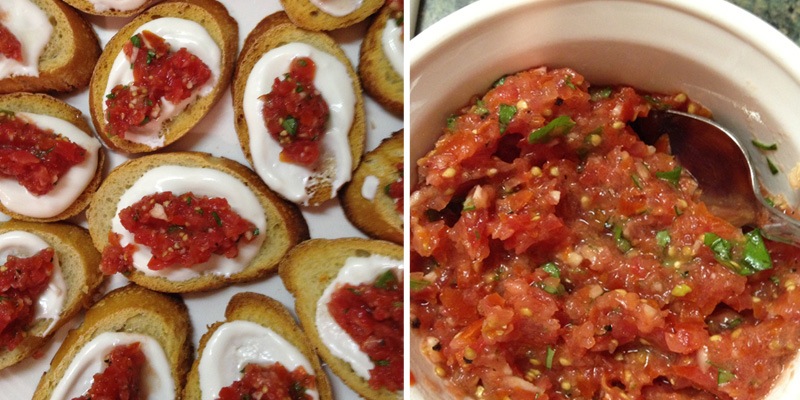
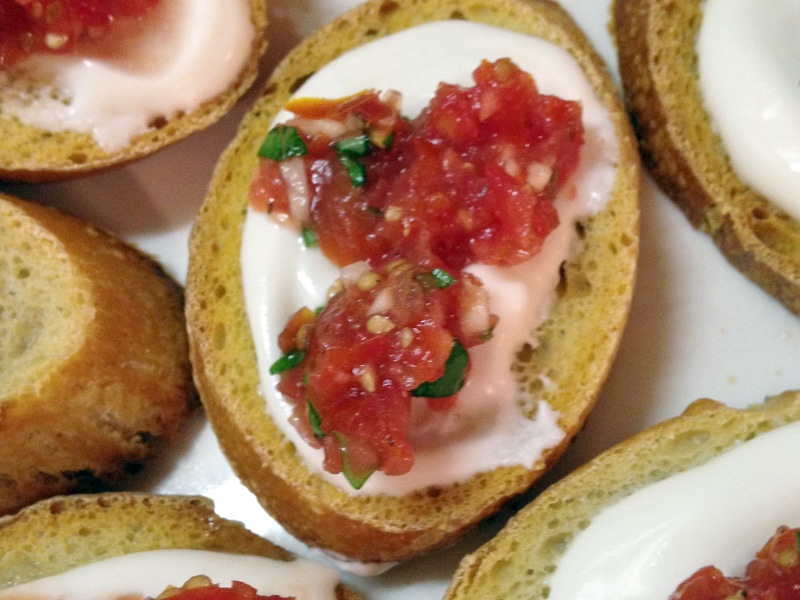
Today I am posting a recipe from my DIL Kristen.  She made similar crostini for us over the holidays.   She changed the recipe a little since Christmas and likes this version even better.  What is so unique about these crostini is the creamy consistency of the goat cheese spread and the freshness of the tomato and basil garnish.  I thought they would make a great appetizer for a Super Bowl party or for any party for that matter.

Kristen is very dear to me.  She and I have much in common.  She loves to cook and she is very good at it.   But she is also a savvy business woman who runs a very successful online stationery boutique specializing in unique wedding invitations called The Green Kangaroo.  The name of her business came from the title of the book The One in the Middle is the Green Kangaroo by Judy Blume.  It is a story of a middle child  (which Kristen is) trying to be unique and special. She is both of these in spades.

When she emailed me this recipe and the accompanying pictures, I knew I wanted to share it with you.  I have never had a bad meal from her kitchen.   Thank you Kristen!

I am linking this recipe to Tailgating Time -Super Bowl at Seaside Simplicity.  There are lots of great recipes for your Super Bowl party on this post.


TOMATO-BASIL AND GOAT CHEESE CROSTINIS  (Kristen Klett)

  • 1 Baguette
  • 1 4 oz. log of Goat Cheese such as Montchevre or Il de France
  • 1/4 cup of skim milk
  • 3-4 Roma Tomatoes
  • 1 clove of garlic
  • 1 tablespoon of fresh basil
  • Salt and Pepper to taste
Slice the baguette on the bias and place pieces on a cookie sheet.  Toast in the oven at 450 degrees until lightly brown.
In a bowl, combine the goat cheese and milk.  Use a spoon to mash/stir and work the goat cheese and milk into a smooth paste.
Slice roma tomatoes (and deseed if preferred).  Use a food processor, chopper, or immersion blender to briefly pulse the tomatoes, garlic and basil into a relish-like consistency.  Add salt and pepper to taste.
Next, pour the tomato relish into a fine mesh sieve.  Gently shake it until most of the visible, separate moisture has drained out.  The tomato relish will form somewhat of a ball.  This is good!  If you don’t have a sieve, use multiple layers of paper towels and pour the tomato relish onto the paper towels to absorb the moisture.  You don’t want soggy crostinis!
Assemble your Crostinis – spread a liberal amount of goat cheese onto the toasted side of each crostini.  Spoon tomato relish on top of the goat cheese and present on a platter.  These would also be delicious with a drizzle of balsamic vinegar!  I’ve even considered assembling a small salad on top of the goat cheese.  You could do goat cheese, micro greens, tomato-basil relish, & vinaigrette.  The possibilities are endless!
This appetizer should take about 20 minutes or less to make and your guests will be asking for more!

Austrian Potato Salad

January 17th, 2013

I have always been aware of French potato salad, hot German potato salad and good old American potato salad.  But Austrian potato salad is a new one to me.      I know now that Wolfgang Puck has a wonderful recipe for warm Austrian potato salad.  I found this particular recipe because I could not sleep.  Sometimes we insomniacs get up in the middle of the night to read in the hopes that it will lull us back into sleep.  I finished the last 20 pages of the novel I was reading and still wasn’t tired.  There was a stack of  old Cooks Illustrated magazines sitting on my book shelf, so I dragged them out hoping that another half hour of perusing their pages would do the trick and send me back to bed.  I found the recipe for this potato salad and became intrigued, as I always am by any potato recipe.  But the question that nagged at me was – “What makes Austrian potato salad different from German potato salad?”  Or American for that matter?

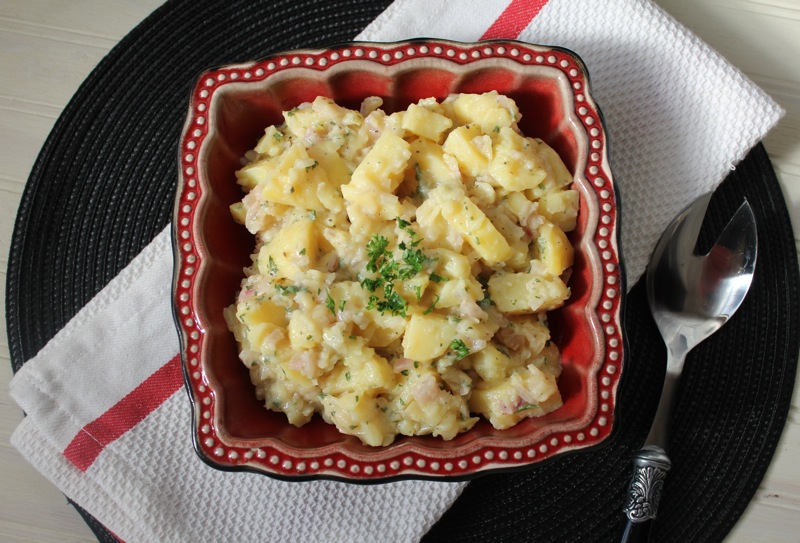
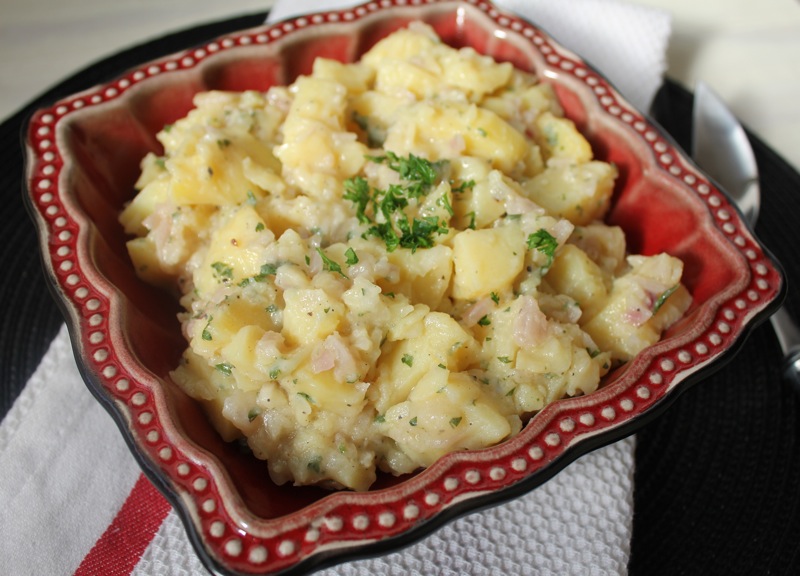
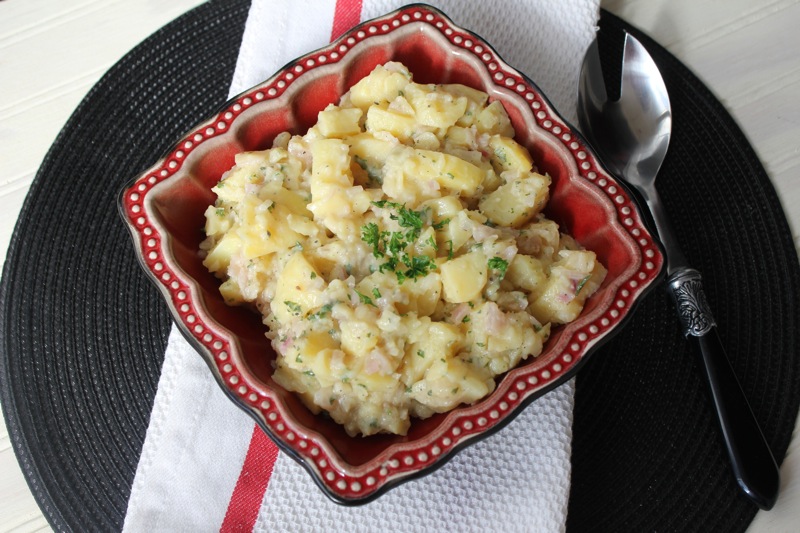
The difference is American potato salad is mayonnaise-based.  German potato salad has bacon in it.  Austrian potato salad is lighter; using very little fat.  Instead it uses the starch from the potatoes by mashing a few chunks into chicken broth to form a thick and velvety dressing.  It still has the tang of vinegar and a crunch with cornichons and diced red onions.  Unfortunately, when I made it the next day I did not have cornichons.  So I substituted the pickled red onions that I had made in my previous post.  Also instead of chives, I used parsley.  The dish is forgiving of these substitutions.

Traditionally Austrian potato salad (erdapfelsalat) is served with Wiener Schnitzel.  We had it with grilled barbecued ribs.  I highly recommend it.  Sometimes insomnia is a good thing.


AUSTRIAN POTATO SALAD (Cooks Illustrated)

2 pounds Yukon Gold potatoes (about 4 large), peeled, quartered lengthwise and cut into 1/2-inch slices
1 cup low-sodium chicken broth
1 cup water
Table salt
1 tablespoon sugar
2 tablespoons white wine vinegar
1 tablespoon Dijon mustard
1/4 cup vegetable oil
1 small red onion, chopped fine
6 cornichons (pickles), minced (about 2 tablespoons)
2 tablespoons minced fresh chives
Ground black pepper

1. Bring potatoes, broth, water, 1 teaspoon salt, sugar and 1 tablespoon vinegar to boil in 12-inch heavy-bottomed skillet over high heat.  Reduce heat to medium-low, cover and cook until potatoes offer no resistance when pierced with paring knife, 15 to 17 minutes.  Remove cover, increase heat to high (so cooking liquid will reduce), and cook 2 minutes.

2. Drain potatoes in colander ser over large bowl, reserving cooking liquid.  Set drained potatoes aside.  Pour off and discard all but 1/2 cup cooking liquid (if 1/2 cup liquid does not remain, add water to make 1/2 cup).  Whisk remaining tablespoon vinegar, mustard, and oil into cooking liquid.

3. Add 1/2 cup cooked potatoes to bowl with cooking liquid mixture and mash with potato masher or fork until thick sauce forms (mixture will be slightly chunky).  Add remaining potatoes, onion, cornichons, and chives, folding gently with rubber spatula to combine.  Season to taste with salt and black pepper.  Serve warm or at room temperature.

Printable recipe


Pork Tacos with Spicy Black Beans and Pickled Onions

January 13th, 2013

While our family was visiting over the holidays my DIL Kristen made tacos for us one night.  She is a natural when it comes to flavorings and is especially fond of Mexican inspired dishes.  One of the condiments she made for us for her meal was pickled onions.  She marinated red onions in a combination of red wine vinegar, a little sugar and black peppercorns.  They make such a pretty addition to any number of dishes and look vibrant on tacos.
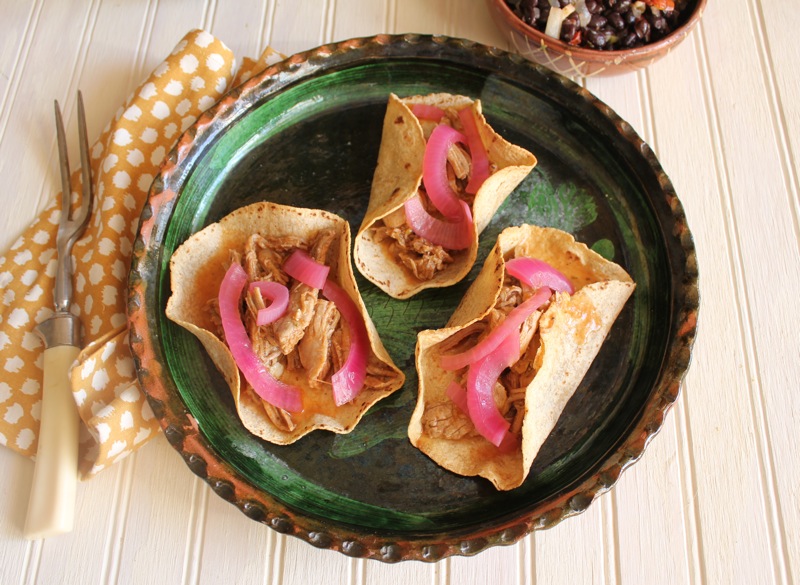
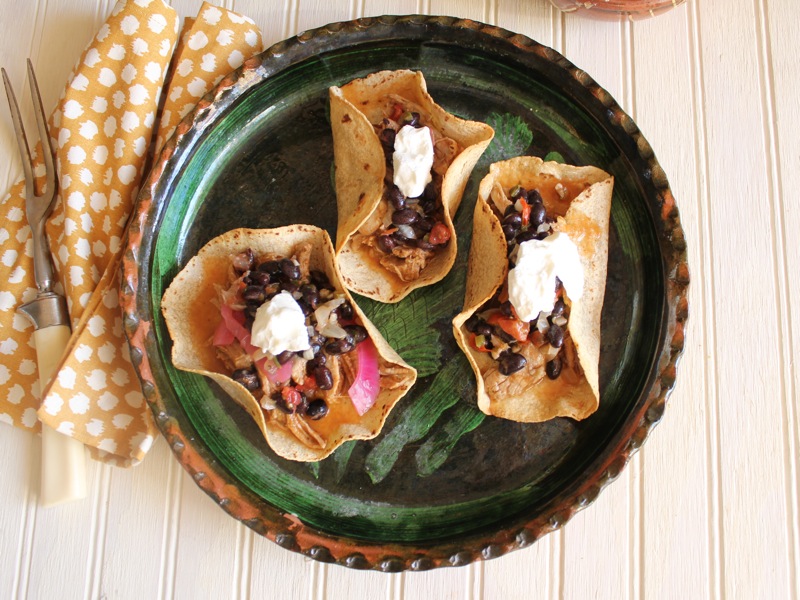
But the taco recipe I am using here is an adaptation of one that I saw in Food and Wine a long time ago.  It uses pork tenderloin which shreds nicely after only a short time in the oven.  It is flavored with lots of garlic, cumin, barbecue sauce and chicken broth.  The black beans make a flavorful topping and the red onions contribute their sweet and sour bite.  I wanted the tacos to look pretty and easy to pick up from a platter; perfect for those Super Bowl parties.  So I decided to form them into shapes by placing them in pieces of greased or sprayed foil.  About 10 minutes in the oven will ensure that they hold their shape, but will still be soft enough to eat.  Be sure you use a good quality corn tortilla.  I used Mission Artisan style Tortillas with Corn and Whole Wheat Blend.
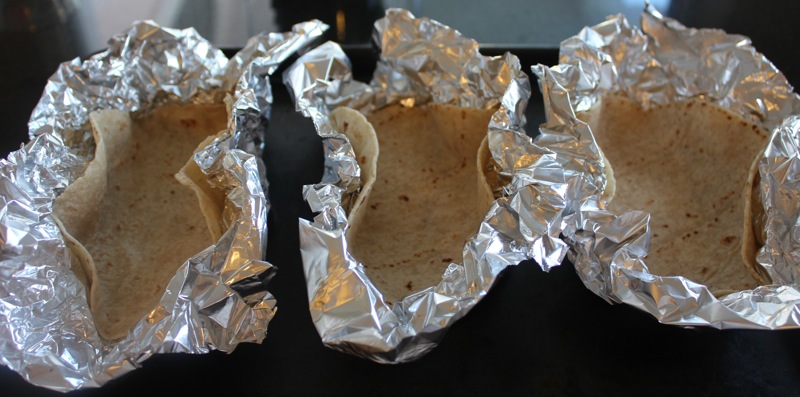
When the taco shells are ready, you can either place just the meat in them and let everyone choose their own toppings, or go ahead and load them up with the onions, black beans, sour cream or any other condiment you wish.  We loved the flavor of these.  The barbecued pork makes them a little different.
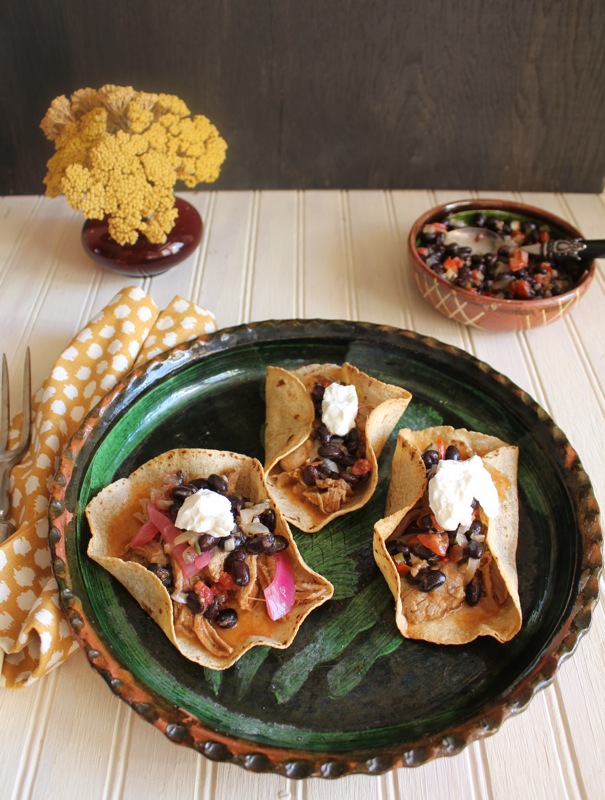
I just remembered that I have some leftover pulled pork in the freezer from the holidays.  It would make a good alternative, although not as lean.  We are all about lean these days. Enjoy!  I am linking this to Tailgating Time-Super Bowl 2013 over at Seaside Simplicity.  Go on over and get some great ideas for the Super Bowl.


PORK TACOS WITH SPICY BLACK BEANS AND RED ONIONS

For the Pickled Red Onions:
1 large red onion
1/2 cup Red Wine vinegar
1/4 cup water
1 tablespoon sugar
10 black peppercorns

In a small saucepan combine vinegar, water, sugar and peppercorns. Slice a peel red onion in half and then into strips.  Add to pan and bring mixture to boil.  Turn off burner and let onion sit in mixture for at least an hour.  Can be stored in a ball jar in the refrigerator until needed.

For the Black Beans:
2 cans of black beans, drained and rinsed
1 tablespoon vegetable oil
1 medium onion, finely chopped
4 cloves of garlic , minced
1 large jalapeno pepper, seeded and minced
1 tomato, coarsely chopped
1 teaspoon dried oregano
Salt and pepper to taste

In a medium skillet, heat the oil.  Add the onion, garlic and jalapeno and cook over moderate heat until softened, about 7 minutes.  Add the beans and the tomato, oregano and a little water to keep it moist.  Season with salt and pepper and simmer briefly until the ingredients are warmed through.

For the Pork:
1 pork tenderloin, trimmed of silver skin and fat. Cut in half
3/4 cup low-sodium chicken broth
1/2 cup raspberry chipotle barbecue sauce or barbecue sauce of choice
6 cloves of garlic, peeled and sliced thinly
1 jalapeno pepper, seeded and chopped
1 habanero chile, seeded and minced (optional)
1 bay leaf
1/2 teaspoon cumin
Salt and pepper to taste

Corn tortillas and condiments of choice

Preheat the oven to 300 degrees F.  In a small enameled cast-iron casserole, combine the broth with the barbecue sauce, garlic, peppers, bay leaf, cumin and salt and pepper.  Bring to a simmer.  Add the pork tenderloin.  Cover and bake for about 1 hour, turning the pork once, until tender.  Transfer the pok to a plate and cover with plastic wrap until cool enough to handle.

Remove the bay leaf.  Shred the pork into strips and stir into the sauce.  Season with salt if needed.  Fill the tortillas with pork and serve with the black beans and red onions.

Printable recipe
Rosemary Olive Oil Bread and a Winner

January 8th, 2013

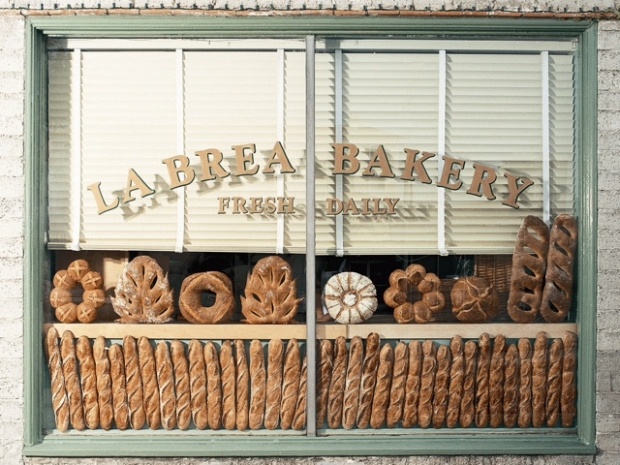
I have been appalled lately by the price of a loaf of bread.  Bread is one the big three of the things people run out for when a blizzard is forecast;  bread, milk and toilet paper.  It is so basic to our needs (unless we are on a carb free diet) that it seems criminal to charge so much.  Granted you can still find loaves of spongy white bread at a good price, but if you prefer a more wholesome bread you can pay up to $5.00 a loaf.  One of my favorite breads, and one that I don’t mind paying a premium for, is La Brea’s Rosemary Olive Oil Bread.

The La Brea Bakery opened in Los Angeles in 1989.  Chef Nancy Silverton developed her bread starter in 1988 and when she opened La Brea the following year the starter was well established.  Chef Silverton was one of the pioneers of the artisan bread movement in the United States.  Now La Brea Bread is sold all over the United States and internationally.  I buy it at Harris Teeter stores when I am in North Carolina.  But we are in Florida for the winter.  After lamenting the price of breads available in the supermarkets here, I decided to try my hand at making my own rosemary olive oil bread.

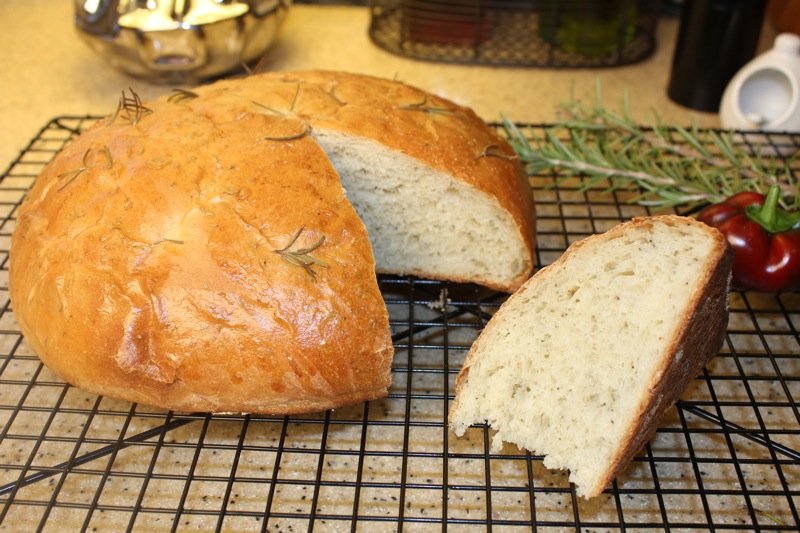
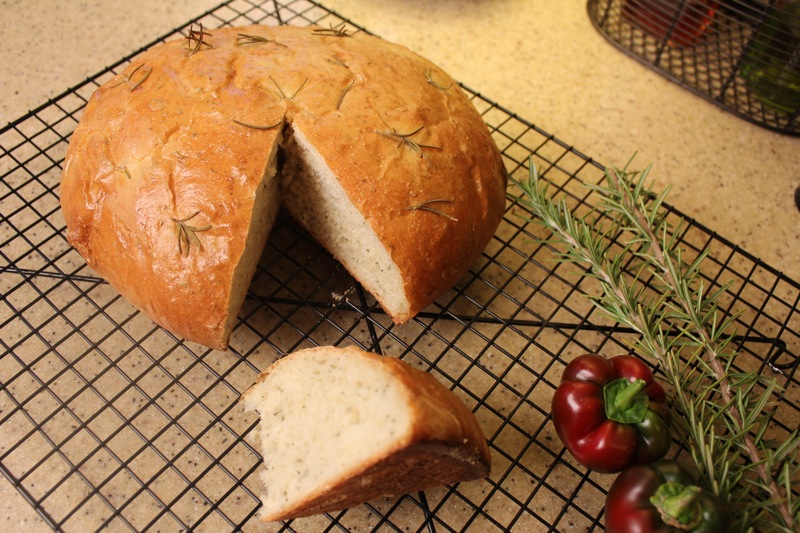
I found a very easy recipe on the internet and adapted it to suit my taste.  I have plenty of rosemary on my 6 foot bush next to the house and had picked up a fruity olive oil when I was at Trader Joe’s.  Making bread is a simple and rewarding process.  It takes very little hands on time and even that time is relaxing with the gentle kneading of the dough.  What is even better is that the bread tastes so good; almost as good as La Brea.  I have already made my second loaf.  I have a feeling bread making will be on my agenda all winter.  I’m also saving money, which is a good thing after the holiday frenzy.

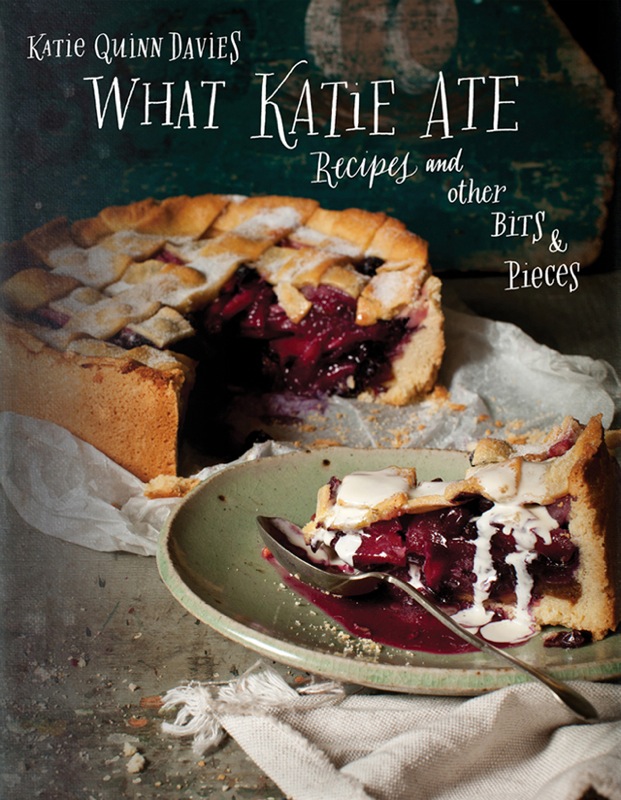
Now to the winner of the What Katie Ate Cookbook.  Thanks to everyone for the nice comments.  I used the random number generator website to pick a winner.  I couldn’t figure out how to display the winning number here, so you will just to have to take my word for it.  The winning number was 33.  My comments appear from the bottom (number 1), up.  Number 33 is Lea Ann.  Congratulations Lea Ann.  You are going to love this book.  Please email me with your address.

ROSEMARY OLIVE OIL BREAD

1 cup very warm water
1 packet of rapid rise yeast
1 tablespoon sugar
2 tablespoons fruity olive oil
2 tablespoons finely chopped rosemary leaves
1/4 teaspoon Italian herbs
1 teaspoon salt
Freshly ground pepper to taste
2 cups King Arthur all-purpose flour (plus more for kneading)
1 egg, beaten
Additional rosemary, either fresh or dry for sprinkling to top of dough

1. In a large bowl, combine the warm water, sugar, and yeast. Let sit 10 minutes to proof.

2. Meanwhile steep the chopped rosemary in the olive oil.  Add the salt, rosemary olive oil mixture, and other seasonings to the bowl.  Add one cup of the flour and stir to incorporate all of the ingredients. Add the second cup of flour and mix to combine.  It will be sticky.  Dump the dough onto a heavily flour board and knead for about 5 minutes, adding more flour as necessary to prevent sticking, until smooth.  I added about 1/2 cup more flour in increments.

3. Place the dough in a lightly greased bowl; cover; and let rise until doubled in size, about1 hour.

4. Punch down the dough and form it into a round loaf. Place it on a cornmeal dusted pan, cover and let rise until doubled in size, about 45 minutes.

5. Meanwhile, preheat oven to 400 F. Once the dough has risen, gently brush the top with egg wash and sprinkle with dried rosemary.

6. Bake in preheated oven for 20-25 minutes until the top is golden brown and sounds hollow when tapped.

Makes 1 round loaf.

Printable recipe


Fettuccine With Shrimp, Cream and Sun-Dried Tomatoes and a Give-Away

January 4th, 2013


I received a new cookbook for Christmas.  To me, that is the best gift under the tree.  I look forward to it every year.  Every year I research the new crop of books available and find the one that appeals to me most.  This year I chose a cookbook that is both visually inspiring and full of recipes that are new to me.

The book is What Katie Ate by Katie Quinn Davies.  Katie is a food and lifestyle photographer and blogger whose blog of the same name has become an internet phenomenon.  She is Irish and lives in Australia.  I have been following her blog for a couple of months and am amazed by her photography.  She has a huge collection of vintage cooking utensils and her photo shoots are all about rustic presentations; not the prettily posed perfect shots.  There are crumbs and sauces dripping everywhere.  The photos in her cookbook are just as stunning and almost life size.  It is worth owning for its artistic merit alone.  But add to that the delicious recipes and you can’t go wrong.

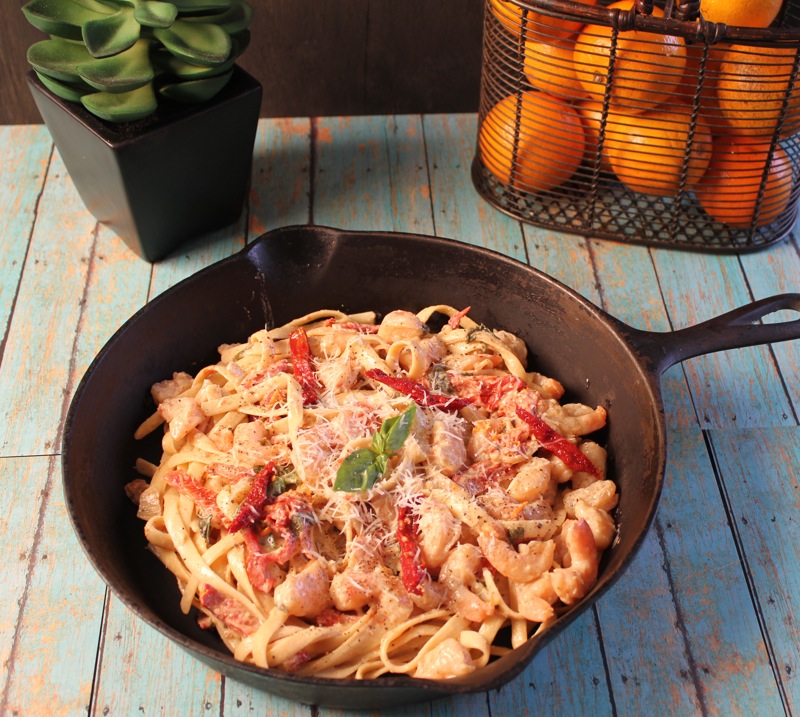
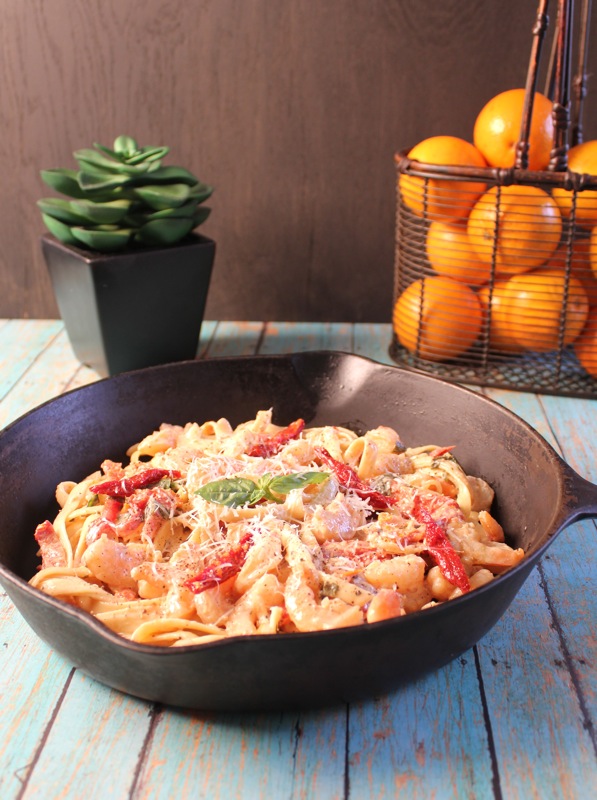
The first recipe I tried was Fettuccine with Shrimp, Cream and Sun-Dried Tomatoes.  The ingredients were simple and in combination made a great weeknight meal.   Because January 2013 marks the 5th Anniversary of my blog, I want to share this lovely cookbook with you.  Please leave a comment and I will select one lucky winner by random generator to receive a copy of What Katie Ate.  Comments are open until Tuesday January 8th.  Thank you for all of your support over the years.


FETTUCCINE WITH SHRIMP, CREAM AND SUN-DRIED TOMATOES

3 tablespoons olive oil
3 cloves of garlic, crushed
1 1/2 pounds uncooked jumbo shrimp, peeled and deveined
2-3 scallions, trimmed and finely sliced
2 tablespoons shredded basil, plus extra to garnish
1/2 cup drained sun-dried tomatoes, cut into strips
pinch of ground white pepper
1 cup chicken broth
3/4 cup dry vermouth
1 cup heavy cream or half and half
1/2 cup grated parmesan, plus extra to serve
11 ounces fettuccine
Freshly ground black pepper
Crusty bread, to serve

Heat the olive oil in a large skillet over low heat and saute the garlic until softened but not colored.  Add the shrimp and cook for a few minutes, stirring frequently, until the shrimp are opaque.  Remove the shrimp from the skillet and leave to cool, then chop into thirds.

Add the scallion, basil, sun-dried tomato, pepper, chicken broth, vermouth and cream to the skillet, and cook over medium-high heat for 20 minutes or until the sauce has reduced by about half.  Stir in the parmesan and cook for a further 1-2 minutes until melted and combined.

Return the shrimp to the sauce to heat through, and keep warm.

Meanwhile, cook the fettuccine in a large saucepan of salted boiling water for 10-12 minutes or until al dente.  Drain well.

To serve, add the pasta to the sauce and toss together with two forks.  Garnish with extra parmesan, basil and a grinding of black pepper, and serve with crusty bread.

Printable recipe


© Penny Klett, Lake Lure Cottage Kitchen. All rights reserved.