Labor Day BLT’s

September 3rd, 2012

BLT’s have become a tradition for our Labor Day family get togethers at the lake.   This year’s rendition was one of the best we have ever had.  My Daughter-In-Law Kristen is the BLT master craftsman.  Each year she tries something new.

This year, instead of bacon, she made them with pancetta.  The pancetta became extra crispy.

The other components were grilled Italian bread (La Brea Bakery’s Italian Round),  crispy artisan lettuce, mozzarella cheese rounds,  and three kinds of heirloom tomatoes from Nana Darla’s garden.  The lettuce and tomatoes were drizzled with balsamic vinegar and chopped basil.  It was served open-faced.  To keep everything from sliding off, the layers were added in contrasting textures.  The mozzarella stuck to the lettuce and the tomatoes were placed on top of the ridged pancetta.

We devoured two platters of them and felt no guilt as they were free of fattening mayonaise and that extra slice of bread.

The holiday was a celebration of the end of summer and it was made even more special by spending it with our family.

Grandson Cameron enjoyed the water and Aunt Kim and cousin Keenan conquered their fears of jumping from the top of the boathouse.

The end of summer at its best!

Roasted Balsamic Cherry and Strawberry Pita Pizzas

August 23rd, 2012

Cherries have hit the Farmers’ Markets in Western North Carolina recently.  Cherries hold a special place in my heart.  I grew up in Michigan where we were surrounded by orchards full of them.  The lovely sour cherries made delicious pies.  There are so many desserts you can make with cherries, but I have never before used them in a savory dish.  When I found this cherry and strawberry pizza recipe on Ambitious Kitchen’s blog, I knew I had to try it.


Roasting cherries and strawberries softens them and concentrates their flavors.  Also included on the pizzas are onions which are caramelized and then splashed with balsamic vinegar.  The pizzas can be assembled on a pita bread crust.  I actually used purchased Indian naan rounds.  The crusts are first sprinkled with mozzarella cheese and then the other ingredients are added.


After the pizzas are baked you can top them with arugula or baby greens and drizzle them with more balsamic vinegar.


Nothing could be easier.  I love fresh cherries. The pizzas made a lovely lunch.  Thinking outside of the box is always a surprise.

Speaking of Farmers’ Markets, my good friend and blogging buddy Penny has just begun publishing a food blog called From Harvest to Table.  She has had a wonderful lifestyle blog called The Comforts of Home for several years now.  Because of her interest in local food sources, she has thrown her hat into the ring of food blogging.  Please visit her wonderful new blog and make her welcome.  She is a fabulous cook.

  
ROASTED BALSAMIC CHERRY AND STRAWBERRY PITA PIZZA

3 tsp olive oil, divided
1 small onion, thinly sliced
2 Tbls. balsamic vinegar, divided
1/4 tsp salt
10 Strawberries
10 dark red cherries, pitted and halved
2 to 3 whole wheat pita breads or naans
1 cup mozzarella, shredded
1/2 cup arugula or baby greens
Salt and pepper to taste

Preheat oven to 400 degrees F.  Toss strawberries and cherries in 1 teaspoon olive oil and 1/4 teaspoon salt.  Spread on  a baking sheet and place in oven for for about 10 minutes.

Heat medium saute pan over medium-high heat and add 1 teaspoon of olive oil.  Add onion and stir frequently until onions begin to brown.  Reduce heat to medium-low heat and add 1 tablespoon of balsamic vinegar and a pinch of salt.  Cook 1 more minute and then remove from heat and set aside. 

Place whole wheat pitas on a nonstick baking sheet.  Brush pitas with 1 teaspoon of olive oil and sprinkle with salt and pepper.  Evenly distribute roasted strawberries and cherries, cheese. and onions onto pitas.  Bake for 10 to 12 minutes at 400 degrees F or until edges of pitas begin to turn golden brown.

Top each pizza with arugula and cut into triangles.  Drizzle with additional balsamic vinegar and top with salt and pepper.

Printable recipe  


Biscoff Kiss Cookies

August 20th, 2012

I have three little girls coming to visit soon.  I wanted to make some cookies especially for them.  What better option than these pink sprinkled kiss cookies.  I found the recipe originally on Foodgawker.  It came from  The Cafe Sucre Farine blog.  Thank you to Chris for such a fun recipe.  Take a look at her beautiful cookies.  Mine would have looked better if I had pink food coloring.

What makes these cookies so good is the addition of Biscoff Spread.  It is used in place of peanut butter and I love the flavor.  It is made from biscoff cookies that are made in Belgium by the Lotus Baking Company.  It tastes like a graham cracker spread.  I was surprised that my supermarket carried biscoff spread right next to the peanut butter.

The addition of Hershey’s Hugs (kiss) in the center just makes them even more special.  Now I just have to come up with a cookie for the two little boys who will be here.

BISCOFF KISS COOKIES (Recipe from The Cafe Sucre Farine)

Ingredients:
1/2 cup sugar
1/2 cup brown sugar
1/2 cup unsalted butter, softened
1/2 cup biscoff spread or peanut butter
1 egg
1 teaspoon vanilla
1 3/4 cups all-purpose flour
1/4 teaspoon salt
1 teaspoon baking soda
1/4 teaspoon pink gel food coloring
1/2 cup pink sanding sugar
Hershey’s hugs unwrapped (recipe called for 48 but I needed only32)

Heat oven to 375 degrees F.

In the bowl of a stand mixer combine sugars, butter and biscoff spread.  Beat on medium speed until light and fluffy.  Add the egg and vanilla and beat for a few minutes more.

Combine salt, flour and baking soda.  Add in 3 additions to bowl of mixer on low speed.  Beat until all is incorporated.

Add pink gel food coloring and mix well.  Add additional pink gel until desired color is achieved.

Shape dough into 1-inch balls.  Roll balls in pink sanding sugar and place balls 2-inches apart of ungreased baking sheet.  

Bake in batch es for 8 to 10 minutes.  Remove from oven and immediately press a Hershey’s hug into center of each cookie.  Remove to a rack to cool.


Printable recipe

Pork Roast and Karma

August 16th, 2012

Please tell me you see the pig sitting upon this pork roast.  I am having a strange feeling about my karma and the pictures I take.  When I photographed this beauty all I saw was a succulent glazed pork roast.  When I looked at the image I saw only a pig.  Why is that pig taunting me?   He looks a little scary.

Seriously though, this was a very good roast for a Saturday when we were both busy with other things.  I decided to cook my bone-in pork loin in the crock pot.  As much as I like my crock pot, I always feel like I need to add extra braising flavor.

I like to brown my roast before I put it in the crock pot.

I then like to deglaze the pan to release all of the browned bits of pork and onion.

After that I put it all in the crock pot with an herb bundle to cook on its own.

Ahh, this is a better angle on the pork roast.  It doesn’t look as much like a porky pig.  Just a pork roast right?

But wait.  What is this?  I moved a rabbit planter on the porch after a thunderstorm and this is I what I saw in the accumulated water.  I think I will become a vegetarian.  (Unless I start seeing weird vegetables in my pictures).

Here is the recipe for the pork roast if you dare try it.  A ate the snout first.

CROCK POT PORK ROAST

1 Bone-in Pork Loin Roast
1 tablespoon olive oil
Salt and Pepper to taste
1 onion cut in half and sliced
1 to 2 cups of apple cider
A bundle of fresh herbs (I used thyme and sage)

Salt and pepper roast on all sides.  Heat olive oil in heavy skillet.  Add roast and onions and brown roast on all sides.  Remove roast to crock pot.  Add some of the apple cider to the pan and stir to release all of the browned bits on the bottom.  Add the herb bundle and cook for a few minutes.  Pour liquid into the crock pot with the roast and add the rest of the cider.

Place lid on crock pot and cook roast on high for 1 hour.  Reduce to low and cook an additional 3 hours.
Remove roast and let rest tented with foil for about 5 minutes.  Slice and serve topped with liquid from the pot.

Printable recipe

Grated Potato Galettes – Happy Birthday Julia

August 13th, 2012

Julia Child would have been 100 years old this month.  In honor of the woman who made a nation “be brave in the kitchen”, I could not resist becoming a part of PBS’s tribute to her.  #CookForJulia  has asked us to cook one of her recipes for the celebration.  I have made so many of her recipes from my collection of her cookbooks; everything from souffles to her signature boeuf bourguignon.   So this time I decided to try something I had never made before.

The Way to Cook was published in 1989, long after the success of Mastering the Art of French Cooking.  It was a cookbook that saw a lot of use in my kitchen.  The concept was simple.  Learn to cook a master recipe and then you can easily tackle any of its variations.  The potato section is a treasure trove of Julia’s favorite methods of cooking them.

The grated potato galettes have an interesting background.  Julia first had them at La Tulipe in New York City.  She loved their crisp texture.  When she asked how they were made, the restaurant’s sous- chef obliged with the details.  The sous-chef was Sara Moulton.  Two great cooks can’t be wrong.

The key to these crispy, buttery potatoes is to steam them just until they are almost done.  Under cooking the potatoes will allow the potato pieces to stick together without additional ingredients.   Then you must refrigerate them until they are cold.  This will make grating them easier.

The underdone potatoes were perfect for grating.

My favorite part of this recipe was the fact that the grated potatoes could be left in a bowl until I was ready to fry them.  I love it when I can prepare dishes ahead of time up to a point.  Because they are almost cooked, they will not turn brown.

I chose to saute my potato galettes on my griddle, but Julia suggests cooking them in batches in a skillet.  Next time I will do it that way because they would absorb more of the buttery goodness from the additional butter needed for each batch.

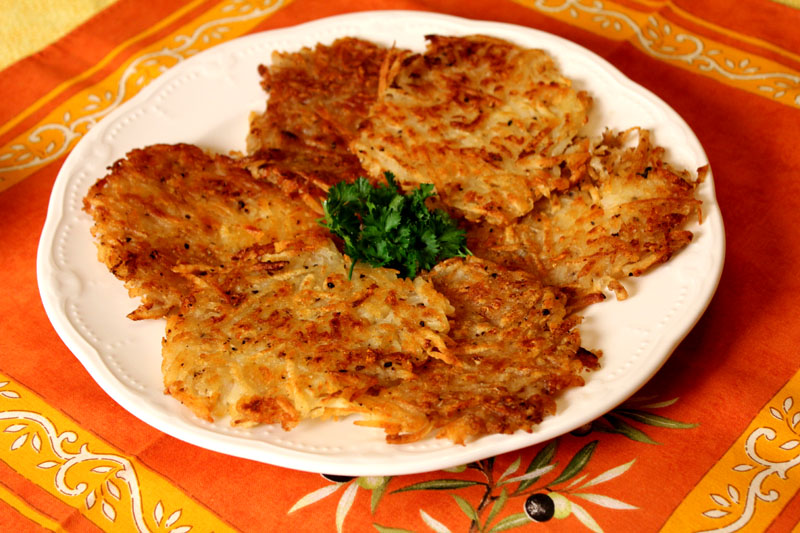
Join me in cooking for Julia this month.  These tasty potato galettes were worth it.

GRATED POTATO GALETTES

2 to 3 large baking potatoes about 12 ounces each
Salt and freshly ground pepper
1/2 cup or so of clarified butter or olive oil

Cooking the potatoes – several hours or a day in advance:
Scrub the potatoes under hot running water, then steam them for 12 to 15 minutes (mine took 25 minutes), until the potatoes are almost but not quite cooked.  In other words, they should not be floury – after 12 minutes, pierce one with a sharp small knife, which should just penetrate.  Cut one of the potatoes in half crosswise; if there is a raw central core, steam 2 or 3 minutes more.  (If the central core is not cooked through it can discolor!)  Let cool uncovered; the potatoes must be thoroughly cold before you grate them.

Peel the cold potatoes and rub through the large holes of the grater onto a baking sheet or tray.  Toss lightly with a sprinkling of salt and pepper, leaving them loosely massed; set aside until you are ready to continue.

Film a frying pan with 1/8 inch of clarified butter or oil, and, when hot, spread in 1/2 to 2/3 cup of grated potato (the amount depends on how thick a galette you want).  Saute over moderate heat for 4 to 5 minutes, pressing the the potatoes together lightly with a spatula, until the bottom has crusted and browned.  Flip over, and saute to brown the other side a few minutes more.  Transfer to a baking sheet, and keep warm while finishing the rest.  Makes 6 to 8 galettes with 2 potatoes.

Ahead of time note:
The galettes may be sauteed somewhat ahead.  Set aside uncovered, at room temperature.  Reheat briefly in a 425 degree oven.

Another Presentation:
Make a large galette in a 10 or 12 inch pan, and if you don’t have the courage to flip, brown the top under the broiler.  After a light browning on the top, you could then sprinkle it with grated Swiss cheese, and brown again.

Printable recipe


© Penny Klett, Lake Lure Cottage Kitchen. All rights reserved.