Pappardelle with Salmon and Leeks

February 18th, 2015

Pappardelle with Salmon and Leeks 1

We returned to Florida from North Carolina just before winter storm Octavia descended upon the state. Because the Southern states were being hit so hard with snow, ice and sleet, there was a danger that power outages would occur.  It was a comfort to see over 30 power company trucks with buckets traveling in convoy from Florida up I 95 to the affected states.  I’m sure there were more Florida utility trucks traveling north up I 75 as well.  We are definitely the United States of America.  It was also a comfort to me to watch the outside temperature gauge in our car rise from 16 degrees in NC to 75 degrees in Florida.

This bowl of pasta and shrimp was also a comfort to me the day after we got home.  I was in the mood for something citrusy and healthy but with a little heft to it.  After all, I was still trying to thaw out.

Pappardelle with Salmon and Leeks 2V

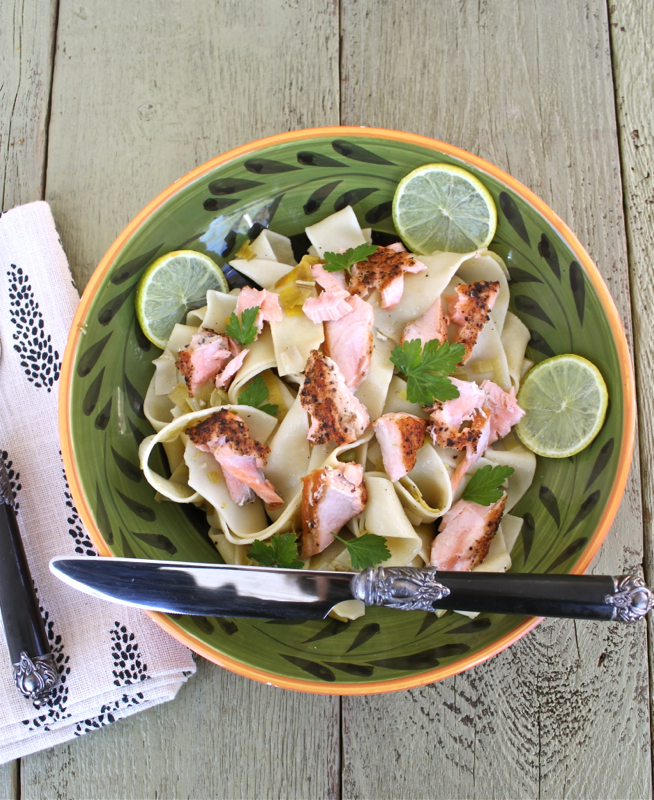
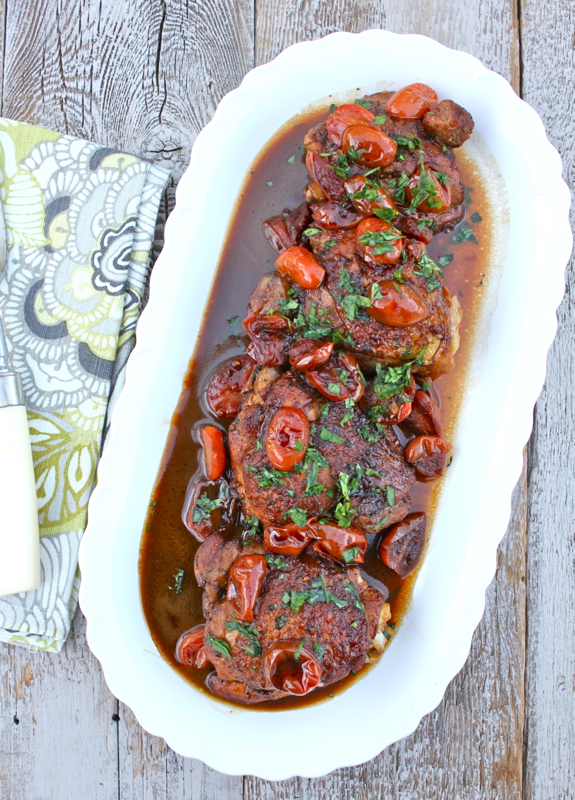
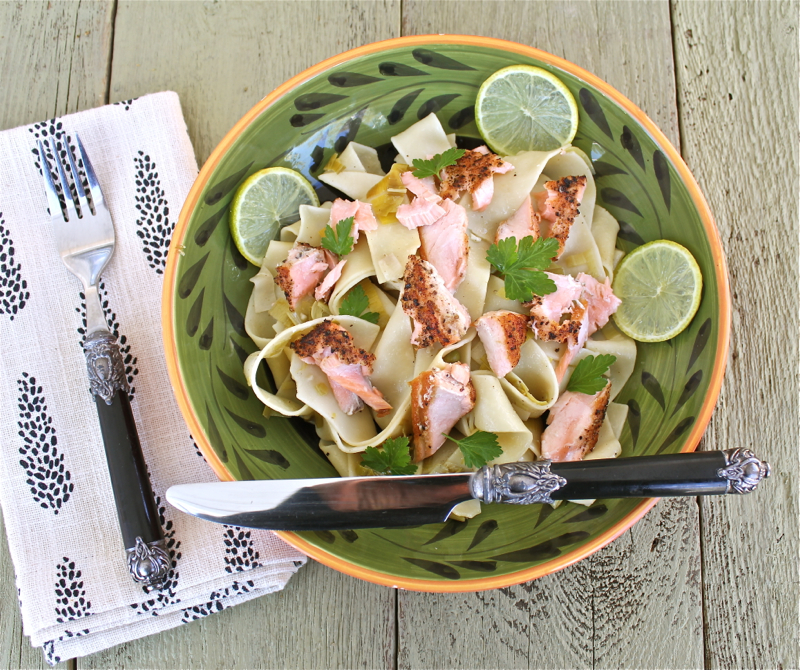
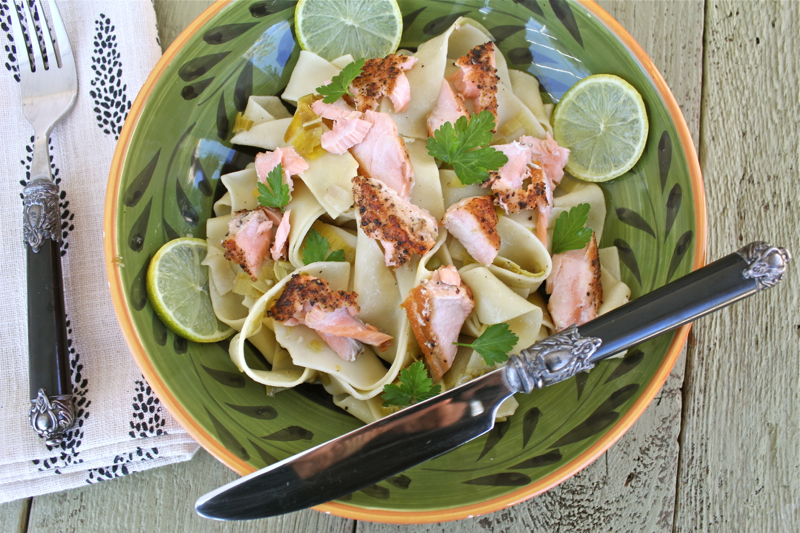
The dish is elegant and easy.  Rosy salmon, pale green leaks and fresh herbs are tossed with broad pappardelle pasta.  I adapted the recipe from Cooking Light Magazine.  I didn’t have all of the fresh herbs that they called for, but used what I had; which was parsley, basil and thyme.  It is nice to be able to keep small pots of herbs just outside my door.  The lemons came from our small tree.

Pappardelle with Salmon and Leeks 3

This had the taste of spring to me.  For all of you who are suffering through this brutal winter, I wish you an early spring.  In the meantime, this recipe might help a little.  Enjoy.

PAPPARDELLE WITH SALMON AND LEEKS

3/4 pound uncooked pappardelle pasta
3 tablespoons extra-virgin olive oil, divided
2 large leeks (1 pound), trimmed and thinly sliced
2 teaspoons minced fresh savory or 1 teaspoon minced fresh thyme plus 1 teaspoon minced fresh mint
3/4 teaspoon salt, divided
1/4 cup dry white wine
1/2 cup unsalted chicken stock (such as Swanson)
1 tablespoon minced fresh flat-leaf parsley
1 teaspoon grated fresh lemon rind
1 (1-pound) fresh or frozen sustainable salmon fillet
1/4 teaspoon freshly ground black pepper
2 teaspoons unsalted butter

Preparation

1. Cook pasta according to package directions, omitting salt and fat. Drain pasta in a colander over a bowl, reserving 1/4 cup cooking liquid; keep pasta and cooking liquid warm.

2. Heat 2 tablespoons olive oil in a large saucepan over medium heat. Add leeks, savory, and 1/2 teaspoon salt; cook 15 minutes or until leeks are translucent, stirring occasionally. Increase heat to medium-high. Add wine; cook 1 minute. Add stock; bring to a simmer. Remove from heat; stir in pasta, reserved cooking liquid, parsley, and lemon rind.

3. Sprinkle salmon fillet with remaining 1/4 teaspoon salt and pepper. Heat a large skillet over medium-high heat. Add remaining 1 tablespoon olive oil and butter; swirl until butter melts. Add salmon fillet, and cook for 5 minutes on each side or until desired degree of doneness. Flake the salmon into large chunks. Arrange 1 cup of the pasta mixture on each of 6 plates, and top evenly with flaked salmon. Serve immediately.

Printable Recipe

Puff Pastry Tomato-Parmesan Hearts

February 12th, 2015


Puff pastry hearts edited
Happy Valentines Day.  I know that most everyone is making chocolate desserts for Valentines Day, but I decided that I wanted something a little bit different. I love chocolate but I also love a good appetizer to be served before a decadent dinner of steak with bearnaise sauce, truffled mashed potatoes and asparagus with prosciutto and parmesan.  These bites would make the perfect beginning for that romantic dinner.  Actually that is just my fantasy dinner.  We will be in North Carolina celebrating our Grandson’s 4th birthday on Valentines Day.  Perhaps he will have a chocolate cake.

Puff Pastry hearts 3V

But I did make these last night before our dinner of Veal Saltimbocco with Julia Child’s scalloped potatoes and snow peas.  These puff pastry hearts are really very simple.  It just takes a little patience to spoon the topping of tomatoes, shallots, and Parmesan cheese on the pastry hearts.  I tried to maintain a heart shape with the red tomatoes.  My heart cookie cutter measured 1 1/2 inches, but you could use a larger cutter if you prefer.

Puff Pastry hearts 2

Wishing everyone a lovely holiday with your loved ones. I am linking this to Foodie Fridays at Rattlebridge Farm.

PUFF PASTRY TOMATO-PARMESAN HEARTS (Adapted from Cooking Light Magazine)

3/4 cup finely diced seeded plum tomatoes (about 2)
1 small shallot, minced
1/2 tablespoon olive oil
1 teaspoon champagne or white wine vinegar
1/2 teaspoon chopped fresh thyme
2 to 3 grinds of black peppercorns
1 sheet frozen puff pastry dough, thawed
Cooking spray or parchment paper
1/3 cup finely grated Parmesan cheese
Kosher salt to taste
Fresh small basil leaves for garnish (optional)

Preheat oven to 400 degrees F.

Combine the first 6 ingredients in a medium bowl.  Place the sheet of pastry dough on a work surface lightly dusted with flour.  Cut the dough with the 1 1/2-inch heart cutter into about 20 pieces.  Place on a baking sheet coated with cooking spray or a piece of parchment paper.  Top each heart with a small amount of cheese and a small amount of the tomato mixture.

Bake at 400 degrees F. for about 15 minutes or until golden.  Sprinkle tarts evenly with salt.  Sprinkle with basil leaves, if desired.

Printable Recipe

Harvest Focaccia

February 8th, 2015

Harvest Focaccia 1

Known as Schiacciata con l’uva in Tuscany, this grape harvest focaccia is showcased in the windows of bakeries all over the region during the Fall harvest season.  According to Angelo Ciardella, a retired restauranteur and cooking teacher, “In Italy we don’t have Thanksgiving.  It’s the time of the grapes.”  The bread appears only during September when the uva fragola or concord grapes are ripe.  The focaccia is studded with the grapes, raisins, and walnuts and sprinkled with rosemary.  In the version I made, the grapes were layered in the bread dough so that they were more evenly distributed.  The top was also sprinkled with coriander seeds and turbinado sugar to bring out the sweetness of the grapes.

You may be wondering why I would be posting about this recipe in February instead of September.  The reason is that we will be in Tuscany during September this year during the harvest season . I found this recipe while doing research.  Planning a trip is satisfying on so many levels.  Researching the food of the regions where you will be staying is one of the sensory delights.  Another is finding interesting places to stay.

Tuscany Kitchen

This is the kitchen of one of the villas we are considering in a small village near Lucca and Florence.

Tuscany Fireplace

The villa also has a beautiful open fireplace.  We are still working out the details of our trip.  What fun it would be to stay here for a few days.

Harvest Focaccia 2V

Because I didn’t have access to concord grapes I used seedless red grapes.  The flavor is not as intense as it would be with the wine grapes, but we had no complaints about this delicious bread.  This Schiacciata (skee-ah-chah-tah) con l’uva was the closest I could come to the authentic bread experience.  It will be interesting to taste the real thing.  What I loved about this recipe is that it had a stick of butter in it.  It gave the focaccia an almost cake-like consistency.

Harvest Focaccia 3

Buon Appetito!

HARVEST FOCACCIA (Food Network Magazine)

2 1/4-ounce packets active dry yeast (1 1/2 tablespoons)
3/4 cup extra-virgin olive oil
1/4 cup plus 1 tablespoon turbinado sugar
1 tablespoon plus 3/4 teaspoon kosher salt
2 1/4 cups all-purpose flour
2 1/4 cups bread flour
1 stick cold unsalted butter, cut into 12 pieces
2 cups (about 1 pound) seedless red grapes
2/3 cup raisins
1 cup walnuts, coarsely chopped
1 teaspoon coriander seeds, cracked with a heavy pan
1 teaspoon minced fresh rosemary
1/2 teaspoon freshly ground pepper

Put 1 3/4 cups lukewarm water, the yeast, 1/2 cup olive oil and 1 tablespoon each turbinado sugar and salt in the bowl of a stand mixer fitted with the dough hook attachment.  Mix on medium speed until the yeast and sugar dissolve, then let stand until foamy, about 10 minutes.  Add both flours and mix on medium speed to make a smooth but stick dough, about 4 minutes.

Poke the butter pieces into the dough, spacing them evenly apart. (Do not mix.)  Cover the dough with plastic wrap and set aside in a wam place until doubled in size, 45 minutes to 1 hour.

Mix the dough with the dough hook on low speed just until there are streaks of butter throughout, about 1 minute.  Put the grapes and raisins in a microwave-safe bowl, cover loosely and microwave until juicy, about 10 minutes.  Let cool, the strain through a sieve, discarding the liquid.

Brush a 10 x 15-inch rimmed baking sheet with 2 tablespoons olive oil.  Divide the dough in half and transfer one piece to the baking sheet, leaving the other in the bowl.  Cover both pieces of dough loosely with parchment paper; set aside until plump and airy, about 30 minutes.  Preheat the oven to 450 degrees F.

Spread the dough on the baking sheet so it fills the pan, dimpling it with your fingertips.  Scatter half of the grape-raisin mixture evenly on top.  Put the remaining piece of dough on top and stretch and pat it to cover the bottom piece of dough. (Don’t worry if the dough tears.)  Scatter the walnuts and the remaining grape-raisin mixture on top. dimple the dough all over with your fingertips, poking the topping into the dough.  Cover loosely with parchment and set aside until the dough rises above the sides of the baking sheet by about 1/2-inch, 35 to 40 minutes.

Mix the remaining 1/4 cup sugar, the coriander, rosemary, the remaining 3/4 teaspoon salt and the pepper; sprinkle over the dough.  Place the baking sheet into the oven and bake 10 minutes.  Reduce the oven temperature to 400 degrees F. and bake until the focaccia is golden and springs back when pressed 20 to 30 minutes.  Brush with the remaining 2 tablespoons olive oil; let cool in the pan 15 minutes, then transfer to a rack to cool.  Can be served warm or at room temperature.  Warning:  Be careful not to eat the bread piping hot or you can burn your lips or mouth on a grape.  This came from personal experience. 

Printable Recipe
 

Bistro Style Chicken Thighs with Raspberry Vinegar

February 3rd, 2015

Vinegar Chicken 2

On these dreary winter days, I have been thinking about food that I have experienced in our travels.  There is something to be said for infusing flavor into a dish.  French bistros offer dishes that are well known for simplicity and big flavors.  The countryside of France is full of cozy bistros nestled in picturesque villages.  We had the pleasure of visiting many on our last two trips to France.

St. Remy Bistrot Decouverte

In St. Remy we had a lovely lunch at Bistrot Decouverte.  The French blue shutters are so typical of Provencal buildings.  Our lunch of braised chicken and salade verte with a glass of chilled rose’ wine was perfect.

St. Remy Penny

Unfortunately the only picture we took was of my empty plate and my satisfied expression.

isle Sur la Sorgue

We spent a week in the charming village of L’Isle Sur la Sorgue.  This village has been called little Venice because the waters of The Sorgue river flow around and through the town.  It is also known for its Brocantes or antique stores.  One of the most popular antique’s fair in France is held every Sunday in the Market Square.  There are also numerous small bistros to enjoy.

Isle Sur La Sorgue toastWe enjoyed many fine meals and aperitifs along the cobbled streets.

Isle Sur la Sorgue Rabbit dishDavid was pleased to find braised rabbit on the menu of L’Aparte, a Bistro with a water view.  It was served with baked ratatouille and a green salad.

Vinegar Chicken 1V

In remembrance of all the fine meals we had in French Bistros, I made this flavorful dish of Chicken Thighs in Raspberry White Balsamic Vinegar.  It is studded with cherry tomatoes.  The ingredient list is short.  The cooking time is also.  But the flavors are big.  It is an adaptation of a dish from Bistro d’a Cote in Paris that Patricia Wells wrote about in her book Bistro Cooking.  If you want to be transported to a warm sunny clime while the snow flurries swirl, this is just the dish to serve for dinner.  You won’t be disappointed.

BISTRO CHICKEN THIGHS WITH RASPBERRY VINEGAR

Serves 2 to 4

1 tablespoon olive oil
2 tablespoons butter
4 chicken thighs, trimmed of some of the skin
Salt and freshly ground black pepper
2/3 cup Raspberry Blush Vinegar ( I used “Alessi” which may be available in your local store for no more than $4.00)
Small container of cherry tomatoes, halved
1/2 cup chicken broth
1 tablespoon butter to finish
Chopped parsley to garnish

In a nonreactive skillet, heat the oil and butter over high heat.  Season the chicken thighs liberally with and salt and pepper.  Add the chicken to the hot skillet and cook until the skin side is golden brown (Approx. 5 minutes).  Regulate the heat so that you do not burn the chicken. Turn the pieces and brown them on the other side for an additional 5 minutes.

Remove the chicken from the skillet and pour out the cooking fat.  Return the chicken to the skillet and very slowly add the vinegar.  Lower the heat to medium and reduce the vinegar by half, turning the chicken from time to time to coat it with the mixture, about 10 minutes.

Add the tomatoes and chicken stock. Cover and simmer gently over medium low heat until the chicken is cooked through, about 20 minutes.

Remove the chicken to a platter and whisk in the 1 tablespoon of butter.  Pour the sauce over the chicken, sprinkle with parsley and serve with mashed potatoes.

Printable Recipe


Fraudulent Sourdough Bread

January 26th, 2015

Sourdough Bread 2

I am always inspired by fellow bloggers.  I sometimes wonder why we even bother with cookbooks when we have such talented people who blog about food on a regular basis.  Monique from La Table de Nana is one of those bloggers.  Among several recipes in one of her recent post, I was attracted to this round of crusty bread full of seeds.  She adapted the recipe from another blogger, Lady and the Pups.  The premise behind the sourdough bread is that you don’t need a sourdough starter.  The sour taste comes from the yogurt that is a part of the mixture.  It is so easy, especially if you kneed it in a stand mixer.  The only difficulty is time.  Time to let it ferment for 6 to 18 hours.  But you might as well just go about your business while the dough does its thing.  There is very little hands on work.

Staub Cookware


One of the reasons that I wanted to try this bread is because it is supposed to be baked in a heavy covered casserole.  I have been waiting to share this news with you.  I was fortunate to win a set of Staub Cookware from one of my favorite sites, the folks at Food52.  Food52 was founded by former New York Times food editor Amanda Hesser and food writer Merrill Stubbs.  The site offers home cooks everything from recipes to food related articles.  It has an active community of over 300,000 members.  They offer recipe contests in which I have participated.  So far 2 of my recipes have been selected as “Community Picks”.

With the publication of Mimi Thorisson’s cookbook My Kitchen in France, they held a contest offering a set of the beautiful French cookware from Staub.  All that was necessary to win was to leave a comment on their website each day of one week.  They gave away 4 sets.  I won one of them.  I was expecting, perhaps, some small individual cocottes, . . . maybe a small oval baker.  Much to my amazement, right before Christmas three large boxes were delivered.  I received a 5 quart round cocotte with lid, a 9.5 inch oval baker, and a 12 inch skillet (not shown here).  I told David I needed nothing more for Christmas.  Staub is amazing cookware, much like Le Creuset.  The matte black pieces are all featured in Mimi’s cookbook.  By the way, I also won one of her cookbooks.  Since I had already purchased mine, I gave this one to my talented daughter-in-law for Christmas.

Sourdough Bread 1

The bread baked in the casserole couldn’t have been better.  I’m sure any heavy duty casserole would do, but there is something satisfying about cooking in beautiful vessels.  I highly recommend this bread.  I love the cracked appearance of the loaf.  It is hard on the outside and soft inside, just as a good sourdough loaf should be.  You can make it without the sunflower and flax seeds as the original recipe suggests.  Monique even suggested that I try it that way first, but I loved this version.  Thank you for a great recipe Monique.

FRAUDULENT SOURDOUGH BREAD

  • 3 cups (405 grams) bread flour
  • 1 1/2 tsp (8 grams) salt
  • 1/4 tsp instant dry yeast (if fermenting for 18 hours), or 3/4 tsp instant dry yeast (if fermenting for 6 hours)
  • 1 1/2 cup + 2 tbsp (385 grams) plain unsweetened yogurt containing active cultures
  • 1/3 cup sunflower seeds, optional
  • 1/3 cup flax seeds, optional

Instructions

  1. In a stand-mixer with dough-hook, or in a large bowl by hands, mix bread flour, instant dry yeast, salt and plain yogurt, plus seeds if using, on medium-low speed for 2 min until a dough forms. If the dough is too dry and has difficulty coming together, add 1 tbsp more plain yogurt. If you’d like, continue to knead the dough on medium-low speed, or with your hands, for a few more minutes until springy. The dough should be very sticky, but able to retain shapes.
  2. Cover the bowl with plastic wrap and let ferment at room-temperature for 18 hours (NO MORE than 20 hours or the yogurt may spoil and become bitter!), or 6 hours depending on your schedule (note that the amount of yeast varies). The dough should almost doubled when finished.
  3. After fermentation, dust the counter with flour then transfer the dough on top. Use just enough flour to prevent the dough from sticking, fold the dough gently (without crushing all the air bubbles inside) over itself like folding a letter. Turn 90 degrees and fold again. Then shape the dough into a ball-shape. Transfer to a piece of floured parchment paper, then cover a large bowl on top and let proof again for 1 ~ 2 hours. The dough is ready when it almost double in size again, and should not spring back when you press it with a finger.
  4. 45 minutes before the dough’s ready, preheat the oven on 450F/225C with a large dutch oven, or a heavy-bottom pot (both should come with lid) inside. To bake the bread, lift the parchment paper to transfer the dough into the preheated pot, cover the lid and bake for 30 min. Then remove the lid, and bake until the crust is golden browned.
  5. Let cool on a rack for 20 min.


Printable Recipe

© Penny Klett, Lake Lure Cottage Kitchen. All rights reserved.