Linguine with Shrimp Scampi

May 15th, 2014

Linguine with Shrimp Scampi 2 better

If you love lemons this is the dish for you.  But it is more than about lemons.  It is about butter, garlic and shrimp in a melange of lemon infused linguine.  I knew that this would be a great dish because it is a Barefoot Contessa recipe. This is even a quick and easy dish if you buy peeled and deveined shrimp.  I think one of the tasks that I hate most is peeling and deveining shrimp.  I once had to peel and devein eight pounds of shrimp for a friend’s birthday party and I thought I would lose my mind long before I finished two hours later.  I’m not sure now how long it really took, but I hated every second of it.  I don’t mind buying peeled and deveined shrimp if I can find them and will gladly pay extra from someone else to do it for me.

Linguine with Shrimp Scampi 3V

I have made several versions of shrimp and pasta here.  This is my favorite one so far.  The fresh parsley came from some that I planted in the planters on my deck.  I get all of my herbs from a local store called The Hickory Nut.  Sherry, the owner, grows many of her own plants and flowers in a greenhouse close by.  She also has chickens and I get my eggs from her also.  I am lucky to have such quality resources in our small community.

Hickory Nut 2

Spring and summer flowers and herbs make my happy.  So does this recipe.  Enjoy.

LINGUINE WITH SHRIMP SCAMPI

Vegetable oil
1 tablespoon kosher salt plus 1 1/2 teaspoons

3/4 pound linguine
3 tablespoons unsalted butter
2 1/2 tablespoons good olive oil
1 1/2 tablespoons minced garlic (4 cloves)
1 pound large shrimp (about 16 shrimp), peeled and deveined
1/4 teaspoon freshly ground black pepper
1/3 cup chopped fresh parsley leaves
1/2 lemon, zest grated
1/4 cup freshly squeezed lemon juice (2 lemons)
1/4 lemon, thinly sliced in half-rounds
1/8 teaspoon hot red pepper flakes

Drizzle some oil in a large pot of boiling salted water, add 1 tablespoon of salt and the linguine, and cook for 7 to 10 minutes, or according to the directions on the package.

Meanwhile, in another large (12-inch), heavy-bottomed pan, melt the butter and olive oil over medium-low heat. Add the garlic. Saute for 1 minute. Be careful, the garlic burns easily! Add the shrimp, 1 1/2 teaspoons of salt, and the pepper and saute until the shrimp have just turned pink, about 5 minutes, stirring often. Remove from the heat, add the parsley, lemon zest, lemon juice, lemon slices, and red pepper flakes. Toss to combine.

When the pasta is done, drain the cooked linguine and then put it back in the pot. Immediately add the shrimp and sauce, toss well, and serve.

Printable recipe

Zucchini Flans and a Giveaway

May 8th, 2014

Zucchini Flans 1

I have been following the blog Manger for a while now and am thrilled that the author Mimi Thorisson is coming out with a new book this Fall.  Manger is the French word for “To Eat”.  Mimi lives in the Medoc region of France with her husband and growing family.  Her blog is beautiful both in her prose and the photography.  Her husband is a professional photographer and is responsible for the ethereal images.


A Kitchen in France 2
To celebrate the publication of her new book  A Kitchen in France, I will give one lucky winner a copy of the book.  Since it will not be published until this Fall,  you will have to wait to receive your copy.  Mimi’s food is as unique as she is with an emphasis on seasonal ingredients.  I have tried several of her recipes and have been very happy with the results.

zucchini flans 2V

These Zucchini Flans are very easy to make and a good use for the ubiquitous summer zucchini that will be in our markets soon.  They make a lovely light breakfast or side dish for any of your summer meals.  I changed the recipe a bit by using basil instead of mint.  They are very adaptive and gluten free since they use cornstarch instead of flour.

To win a copy of the cookbook, you have two chances.  Leave a comment on this post for one chance.  Follow my new Lake Lure Cottage Kitchen Facebook page for another chance.  Let me know in a separate comment if you are following me on Facebook.

ZUCCHINI FLANS

2 large zucchini, sliced in half-rounds
5 eggs
4 tbsp cornstarch (maïzana in France)
2 tbsp fresh lemon juice
A handful of chopped basil
1/2 cup grated cheese (Emmental or Gruyère)
2 shallots, finely chopped
2 garlic cloves, sliced finely
½ tsp nutmeg
Salt & black pepper

Preheat oven 180°C/ 350 F
Slice zucchini thinly in half rounds. Slice shallots and garlic finely. In a large frying pan, heat 2 tbsp of olive oil and fry shallots, garlic and zucchini for a few minutes, until slightly golden.
In a large bowl, whisk eggs and cornstarch, then add grated cheese, nutmeg, salt & pepper. Combine zucchini/shallots/garlic, lemon juice and sliced basil – stir gently.
Pour mixture into a muffin pan. Bake in oven for 20 minutes, until slightly golden on top.
a Rafflecopter giveaway

Southern Biscuits

May 5th, 2014

Southern Biscuits 3

So much of what  Southern cooking is about is how its women were able to provide filling and nutritious meals for their families.  When I think about the Southern table I think about the history of putting food by; women sitting on their porches shelling butter beans, the steaming pots of water waiting on the stove for those ball jars full of strawberry jam ready to be sterilized and the rendered lard waiting to be mixed with flour and buttermilk for the morning biscuits.  And if there were leftover biscuits, they would be used as a topping for that old stewing hen.

Southern Biscuits 2V

We have come a long way from the times when putting food by was a necessity for survival, but making biscuits is still a primal instinct to me.  There is nothing like rising early in the morning, lighting the oven and mixing the simple ingredients for biscuits. I love the put-put sound of my knife as it slashes through the butter and shortening cubes in the flour.  I make a floury mess in the kitchen as I pat the dough onto a board and cut the biscuits into shape.  Traces of flour cover the refrigerator door handle as I reach for the buttermilk and my clothing is dusted in flour.  After the biscuits are in the oven, David enters the kitchen, takes one look around and says “You must be making biscuits”.

Southern Biscuits Pan 2

My biscuit making skills are still a work in progress.  A recipe that I have been using lately comes from Alton Brown.  He uses regular flour and a combination of butter and shortening and buttermilk in his biscuits.  It is a good basic recipe. Watching the Food Network a while back, I saw Sunny Anderson talk about her Grandmother’s biscuits.  Her Grandmother shared her recipe with her, but the recipe never came out the same for Sunny.  So watching her Grandmother carefully one day she noticed that her Grandmother’s flour looked different.than they flour that she used.  Her Grandmother’s flour had little yellow flakes in it.  She neglected to tell her that she used Atkinson Flour with Butterflakes.  Sunny shared her recipe here.  I also found a new flour that I used in my biscuits this time.

Southern Biscuit Pan 1

King Arthur has a Pastry Flour Blend that duplicates many of the Southern flours used by previous generations of southern cooks.  It is softer and produces lighter biscuits and scones.  It is also great for flaky pie crusts.  It is not recommended for yeast risen baked goods.  I found it easier to handle and loved the results in my biscuits.  I have yet to use it in pie crust, but am anxious to try it.

Southern Biscuits 4

My biscuits were light and tender and went well with my freezer strawberry jam.  But I just may try the Atkinson flour blend to compare the results.  I would be interested to know if any of you have a favorite biscuit recipe.

SOUTHERN BISCUITS (Alton Brown)

2 cups flour
4 teaspoons baking powder
1/4 teaspoon baking soda
3/4 teaspoon salt
2 tablespoons butter
2 tablespoons shortening
1 cup buttermilk, chilled

Preheat oven to 450 degrees.

In a large mixing bowl, combine flour, baking powder, baking soda and salt. Using your fingertips, rub butter and shortening into dry ingredients until mixture looks like crumbs. (The faster the better, you don’t want the fats to melt.) Make a well in the center and pour in the chilled buttermilk. Stir just until the dough comes together. The dough will be very sticky.

Turn dough onto floured surface, dust top with flour and gently fold dough over on itself 5 or 6 times. Press into a 1-inch thick round. Cut out biscuits with a 2-inch cutter, being sure to push straight down through the dough. Place biscuits on baking sheet so that they just touch. Reform scrap dough, working it as little as possible and continue cutting. (Biscuits from the second pass will not be quite as light as those from the first, but hey, that’s life.)

Bake until biscuits are tall and light gold on top, 15 to 20 minutes.

Printable Recipe

Triple Cinnamon Scones

May 1st, 2014

Triple Cinnamon Scones 2


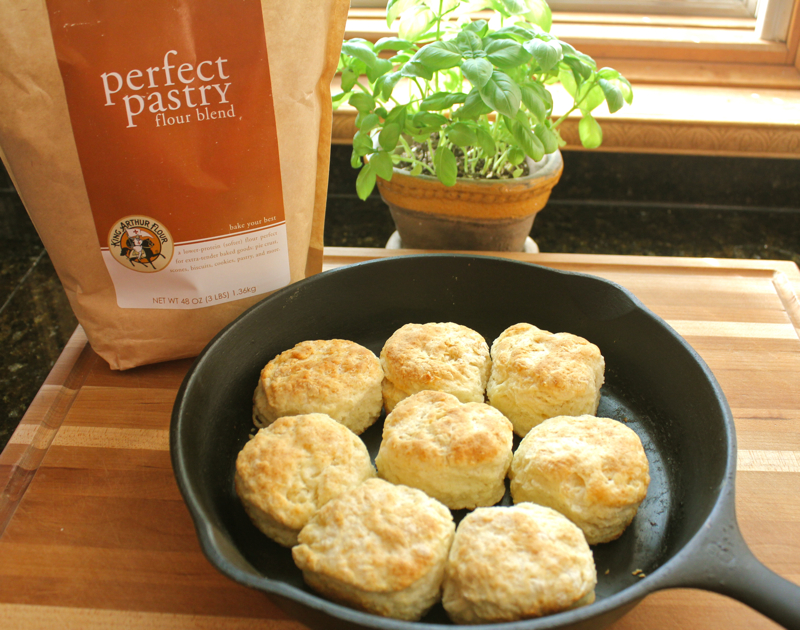
I love the King Arthur Flour Company.  Not only do they have some of the best flour available, but they also have some of the best baking ingredients and tools to turn out some of the best baked good you will ever taste.  While visiting our family over Easter, Kristen served us these Triple Cinnamon Scones.  I fell in love with them.  They are the best scones I have ever eaten.  She got the recipe and several of the ingredients from King Arthur.

Triple Cinnamon Scones V

I immediately placed an order online for their cinnamon chips and their baker’s cinnamon filling mix; because, you see, these cinnamon scones are indeed a triple blast of cinnamon.  The cinnamon chips, the cinnamon filling and the cinnamon glaze make them sooo delicious – no dry scones here.

Triple Cinnamon Scones 1 close

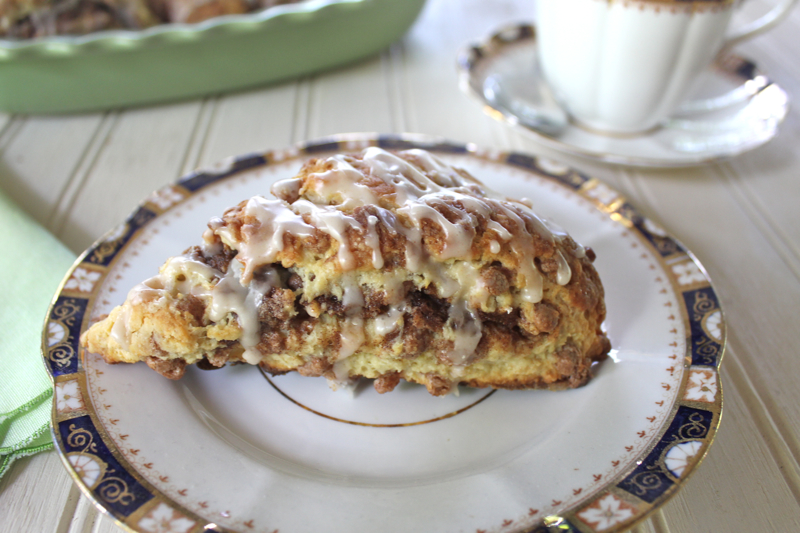
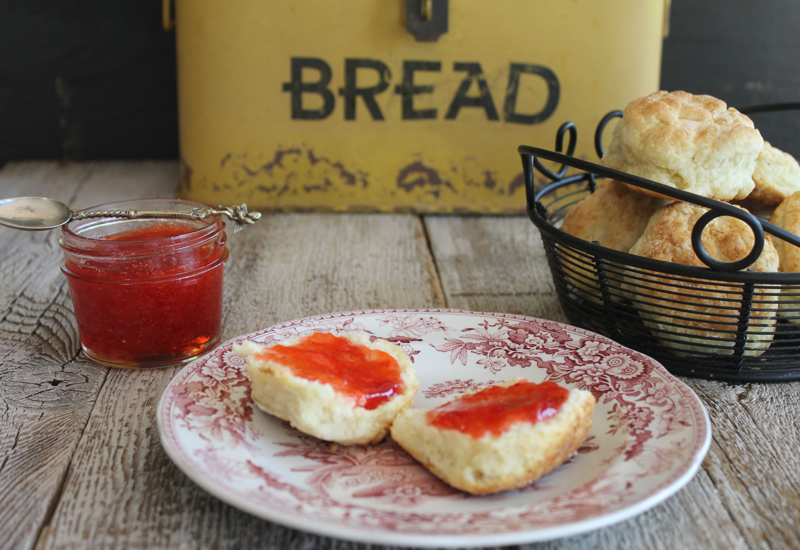
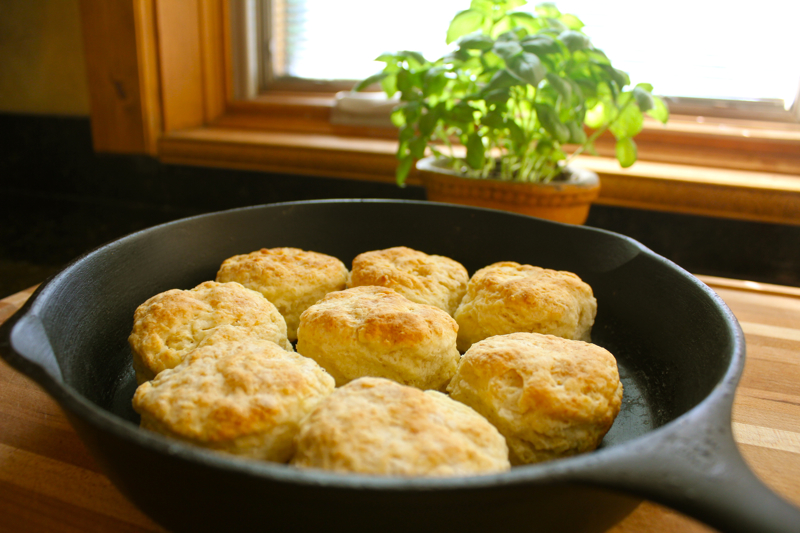
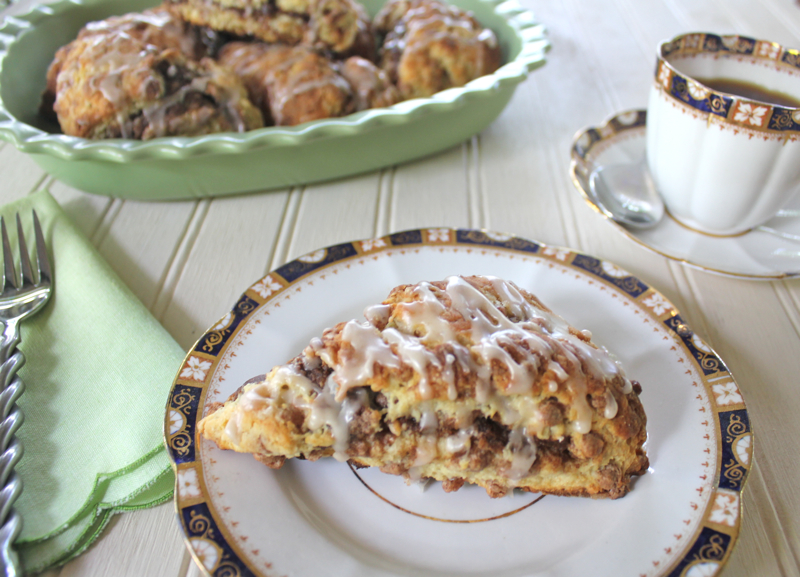
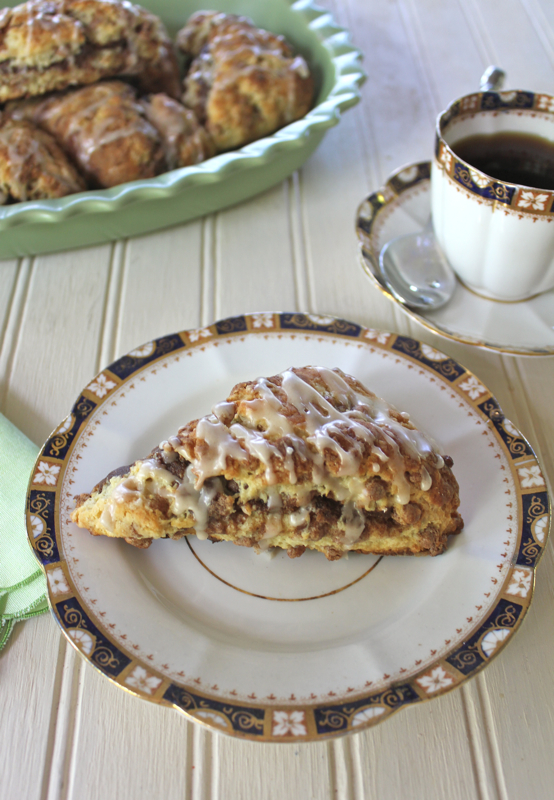
You can just see the layers of flavor.  Because of that there are a few steps involved in their preparation, but it is totally worth it.  The recipe has some great tips to make successful scones.   One tip is to put the prepared scones in the freezer for 30 minutes before baking.  Another suggestion I have, is to use a very sharp knife to cut the scone shapes.  That way they will not become lopsided while baking.  Make a clean cut without pulling at the batter.  Also, I made only about half of the glaze and just drizzled the tops of the scones instead of slathering the whole thing in glaze.

Triple Cinnamon Scones All


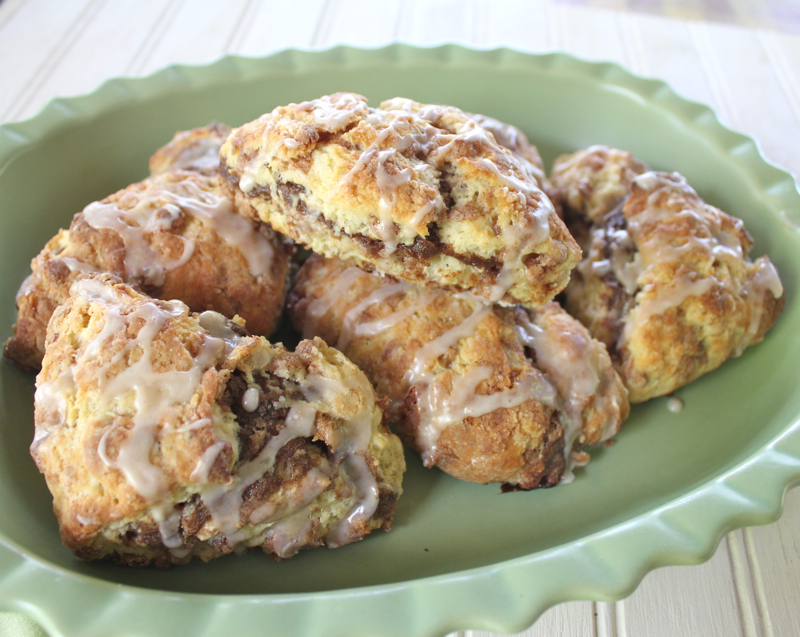
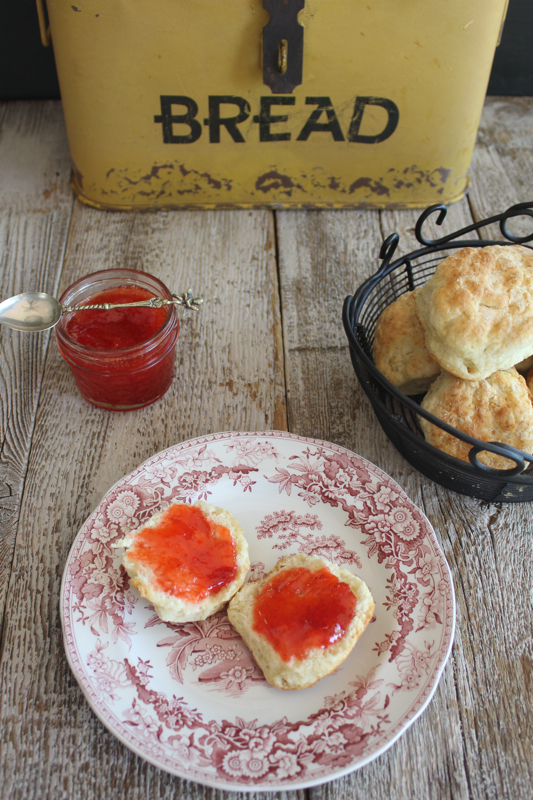
A platter of warm scones is the perfect breakfast for a crowd.  I plan on making them (and perfecting my skills) all summer while we have visitors.  I may even make them in advance and freeze a few batches.  My next scone recipe will be an Orange scone using the Candied Orange Peel that I got from King Arthur.

Triple Cinnamon Scones 4
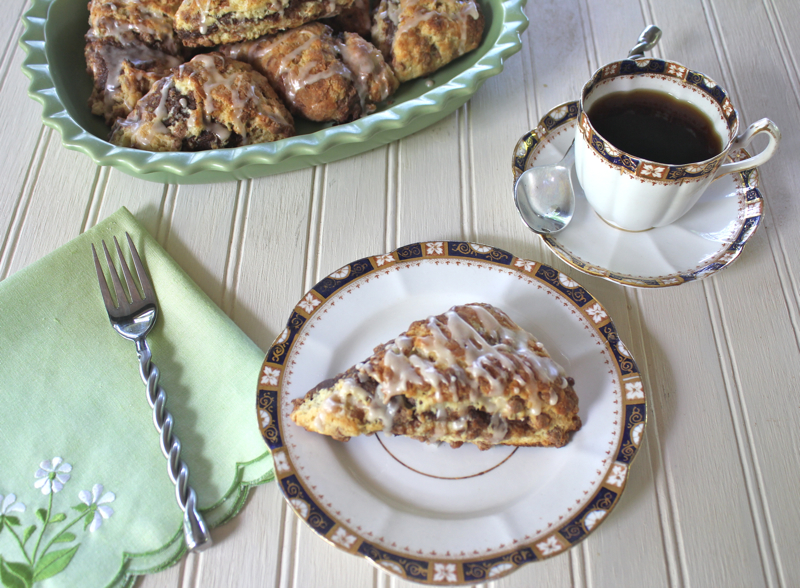
By the way, the pretty plate and cup and saucer were a gift from a special blogging friend, Mary, from A Breath of Fresh Air.  Thank you Mary.  The pretty luncheon napkin is one from a set that belonged to my Mother.  She used them for special luncheons with friends when I was just a child.  I treasure them.

TRIPLE CINNAMON SCONES

scones

  • 3/4 cup half and half or evaporated milk
  • 1 cup cinnamon Flav-R-Bites or cinnamon chips
  • 2 3/4 cups King Arthur Unbleached All-Purpose Flour
  • 1/3 cup sugar
  • 1 tablespoon baking powder
  • 3/4 teaspoon salt
  • 1/2 cup cold butter, cut into pats
  • 2 large eggs, lightly beaten
  • 1 teaspoon vanilla extract

filling

  • 3/4 cup Baker’s Cinnamon Filling*
  • 3 tablespoons water
  • *Or substitute 5 tablespoons butter, 3/4 cup brown sugar, and 2 tablespoons ground cinnamon for the Baker’s Cinnamon Filling mix and water.

glaze

  • 3 1/2 cups confectioners’ sugar
  • 1 teaspoon ground cinnamon
  • 7 tablespoons water

1) Combine the Cinnamon Flav-R-Bites with the half and half or milk in a small bowl. Let the mixture rest for about 20 minutes.

2) While the cinnamon mixture is resting, get started putting together the rest of the ingredients. In a large mixing bowl, whisk together the flour, sugar, baking powder, and salt.

3) Work in the butter just until the mixture is unevenly crumbly; it’s OK for some larger chunks of butter to remain unincorporated.

4) Add the eggs and vanilla to the cinnamon-milk mixture, stirring to combine.

5) Add the liquid ingredients to the dry ingredients and stir until all is moistened and holds together.

6) Scrape the dough onto a well-floured work surface. Pat/roll it into a rough 9″ square, a scant 3/4″ thick. Make sure the surface underneath the dough is very well floured. If necessary, use a giant spatula (or the biggest spatula you have) to lift the square, and sprinkle more flour underneath.

7) Spread the filling over the dough. Fold one edge into the center and over the filling, as though you were folding a letter. Fold the remaining edge over the center to complete the three-fold. You’ll now have a rectangle that’s stretched to about 4″ x 12″. Gently pat/roll it to lengthen it into a 3″ x 18″ rectangle; it’ll be between 3/4″ and 1″ thick.

8) Cut the rectangle into six 3″ squares. Transfer the squares to a lightly greased (or parchment-lined) baking sheet. Now you have a choice. For large scones, cut each square in half diagonally to make a triangle; you’ll have 12 scones. For medium scones, cut each square in half diagonally again, making four triangular scones from each square. Gently separate the scones (if you like scones with crunchy edges), leaving about 1″ between them. For softer scones, separate the scones just enough to break contact between them.

9) You may also choose to make scone strips, or tiny squares. Cut each 3″ square into three 1″ x 3″ rectangles, for a total of 18 scone strips. Gently separate the strips, leaving about 1/2″ between them. Or cut each 3″ square into nine 1″ squares, to make 54 bite-sized mini scones.

10) For best texture and highest rise, place the pan of scones in the freezer for 30 minutes, uncovered. While the scones are chilling, preheat the oven to 425°F.

11) Bake the scones for 16 to 20 minutes, or until they’re golden brown. Remove the pan from the oven, and allow the scones to cool right on the pan.

11) Make the glaze by stirring together the sugar, cinnamon, and water. If the sugar seems particularly lumpy, sift it first, for an extra-smooth glaze.

12) Now you’re going to coat each scone with glaze. You can dip each one individually, which is quite time-consuming. Or line a baking sheet (with sides) with parchment, and pour about half the glaze atop the parchment. Set the scones atop the glaze, swirling them around a bit to coat their bottoms. Then drizzle the remaining glaze over the top. Use a pastry brush to brush the glaze over each scone, to coat it entirely. The glaze is very thin, so this is easily done.

13) Transfer the scones to a rack set over parchment, to catch any drips. As you pick each scone up, run its sides over the glaze in the bottom of the pan, both to use up some of the extra glaze, and to make sure all sides are coated. Allow the glaze to set before serving the scones.

Yield: one dozen triangles, 5″ x 3″; 2 dozen triangles, 2 1/2″ x 3″; 18 strips, 4″ x 1 1/2″; or 54 mini (1 1/2″) squares.

Printable recipe

Polynesian Meatballs

April 26th, 2014

Polynesian Meatballs 3

Sometimes I have to  admit to myself, that when given a choice of meat to enjoy, I would invariably choose ground beef.  As a child my favorite meal was hamburgers and french fries.  Ground beef is so versatile.  It can be used in casseroles with a southwestern flavor or turn Italian in spaghetti.  I remember my Aunt Pat making hundreds of meatballs for my cousin’s wedding.  They were cooked in a combination of chili sauce and jellied cranberry sauce.  I’m sure you remember that combination.  That’s why this combination with a Polynesian spin caught my eye.

Polynesian Meatballs 2V

Sweet and sour dishes are always popular in our house.  There are interesting components to this recipe.  The coconut milk in the meatballs is a nice touch.  If you buy a can of coconut milk for this, you will have leftover milk.  You can freeze the rest for future uses. The pineapple, ginger and garlic give just the right flavor to the whole dish.  The only caveat that I have is that I think there is too much sugar.  You can cut it down if you prefer.

Polynesian Meatballs 1


The sauce can be made ahead of time and the meatballs are easy because they are browned in the oven. This makes a colorful and complete meal on a plate with a scoop of rice.  Enjoy!  I know we did.  I am linking this to Foodie Friday at Rattlebridge Farm and Tasty Tuesday at The Comforts of Home.

POLYNESIAN MEATBALLS ( The Fresh Market and Friends Cookbook )

Polynesian Sauce:
1/2 jalapeno, chopped
1/3 cup cider vinegar
1/2 cup sugar or Demerara sugar
1 1/4 cups pineapple juice
1 (8 ounce can crushed pineapple with juice
1 tablespoon water
2 tablespoons cornstarch
1 tablespoon soy sauce
2 green onions, thinly sliced
1/2 red bell pepper, cut into 2-inch long thin strips
1 teaspoon fresh mint, chopped
1 tablespoon fresh cilantro, chopped

Meatballs:
1 1/2 pound ground beef
2/3 cup Panko breadcrumbs
1/4 onion, minced
1 egg
1/4 cup coconut milk
2 teaspoons fresh ginger, grated
1/2 teaspoon salt
1 tablespoon chili garlic sauce

Preheat oven to 450 degrees F.  In a small sauce pan over high heat, bring jalapeno and cider vinegar to a boil.  Remove from heat, let stand 30 minutes, strain to remove jalapenos and set aside.

In a large saucepan over high heat, combine jalapeno vinegar, sugar, pineapple juice and crushed pineapple; bring to a boil until sugar has dissolve.  In a mixing bowl, combine water, cornstarch and soy sauce until smooth; pour into sauce and bring to a boil.  Remove from heat and add onions, bell pepper, mint and cilantro; set aside and keep warm.

In a medium bowl, gently fold together all meatball ingredients.  Roll into 1-inch meatballs and place on a greased baking sheet.  Bake 20 minutes.

Transfer meatballs to a shallow bowl.  Pour sauce over top and toss to coat.

Printable recipe

© Penny Klett, Lake Lure Cottage Kitchen. All rights reserved.