Oatmeal Bread to Celebrate a Book

April 11th, 2013

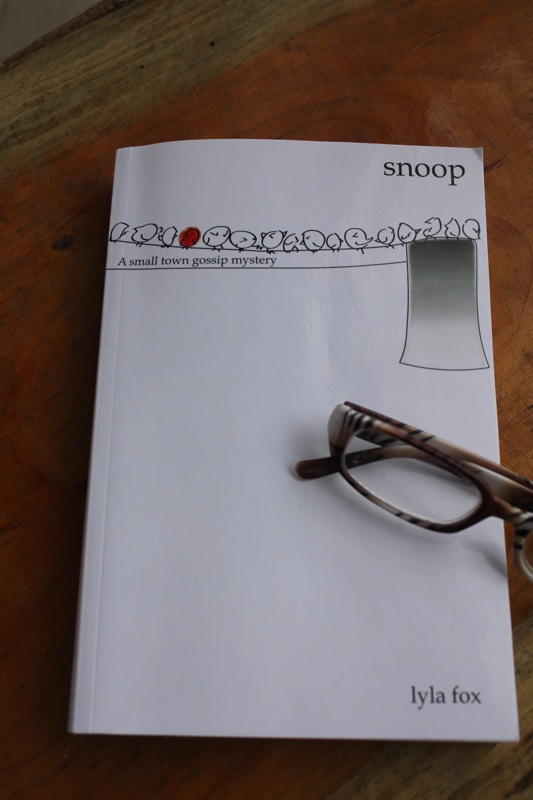
I made this bread for a very special reason.  It is to celebrate the publication of my childhood friend, Lyla’s new book.  Lyla taught English for over twenty years.  She taught students from first grade, to high school and college.  She has always been a writer with publications in national magazines like Newsweek, Forbes, and Parents.  A children’s novel that she wrote won a Writer’s Digest Honorable Mention.  She has been working on a mystery for several years now.  You see, she and I grew up reading Nancy Drew and loved the adventures of the intrepid sleuth.  Her new novel, Snoop (A small town gossip mystery), is similar to that genre but with grown up characters.  There are also similarities to our own small town in the book.  It has been a joy for me to read it.

Lyla loves to cook as much as I do so there are numerous references to food in Snoop, although the main character Sam is not much of a cook.  But she knows all of the best take-out places and loves the oatmeal bread that elderly Elli makes and sells to the local restaurant.  When Elli is found brutally murdered, Sam cannot curb her snooping.   After all, Snooping is the name of her column in the local newspaper. This is a great whodunit with a surprise ending.

Lyla and I got together a few years ago in our hometown.  We had not seen each other since junior high school.  She even sent me an 80th Anniversary Limited Edition copy of Nancy Drew’s The Secret of the Old Clock to commemorate our childhood love of reading the mysteries.  That is why I am so proud of her for following her dreams and writing a mystery of her own.  There will be more in the series too.  If you would like to get a copy of her book you can order it from Amazon here.

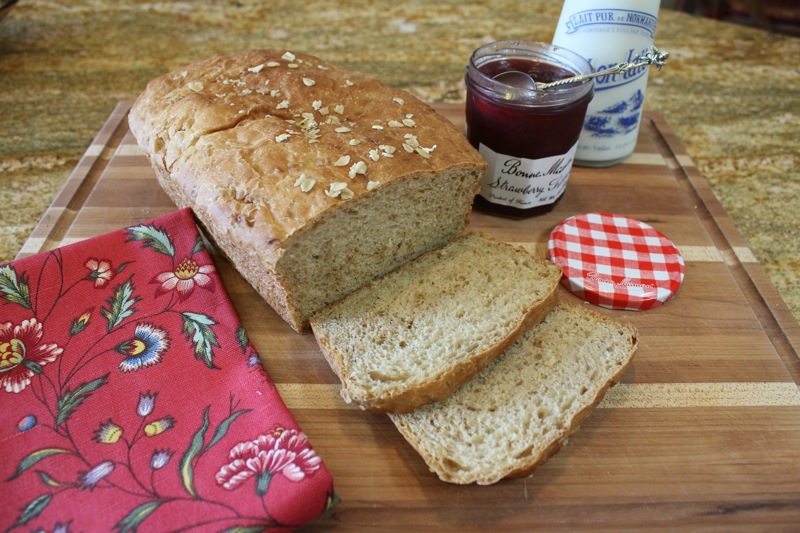
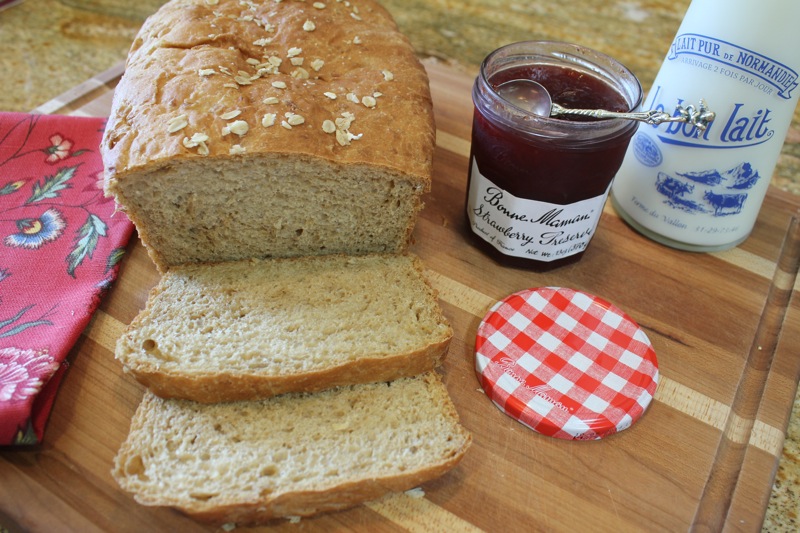
Lyla told me that Elli’s famous oatmeal bread recipe was actually a James Beard recipe.  This comes out in book #2 called Deadly Snooping.  She sent me the recipe and I made it yesterday.  It was one of the easiest yeast bread recipes I have ever made because there is limited kneading.  I made David a sandwich with it today and he loved it.  I was happy with the texture and the delightful flavor.  I will be making this bread often.  Thank you Lyla.  Both the bread and the book are delightful.

OATMEAL BREAD

2 packages active dry yeast
2 teaspoons sugar
1 cup lukewarm water
1/3 cup butter
1 cup boiling water
1 cup rolled oats (not instant)
1/3 cup molasses
1 tablespoon salt
1 egg
5 1/2 cups all-purpose-flour

Dissolve dry active yeast and sugar in 1 cup lukewarm water.  Let stand 10 minutes, then stir very well.

Cream butter in a large mixing bowl; add boiling water, and stir until completely melted.  Add oats, molasses and salt.  Blend thoroughly and cool to lukewarm.  Add egg and beat well.  Add yeast, then fold in flour.

Put the dough in a buttered mixing bowl, turning it so that it is well greased on all sides, then refrigerate for at least two hours – you can leave it for three to four hours.  Turn out the chilled dough on a floured work surface and shape into two loaves.  Place in well-buttered 9 x 5-inch loaf pas, and let rise in a warm, draft-free spot until double in bulk, about two hours.

Preheat oven to 350 degrees F.  Bake bread for approximately one hour or until the loaves are nicely browned and sound hollow when you rap them.  Remove from pans and cool on racks.
Printable recipe

Grilled Flank Steak with Red Peppers and Gremolata Stuffing

April 8th, 2013

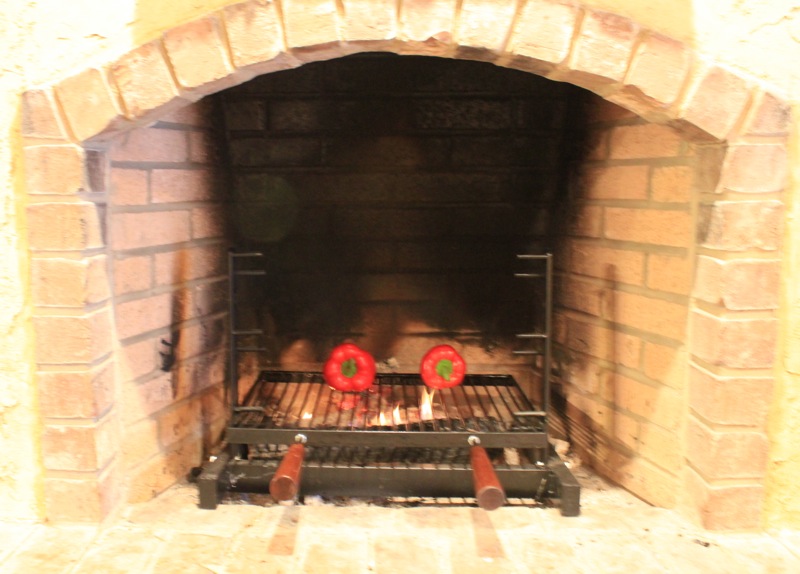
Although it is early for grilling, we have a cold weather method that we implement from time to time.  We have a grill that fits into our fireplace.  When the winds are howling and the rain and sleet are coming down we like to light a fire and cook our meal on the hearth.  We did that last Monday.

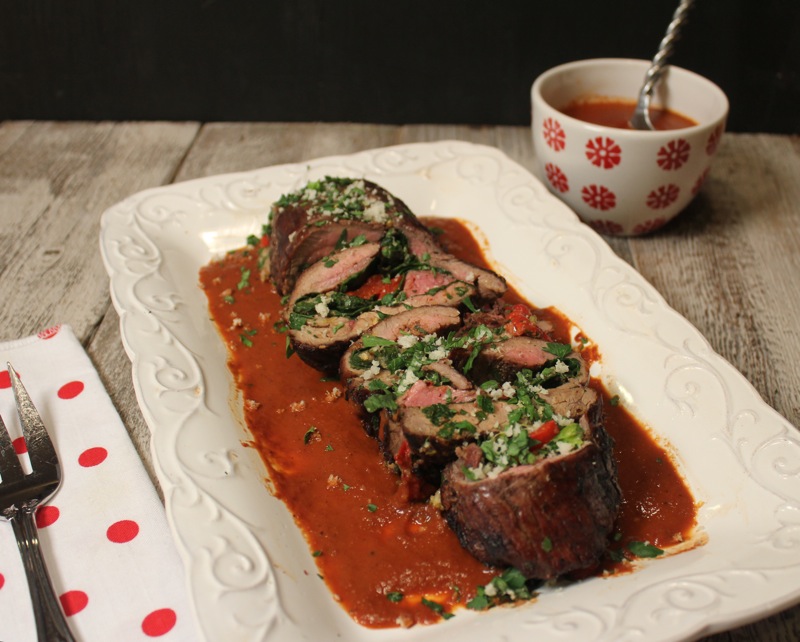
Part of this recipe for the rolled and tied flank steak involved roasted red peppers, onions and garlic.  I charred the peppers on the grill and cooked the garlic and onions in the coals.  You know how good it makes you feel when you find a recipe that sends your mind awhirl with possibilities.  That is true of the sauce I made to go with the flank steak.  It is Wood-Roasted Red Pepper Wine Sauce.

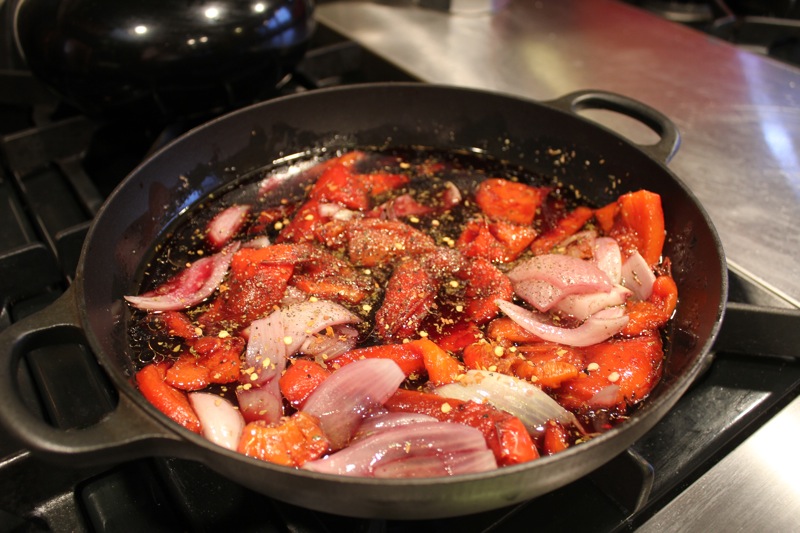
After the peppers, onions and garlic are cooked, they are put in a pan with red wine, olive oil, herbs, honey and a pinch of red pepper flakes.  This is cooked to reduce it slightly.  Then it is pureed in a blender and sieved.  It makes a beautiful and delicious sauce that can be used in numerous dishes.

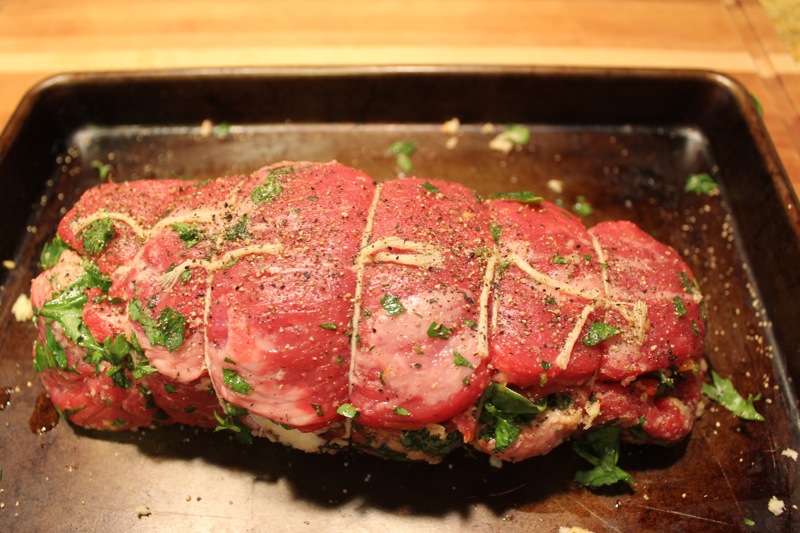
The flank steak is butterflied and pounded to a 1/4-inch thickness.  It is spread with a stuffing made from parsley, basil, garlic, lemon zest,panko crumbs, and red pepper flakes.  Over that is placed roasted red peppers, baby spinach and slices of Fontina cheese.  I did not have the Fontina cheese and just used some grated Parmesan and Gruyere.   The roast is then rolled and tied.  I didn’t get a picture of it cooking on the grill.

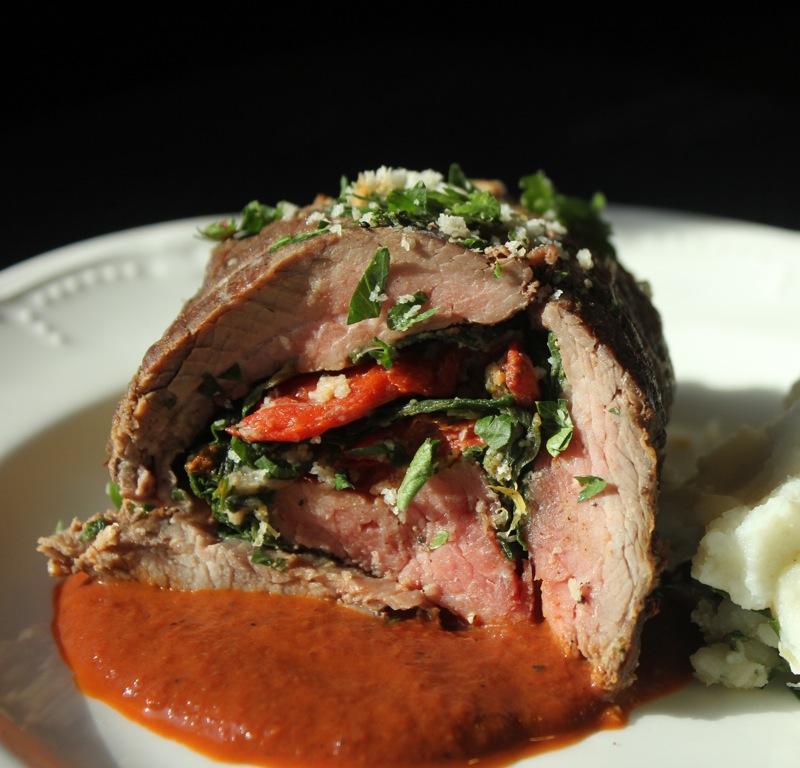
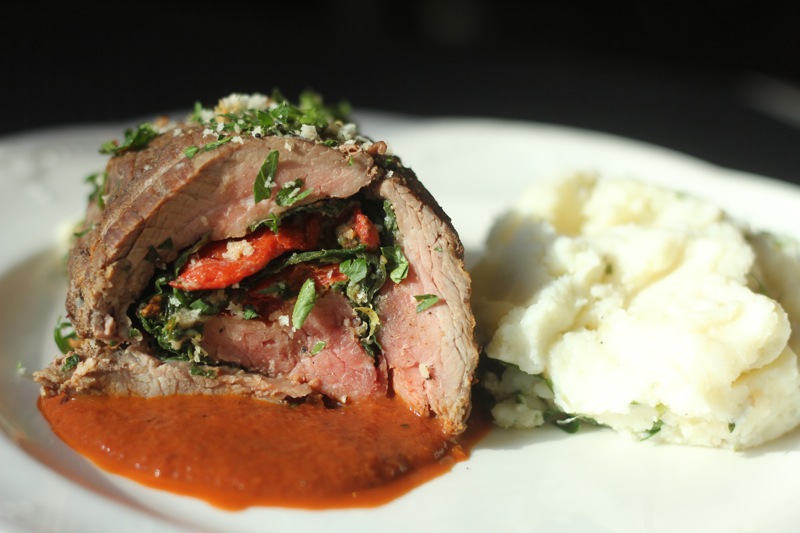
We used an instant read thermometer to cook the steak to 120 to 130 degrees, which was a nice medium to medium rare.  The sauce was perfect with it.

We served it with horseradish mashed potatoes.  There is nothing like a cold day and a hearth cooked meal to make you warm all over.  But I do have to report that the cold weather has left us and warm Spring breezes are coaxing the buds into bloom.  I am glad of it.

GRILLED FLANK STEAK WITH RED PEPPERS AND GREMOLATA STUFFING (From Wood-Fired Cooking by Mary Karlin)

1 (1 1/2-to 2-pound flank steak
Kosher salt and freshly ground black pepper

Gremolata Stuffing:
1 cup coarsely chopped fresh flat-leaf parsley
1/4 cup julienned fresh basil
6 cloves garlic, roasted and minced (You can wrap a head of garlic in foil and roast in oven or on the coals)
Grated zest of 1 lemon
1/3 cup bread crumbs or panko crumbs
1/2 teaspoon red pepper flakes
1/2 teaspoon kosher salt
2 tablespoons olive oil, for moistening

2 red bell peppers, roasted and peeled (Or you can use jarred roasted red peppers)
2 cups packed spinach leaves
8 ounces Italian fontina or Monterey Jack cheese, thinly sliced
Olive oil, for brushing
Wood-Roasted Red Pepper Wine Sauce (recipe follows)

Prepare a hot fire (475 to 500 degrees F) in a wood-fired oven or grill.

Butterfly the steak by slicing through it horizontally (with the grain), cutting almost through, leaving halves attached by 1/2-inch.  Open and flatten the cut meat.  Here is link to a great video to show you how to butterfly a flank steak.  Pound the steak to create a fairly even thickness.  Season with salt and pepper.

To make the gremolata stuffing, combine all the ingredients in a bowl.  Set aside, reserving 3 tablespoons for garnish.

Cut the roasted red peppers into 4 large slabs.  Lay the spinach leaves over the opened steak.  Line with cheese lices, then the red pepper slabs.  Sprinkle with the gremolata stuffing.  Roll up the steak tightly lengthwise.  Tie the rolled steak with kitchen string about every 3 inches.  Brush with olive oil and season lightly with salt and pepper.

Place the meat on a grate in the oven or on the grill and turn to brown on all sides, about 10 minutes.  Move off direct heat and continue cooking for 20 to 25 minutes, or until an instan-read thermometer inserted in the center registers 120 to 130 degrees F.  Transfer to a carving board, tent loosely with aluminum foil, and let rest for 10 minutes, or until an instant-read thermometer inserted in the center resisters 130 to 135 degrees F.  Cut into 1/2-inch thick rounds, sprinkle with the reserved gremolata, and serve with the wine sauce.

WOOD-ROASTED RED PEPPER WINE SAUCE

This simple sauce has many applications: as a sauce for meat, as a pasta sauce, or as a soup base.  Wood-roasting the peppers and onions adds great flavor.  Use a red wine that has a lot of presence such as Zinfandel or Sangiovese.  You can add other spices, such as a curry blend or chipotles in adobo, as you choose.

2 large red bell peppers
1 yellow onion, halved
3 cloves roasted garlic
1/4 cup olive oil
1 cup dry red wine
1/2 teaspoon dried herbs of choice
2 teaspoons honey
Kosher salt and freshly ground pepper
Pinch of red pepper flakes (optional)

Place the bell peppers in the embers of a wood-fired oven or over the direct heat of a grill.  Roast until well blistered and charred all over.  Place in a bowl, covered with plastic wrap, and let stand for 10 minutes.  Remove the skin, seeds, and stem.  Reserve any juice.  Cut into chunks,  Roast the onion, cut side down on the grill or skin side down in the embers, until slightly caramelized.  Remove the skin and coarsely chop.

Combine the peppers, reserved juice, onion, garlic, olive oil, wine, and herbs in a baking dish and place on the floor of the wood-fired oven or over indirect heat on the grill.  Cook, uncovered, until liquid is slightly reduced, 10 to 15 minutes.  Remove from the heat and let cool.  Place in a blender or food processor and puree.  Strain through a fine-mesh sieve, pushing down on the solids with the back of a large spoon.  Season with the honey and salt and pepper to taste.  Add the pepper flakes, if you like.  Thin with a touch warm water or vegetable stock if needed.  Use warm, or store in portions in self-sealing plastic bags in the refrigerator for 1 week or in your freezer for up to 2 months.

Printable recipe


Southwest Chia Seed Pierogi with Avocado Cream Sauce

April 1st, 2013

It is always such a treat to visit our family for many reasons.  One of which is the creative ideas that come out of DIL Kristen’s kitchen.  Michael and Kristen feed their children well.  They are trying to keep their diets as natural as possible.  Roasted root vegetables, fresh fruit, avocados, and quinoa are a part of their daily meals.  They eat meat, poultry and fish, but many of their dinners are vegetarian.  A new ingredient that Kristen has been experimenting with lately is Chia Seeds.  I know what you are thinking. . . . . Am I going to grow grass all over my body if I eat chia seeds?  The answer is no.   Unlike the ubiquitous Chia pets from a few years back, chia seeds are now being offered as a wholesome alternative to flax seeds in our diets.  Grown in Mexico and Bolivia, they are rich in omega-3 fatty acids, antioxidents, protein and fiber.  They offer a bit of crunch to breads and doughs while boosting the nutrient value.

Kristen decided to make a Southwestern flavored dish with homemade pierogi and chia seed dough.  The filling was mashed potatoes with green chiles, sour cream, cheese, and cumin.

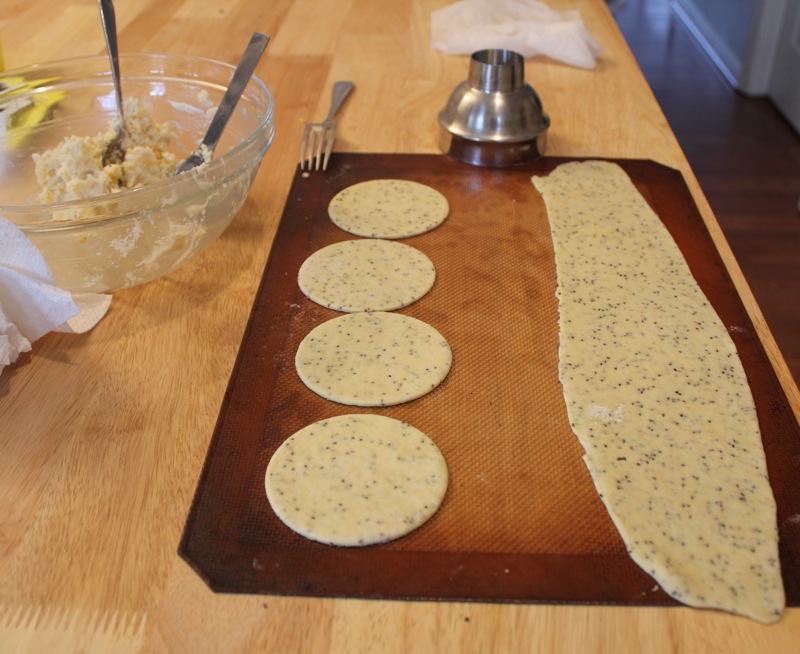
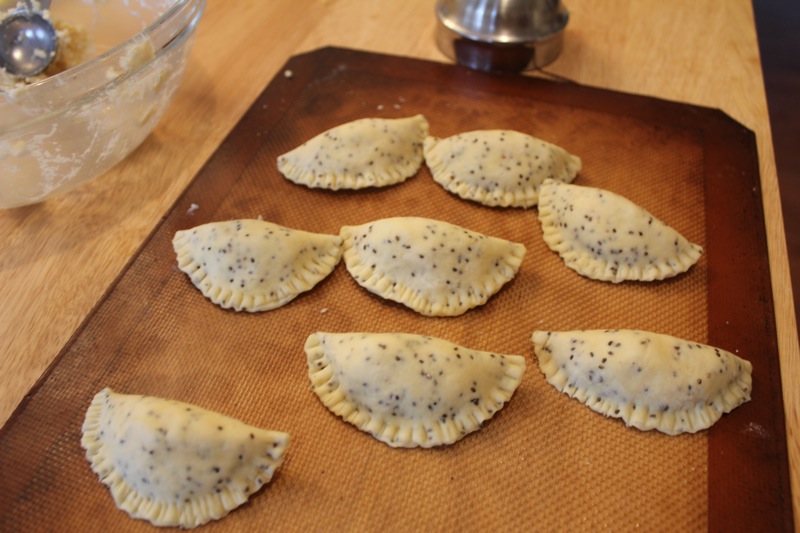
The dough was flecked with the chia seeds.  Kristen used her pasta attachment to her Kitchen Aid mixer to roll the dough.  But you could also do it by hand if you don’t have a pasta machine.  Circles were cut from the dough.

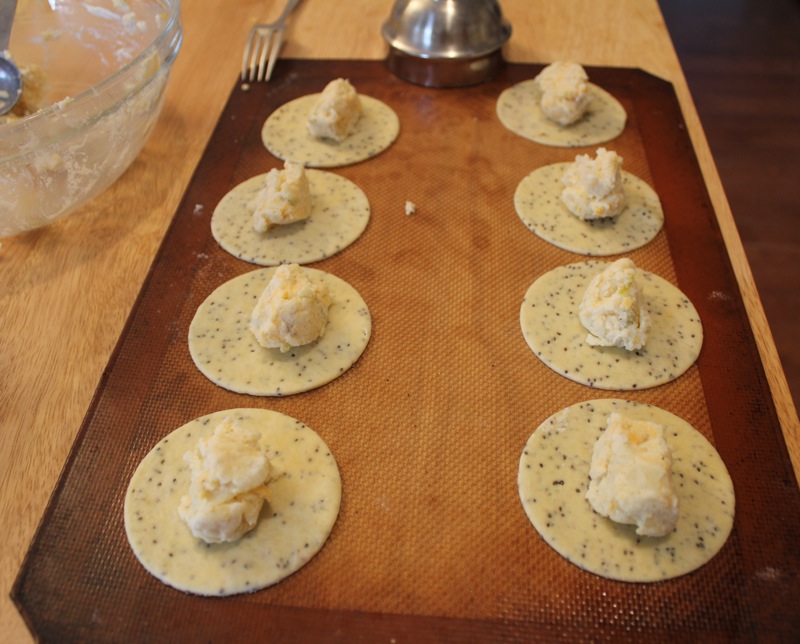
A tablespoon of the potato mixture was placed in each circle of dough.

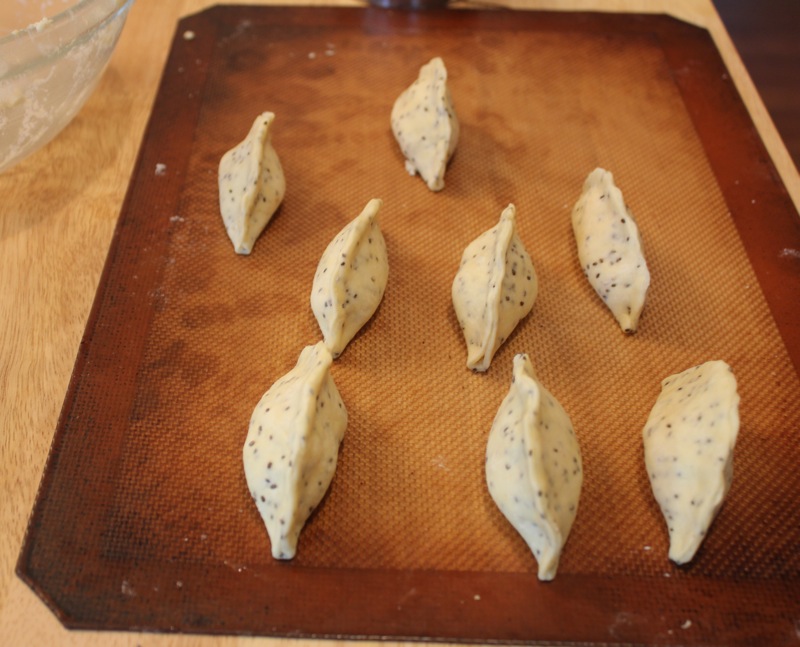
The opposite sides of the dough were brought together and the edges were pinched shut.

The edges were further sealed with the tines of a fork.

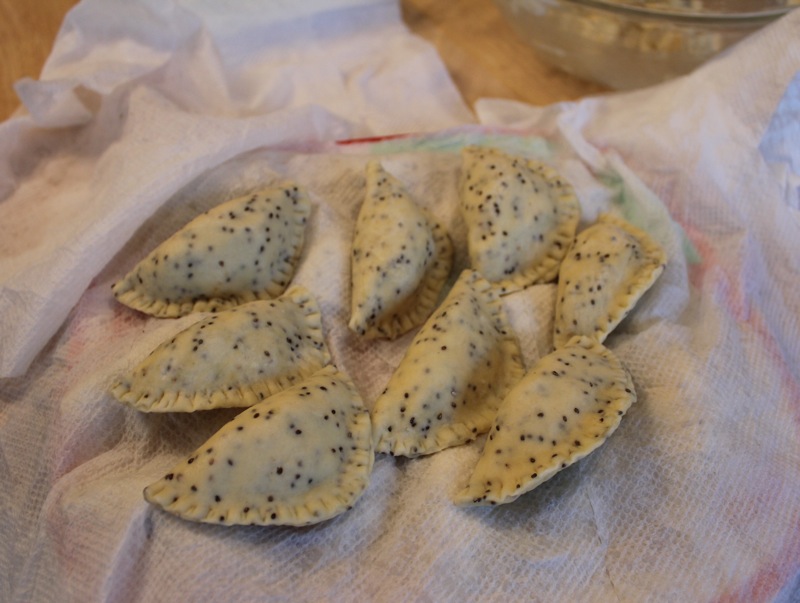
It is a good idea to keep the pierogi covered with damp paper towels as you work so that they do not dry out.

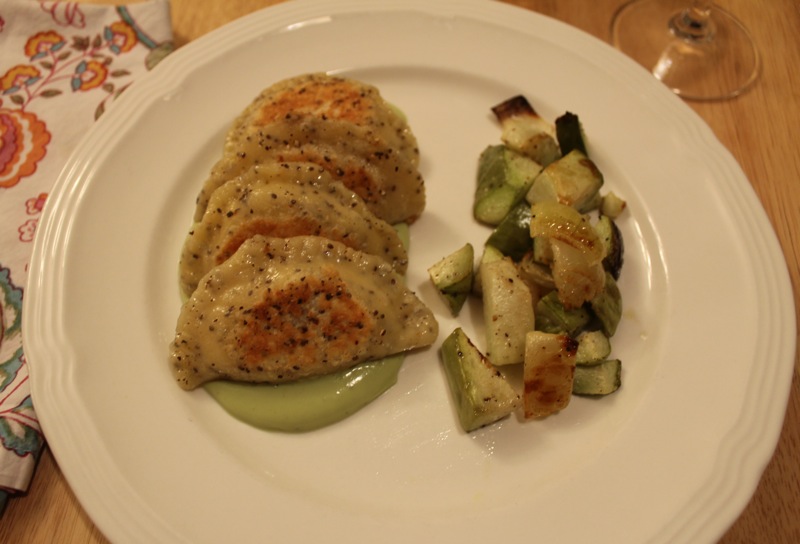
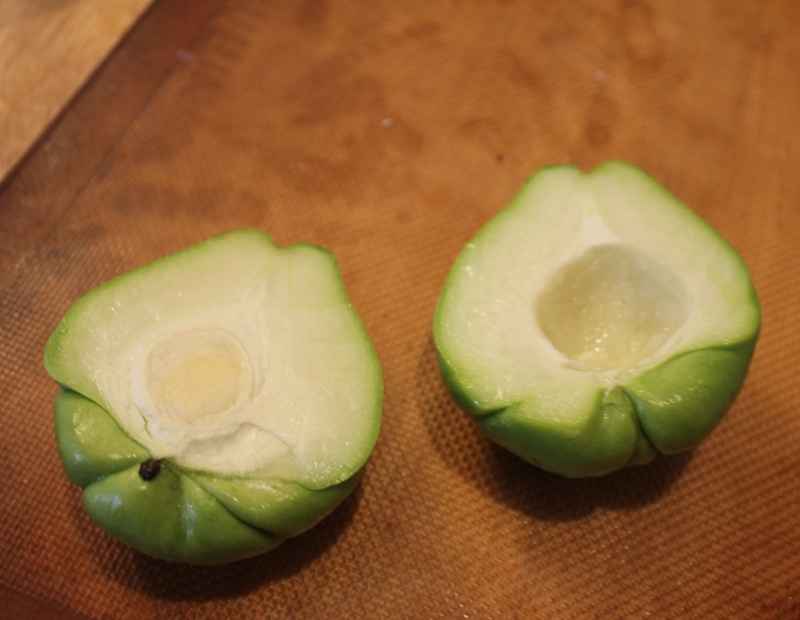
Another dish that Kristen made that continued the Southwestern theme was roasted Chayote squash.  Native to Mexico, Chayote squash is similar to summer squashes like yellow squash and zucchini.  She roasted it with onions and seasoned it with salt and pepper and a hit of coriander.

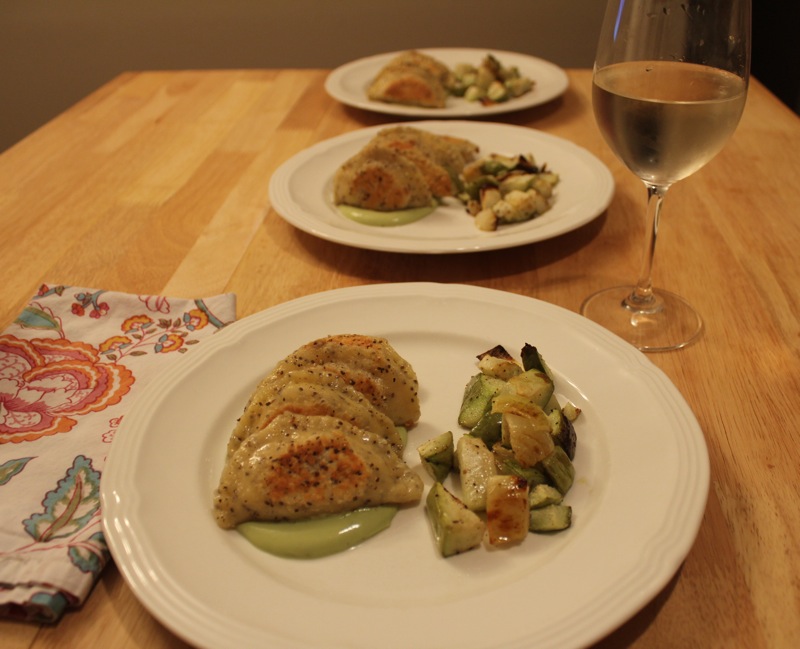
Everyone loved this meal.  The pierogi were flavorful and the avocado cream sauce was light and velvety with a bit of tang from the sour cream and lime.  This is one of those meals that is somewhat time consuming,  But the fact that all of the components are homemade, flavorful and nutritious makes it all worthwhile.  On a lazy Sunday afternoon I may even make a batch of pierogi and freeze them for several meals.

SOUTHWEST CHIA PIEROGI WITH AVOCADO CREAM SAUCE

DOUGH

  • 2 cups Unbleached All-Purpose Flour
  • 1 teaspoon salt
  • 1/4 tsp. garlic powder
  • 2 tbsp. chia seeds (optional, but great for added protein, fiber and texture!)
  • 1 large egg
  • 1/2 cup sour cream
  • 1/4 cup butter, room temperature

FILLING

  • 1.5 small to medium russet potatoes, 1.5 cups chicken broth or chicken base
  • 1 cup shredded cheddar or pepper jack cheese (or a combination of the two)
  • 2 heaping spoonfuls of sourcream
  • 1/2 can (4.5 oz) of chopped green chiles
  • 1/2 tsp. cumin
  • salt and fresh black pepper to taste

SAUCE

  • 1 large Hass Avocado (pit and skin removed)
  • Juice from 1.5 limes
  • 2 heaping spoonfuls of sourcream
  • 1/2 cup skim milk
  • 1/4 tsp. coriander

MAKE THE DOUGH…

  • Mix together the flour and salt. Add the egg to the flour and combine. The dough will be quite clumpy at this stage.
  • Work in the sour cream and soft butter until the dough comes together in a slightly rough, slightly sticky ball.
  • Using just your fingertips, knead and fold the dough, picking up bits around the bowl  until the dough becomes less sticky but still quite moist. It will be a firm dough.
  • Wrap the dough well in plastic wrap and refrigerate for 1-2 hours, or up to 48 hours. I found that the longer the dough chills, the easier it is to work with.  My brother tells me that chilling dough helps the gluten to relax?  Whatever that means.

MAKE THE FILLING…

  • Peel and cut potato into large pieces (6 to 8 pieces per potato).  Boil in 1.5 cups of chicken broth until tender.
  • Drain and rinse potatoes in cold water. Blot with a clean dish towel or layered paper towels to remove excess moisture.
  • Gently mash the potato until there are only small chunks (or no chunks if you prefer) remaining. Stir in cheese, sour cream, green chiles, and cumin. Taste and adjust the seasonings with salt and pepper.

FILL THE PIEROGI…

  • I cut the dough in to 8 sections, shaped and rolled gently into a small rectangle.  Then, I worked one section at a time through my pasta roller attachment.  4 passes at setting 1 (the thickest setting), 4 passes through setting 2.  If you are hand rolling, I still think it’s easier to cut the dough in to 8 sections and the roll each section out into a long rectangle or oval.  It should be roughly about 1/8” thick.
  • You can either roll out all the dough, then cut and fill – or you can roll a couple of batches, cut and fill those, then repeat with remaining dough until complete.  It probably depends mostly on the size and work surfaces available in your kitchen.  Ours is small!
  • TIP: Any dough you are not actively working with should be loosely wrapped in plastic wrap or covered with a damp paper towel or cloth at all times.
  • Use a 3-4” round cutter to cut circles of dough (I used the top of our cocktail shaker). Repurpose scraps by creating another section of dough or snip into small pieces for soup noodles.
  • Place 1 tablespoon of filling on each round of dough. Gently pull two opposite sides of the dough up together and press together working from the center out to ther corners to form a pocket. Pinch the edges of the pierogi to seal, then seal again with the tines of a fork.
  • Cook in a large stockpot of boiling unsalted water (since I added salt to my dough, it was not necessary to salt the water). Only cook about 10 pierogi at a time, so that they have room to float without sticking. When the pierogi float after about 5-6 minutes, they’re ready.  Fish out of the water with a slotted spoon and set aside on a plate until all the pierogi are boiled.

FINISH THE DISH…

  • on medium low and add enough olive oil to generously coat the pan.
  • one at a time, add the pierogi to the skillet and gently swirl (by hand) in the olive oil to prevent sticking.  Fill the pan with perogi, but don’t over-crowd.  If your pan is too hot, the pierogi are more likely to stick so watch the heat!
  • Sprinkle lightly with salt and pepper on the sides that have not yet been introduced to the oil.
  • Flip with tongs once the down side is lightly browned and crispy.  Crisp up the other side and remove from pan (cook in batches and keep completed pierogi warm in a 200 degree oven while the others cook) .
  • Using an immersion blender, blender or food processor, puree all sauce ingredients until a smooth, thick pourable consisentcy is achieved.
  • Spread 2-3 spoonfulls of sauce on a plate and place 4-5 pierogie (sitting up) on top.
  • Serve your favorite seasonal roasted vegetable alongside.

Printable recipe

Salmon En Papillote with Julienned Vegetables

March 28th, 2013

I have been in a cooking funk lately.  Nothing I have made has been blog worthy.  I just burned some honey glazed pancetta that was supposed to go on a salad.  Other dishes that I have made were just plain boring.  We are back in Lake Lure.  The weather is cold and windy and the cottage is in need of all kinds of fluffing and repairs.  Squirrels chewed the wires to the steam bath and made themselves a nest under the tub.  David was looking forward to satisfying his Finnish blood with a hot steam bath and was dismayed to discover what the critters had done.  They even feathered their nest with paint brushes from the basement.  I guess they were planning on remodeling.   We are planning on evicting them.  So when dinner time rolled around last night, I was in no mood to get creative with the salmon.  David said “Have you ever blogged about my salmon cooked in parchment paper?”  Needless to say, I was more than happy to turn the kitchen over to him while I snapped the pictures.

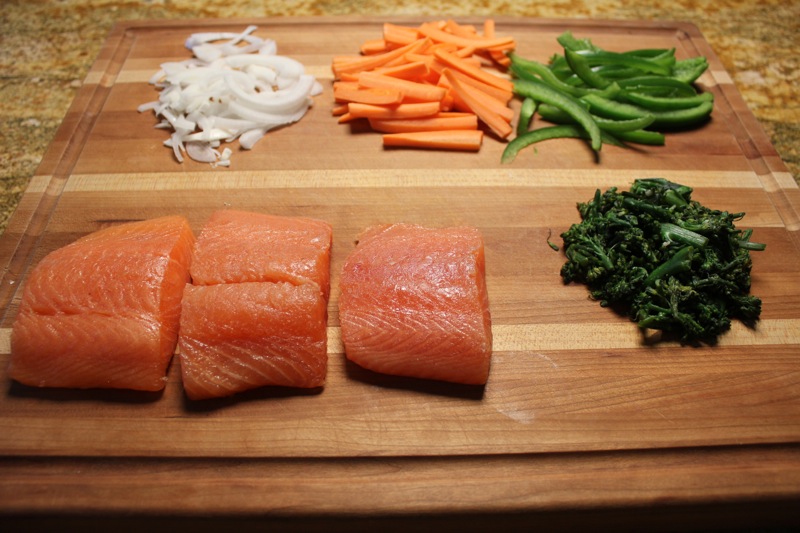
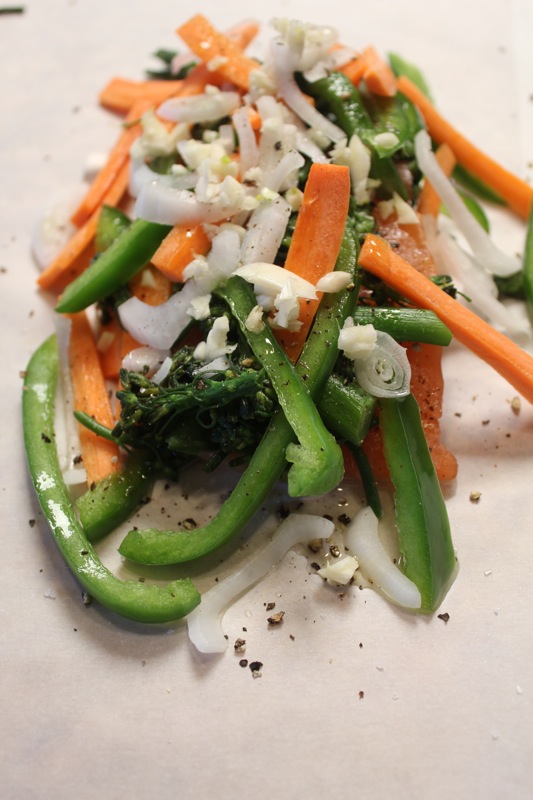
Here are the main ingredients.  It is important that the vegetables you use are sliced thinly because the salmon cooks for only 15 minutes.  You can use what you have.  I had carrots, peppers, onions and some cooked baby broccoli from another meal.  You could also use thinly sliced broccoli, scallions, snow peas or asparagus.

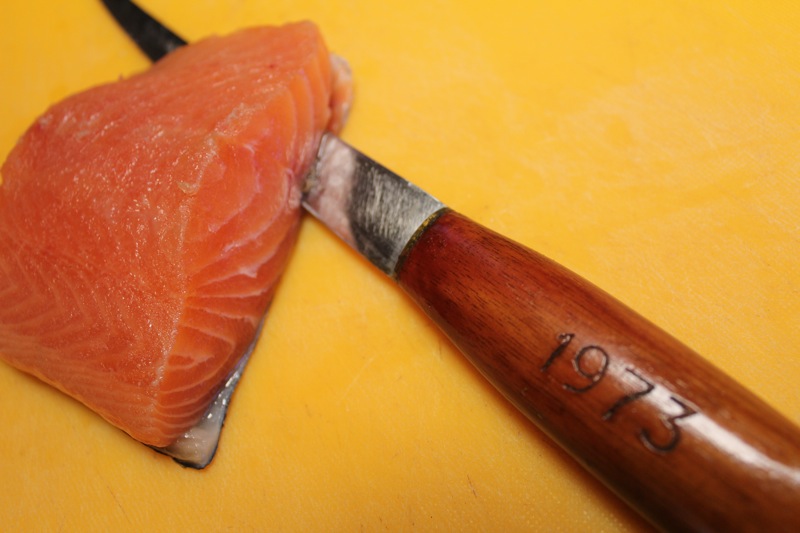
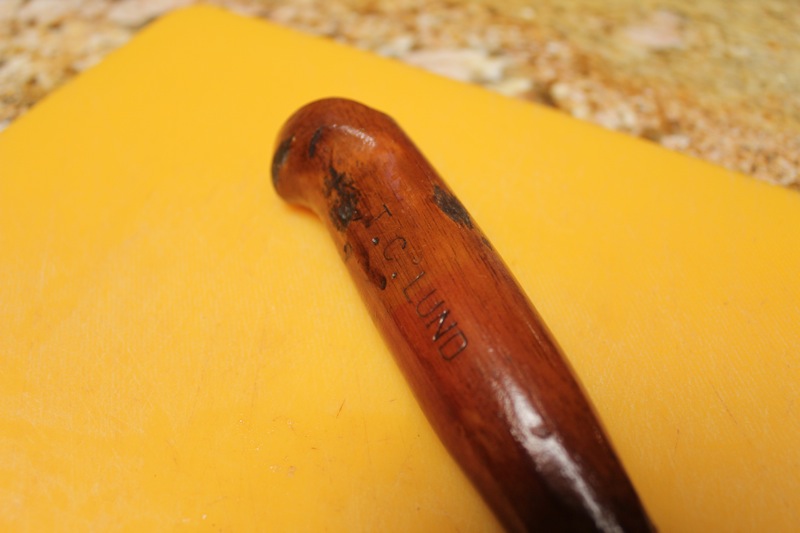
David is proud of this fillet knife that he got at an estate sale last year in our hometown of Dowagiac, MI.  It is engraved with the date and Trig Lund’s name.  Trig was an executive with the Heddon Lure Company a maker of fishing lures sold around the world. I wrote a whole post about the estate sale last summer.

We always remove the skin from our salmon before we cook it.

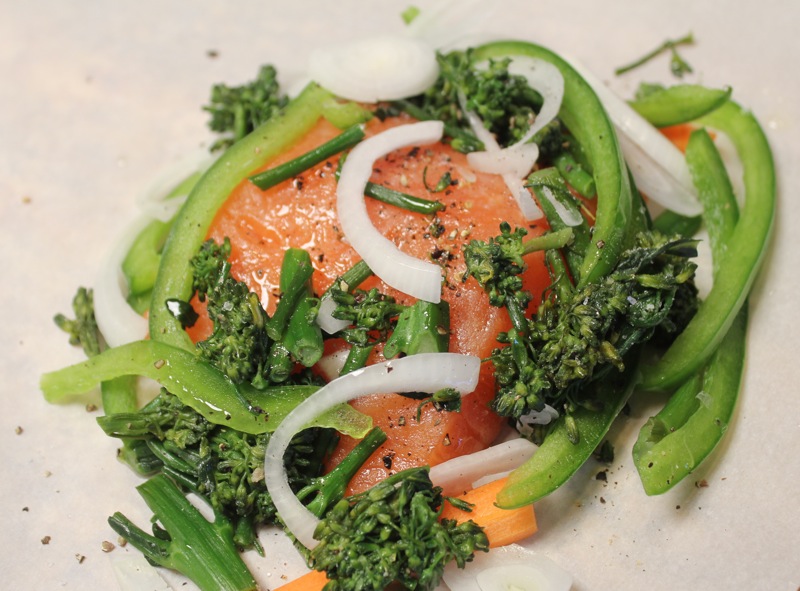
Each piece of salmon is placed on a piece of parchment paper and covered with the vegetables and seasoning.

You can actually see the salmon in this shot.

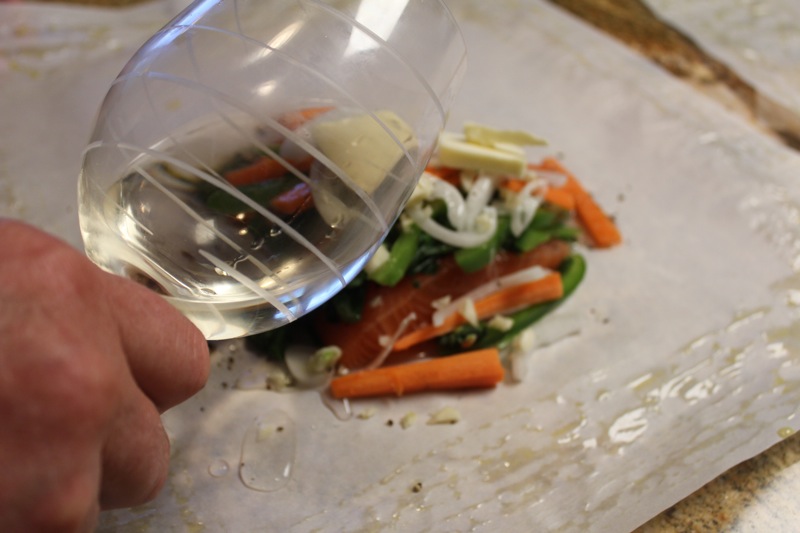
A little wine for moisture is always a good thing.  Also note that David has brushed the edges of the parchment paper with an egg wash to help seal the packets.

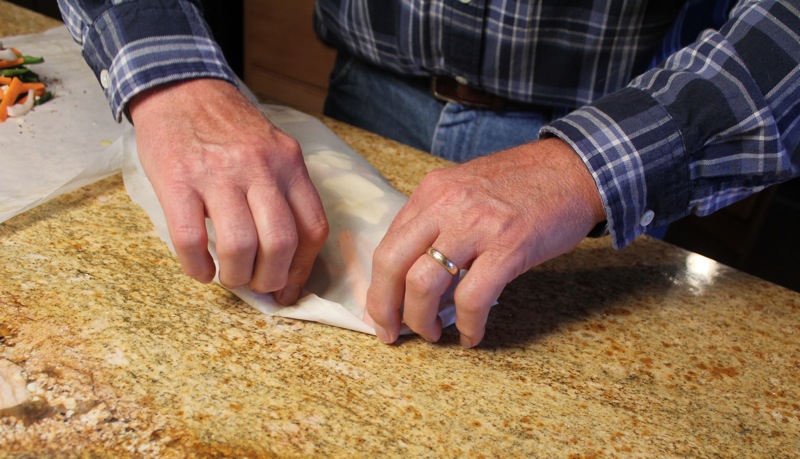
The packets are sealed.

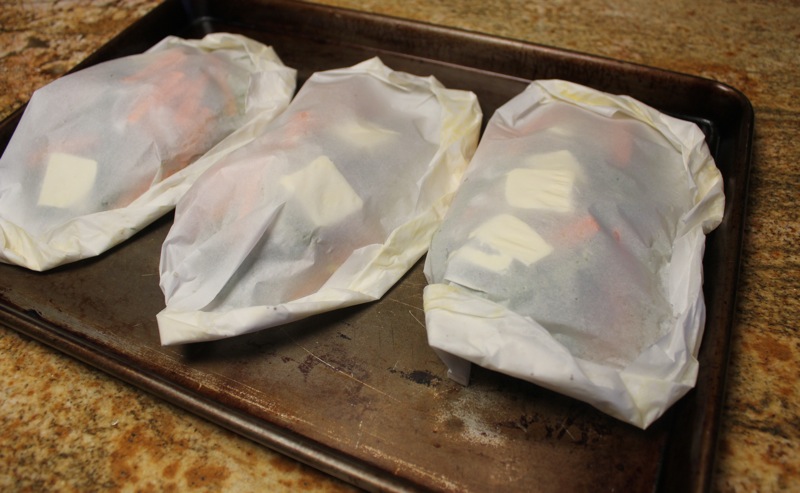
The packets ready to go into the oven.  Notice he has also included pats of butter, along with some lemon juice.

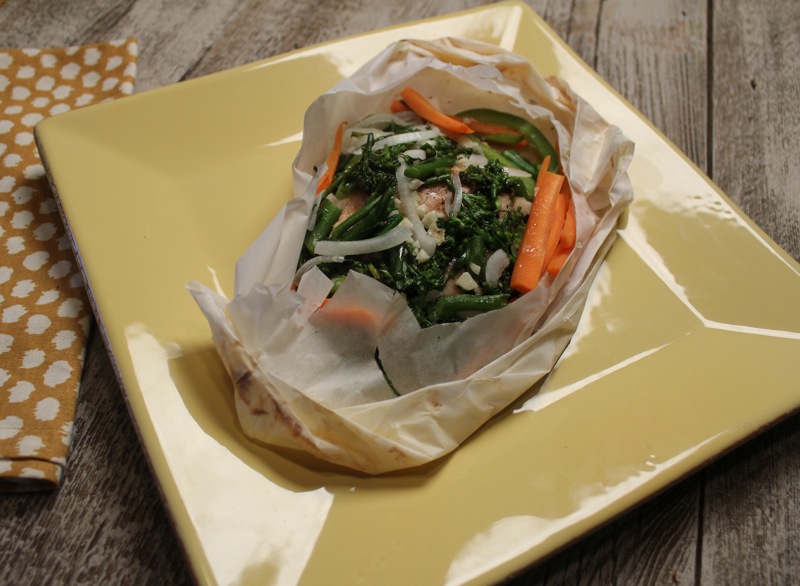
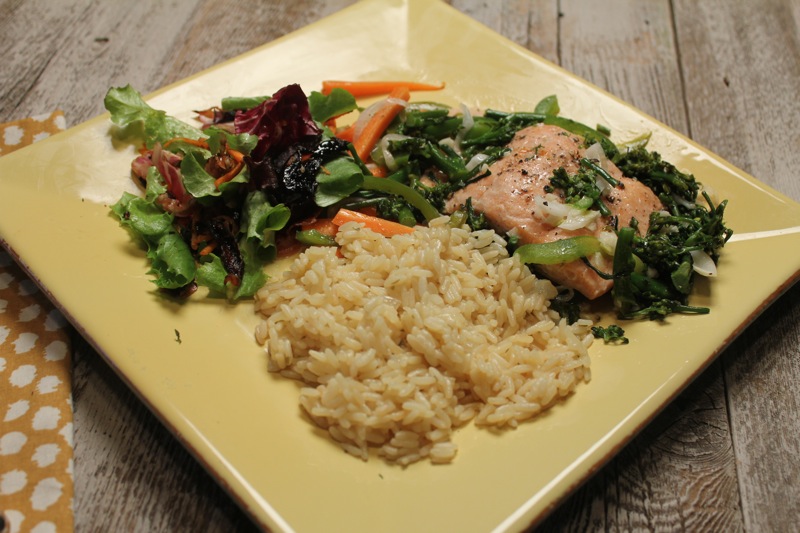
After a brief time in the oven, dinner was served.  Along with the salmon I made a rice pilaf and a salad with that burned pancetta.  It actually wasn’t bad.  I will experiment with it again and give you a recipe when I figure it out.   David had no trouble figuring out a great salmon dish.  Here is his recipe.

SALMON EN PAPILLOTE WITH JULIENNED VEGETABLES

This is a very simple, delicious and fool-proof way to prepare salmon with vegetables. And, it looks fancy and festive, but it is so easy. You can use any combination of vegetables that suits your fancy. Listed below are some of the ones we commonly use, but you can substitute or include others such as, leeks, and snow peas, anything that can be cut into thin pieces so that it cooks rapidly. You can also substitute any other type of fish fillet that you might have on hand or can find, and you also might want to experiment with other herbs and spices.

Here are one possible set of ingredients per packet, i.e. per serving

one 8 oz salmon filet
¼ cup julienned carrots
¼ cup julienned green onions
¼ cup julienned broccolini
¼ cup julienned red or green pepper
1 Tbsp minced garlic
1 tsp olive oil
2 Tbsp dry white wine
basil ½ tsp dried or 1 tsp chopped fresh
2 lemon slices
3 pats of butter
salt and pepper to taste
1 egg beaten-to seal the packets

Place a salmon filet to the right of the center of a 15” square of parchment paper. Salt and pepper the filet to taste. Sprinkle the olive oil, garlic, and basil over the salmon. Arrange the julienned vegetables on top of the filet. Place two lemon slices and three butter pats on top. Sprinkle the wine over the top and add a little more salt and pepper to the top of the vegetables. Use a brush and the egg wash to paint the edge of paper all the way around to help seal the packet. Fold the left side of the paper over the fish and vegetables and start at the top left corner making small overlapping folds all the way around the three open sides. When you get to the final fold, turn it under to help keep it from unfolding. Prepare as many packets as you want servings and place on a baking sheet in a 400 deg oven for about 18-20 minutes. The fish will actually be done in about 15 minutes, but the veggies will benefit from the extra time, and the fish will remain moist and tender from the cooking method. To serve, place a packet on each plate along with whatever starch you are serving, and cut the packets open with a sharp knife so the contents can be removed to the plate.  Enjoy.

Printable recipe

Thai Shrimp Cakes

March 23rd, 2013

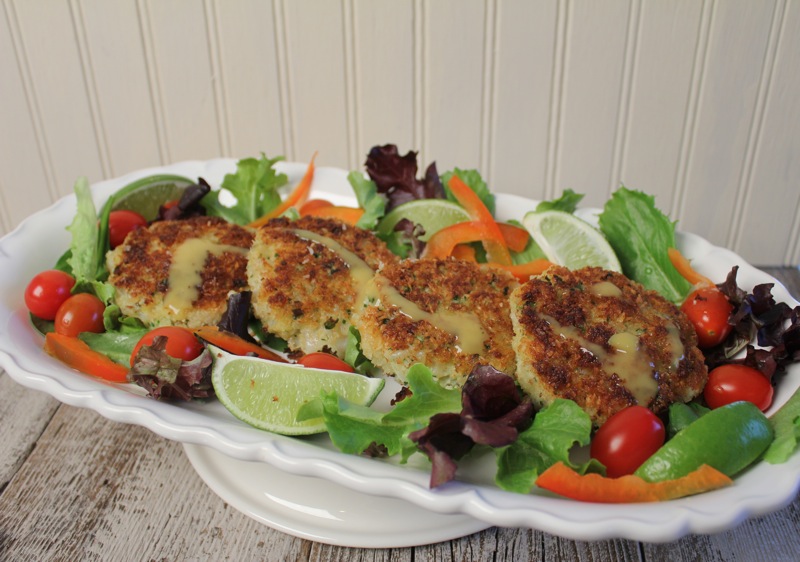
We love our seafood restaurants in Florida.  There are so many fresh and healthy options to choose from in any number of places especially from sushi restaurants near me to taste variety of fish recipes. David and I usually order broiled or baked fish when we are out.  But if fried coconut shrimp is on a restaurant menu, I can’t resist it.  Coconut shrimp, in my opinion, is the very best combination of fried shrimp with a hit of coconut sweetness.  It may not be the best choice, but I love it.

I was happy to see a recipe in Cooking Light Magazine for Thai shrimp Cakes.  One of the ingredients was unsweetened dried coconut.  This was mixed with panko crumbs for both the filling and the breading.  It sounded like it had all of my favorite coconut shrimp flavors.  The first hurdle was finding the coconut.  All that is available in our supermarkets is sweetened flaked coconut.  But we do have a wonderful health food store in town and they had unsweetened dried coconut in the bulk bins.  My 1 cup purchase cost me only $1.00. It was in tiny bits and had a heavenly coconut aroma.

This was an easy recipe to pull together.  Basically, all of the ingredients are chopped and mixed in a bowl.  They are formed into cakes and then coated with a combination of panko crumbs and dried coconut.  A quick saute in oil and you have succulent shrimp cakes with a hint of Asian flavors.  But what came through to me the most was the coconut breading.

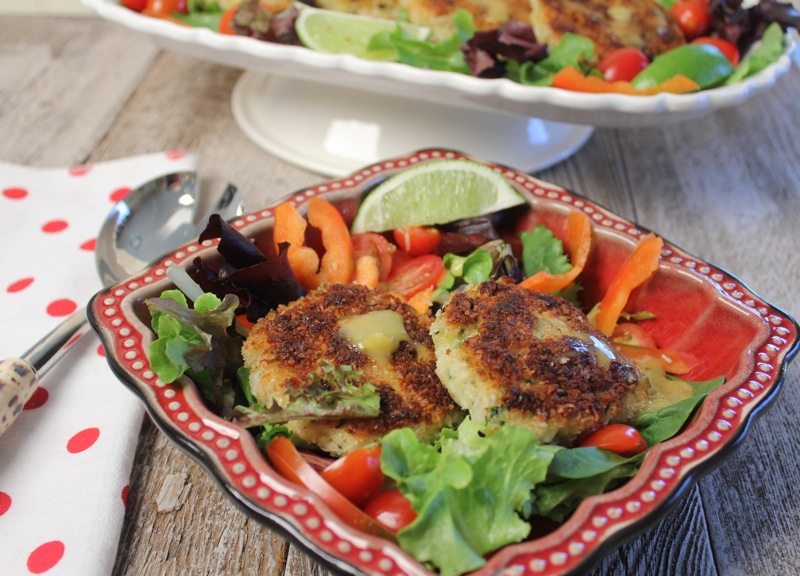
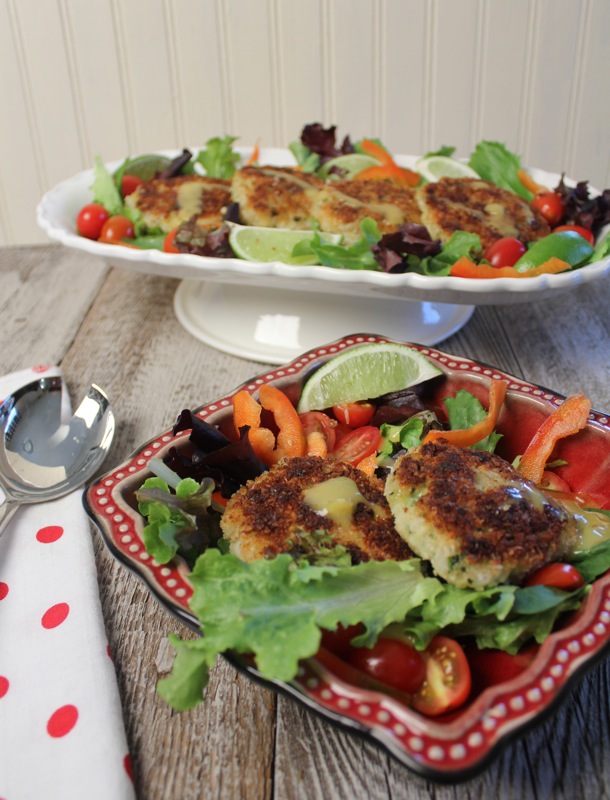
This makes a great lunch with salad greens and a good viniagrette dressing.

THAI SHRIMP CAKES

2/3 cup panko crumbs, divided
1/4 cup unsweetened dried coconut, divided (minced if large)
2 tablespoons minced green onions
2 tablespoons finely chopped fresh cilantro
2 teaspoons fish sauce
2 teaspoons Sriracha (hot chile sauce)
1 1/2 teaspoons grated peeled fresh ginger
1 teaspoon lime juice
1 large egg, lightly beaten
1 clove garlic, minced
8 ounces peeled and deveined shrimp, chopped
1 tablespoon olive oil
1 lime, quartered

Combine 1/3 cup panko, 2 tablespoons coconut, and next 8 ingredients in a large bowl.  Add shrimp; stir just until combines.  Using wet hands, shape mixture into 4 equal balls.  Comine remaining panko and coconut in a shallow dish.  Coat balls in panko mixture; press to form 4 (4-inch) patties.

Heat a large nonstick skillet over medium-high heat.  Add oil; swirl to coat.  Add patties; cook 4 minutes on each side or until desired degree of doneness.  Serve with lime.

I served this with spring mix salad greens and a vinaigrette dressing.

Printable recipe

© Penny Klett, Lake Lure Cottage Kitchen. All rights reserved.